


版本说明
本例于windows基于Nacos配置注册、MybatisPlus、Hikari数据源,数据库为Mysql,示例代码为Seata的AT模式。案例代码GitHub地址spring-cloud-alibaba
具体版本:
-
seata 1.4.0
-
SpringBoot 2.3.6.RELEASE
-
SpringCloud Hoxton.SR9
-
SpringCloudAlibaba 2.2.3.RELEASE
-
MybatisPlus 3.3.2
下载资源
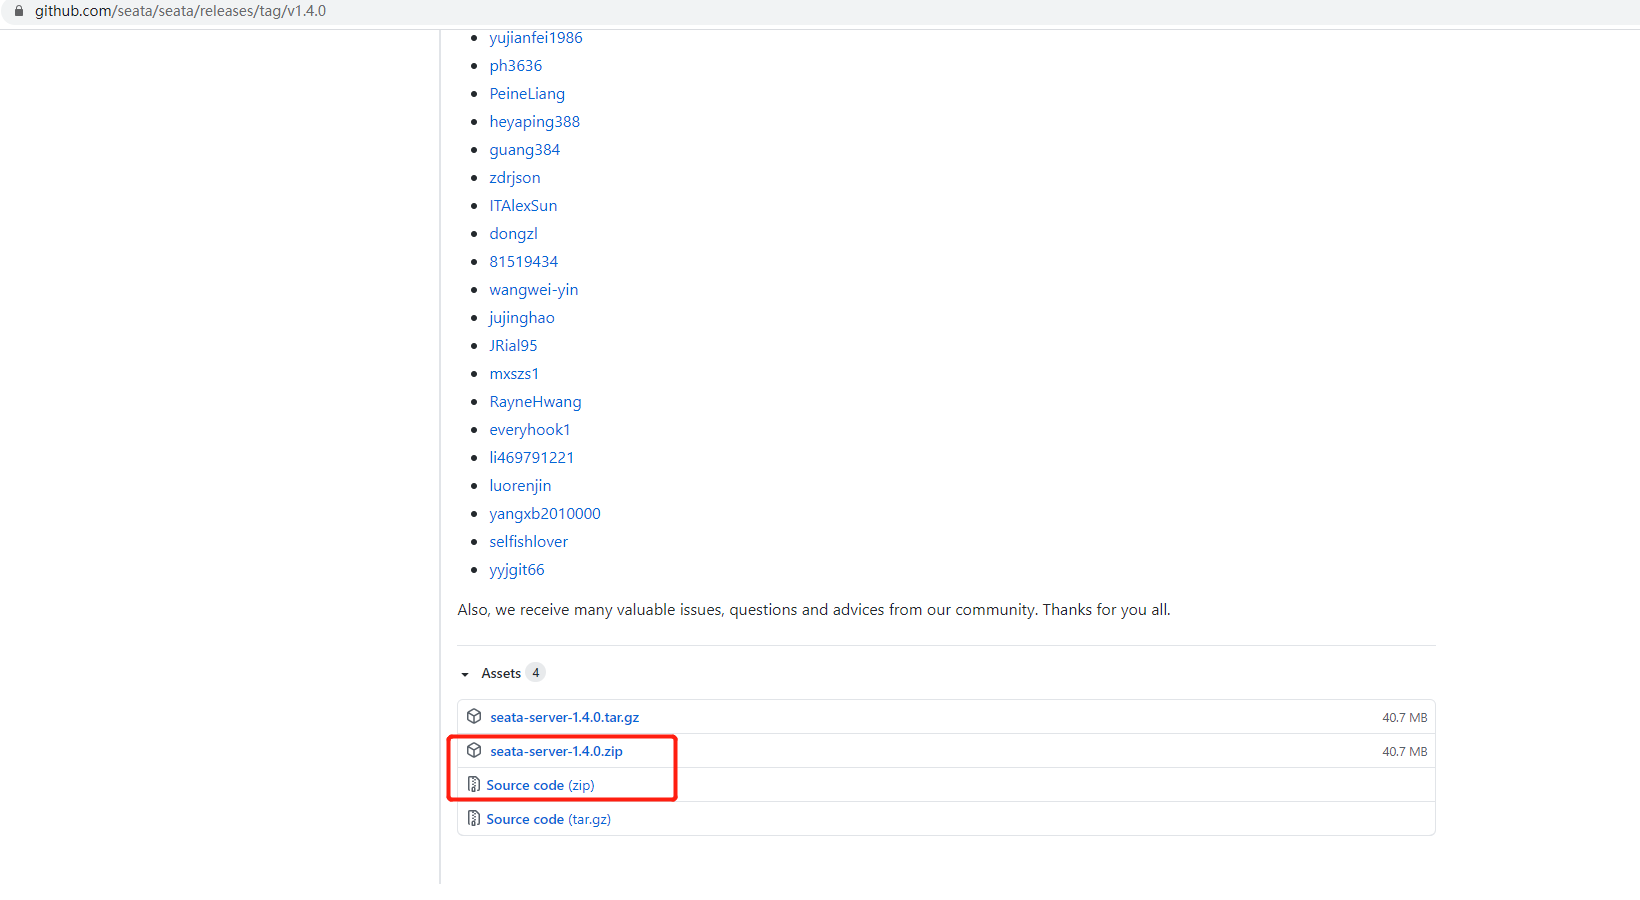
从Seata Release下载目前最新版的1.4.0发行包和源码
Seata配置
Server
1、解压seata-server-1.4.0文件,进入/seata/conf,将register.conf内容修改为
registry {
  # file 、nacos 、eureka、redis、zk、consul、etcd3、sofa
  type = "nacos"

  nacos {
    application = "seata-server"
    serverAddr = "127.0.0.1:8848"
    group = "SEATA_GROUP"
    namespace = "56c94dbe-7fbe-49c2-b456-170001455569"
    cluster = "default"
    username = "nacos"
    password = "nacos"
  }

}

config {
  # file、nacos 、apollo、zk、consul、etcd3
  type = "nacos"

  nacos {
    serverAddr = "127.0.0.1:8848"
    namespace = "56c94dbe-7fbe-49c2-b456-170001455569"
    group = "SEATA_GROUP"
    username = "nacos"
    password = "nacos"
  }
}
此处为设置seata使用nacos进行注册与配置
registry.nacos.namespace为nacos中的命名空间,可以自行创建命名空间后,替换此处的namespace
进入/bin,打开cmd,运行
seata-server.bat -p 9000 -m file
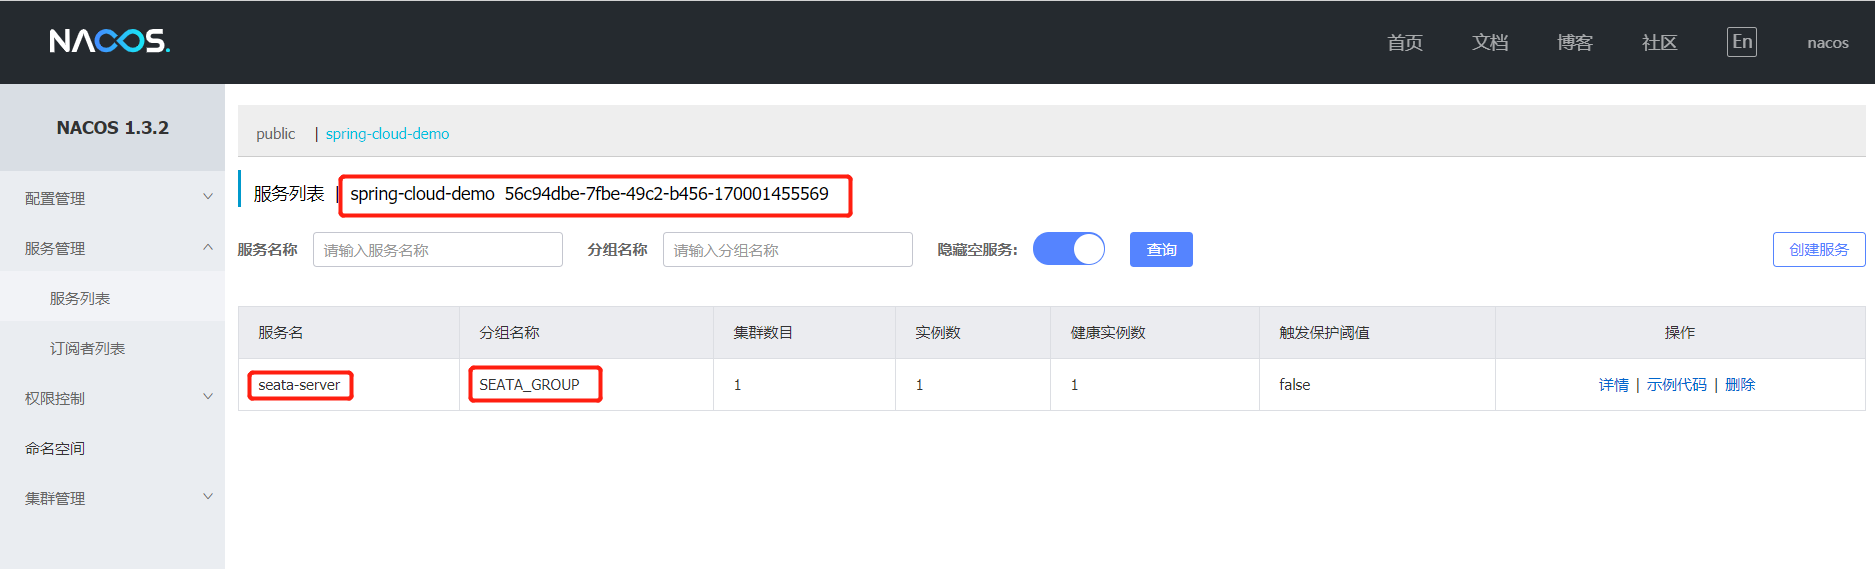
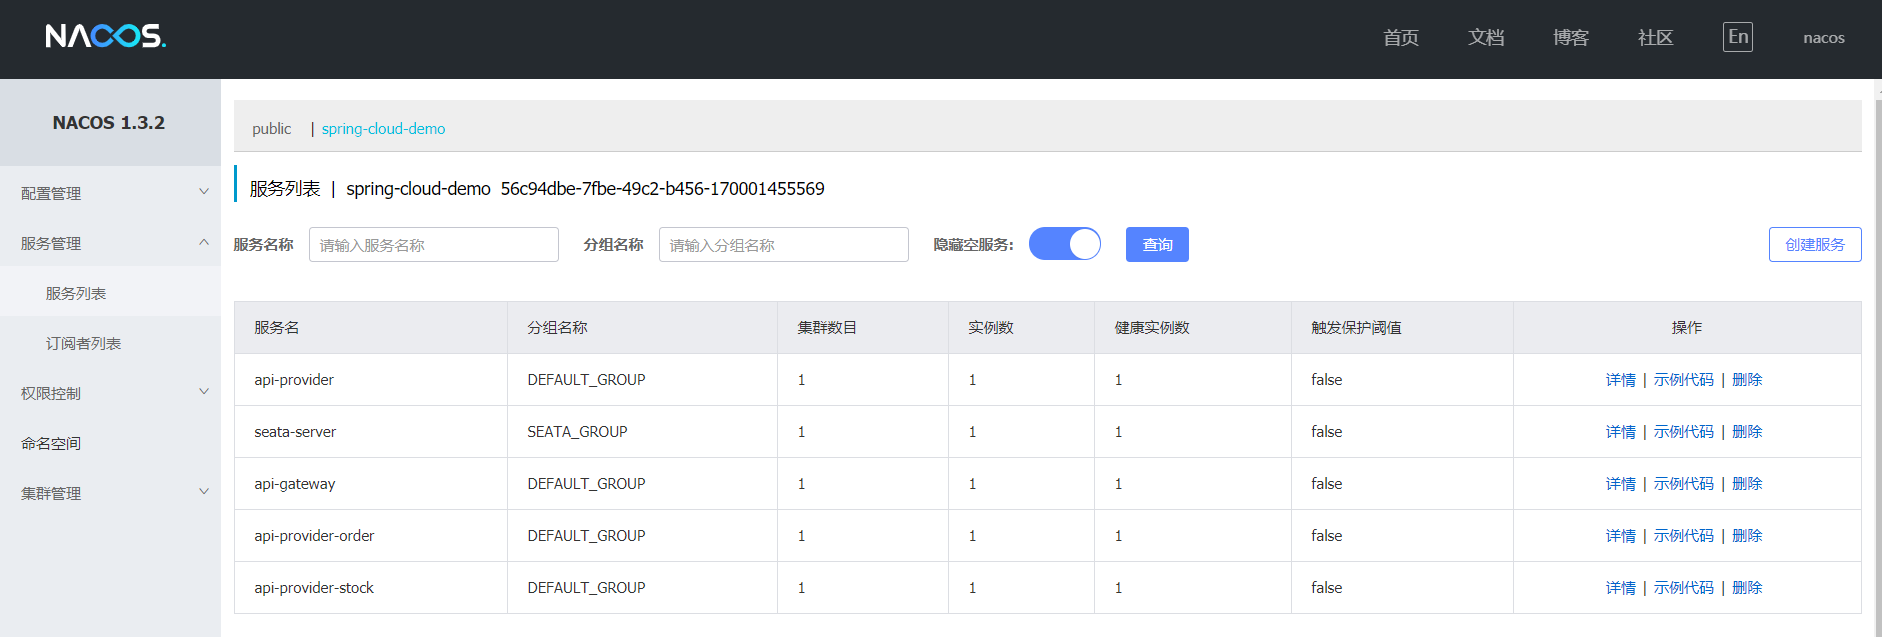
运行成功后,将会在nacos服务列表中显示
2、数据库建seata库即表
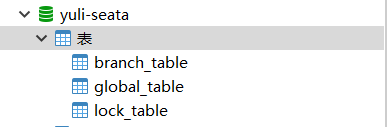
数据库新建yuli-seata数据库,用来存放seata全局数据
进入script/server/db,在yuli-seata库中运行mysql.sql文件,最终得到三张表
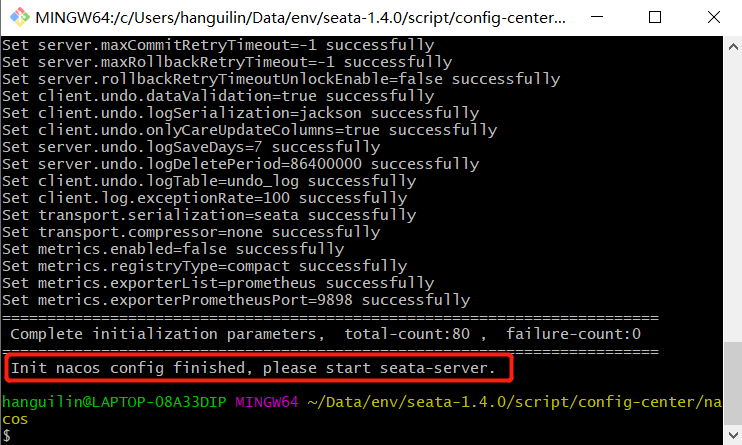
3、初始化配置文件同步到nacos中,请先启动nacos,再执行此操作
解压seata的source code,进入script/config-center,修改config.txt配置文件
transport.type=TCP
transport.server=NIO
transport.heartbeat=true
transport.enableClientBatchSendRequest=false
transport.threadFactory.bossThreadPrefix=NettyBoss
transport.threadFactory.workerThreadPrefix=NettyServerNIOWorker
transport.threadFactory.serverExecutorThreadPrefix=NettyServerBizHandler
transport.threadFactory.shareBossWorker=false
transport.threadFactory.clientSelectorThreadPrefix=NettyClientSelector
transport.threadFactory.clientSelectorThreadSize=1
transport.threadFactory.clientWorkerThreadPrefix=NettyClientWorkerThread
transport.threadFactory.bossThreadSize=1
transport.threadFactory.workerThreadSize=default
transport.shutdown.wait=3
service.vgroupMapping.spring-cloud-demo=default
service.default.grouplist=127.0.0.1:8091
service.enableDegrade=false
service.disableGlobalTransaction=false
client.rm.asyncCommitBufferLimit=10000
client.rm.lock.retryInterval=10
client.rm.lock.retryTimes=30
client.rm.lock.retryPolicyBranchRollbackOnConflict=true
client.rm.reportRetryCount=5
client.rm.tableMetaCheckEnable=false
client.rm.sqlParserType=druid
client.rm.reportSuccessEnable=false
client.rm.sagaBranchRegisterEnable=false
client.tm.commitRetryCount=5
client.tm.rollbackRetryCount=5
client.tm.defaultGlobalTransactionTimeout=60000
client.tm.degradeCheck=false
client.tm.degradeCheckAllowTimes=10
client.tm.degradeCheckPeriod=2000
store.mode=db
store.file.dir=file_store/data
store.file.maxBranchSessionSize=16384
store.file.maxGlobalSessionSize=512
store.file.fileWriteBufferCacheSize=16384
store.file.flushDiskMode=async
store.file.sessionReloadReadSize=100
store.db.datasource=druid
store.db.dbType=mysql
store.db.driverClassName=com.mysql.jdbc.Driver
store.db.url=jdbc:mysql://127.0.0.1:3306/yuli-seata?useUnicode=true
store.db.user=root
store.db.password=root
store.db.minConn=5
store.db.maxConn=30
store.db.globalTable=global_table
store.db.branchTable=branch_table
store.db.queryLimit=100
store.db.lockTable=lock_table
store.db.maxWait=5000
store.redis.host=127.0.0.1
store.redis.port=6379
store.redis.maxConn=10
store.redis.minConn=1
store.redis.database=0
store.redis.password=null
store.redis.queryLimit=100
server.recovery.committingRetryPeriod=1000
server.recovery.asynCommittingRetryPeriod=1000
server.recovery.rollbackingRetryPeriod=1000
server.recovery.timeoutRetryPeriod=1000
server.maxCommitRetryTimeout=-1
server.maxRollbackRetryTimeout=-1
server.rollbackRetryTimeoutUnlockEnable=false
client.undo.dataValidation=true
client.undo.logSerialization=jackson
client.undo.onlyCareUpdateColumns=true
server.undo.logSaveDays=7
server.undo.logDeletePeriod=86400000
client.undo.logTable=undo_log
client.log.exceptionRate=100
transport.serialization=seata
transport.compressor=none
metrics.enabled=false
metrics.registryType=compact
metrics.exporterList=prometheus
metrics.exporterPrometheusPort=9898
修改项
-
service.vgroupMapping.spring-cloud-demo=default
spring-cloud-demo为自定义的事务组
-
store.mode=db
状态由数据库管理
-
store.db.url=jdbc:mysql://127.0.0.1:3306/yuli-seata?useUnicode=true
数据库连接地址
-
store.db.user=root
数据库用户名
-
store.db.password=root
数据库密码
-
windows环境下可以通过python环境执行py脚本,也可通过git环境执行sh脚本,本文使用git bash
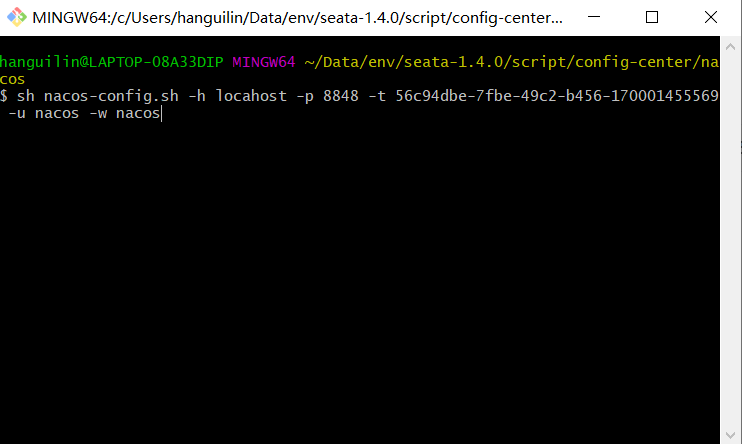
进入解压后的源码包中/script/config-center/nacos

打开git bash窗口,执行
sh nacos-config.sh -h localhost -p 8848 -t 56c94dbe-7fbe-49c2-b456-170001455569 -u nacos -w nacos
-
-h
nacos’s host
-
p
nacos’s 端口
-
-t
nacos namespace命名空间id
-
-u
nacos用户名
-
-w
nacos密码
执行成功:
在nacos中查看配置
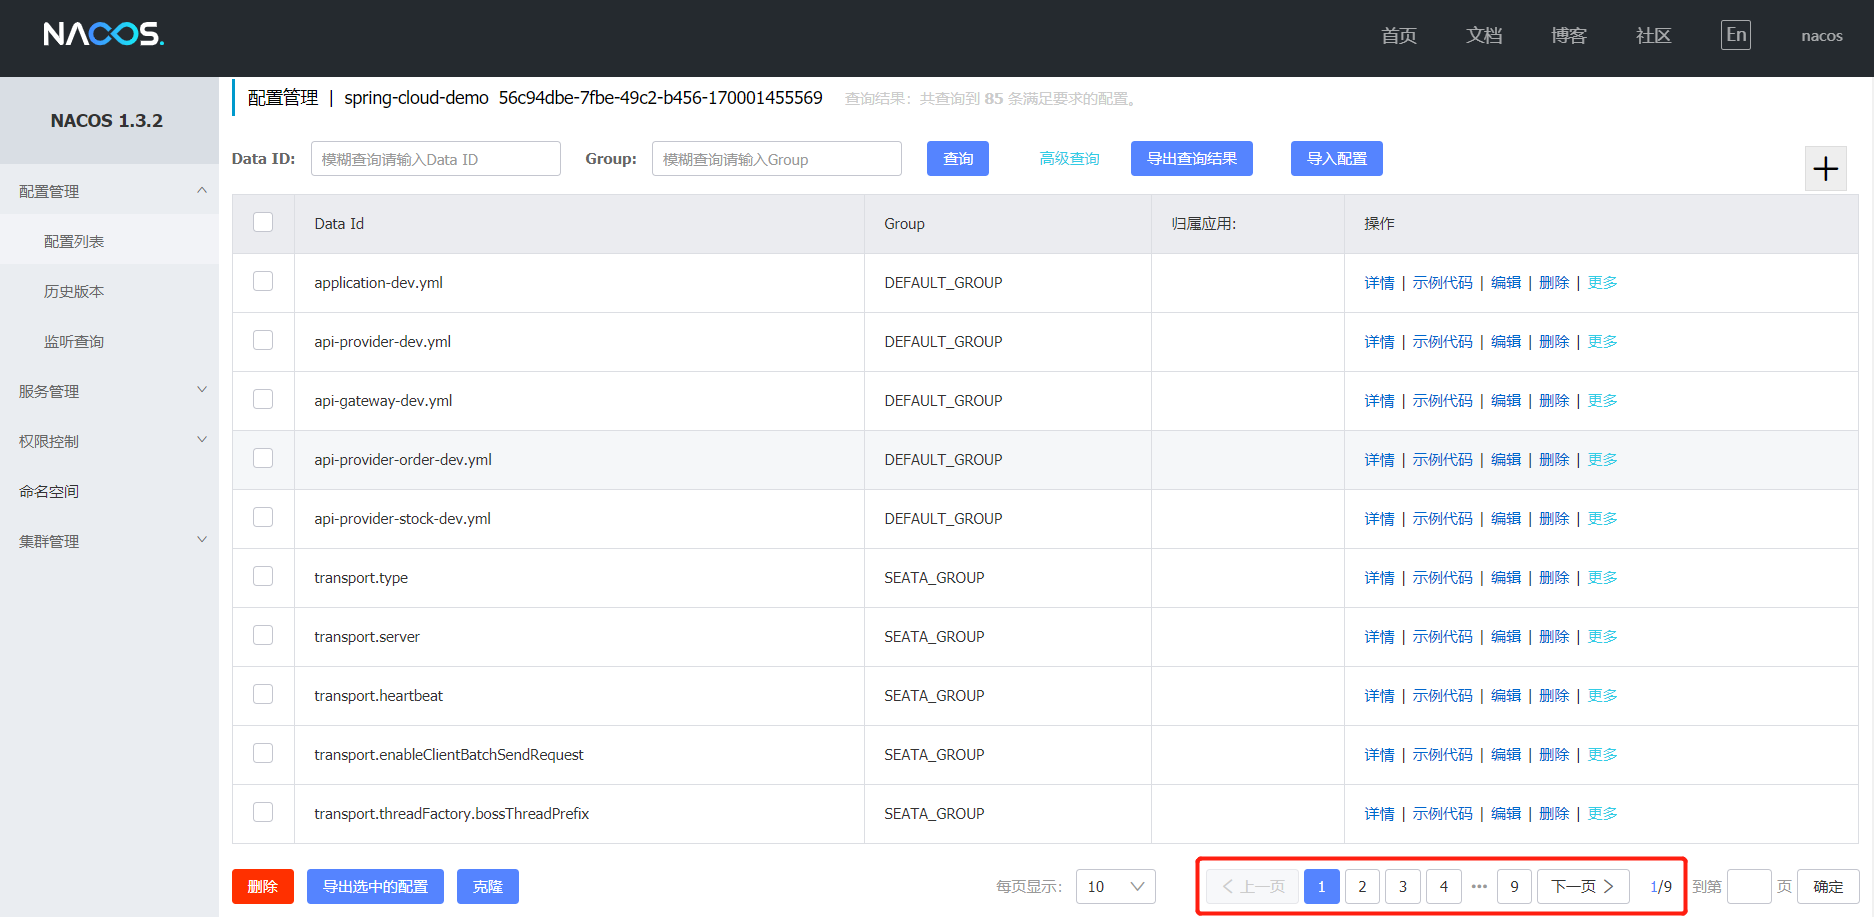
可以发现配置散落一地,别诧异,这是正常的。但是希望后期会有所优化吧,毕竟太散乱
Client
引入依赖,注意本例父pom中引入了spring-cloud-alibaba-dependencies,且定义了版本号,所以此处未手动定义版本号。需要查看完整代码的请移步文章头部提到的代码地址。
<dependency>
  <groupId>com.alibaba.cloud</groupId>
  <artifactId>spring-cloud-starter-alibaba-seata</artifactId>
</dependency>
在项目的bootstrap.yml文件中增加如下配置
seata:
  enabled: true
  application-id: ${spring.application.name}
  tx-service-group: spring-cloud-demo    #此处配置自定义的seata事务分组名称
  enable-auto-data-source-proxy: true    #开启数据库代理
  config:
    type: nacos
    nacos:
      server-addr: ${spring.cloud.nacos.discovery.server-addr}
      namespace: ${spring.cloud.nacos.discovery.namespace}
      group: SEATA_GROUP
  registry:
    type: nacos
    nacos:
      application: seata-server
      server-addr: ${spring.cloud.nacos.discovery.server-addr}
      namespace: ${spring.cloud.nacos.discovery.namespace}
${}为获取本文件中定义变量
如${spring.cloud.nacos.discovery.server-addr},在本例中已经有设置为localhost:8848
注意seata.tx-service-group和上文config.txt文件中service.vgroupMapping.spring-cloud-demo=default有对应关系,
关系为spring-cloud-demo
配置代理数据源
package cn.javayuli.mybatis.config;

import com.zaxxer.hikari.HikariDataSource;
import io.seata.rm.datasource.DataSourceProxy;
import org.springframework.boot.autoconfigure.condition.ConditionalOnClass;
import org.springframework.boot.context.properties.ConfigurationProperties;
import org.springframework.context.annotation.Bean;
import org.springframework.context.annotation.Configuration;
import org.springframework.context.annotation.Primary;

import javax.sql.DataSource;

/**
 * 对分布式事务seata配置的数据源代理
 *
 * @author hanguilin
 */
@Configuration
@ConditionalOnClass(HikariDataSource.class)
public class DataSourceProxyConfig {

    /**
     * 原生datasource前缀取"spring.datasource"
     *
     * @return
     */
    @Bean
    @ConfigurationProperties(prefix = "spring.datasource")
    public DataSource hikariDataSource() {
        HikariDataSource hikariDataSource = new HikariDataSource();
        return hikariDataSource;
    }

    /**
     * 构造datasource代理对象,替换原来的datasource
     *
     * @param hikariDataSource
     * @return
     */
    @Primary
    @Bean("dataSource")
    public DataSourceProxy dataSourceProxy(DataSource hikariDataSource) {
        return new DataSourceProxy(hikariDataSource);
    }
}
启动类排除DataSourceAutoConfiguration类
package cn.javayuli;

import org.springframework.boot.SpringApplication;
import org.springframework.boot.autoconfigure.EnableAutoConfiguration;
import org.springframework.boot.autoconfigure.jdbc.DataSourceAutoConfiguration;
import org.springframework.cloud.client.SpringCloudApplication;

/**
 * 订单服务
 *
 * @author hanguilin
 */
@EnableAutoConfiguration(exclude = {DataSourceAutoConfiguration.class})
@SpringCloudApplication
public class OrderApplication {

    public static void main(String[] args) {
        SpringApplication.run(OrderApplication.class, args);
    }
}
DEMO
本例举很经典的例子:下订单时需要生成订单信息和扣减商品库存。
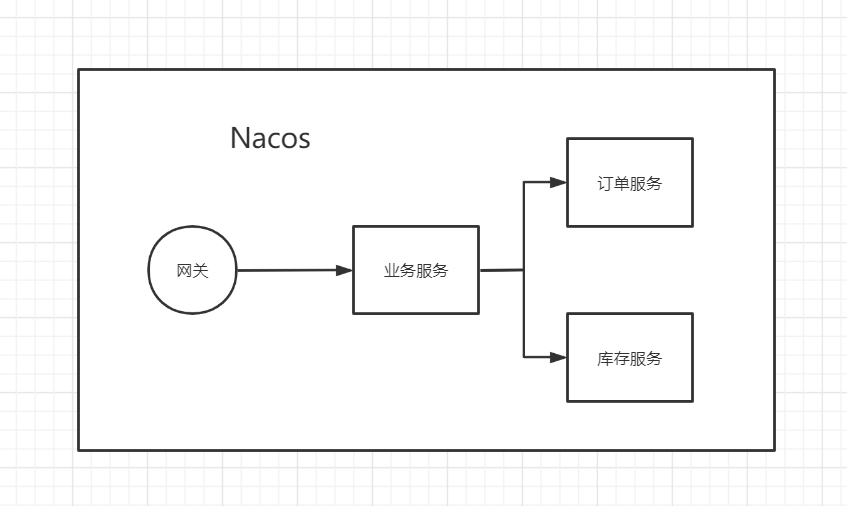
结构图
调用关系图:
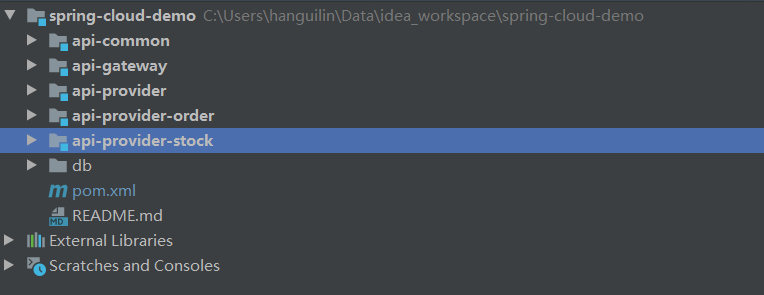
项目结构图:
-
api-common
公共调用,其中api-common-mybatis包含mybatis、seata、mysql-connect-java依赖,以及seata代理数据源配置,需要连接数据库的服务直接在pom中引入其项目即可
-
api-gateway
基于springcloud gateway的网关服务
-
api-provider
业务服务,由其发起远程调用,调用订单、库存服务
-
api-provider-order
订单服务,可以创建订单信息
-
api-provider-stock
库存服务,可以扣减商品数量
库表
项目库表
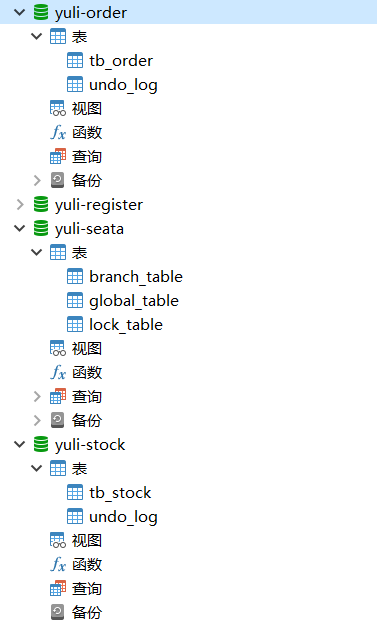
yuli-order库中tb_order表为订单信息表
yuli-stock库中tb_stock表为库存信息表
undo_log为seata事务中重要的表,在每个应用中都需要创建一张,如果是单库,就用一张undo_log表即可
undo_log表建表语句
CREATE TABLE `undo_log` (
	`id` BIGINT(20) NOT NULL AUTO_INCREMENT,
	`branch_id` BIGINT(20) NOT NULL,
	`xid` VARCHAR(100) NOT NULL COLLATE 'utf8_general_ci',
	`context` VARCHAR(128) NOT NULL COLLATE 'utf8_general_ci',
	`rollback_info` LONGBLOB NOT NULL,
	`log_status` INT(11) NOT NULL,
	`log_created` DATETIME NOT NULL,
	`log_modified` DATETIME NOT NULL,
	`ext` VARCHAR(100) NULL DEFAULT NULL COLLATE 'utf8_general_ci',
	PRIMARY KEY (`id`) USING BTREE,
	UNIQUE INDEX `ux_undo_log` (`xid`, `branch_id`) USING BTREE
)
COLLATE='utf8_general_ci'
ENGINE=InnoDB
AUTO_INCREMENT=56;
tb_order
CREATE TABLE `tb_order` (
	`id` INT(11) NOT NULL AUTO_INCREMENT,
	`no` VARCHAR(64) NULL DEFAULT NULL COMMENT '订单编号' COLLATE 'utf8_general_ci',
	`remark` VARCHAR(255) NULL DEFAULT NULL COMMENT '备注' COLLATE 'utf8_general_ci',
	`create_time` DATETIME NULL DEFAULT NULL COMMENT '创建时间',
	`update_time` DATETIME NULL DEFAULT NULL COMMENT '修改时间',
	`del_flag` CHAR(1) NULL DEFAULT NULL COLLATE 'utf8_general_ci',
	PRIMARY KEY (`id`) USING BTREE
)
COLLATE='utf8_general_ci'
ENGINE=InnoDB
AUTO_INCREMENT=39;
tb_stock
CREATE TABLE `tb_stock` (
	`id` INT(11) NOT NULL AUTO_INCREMENT,
	`goods` VARCHAR(255) NULL DEFAULT NULL COMMENT '物资名称' COLLATE 'utf8_general_ci',
	`number` INT(10) NULL DEFAULT NULL COMMENT '库存数量',
	`remark` VARCHAR(255) NULL DEFAULT NULL COMMENT '备注' COLLATE 'utf8_general_ci',
	`create_time` DATETIME NULL DEFAULT NULL COMMENT '创建时间',
	`update_time` DATETIME NULL DEFAULT NULL COMMENT '更新时间',
	`del_flag` CHAR(1) NULL DEFAULT NULL COLLATE 'utf8_general_ci',
	PRIMARY KEY (`id`) USING BTREE
)
COLLATE='utf8_general_ci'
ENGINE=InnoDB
AUTO_INCREMENT=2;
接口
订单服务暴露接口
/**
 * 创建订单
 *
 * @param no 订单编号
 * @return
 */
@PostMapping("/order/save")
public String doSaveOrder (@RequestParam("no") String no) {
    Order order = new Order();
    order.setNo(no);
    // 保存订单
    orderService.save(order);
    return "success";
}
库存服务暴露接口
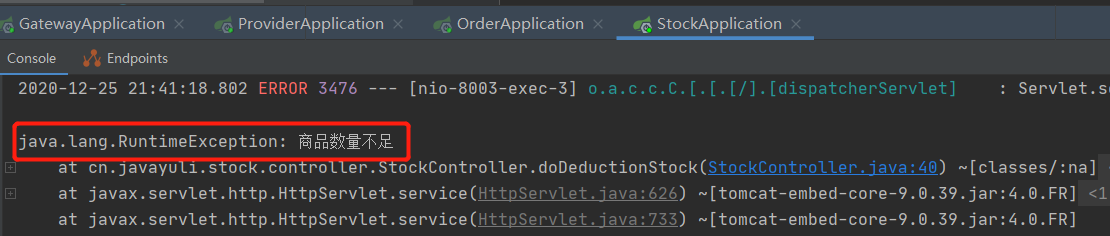
根据物资现有数量减去出售数量,如果库存不够就会抛出异常
/**
 * 扣减库存
 *
 * @param goods 物资
 * @param number 扣除量
 * @return
 */
@GetMapping("/deduct")
public String doDeductionStock(@RequestParam("goods") String goods, @RequestParam("number") int number) 	{
    Stock stock = orderService.getOne(Wrappers.lambdaQuery(Stock.class).eq(Stock::getGoods, goods));
    Integer stockNumber = stock.getNumber();
    Integer left = stockNumber - number;
    if (stockNumber == 0 || left < 0) {
        throw new RuntimeException("商品数量不足");
    }
    stock.setNumber(left);
    orderService.updateById(stock);
    return "success";
}
业务服务feign接口
/**
 * 远程调用库存服务
 *
 * @author hanguilin
 */
@FeignClient(contextId = "remoteOrderService", value = "api-provider-order",
        fallbackFactory = RemoteOrderServiceFallbackFactory.class)
public interface RemoteOrderService {

    /**
     * 创建订单
     *
     * @param no 订单编号
     * @return
     */
    @PostMapping("/order/save")
    String doSaveOrder (@RequestParam("no") String no);
}
/**
 * 远程调用库存服务
 *
 * @author hanguilin
 */
@FeignClient(contextId = "remoteStockService", value = "api-provider-stock",
        fallbackFactory = RemoteStockServiceFallbackFactory.class)
public interface RemoteStockService {

    /**
     * 扣减库存
     *
     * @param goods 物资
     * @param number 扣除量
     * @return
     */
    @GetMapping("/stock/deduct")
    String doDeductionStock(@RequestParam("goods") String goods, @RequestParam("number") int number);
}
业务服务暴露接口
/**
 * 下订单
 *
 * @param no 订单编号
 * @param goods 物资
 * @return
 */
@GlobalTransactional
@PostMapping("/business/create/order")
public String doCreateOrder (@RequestParam("no") String no, @RequestParam("goods") String goods) {
    return businessService.createOrder(no, goods);
}
/**
 * 下订单
 *
 * @param no 订单编号
 * @param goods 物资
 * @return
 */
@Override
public String createOrder(String no, String goods) {
    remoteOrderService.doSaveOrder(no);
    remoteStockService.doDeductionStock(goods, 1);
    return "success";
}
@GlobalTransactional为seata的注解,表示开启全局事务
网关配置
nacos中api-gateway-dev.yml
server:
  port: 8001
spring:
  cloud:
    gateway:
      routes:
      - id: api-provider
        uri: lb://api-provider
        predicates:
        - Path=/provider/**
        filters:
        - RewritePath=/provider/(?<segment>.*), /$\{segment}
      - id: api-provider-order
        uri: lb://api-provider-order
        predicates:
        - Path=/provider-order/**
        filters:
        - RewritePath=/provider-order/(?<segment>.*), /$\{segment}
      - id: api-provider-stock
        uri: lb://api-provider-stock
        predicates:
        - Path=/provider-stock/**
        filters:
        - RewritePath=/provider-stock/(?<segment>.*), /$\{segment}
场景测试
库存充足情况下会正常插入一条订单信息和将商品库存数减1
启动nacos->seata->(api-gateway、api-provider、api-provider-order、api-provider-stock)
端口说明
api-gateway:8001
api-provider:8000
api-provider-order:8002
api-provider-stock:8003
发送请求,路径http://localhost:8001/provider/business/create/order,走网关请求
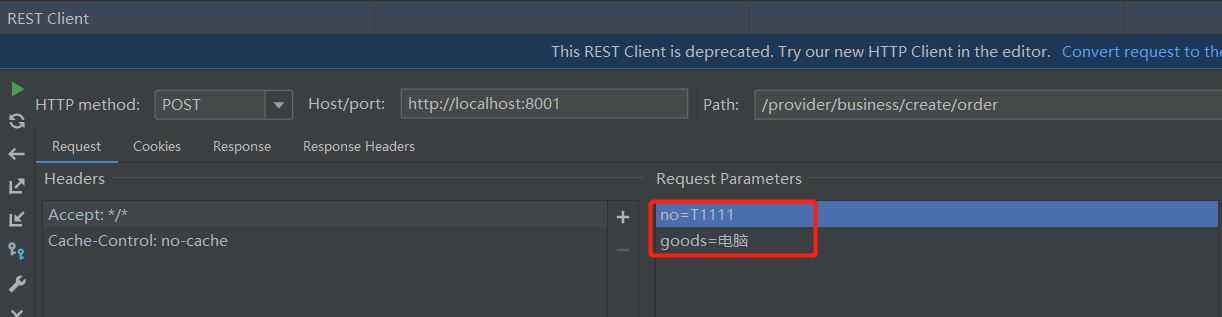
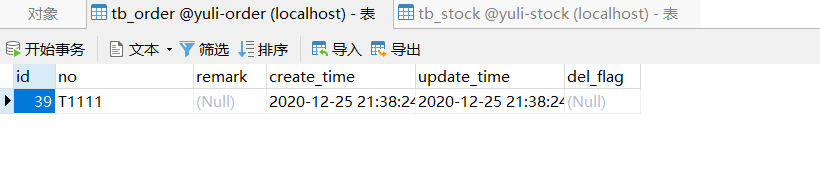
订单成功插入一条数据

库存成功扣减(1->0)

此时将订单号修该一下,再请求,此时库存服务就会抛出异常
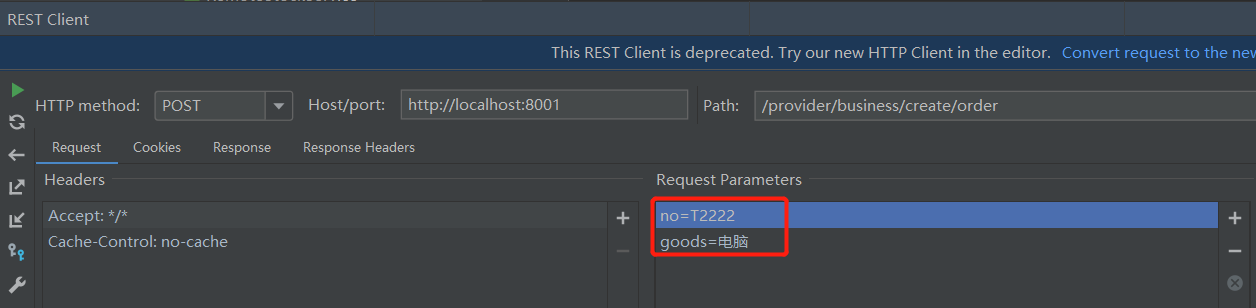

订单信息未插入
可看到订单服务控制台显示分支事务回滚,二阶段回滚,说明全局事务在其中起到了相应作用


 2392
2392


 被折叠的 条评论
为什么被折叠?
被折叠的 条评论
为什么被折叠?
 到【灌水乐园】发言


