【无聊】opencv与图像处理基础之车道线检测

车道线检测

参考:opencv在python中的哈夫直线变换(Hough Line Transform) https://www.jianshu.com/p/ebaf449b434b

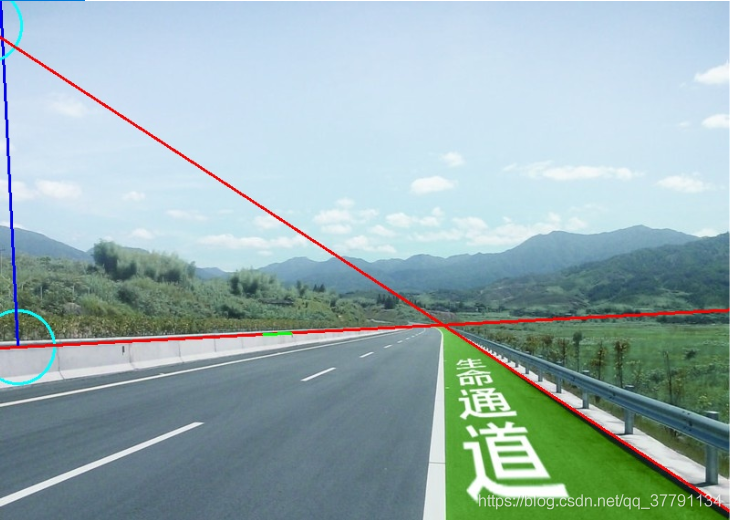
其中第一条直线,以及与中心点垂直的直线示意图如下,分别是红色线和蓝色线,如上图,为啥呢?首先200阈值导致只有两根线,如果设置为100,则有许多线,这个是经验值。lines[i][0][0]表示极坐标半径,lines[i][0][1]表示极坐标角度,这个是切点。所以连接原点的线与所得直线垂直。

结果:

  • 1
    点赞
  • 2
    收藏
    觉得还不错? 一键收藏
  • 1
    评论
以下是基于 OpenCV车道线检测图片处理代码例: ```python import cv2 import numpy as np def region_of_interest(img, vertices): mask = np.zeros_like) cv2.fillPoly(mask, vertices, 255) masked_img = cv2.bitwise_and(img, mask) return masked_img def draw_lines(img, lines, color=(0, 255, 0), thickness=3): for line in lines: for x1, y1, x2, y2 in line: cv2.line(img, (x1, y1), (x2, y2), color, thickness) def lane_detection(img): gray_img = cv2.cvtColor(img, cv2.COLOR_BGR2GRAY) edges = cv2.Canny(gray_img, 50, 150) height, width = edges.shape vertices = np.array([[(0, height), (width/2, height/2), (width, height)]], dtype=np.int32) masked_edges = region_of_interest(edges, vertices) lines = cv2.HoughLinesP(masked_edges, rho=1, theta=np.pi/180, threshold=20, minLineLength=20, maxLineGap=300) line_img = np.zeros_like(img) draw_lines(line_img, lines) lane_img = cv2.addWeighted(img, 0.8, line_img, 1, 0) return lane_img # 读取图像文件 img = cv2.imread('path/to/image.jpg') lane_img = lane_detection(img) cv2.imshow('Lane Detection', lane_img) cv2.waitKey(0) cv2.destroyAllWindows() ``` 此代码与之前的视频处理代码类似,只是将视频处理的循环部分移除,直接处理一张静态图像。可以将此代码保存为 Python 文件,并将 `path/to/image.jpg` 替换为你的图像文件路径,然后运行代码来进行车道线检测。 同样需要注意,这只是一个简单的示例,实际应用中可能需要进行更多的图像处理和参数调整。

“相关推荐”对你有帮助么?

  • 非常没帮助
  • 没帮助
  • 一般
  • 有帮助
  • 非常有帮助
提交
评论 1
添加红包

请填写红包祝福语或标题

红包个数最小为10个

红包金额最低5元

当前余额3.43前往充值 >
需支付:10.00
成就一亿技术人!
领取后你会自动成为博主和红包主的粉丝 规则
hope_wisdom
发出的红包
实付
使用余额支付
点击重新获取
扫码支付
钱包余额 0

抵扣说明:

1.余额是钱包充值的虚拟货币,按照1:1的比例进行支付金额的抵扣。
2.余额无法直接购买下载,可以购买VIP、付费专栏及课程。

余额充值