


 本文详细介绍如何在SpringBoot项目中集成Swagger3,包括依赖引入、配置类编写及接口注解使用等内容,帮助快速实现API文档自动生成。
准备
spring boot项目创建,
引入mysql驱动
等步骤省略。
maven 配置
<!-- swagger 3 -->
<dependency>
   <groupId>io.springfox</groupId>
   <artifactId>springfox-boot-starter</artifactId>
   <version>3.0.0</version>
</dependency>
配置
创建一个Swagger3Config.java 用于配置swagger
package com.demo.config;

import io.swagger.annotations.Api;
import io.swagger.annotations.ApiOperation;
import org.springframework.beans.factory.annotation.Value;
import org.springframework.context.annotation.Bean;
import org.springframework.context.annotation.Configuration;
import springfox.documentation.builders.ApiInfoBuilder;
import springfox.documentation.builders.PathSelectors;
import springfox.documentation.builders.RequestHandlerSelectors;

import springfox.documentation.oas.annotations.EnableOpenApi;
import springfox.documentation.service.ApiInfo;
import springfox.documentation.service.Contact;
import springfox.documentation.spi.DocumentationType;
import springfox.documentation.spring.web.plugins.Docket;

@EnableOpenApi
@Configuration
public class Swagger3Config {
    @Value("${swagger3.swaggerEnabled}")
    private Boolean swaggerEnabled;

    @Bean
    public Docket createRestApi() {
        return new Docket(DocumentationType.OAS_30).apiInfo(apiInfo())
                // 是否开启
                .enable(swaggerEnabled).select()
                // 扫描的路径包
                .apis(RequestHandlerSelectors.basePackage("com.demo.controller"))
                .apis(RequestHandlerSelectors.withClassAnnotation(Api.class))
                .apis(RequestHandlerSelectors.withMethodAnnotation(ApiOperation.class))
                // 指定路径处理PathSelectors.any()代表所有的路径
                .paths(PathSelectors.any())
                .build()
                .pathMapping("/");
    }

    private ApiInfo apiInfo() {
        return new ApiInfoBuilder()
                .title("Spring Boot中演示swaggerUI")
                .description("155@qq.com")
                .contact(new Contact("张小三","","1554"))
                .version("1.0")
                .build();
    }
}
接口配置
- 在接口的类上配置
/**
* 用户 模块
*/
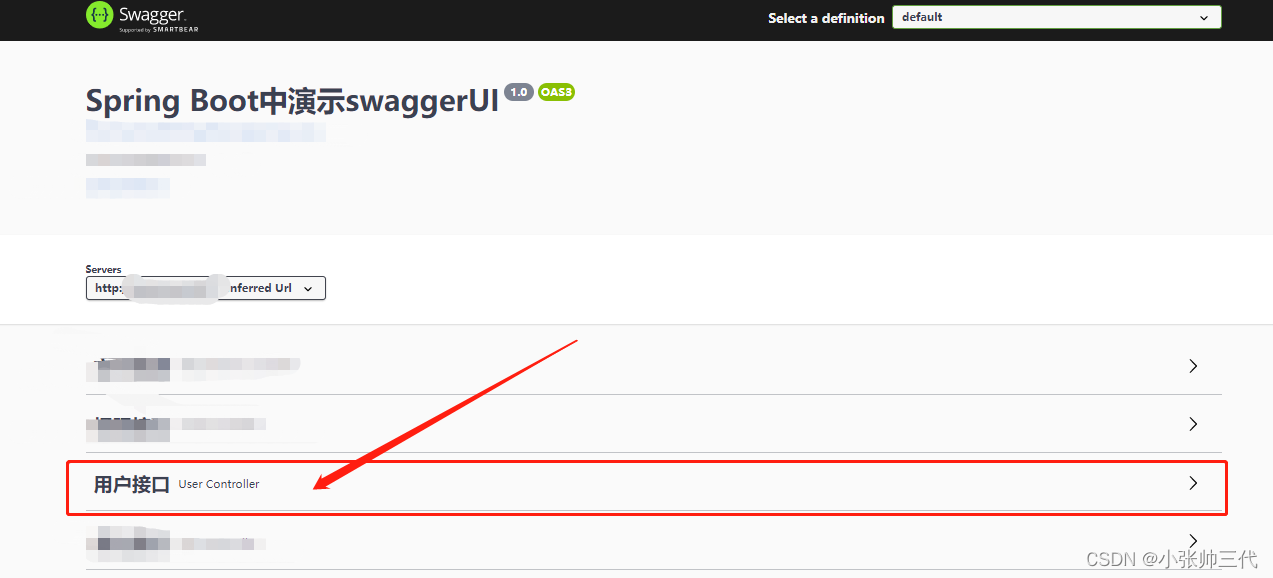
@Api(value = "用户接口", tags = "用户接口")
@RestController
@RequestMapping(value = "user", method = RequestMethod.POST)
public class UserController {
//todo
}
此处的配置在swagger中展示为下图所示:
2. 在方法上注明方法功能和参数相关说明,
具体的swagger直接自行百度。
例如
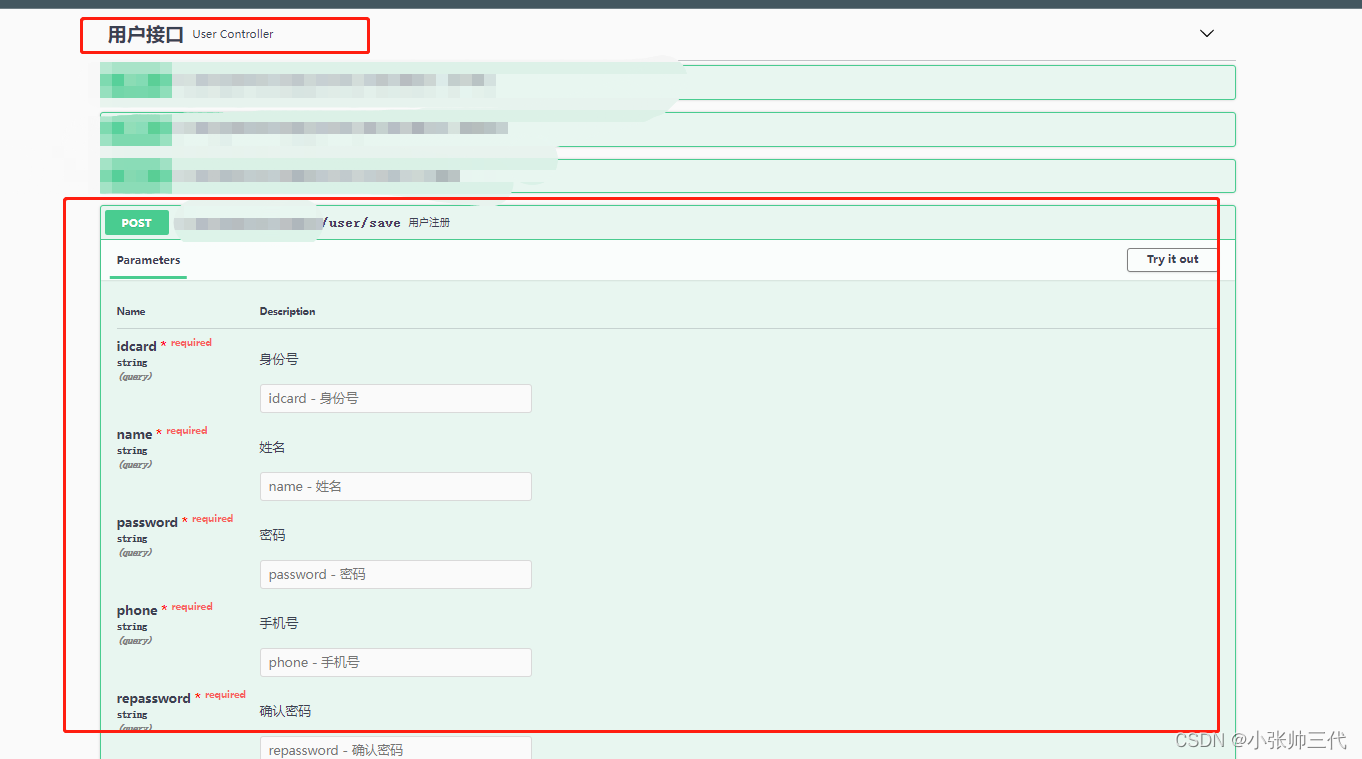
/**
* 用户注册
*/
@ApiOperation(value = "用户注册")
@ApiImplicitParams({
       @ApiImplicitParam(name = "name", value = "姓名", required = false, paramType = "query", dataType = "String", defaultValue = ""),
       @ApiImplicitParam(name = "password", value = "密码", required = false, paramType = "query", dataType = "String", defaultValue = ""),
       @ApiImplicitParam(name = "repassword", value = "确认密码", required = false, paramType = "query", dataType = "String", defaultValue = ""),
       @ApiImplicitParam(name = "phone", value = "手机号", required = false, paramType = "query", dataType = "String", defaultValue = ""),
       @ApiImplicitParam(name = "idcard", value = "身份号", required = false, paramType = "query", dataType = "String", defaultValue = ""),
       @ApiImplicitParam(name = "roleId", value = "角色id", required = false, paramType = "query", dataType = "String", defaultValue = "")
})
@RequestMapping(value = "save")
public String save(
       @RequestParam(value = "name") String name,
       @RequestParam(value = "password") String password,
       @RequestParam(value = "repassword") String repassword,
       @RequestParam(value = "phone") String phone,
       @RequestParam(value = "idcard") String idcard,
       @RequestParam(value = "roleId") String roleId
) throws Exception {
	// todo
}
在swagger上如下所示:
访问地址
http://localhost:8003/DemoApi/swagger-ui/index.html
localhost: 本机地址
8003:项目端口
DemoApi:项目名称。在application.properties文件中配置了server.servlet.context-path=DemoApiApi 项目名称。未配置可以省略。
注意
当项目中有配置继承了WebMvcConfigurationSupport时,springMVC默认的WebMvc配置就会失效,此时是访问不到swagger页面的。
需要在WebMvcConfigurationSupport配置文件中加入以下代码:
@Override
protected void addResourceHandlers(ResourceHandlerRegistry registry) {
    registry.addResourceHandler("/swagger-ui/**")
            .addResourceLocations("classpath:/META-INF/resources/webjars/springfox-swagger-ui/");
}
若项目中配置了拦截器,则需要将下面的访问目标放开拦截
/swagger-ui
/swagger-resources
/v3
/swagger-resources/configuration


 1万+
1万+

 被折叠的 条评论
为什么被折叠?
被折叠的 条评论
为什么被折叠?
 到【灌水乐园】发言


