


首先展示一个这个项目的原型:
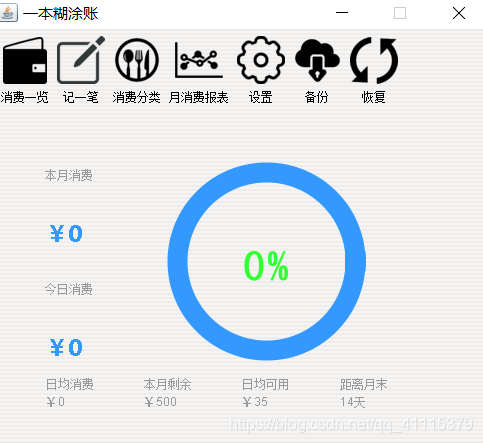
有这些各种各样的功能。
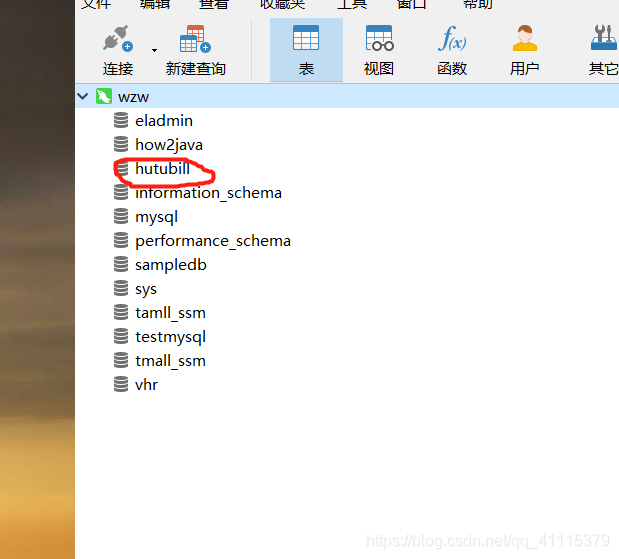
首先第一步是创建对应的数据库:
启动mysql 服务,然后连接Navicat
数据库的名字叫做hutubill
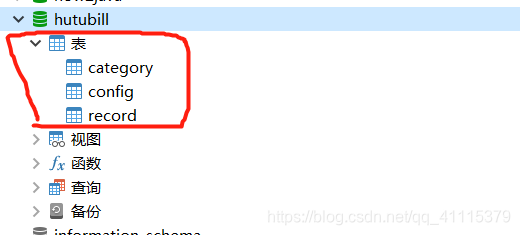
再创建三个表:
- 配置表信息 config
用于保存每月预算和Mysql的安装路径( 用于备份还原用) - 消费分类表 category
用于保存消费分类,比如餐饮,交通,住宿 - 消费记录表 record
用于存放每一笔的消费记录,并且会用到消费分类
config有id,key_,value
CREATE TABLE config (
  id int ,
  key_ varchar(255) ,
  value varchar(255)
)  ENGINE=InnoDB  DEFAULT CHARSET=utf8;
category 有id,name
CREATE TABLE category (
  id int,
  name varchar(255)
)   ENGINE=InnoDB DEFAULT CHARSET=utf8;
record有 id,spend,cid,comment,date
CREATE TABLE record (
  id int,
  spend int,
  cid int,
  comment varchar(255) ,
  date Date
)   ENGINE=InnoDB DEFAULT CHARSET=utf8;
这边没有表示主键,是因为在之后有其他的约束来对他进行标识
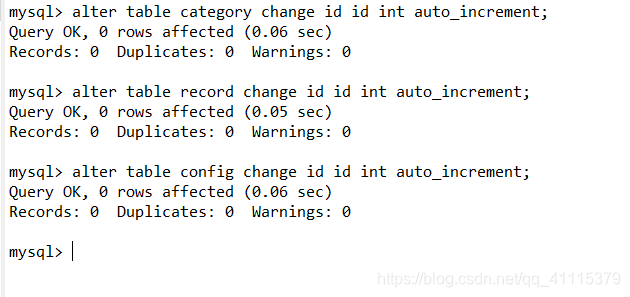
对应的主键约束:
alter table category add constraint pk_category_id primary key (id);
alter table record add constraint pk_record_id primary key (id);
alter table config add constraint pk_config_id primary key (id);
并对id进行自增长
最后是增加外键约束
(确定record表的外键是cid,指向了category表的id主键)
alter table record add constraint fk_record_category foreign key (cid) references category(id);
接下来就是对应的原型设计了
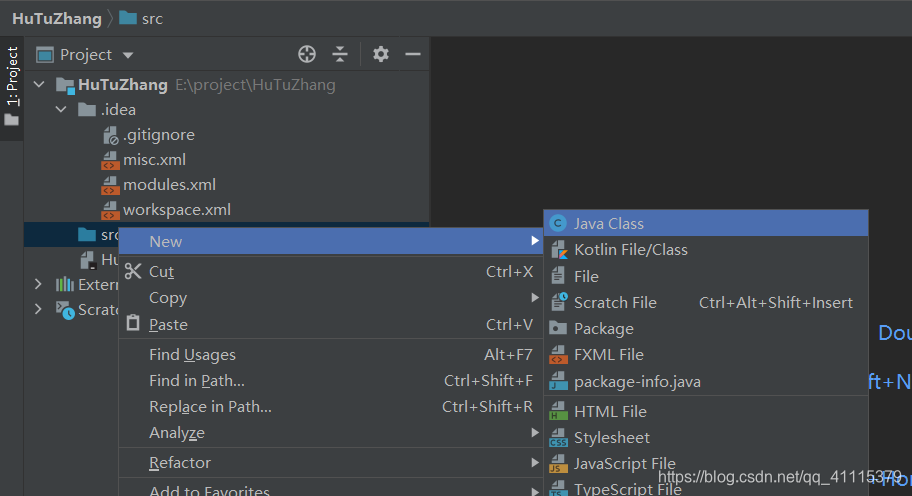
在src下创建HutuMainFrame 这个类
import javax.swing.*;
import java.awt.*;
import java.awt.event.ActionEvent;
import java.awt.event.ActionListener;

public class HutuMainFrame {
    public static void main(String[] args) {
        //用到了JFrame 它是swing的一个组件,是用来创建窗口的
        JFrame f=new JFrame();
        //应该算是他的大小
        f.setSize(500,450);
        f.setTitle("wzw的一本糊涂账");
        //如果组件当前未显示或者 c 为 null,则此窗口将置于屏幕的中央
        f.setLocationRelativeTo(null);
        //这个是判断是否可以调整,false就是不能自动调整
        f.setResizable(false);
        //设置用户在此窗体上发起 "close" 时默认执行的操作
        //而EXIT_ON_CLOSE(在 JFrame 中定义):使用 System exit 方法退出应用程序
        f.setDefaultCloseOperation(JFrame.EXIT_ON_CLOSE);

        //创建按钮
        //这个是一个工具栏
        JToolBar tb=new JToolBar();
        JButton bSpend=new JButton("消费一览");
        JButton bRecord=new JButton("记一笔");
        JButton bCategory=new JButton("消费分类");
        JButton bReport=new JButton("月消费报表");
        JButton bConfig=new JButton("设置");
        JButton bBackup=new JButton("备份");
        JButton bRecover=new JButton("恢复");

        //再把这几个按钮都加到工具栏中
        tb.add(bSpend);
        tb.add(bRecord);
        tb.add(bCategory);
        tb.add(bReport);
        tb.add(bConfig);
        tb.add(bBackup);
        tb.add(bRecover);
        //再是位置 这个是默认0边距的,可以改改看
        f.setLayout(new BorderLayout());
        //这里就是在上面,放这个工具栏
        f.add(tb,BorderLayout.NORTH);
        //这个意思应该是在布局的中间位置,放JPanel
        f.add(new JPanel(),BorderLayout.CENTER);

        //再让其可见
        f.setVisible(true);

        //再添加几个按键的功能,也就是监听事件
        //消费一览
        bSpend.addActionListener(new ActionListener() {
            public void actionPerformed(ActionEvent e){

            }
        });
        //记一笔
        bRecord.addActionListener(new ActionListener() {
            @Override
            public void actionPerformed(ActionEvent e) {

            }
        });
        //消费分类
        bCategory.addActionListener(new ActionListener() {
            @Override
            public void actionPerformed(ActionEvent e) {

            }
        });
        //设置
        bConfig.addActionListener(new ActionListener() {
            @Override
            public void actionPerformed(ActionEvent e) {

            }
        });
        //备份
        bBackup.addActionListener(new ActionListener() {
            @Override
            public void actionPerformed(ActionEvent e) {

            }
        });
        //恢复
        bRecover.addActionListener(new ActionListener() {
            @Override
            public void actionPerformed(ActionEvent e) {

            }
        });


    }
}
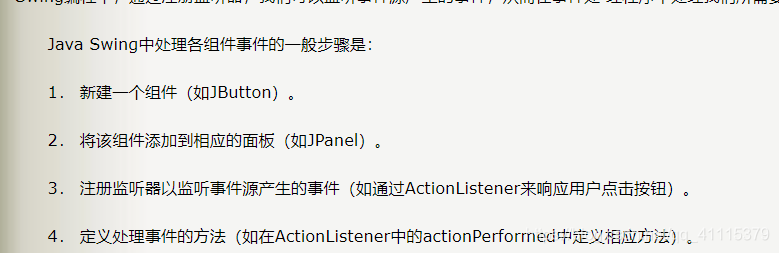
但这还不是完全的,在JPanel以及之后的监听器事件上,都会做相应的添加。
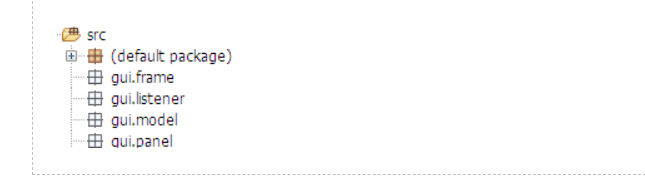
进行界面规划之后,大致需要分成以下几个包,和包里各自的类,现在先给这个包
首先第一个是在面板类中,为了方便监听器选择对应的值,
把组件声明为public的属性, 把面板类设计为单例模式
这里使用最简单的单例模式
直接声明一个SpendPanel类型的静态属性,并指向当前实例
SpendPanel 类
package gui.panel;

import javax.swing.*;

public class SpendPanel {
    //这里就是创建一个对象 为什么可以直接getInstance
    //是因为 他是instance吗, 我等下改成别的试试看
    public static SpendPanel instance=new SpendPanel();
    //JLabel 就是一个可以显示图像和文本的标签
    JLabel lMonthSpend =new JLabel("本月消费");
    JLabel lTodaySpend =new JLabel("今日消费");
    JLabel lAvgSpendPerDay=new JLabel("日均消费");
    JLabel lMonthLeft =new JLabel("本月剩余");
    JLabel lDayAvgAvailable =new JLabel("日均可用");
    JLabel lMonthLeftDay=new JLabel("距离月末");

    //这个相当于是设置初始值吗
    JLabel vMonthSpend =new JLabel("¥2300");
    JLabel vTodaySpend =new JLabel("¥25");
    JLabel vAvgSpendPerDay=new JLabel("¥120");
    JLabel vMonthLeft =new JLabel("¥2084");
    JLabel vDayAvgAvailable =new JLabel("¥389");
    JLabel vMonthLeftDay=new JLabel("15天");

    //然后这边就是 私有化构造方法使得该类无法在外部通过new 进行实例化
    private SpendPanel(){}
}
再又写一个用于居中的面板 CenterPanel继承了JPanel
package util;

import javax.swing.*;
import java.awt.*;

public class CenterPanel extends JPanel {
    //这个继承居然没有要写的东西
    private double rate;//拉伸的比例
    private JComponent c;//显示的组件
    private boolean strech;//是否拉伸

    //再写一个构造函数
    public CenterPanel(double rate, boolean strech) {
        //将容器的布局设为绝对布局,也就是固定大小
        this.setLayout(null);
        this.rate = rate;
        this.strech = strech;
    }

    //还有一个构造器
    public CenterPanel(double rate) {
        this(rate, true);//调用了上一个构造器
    }

    //然后是repaint方法会使用绝对定位的方式把组件放在中间位置
    //如果strech是true,就会根据整个容器的大小,设置组件的大小,达到拉伸的效果
    //如果strech是false, 就使用组件的preferredSize,即非拉伸效果。
    public void repaint() {
        if (null != c) {
            //如果组件不为空,this就是这个继承JPanel 的类
            Dimension containerSize = this.getSize();
            //相当于是获得预尺寸
            Dimension componentSize = c.getPreferredSize();
            if (strech)//可以拉伸的
                c.setSize((int)(containerSize.width*rate),(int)(containerSize.height*rate));
            else
                c.setSize(componentSize);

            //再设置位置 setSize在上一步已经确定好拉不拉伸了
            c.setLocation(containerSize.width/2-c.getSize().width/2,containerSize.height/2-c.getSize().height/2);
        }
        super.repaint();
    }
    //再是show方法
    // 先把这个容器中的组件都移出,然后把新的组件加进来,并且调用updateUI进行界面渲染。
    //参数是新的组件p
    public void show(JComponent p){
        this.c=p;
        //开始移组件
        Component[] cs=getComponents();
        for(Component c:cs){
            remove(c);
        }
        //再把新的加进来
        add(p);
        //再进行升级
        this.updateUI();
    }
    //开始调用主函数
    public static void main(String[] args) {
        JFrame f=new JFrame();
        f.setSize(200,200);
        //设置窗口相对于指定组件的位置。
        //如果组件当前未显示或者 c 为 null,则此窗口将置于屏幕的中央
        f.setLocationRelativeTo(null);
        //意思是需要进行拉伸
        CenterPanel cp=new CenterPanel(0.85,true);
        //为什么会有这个set方法呢,是content,而不是自己新建的
        f.setContentPane(cp);
        f.setDefaultCloseOperation(JFrame.EXIT_ON_CLOSE);
        f.setVisible(true);
        JButton b=new JButton("abc");
        cp.show(b);
    }

}
再创建一个工具类GUIUtil
package util;


import javax.swing.*;
import java.awt.*;
import java.io.File;

public class GUIUtil {
    //这个到时候改
    private static String imageFolder="e:/project/HuTuZhang/img";

    //给按钮设置图标和文本以及提示文字
    public static void setImageIcon(JButton b, String fileName, String tip){
        ImageIcon i=new ImageIcon(new File(imageFolder,fileName).getAbsolutePath());
        b.setIcon(i);
        b.setPreferredSize(new Dimension(61,81));
        b.setToolTipText(tip);
        b.setVerticalTextPosition(JButton.BOTTOM);
        b.setHorizontalTextPosition(JButton.CENTER);
        b.setText(tip);
    }
    //Component...这是什么意思
    public static void setColor(Color color,JComponent... cs){
        for(JComponent c:cs){
            //这个是背景的颜色吗
            c.setForeground(color);
        }
    }

    //这里的拉伸比例1表示满屏幕
    public static void showPanel(JPanel p,double strechRate){
        //这个方法之后会操作的
        GUIUtil.useLNF();
        JFrame f=new JFrame();
        f.setSize(500,500);
        f.setLocationRelativeTo(null);
        CenterPanel cp=new CenterPanel(strechRate);
        f.setContentPane(cp);
        f.setDefaultCloseOperation(JFrame.EXIT_ON_CLOSE);
        f.setVisible(true);
        cp.show(p);
    }
    //然后还有一个默认的,参数只有JPanel
    public static void showPanel(JPanel p){
        showPanel(p,0.85);
    }
    //先写一个判断输入框内容是否为空的
    public static boolean checkEmpty(JTextField tf,String input){
        //trim修剪 删去部分空白
        String text=tf.getText().trim();
        if(0==text.length()){
            //如果长度是0 的话
            //JOptionPane是消息提示框
            JOptionPane.showMessageDialog(null,input+"不能为空");
            //说是什么聚焦窗口 也不知道有什么用
            tf.grabFocus();
            return false;
        }
        return  true;
    }
    //校验一个组件内容是否是数字格式
    public static boolean checkNumber(JTextField tf,String input){
        if(!checkEmpty(tf,input))
            return false;
        String  text=tf.getText().trim();
        try{
            //就是把内容转化成整数,如果遇到不能转化的,就会抛出异常
            Integer.parseInt(text);
            return true;
        }catch (NumberFormatException e1){
            //这里就抛出数字格式异常
            //出现消息提示框
            JOptionPane.showMessageDialog(null,input+"需要是整数");
            tf.grabFocus();
            return false;
        }
    }
    //判断一个组件的内容是否为零
    public static boolean checkZero(JTextField tf,String input){
        if(!checkNumber(tf,input))
            return false;
        String text=tf.getText().trim();
        if(0==Integer.parseInt(text)){
            //如果换算出来的整数就是0的话
            JOptionPane.showMessageDialog(null,input+"不能为零");
            tf.grabFocus();
            return false;
        }
        return  true;

    }
    //这里又写了一个方法用来设置水晶皮肤
    public static void useLNF(){
        try{
            javax.swing.UIManager.setLookAndFeel("com.birosoft.liquid.LiquidLookAndFeel");
        }catch (Exception e){
            e.printStackTrace();
        }
    }


}
这里有一个水晶皮肤的jar文件,需要的可以私信我发给你:
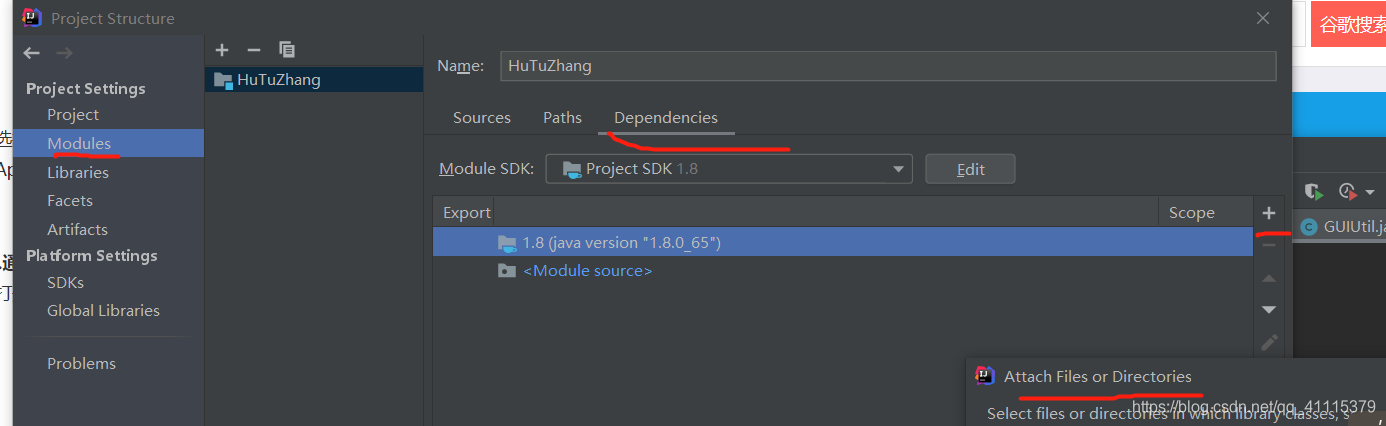
需要把这个包导入到项目中:
导入方法:file->Project Structure
然后Modules -> Dependencies -> “+” -> “Jars or directories”
最后 apply->ok
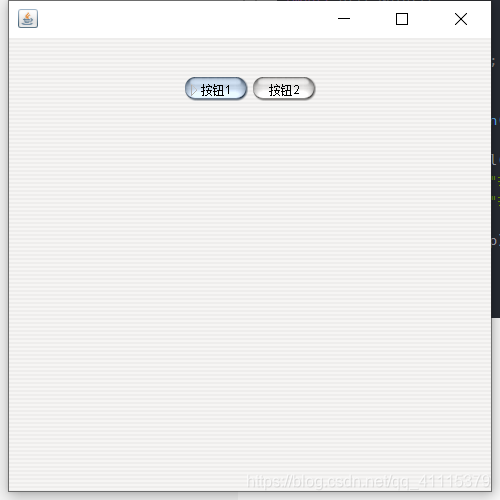
然后可以写代码测试一下:
import util.CenterPanel;
import util.GUIUtil;

import javax.swing.*;
import java.security.Guard;

public class Test {
    public static void main(String[] args) {
        GUIUtil.useLNF();
        JPanel p=new JPanel();
        p.add(new JButton("按钮1"));
        p.add(new JButton("按钮2"));
        //默认是0.85的
        GUIUtil.showPanel(p);
    }
}
结果显示:
这边的话,不想用这个插件,也可以改成
javax.swing.UIManager.setLookAndFeel("com.sun.java.swing.plaf.windows.WindowsLookAndFeel");
然后是集合了颜色的工具类:
package util;

import java.awt.*;

public class ColorUtil {
    //Color来自Integer.decode
    public static Color blueColor= Color.decode("#3399FF");
    public static Color garyColor= Color.decode("#999999");
    public static Color backgroundColor= Color.decode("#eeeeee");
    public static Color warningColor= Color.decode("#FF3333");

    //这个方法是根据进度来显示不同的颜色
    public static Color getByPercentage(int per){
        if(per>100)
            per=100;
        int r=51;
        int g=255;
        int b=51;
        //这个就相当于是显示百分比
        //这个代码是颜色渐变,从蓝色渐变到红色的过程
        float rate=per/100f;
        r=(int)((255-51)*rate+51);
        g=255-r+51;
        Color color=new Color(r,g,b);
        return color;
    }
}
还有一个环形进度条的工具
package util;

import java.awt.BasicStroke;
import java.awt.BorderLayout;
import java.awt.Color;
import java.awt.Font;
import java.awt.FontMetrics;
import java.awt.Graphics;
import java.awt.Graphics2D;
import java.awt.RenderingHints;
import java.awt.event.ActionEvent;
import java.awt.event.ActionListener;

import javax.swing.JButton;
import javax.swing.JPanel;
import javax.swing.SwingWorker;

public class CircleProgressBar extends JPanel {

    private int minimumProgress;

    private int maximumProgress;

    private int progress;

    private String progressText;

    private Color backgroundColor;

    private Color foregroundColor;

    public CircleProgressBar() {
        minimumProgress = 0;
        maximumProgress = 100;
        progressText = "0%";
    }

    public void paint(Graphics g) {
        super.paint(g);
        Graphics2D graphics2d = (Graphics2D) g;
        // 开启抗锯齿
        graphics2d.setRenderingHint(RenderingHints.KEY_ANTIALIASING, RenderingHints.VALUE_ANTIALIAS_ON);
        int x = 0;
        int y = 0;
        int width = 0;
        int height = 0;
        int fontSize = 0;
        if (getWidth() >= getHeight()) {
            x = (getWidth() - getHeight()) / 2 + 25;
            y = 25;
            width = getHeight() - 50;
            height = getHeight() - 50;
            fontSize = getWidth() / 8;
        } else {
            x = 25;
            y = (getHeight() - getWidth()) / 2 + 25;
            width = getWidth() - 50;
            height = getWidth() - 50;
            fontSize = getHeight() / 8;
        }
        graphics2d.setStroke(new BasicStroke(20.0f));
        graphics2d.setColor(backgroundColor);
        graphics2d.drawArc(x, y, width, height, 0, 360);
        graphics2d.setColor(foregroundColor);
        graphics2d.drawArc(x, y, width, height, 90,
                -(int) (360 * ((progress * 1.0) / (maximumProgress - minimumProgress))));
        graphics2d.setFont(new Font("黑体", Font.BOLD, fontSize));
        FontMetrics fontMetrics = graphics2d.getFontMetrics();
        int digitalWidth = fontMetrics.stringWidth(progressText);
        int digitalAscent = fontMetrics.getAscent();
        graphics2d.setColor(foregroundColor);
        graphics2d.drawString(progressText, getWidth() / 2 - digitalWidth / 2, getHeight() / 2 + digitalAscent / 2);
    }

    public int getProgress() {
        return progress;
    }

    public void setProgress(int progress) {
        if (progress >= minimumProgress && progress <= maximumProgress)
            this.progress = progress;
        if (progress > maximumProgress)
            this.progress = maximumProgress;

        this.progressText = String.valueOf(progress + "%");

        this.repaint();
    }

    public Color getBackgroundColor() {
        return backgroundColor;
    }

    public void setBackgroundColor(Color backgroundColor) {
        this.backgroundColor = backgroundColor;
        this.repaint();
    }

    public Color getForegroundColor() {
        return foregroundColor;
    }

    public void setForegroundColor(Color foregroundColor) {
        this.foregroundColor = foregroundColor;
        this.repaint();
    }

}
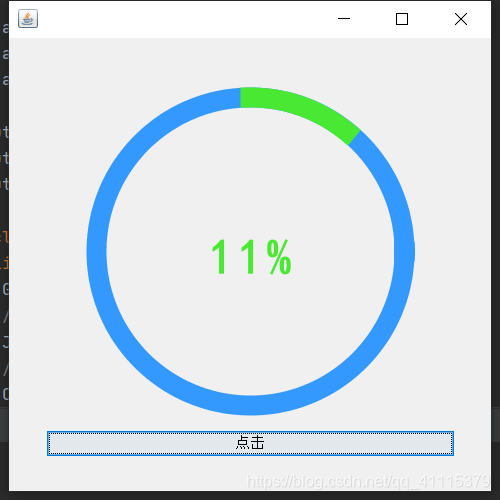
这个也可以写一个测试代码来运行一下:
package test;

import java.awt.BorderLayout;
import java.awt.event.ActionEvent;
import java.awt.event.ActionListener;

import javax.swing.JButton;
import javax.swing.JPanel;
import javax.swing.SwingWorker;

import util.CircleProgressBar;
import util.ColorUtil;
import util.GUIUtil;

public class Test {
    public static void main(String[] args) {
        GUIUtil.useLNF();
        //面板
        JPanel p = new JPanel();
        //进度条组件
        CircleProgressBar cpb = new CircleProgressBar();
        cpb.setBackgroundColor(ColorUtil.blueColor);
        cpb.setProgress(0);
        //按钮
        JButton b = new JButton("点击");
        //添加组件
        p.setLayout(new BorderLayout());
        p.add(cpb, BorderLayout.CENTER);
        p.add(b, BorderLayout.SOUTH);
        //显示面板
        GUIUtil.showPanel(p);

        //给按钮加监听
        b.addActionListener(new ActionListener() {

            @Override
            public void actionPerformed(ActionEvent e) {
                new SwingWorker() {

                    @Override
                    protected Object doInBackground() throws Exception {
                        for (int i = 0; i < 100; i++) {
                            cpb.setProgress(i + 1);
                            cpb.setForegroundColor(ColorUtil.getByPercentage(i + 1));
                            try {
                                Thread.sleep(100);
                            } catch (InterruptedException e1) {
                                // TODO Auto-generated catch block
                                e1.printStackTrace();
                            }
                        }
                        return null;
                    }

                }.execute();

            }
        });

    }
}
然后是生成柱状图的工具,这个也需要导入一个chart.jar文件,需要的可以私聊我
package util;

import java.awt.Color;
import java.awt.Font;
import java.awt.Image;

import javax.swing.Icon;
import javax.swing.ImageIcon;
import javax.swing.JLabel;
import javax.swing.JPanel;

import com.objectplanet.chart.BarChart;
import com.objectplanet.chart.Chart;

public class ChartUtil {

    public static int max(double[] sampleValues) {
        int max = 0;
        for (double v : sampleValues) {
            if (v > max)
                max = (int) v;
        }
        return max;

    }

    private static String[] sampleLabels() {
        String[] sampleLabels = new String[30];

        for (int i = 0; i < sampleLabels.length; i++) {
            if (0 == i % 5)
                sampleLabels[i] = String.valueOf(i + 1 + "日");
        }
        return sampleLabels;
    }

    public static Image getImage(int width, int height) {
        // 模拟样本数据
        double[] sampleValues = sampleValues();
        // 下方显示的文字
        String[] sampleLabels = sampleLabels();
        // 样本中的最大值
        int max = max(sampleValues);

        // 数据颜色
        Color[] sampleColors = new Color[] { ColorUtil.blueColor };

        // 柱状图
        BarChart chart = new BarChart();

        // 设置样本个数
        chart.setSampleCount(sampleValues.length);
        // 设置样本数据
        chart.setSampleValues(0, sampleValues);
        // 设置文字
        chart.setSampleLabels(sampleLabels);
        // 设置样本颜色
        chart.setSampleColors(sampleColors);
        // 设置取值范围
        chart.setRange(0, max * 1.2);
        // 显示背景横线
        chart.setValueLinesOn(true);
        // 显示文字
        chart.setSampleLabelsOn(true);
        // 把文字显示在下方
        chart.setSampleLabelStyle(Chart.BELOW);

        // 样本值的字体
        chart.setFont("rangeLabelFont", new Font("Arial", Font.BOLD, 12));
        // 显示图例说明
        chart.setLegendOn(true);
        // 把图例说明放在左侧
        chart.setLegendPosition(Chart.LEFT);
        // 图例说明中的文字
        chart.setLegendLabels(new String[] { "月消费报表" });
        // 图例说明的字体
        chart.setFont("legendFont", new Font("Dialog", Font.BOLD, 13));
        // 下方文字的字体
        chart.setFont("sampleLabelFont", new Font("Dialog", Font.BOLD, 13));
        // 图表中间背景颜色
        chart.setChartBackground(Color.white);
        // 图表整体背景颜色
        chart.setBackground(ColorUtil.backgroundColor);
        // 把图表转换为Image类型
        Image im = chart.getImage(width, height);
        return im;
    }

    private static double[] sampleValues() {

        double[] result = new double[30];
        for (int i = 0; i < result.length; i++) {
            result[i] = (int) (Math.random() * 300);
        }
        return result;

    }

    public static void main(String[] args) {
        JPanel p = new JPanel();
        JLabel l = new JLabel();
        Image img = ChartUtil.getImage(400, 300);
        Icon icon = new ImageIcon(img);
        l.setIcon(icon);
        p.add(l);
        GUIUtil.showPanel(p);
    }

}
然后就是几张图片,需要的私聊我,放在之前定义好的位置上,我是放在:
e:/project/HuTuZhang/img


 1266
1266


 被折叠的 条评论
为什么被折叠?
被折叠的 条评论
为什么被折叠?
 到【灌水乐园】发言


