


最近项目上需要一个activity Mq的即时通讯,这两天开始学习,写篇文章记录一下学习心得,也希望有大神能指点一二。
进入正题,首先是安装activityMq,直接去官网下载下来解压就可以了,然后进入bin目录根据操作系统版本进入文件夹(我的是Windows64位),双击activitymq.bat进入小黑框(应该不会出现问题,倒霉如我也没在这上遇到坑,如果真的有,请百度之后告诉我解决方案(:)。
小黑框如果长这样那就算成功了。
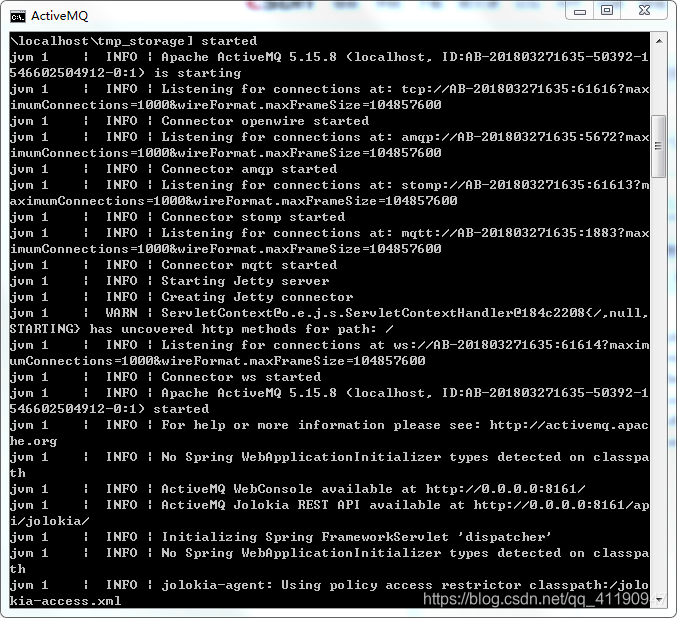
启动之后就可以写代码了(应该是代码写完之后启动它。。。。好像差不多?。。。。。。
如果使用maven,直接到官网去copy就好,如果使用jar,直接到你刚刚下的那个压缩包里边找一个叫activemq-all.jar的就好。
正式写代码:
po封装类:
package com.mq.demo;

/**
 * @author HTC
 * @create 2019-01-03 16:50
 * @desc 一个简单的ajax模板
 **/
public class Po {
    private String State;
    private String mag;
    private String userName;

    public Po(String state, String mag, String userName) {
        State = state;
        this.mag = mag;
        this.userName = userName;
    }
    public Po(String state, String mag) {
        State = state;
        this.mag = mag;
    }
    public Po() {}

    public String getState() {
        return State;
    }

    public void setState(String state) {
        State = state;
    }

    public String getMag() {
        return mag;
    }

    public void setMag(String mag) {
        this.mag = mag;
    }

    public String getUserName() {
        return userName;
    }

    public void setUserName(String userName) {
        this.userName = userName;
    }
}
消息发送端的代码:
package com.mq.demo;

import org.apache.activemq.ActiveMQConnectionFactory;

import javax.jms.*;

/**
 * @author HTC
 * @create 2019-01-04 20:05
 * @desc 消息发送方
 **/
public class MqSender {

    ConnectionFactory connectionFactory;
    Connection connection;
    Session session=null;
    Destination destination;
    MessageProducer producer;
    MessageConsumer messageConsumer;
    /*初始化*/
    public  boolean start(){
        //连接工厂
        connectionFactory=new ActiveMQConnectionFactory(ActiveMQConnectionFactory.DEFAULT_USER,ActiveMQConnectionFactory.DEFAULT_PASSWORD,"tcp://127.0.0.1:61616");
        try {
            //连接
            connection=connectionFactory.createConnection();
            //启动
            connection.start();
            //创建session
            session=connection.createSession(Boolean.FALSE,Session.AUTO_ACKNOWLEDGE);
            //消息目的地
//            destination = session.createQueue("FirstQueue");
            destination=session.createQueue("Javcekon-MQ");
            //消息生产者
            producer = session.createProducer(destination);
            //设置不持久化
            producer.setDeliveryMode(DeliveryMode.PERSISTENT);
        } catch (JMSException e) {
            e.printStackTrace();
            close();
            return false;
        }
        return true;
    }

    /*发送消息*/
    public Po send(String text){
        Po po=new Po();
        try {
//            创建消息
            TextMessage textMessage=session.createTextMessage(text);
//            发送消息
            producer.send(textMessage);
             //如果输入exit,则退出,没有写退出后对消息的解决方案
            if("exit".equals(text)){
                close();
            }
        } catch (JMSException e) {
            e.printStackTrace();
            close();
            po=new Po("0","error");
        }
        po=new Po("1",text);
        return po;
    }

        /*关闭*/
    public void close(){
        try {
            connection.close();
            session.close();
        } catch (JMSException e) {
            e.printStackTrace();
        }
    }
}
消息接收方的代码:
package com.mq.demo;

import org.apache.activemq.ActiveMQConnection;
import org.apache.activemq.ActiveMQConnectionFactory;

import javax.jms.*;
import java.util.ArrayList;
import java.util.List;

/**
 * @author HTC
 * @create 2019-01-04 8:42
 * @desc 消费者
 **/
public class Redriver {
    // ConnectionFactory :连接工厂,JMS 用它创建连接
    ConnectionFactory connectionFactory=null;
    // Connection :JMS 客户端到JMS Provider 的连接
    Connection connection=null;
    // Session: 一个发送或接收消息的线程
    Session session=null;
    // Destination :消息队列,消息的存放地
    Destination destination=null;
    // MessageProducer:消息发送者
    MessageConsumer messageConsumer=null;

    public void start(){
        // TextMessage message;
        // 构造ConnectionFactory实例对象
        //tcp://127.0.0.1:61616 是对方的消息队列的地址,因为是给自己发消息,所以发送方和接收方地址一样
        connectionFactory=new ActiveMQConnectionFactory(ActiveMQConnection.DEFAULT_USER,ActiveMQConnection.DEFAULT_PASSWORD,"tcp://127.0.0.1:61616");
        // 构造从工厂得到连接对象
        try {
            connection=connectionFactory.createConnection();
            connection.start();
            session=connection.createSession(Boolean.FALSE,Session.AUTO_ACKNOWLEDGE);
            destination = session.createQueue("Javcekon-MQ");
            messageConsumer = session.createConsumer(destination);
        } catch (JMSException e) {
            e.printStackTrace();
            close();
        }
    }

        /*将收到的消息添加到list*/
        List<Po>list=new ArrayList<>();
        /*接收消息*/
        public List<Po> GetMessage(){
            try {
                /*初始化*/
                start();
                while (true) {
                    //设置接收者接收消息的时间
                    TextMessage message = (TextMessage) messageConsumer.receive(500);
                    //如果为空则跳出循环
                    if ( message!=null) {
                    //封装消息
                        Po po=new Po();
                        po.setUserName(message.getJMSMessageID());
                        po.setMag(message.getText());
                        list.add(po);
                    }
                    else {
                        break;
                    }
                }
            } catch (JMSException e) {
                e.printStackTrace();
            }finally {
                close();
            }
            return list;
        }

        public void close(){
            try {
                session.close();
                connection.close();
            } catch (JMSException e) {
                e.printStackTrace();
            }
        }

}
ok,要用的东西都齐全了,开搞!
我用的是springboot,直接上配置源码(其他的框架也一样,如果只想写纯java自己动手改一下就odk了)
#server start
server.port=8081
#server end
#thymeleaf start
spring.thymeleaf.mode=HTML5
spring.thymeleaf.encoding=UTF-8
spring.thymeleaf.servlet.content-type=text/html
#开发时关闭缓存,不然没法看到实时页面
spring.thymeleaf.cache=false
#static 文件夹下的静态文件访问路径
spring.mvc.static-path-pattern=/static/**
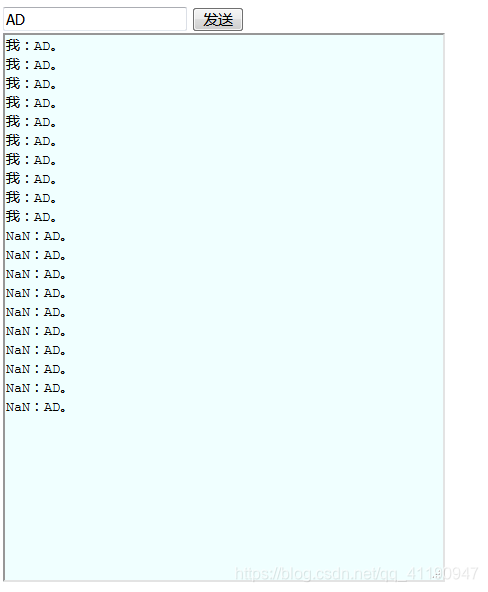
#thymeleaf end一个极其简陋的客户端界面:
它是通过定时向后台发送消息接收请求的方式来获得消息的,所以会看到有时候没得一条消息,有时候几十条消息,,,,(毕竟是几秒钟才请求一次,消息积压得多)
<!DOCTYPE html>
<html lang="en">
<head>
    <meta charset="UTF-8">
    <title>消息</title>
    <script type="text/javascript" src="/static/jquery-1.7.2.min.js"></script>
</head>
<body>
        <input type="text" id="inputInfo">

        <button id="send">发送</button><br/>

        <textarea id="textarea" style="background-color: azure;width: 400px;height: 500px"></textarea>

</body>
    <script>
        $("#send").click(function (e) {
            var text = document.getElementById("inputInfo").value;
            var textarea = document.getElementById("textarea");
            textarea.innerHTML+="我:"+text+"。\n";
            text.innerText="";
            $.ajax({
                type:"post",
                url:"/Main/send",
                dataType:"json",
                data:{"text":text},
                success:function (data) {
                    if(data.State=="0"){
                        alert("消息发送失败");
                    }
                }
            })
        });
        //定时到后台获取消息
        ref = setInterval(function(){
            var textarea = document.getElementById("textarea");
            $.ajax({
                type:"post",
                url:"/Main/getMessage",
                dataType:"json",
                success:function (data) {
                    console.log(data);
                    for(var i=0;i<data.length;i++){
                        textarea.innerHTML+=+data[i].userName+":"+data[i].mag+"。\n";
                    }
                }
            })
        },2500);

    </script>
</html>
一个极其简陋的后台controller:
package com.mq.demo;

import org.springframework.stereotype.Controller;
import org.springframework.web.bind.annotation.RequestMapping;
import org.springframework.web.bind.annotation.RequestParam;
import org.springframework.web.bind.annotation.ResponseBody;

import java.util.List;

/**
 * @author HTC
 * @create 2019-01-03 16:41
 * @desc 用于页面跳转
 **/
@Controller
@RequestMapping("/Main")
public class MainController {
    MqSender mqSender=new MqSender();
    /**
    * @Author: HTC
    * @Description: 用于消息发送
    * @Param: String text
    * @return: Po po
    * @Date: 2019/1/4
    */
    @RequestMapping("/send")
    @ResponseBody
    public Po sendMasage(@RequestParam("text") String text){
        Po po=null;
        po=mqSender.send(text);
        return po;
    }

    /**
    * @Author: HTC
    * @Description: 在进入发送消息的HTML页面前就开始初始化mq
    * @Param: null
    * @return: String 页面
    * @Date: 2019/1/4
    */
    @RequestMapping("toSendMassage")
    public String toSendMassage(){
        //页面加载前初始化Mq
        boolean b=mqSender.start();
        if(!b){
            return "error";
        }
        return "SendMassage";
    }
    /**
    * @Author: HTC
    * @Description: 从消费者获得消息
    * @Param: null
    * @return: List<Po> list
    * @Date: 2019/1/4
    */
    @RequestMapping("getMessage")
    @ResponseBody
    public List<Po> toGetMessage(){
        Redriver redriver=new Redriver();
        List<Po> list=redriver.GetMessage();
        return list;
    }

}
跑一个?大概就这样了(我是给自己的消费者发消息,所以返回的是一样的)
注意:
正常情况是A有一个客户端A1和一个消费者端A2,B也有一个客户端B1和一个消费者端B2,如果A要给B发消息,是A1发消息给B2,所以A1的地址是填的B2的。
下一步是把ajax轮询替换成webSocket。
------------------------------------------------------------------雷区警戒线----------------------------------------------------------------------------
坑1:
我发了20条信息,却只接到了15条?消息似乎消失了?
填坑:
1.你得看看是不是在某些地方消费了那些消息,毕竟有多个消费者消费消息的时候,你的消费者不一定会抢得到那么多。。。。
你可以去你的管理界面看看,如果ajax轮询因为你的代码习惯或者什么什么之类的问题导致了它在每次查询的时候都创建了一个新的消费者(而且因为你还在发消息它还没法关掉),那可能消息就莫名丢失了。
坑2:
我消息发得好好的,为啥接收的消息就顺序是乱的?
填坑:
在这里有两个关于时间的设置:第一个是: TextMessage message = (TextMessage) messageConsumer.receive(500);这是设置消费者消息接收的时间间隔(就叫“后台时间”),可以减少资源占用(毕竟不用时时刻刻盯着有没得消息过来,没那么累,,,,我就这么理解的)
第二个是Html页面的请求消息接收的定时器(就叫“前台时间”了): ref = setInterval(function(){.........省略实现代码.....},2500);
如果你的手速(输入的速度)大于这两个时,并且前台时间小于后台时间的话,输入的东西就会乱掉。(手速是个好东西,可是。。。。。。不说了,,,,,,其实这个坑是可以控制的,毕竟人的输入速度不可能小于0.5秒吧,把值设置得低点就好了)。
异常:javax.jms.InvalidClientIDException: Broker: localhost - Client: HTC already connected from tcp://127.0.0.1:54914
其实就是一个端口只能开一个页面,多开页面是不存在的,至于解决方案嘛,暂时没有。。。。。。。
--------------------------------------------------------------我不是系统的生产者,我只是bug的搬运工----------------------------------------
上一篇文章:springboot整合dubbo之dubbo管理平台搭建以及服务搭建SpringBoot 学习笔记(第五天)


 1万+
1万+


 被折叠的 条评论
为什么被折叠?
被折叠的 条评论
为什么被折叠?
 到【灌水乐园】发言


