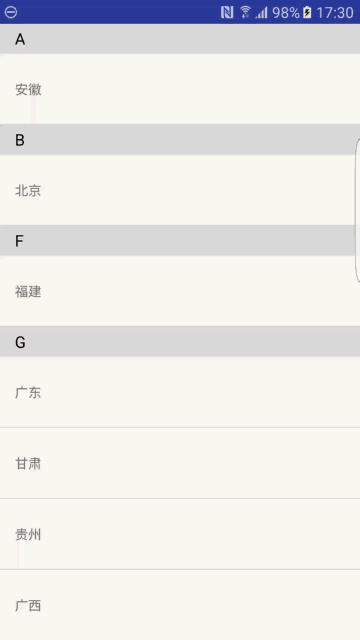
本文是Android导航分组列表系列上,因时间和篇幅原因分上下,最终上下合璧,完整版效果如下:
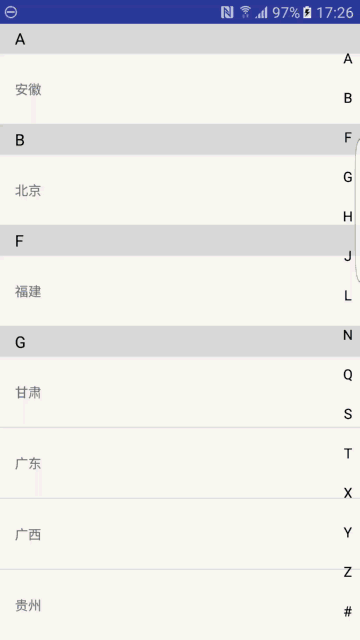
上部残卷效果如下:两个ItemDecoration,一个实现悬停头部分组列表功能,一个实现分割线(官方demo)
网上关于实现带悬停分组头部的列表的方法有很多,像我看过有主席的自定义ExpandListView实现的,也看过有人用一个额外的父布局里面套 RecyclerView/ListView+一个头部View(位置固定在父布局上方)实现的。
对于以上解决方案,有以下几点个人觉得不好的地方:
1. 现在RecyclerView是主流
2. 在RecyclerView外套一个父布局总归是增加布局层级,容易overdraw,显得不够优雅。
3. item布局实现带这种分类头部的方法有两种,一种是把分类头部当做一种itemViewtype(麻烦),另一种是每个Item布局都包含了分类头部的布局,代码里根据postion等信息动态Visible,Gone头部(布局冗余,item效率降低)。
况且Google为我们提供了ItemDecoration,它本身就是用来修饰RecyclerView里的Item的,它的getItemOffsets() onDraw()方法用于为Item分类头部留出空间和绘制(解决缺点3),它的onDrawOver()方法用于绘制悬停的头部View(解决缺点2)。
而且更重要的是,ItemDecoration出来这么久了,你还不用它?
本文就利用ItemDecoration 打造 分组列表,并配有悬停头部功能。
亮点预览:添加多个ItemDecoration、它们的执行顺序、ItemDecoration方法执行顺序、ItemDecoration和RecyclerView的绘制顺序
二 使用ItemDecoration
用法:为RecyclerViewPool添加一个或多个ItemDecoration
mRv.addItemDecoration(mDecoration = new TitleItemDecoration(this, mDatas));
mRv.addItemDecoration(new TitleItemDecoration2(this,mDatas));
mRv.addItemDecoration(new DividerItemDecoration(MainActivity.this,DividerItemDecoration.VERTICAL_LIST));
为RecyclerView添加ItemDecoration只要这么一句addItemDecoration(),
它有两个同名重载方法:
addItemDecoration(ItemDecoration decor) 常用,(按照add顺序,依次渲染ItemDecoration)
 addItemDecoration(ItemDecoration decor, int index) add一个ItemDecoration,并为它指定顺序
上来就高能,别的讲解RecyclerView的文章一般都是对ItemDecoration一笔带过,用的Demo一般也都是官方的DividerItemDecoration类,更别提还添加多个ItemDecoration了。其实我也是昨天写Demo的时候才发现这个方法,点进去查看了一下源码:
    public void addItemDecoration(ItemDecoration decor) {
        addItemDecoration(decor, -1);
    }

    public void addItemDecoration(ItemDecoration decor, int index) {
        if (mLayout != null) {
            mLayout.assertNotInLayoutOrScroll("Cannot add item decoration during a scroll  or"
                    + " layout");
        }
        if (mItemDecorations.isEmpty()) {
            setWillNotDraw(false);
        }
        if (index < 0) {
            mItemDecorations.add(decor);
        } else {
            mItemDecorations.add(index, decor);
        }
        markItemDecorInsetsDirty();
        requestLayout();
    }
- 1
- 2
- 3
- 4
- 5
- 6
- 7
- 8
- 9
- 10
- 11
- 12
- 13
- 14
- 15
- 16
- 17
- 18
- 19
- 20
老套路:我们最常用的单参数方法 内部调用了双参数方法,并把index 传入-1。
我们add的ItemDecoration 都存储在RecyclerView类的mItemDecorations变量里,
这个变量就是一个ArrayList,定义如下
private final ArrayList<ItemDecoration> mItemDecorations = new ArrayList<>();
三 ItemDecoration方法介绍和编写
常用(全部)方法:
按照在RecyclerView中它们被调用的顺序排列:
1. public void getItemOffsets(Rect outRect, View view, RecyclerView parent, RecyclerView.State state)
2. public void onDraw(Canvas c, RecyclerView parent, RecyclerView.State state)
3. public void onDrawOver(Canvas c, RecyclerView parent, RecyclerView.State state)
这个三个方法也是继承一个ItemDecoration必须实现的三个方法。(其实ItemDecoration里除了@Deprecated 的方法 也就它们三了,)
方法一的编写
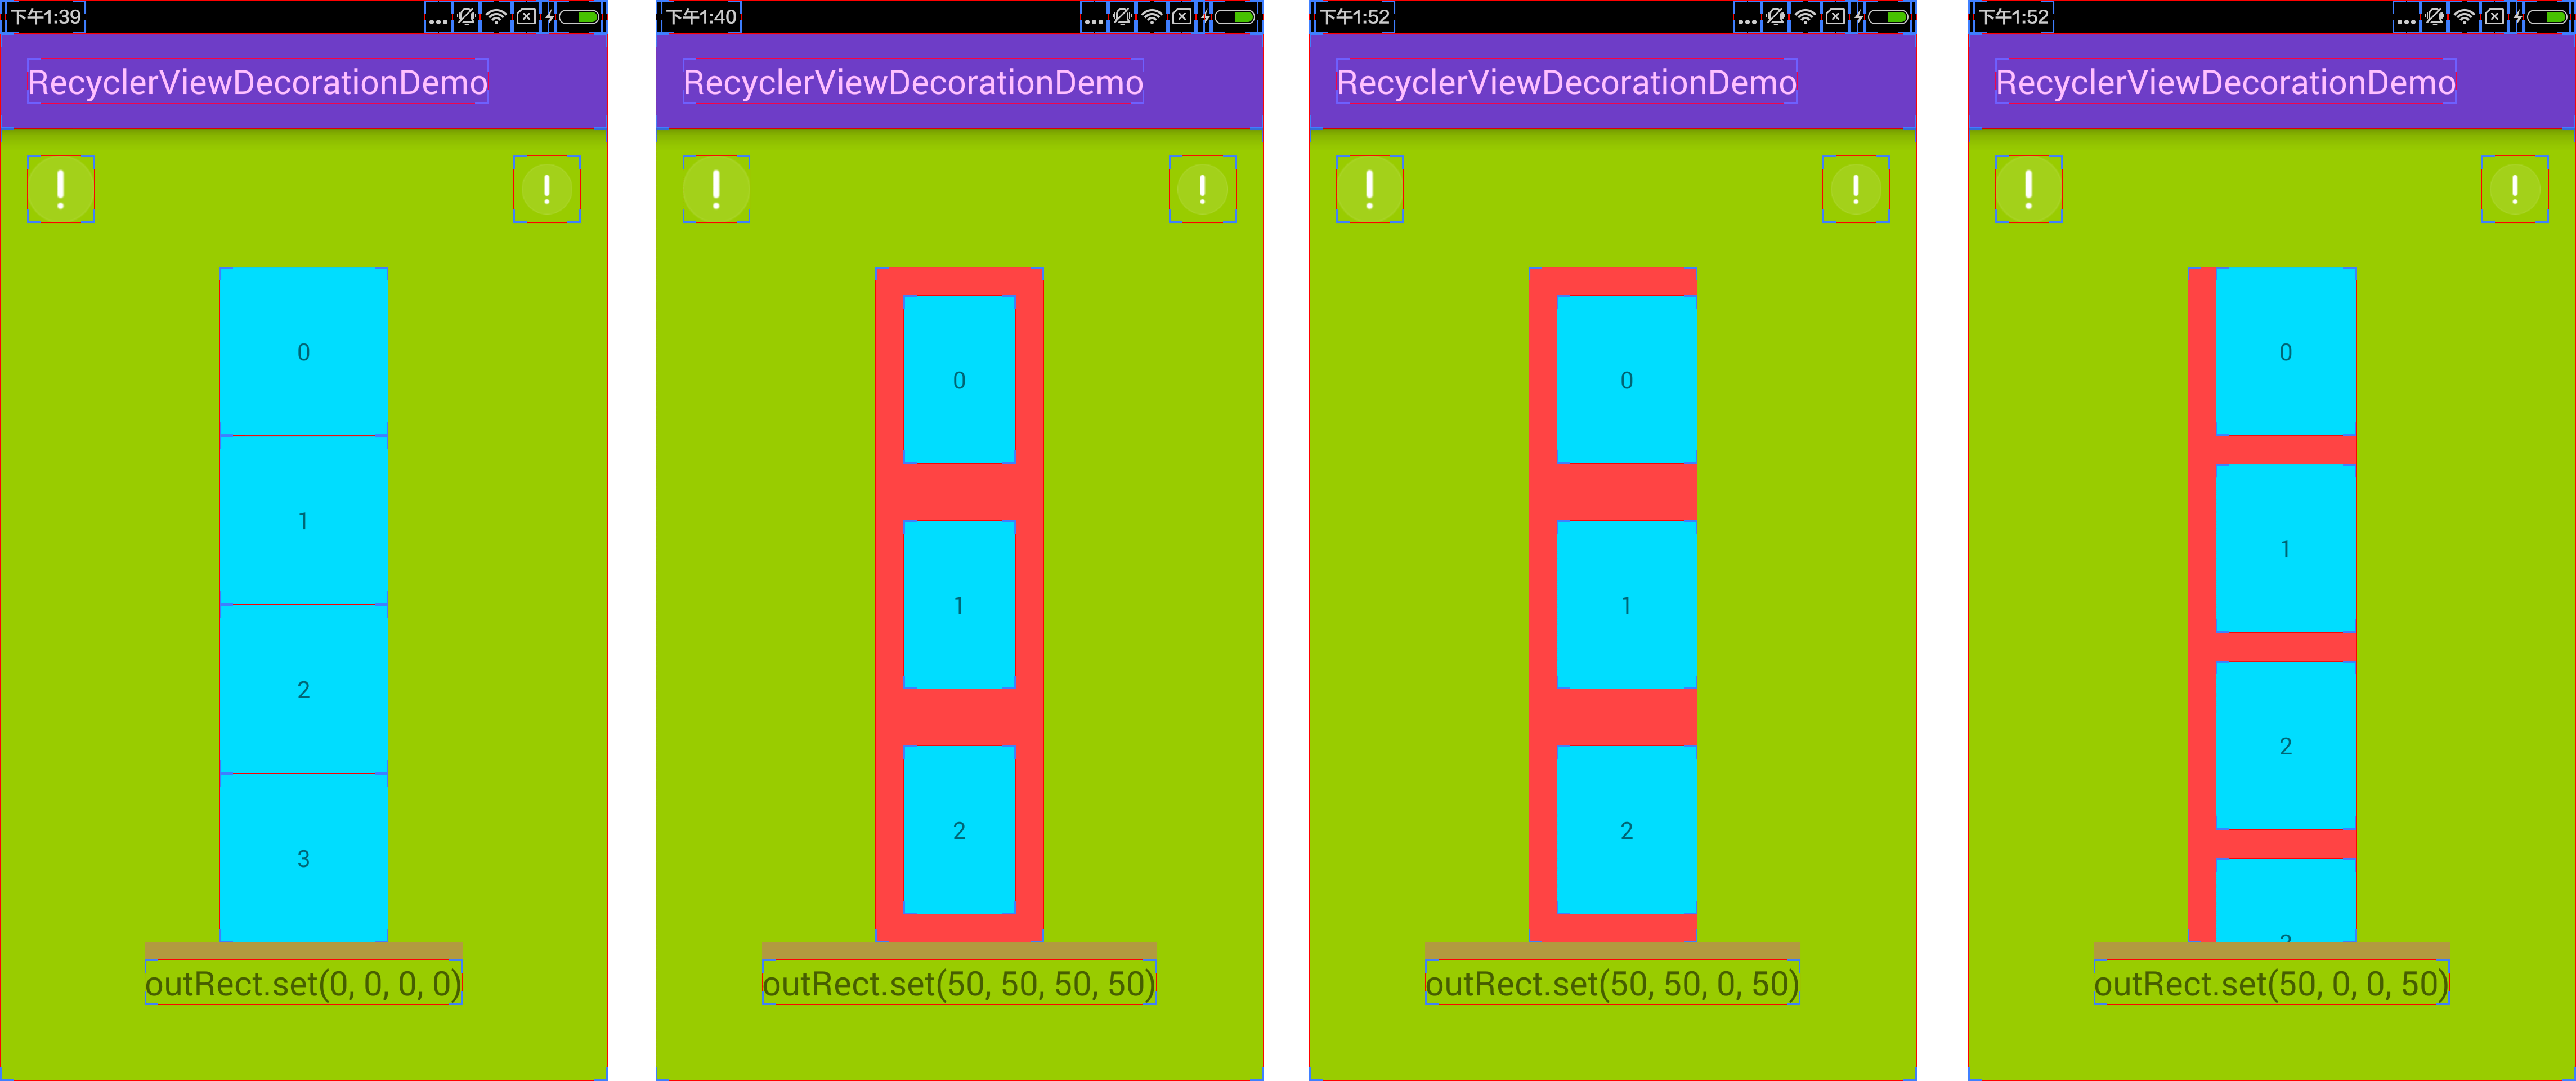
public void getItemOffsets(Rect outRect, View view, RecyclerView parent, RecyclerView.State state):
我们需要利用 parent和state变量,来获取需要的辅助信息,例如postion, 最终调用outRect.set(int left, int top, int right, int bottom)方法,设置四个方向上 需要为ItemView设置padding的值。
下图我觉得很经典:摘自(https://blog.piasy.com/2016/03/26/Insight-Android-RecyclerView-ItemDecoration/?utm_source=tuicool&utm_medium=referral)向作者表示感谢。如作者不许我转图,烦请联系我删除
本文的 实体bean如下编写:
/**
* Created by zhangxutong .
* Date: 16/08/28
*/
public class CityBean {
private String tag;
private String city;
public CityBean(String tag, String city) {
this.tag = tag;
this.city = city;
}
public String getTag() {
return tag;
}
public void setTag(String tag) {
this.tag = tag;
}
public String getCity() {
return city;
}
public void setCity(String city) {
this.city = city;
}
}
- 1
- 2
- 3
- 4
- 5
- 6
- 7
- 8
- 9
- 10
- 11
- 12
- 13
- 14
- 15
- 16
- 17
- 18
- 19
- 20
- 21
- 22
- 23
- 24
- 25
- 26
- 27
- 28
- 29
- 30
getItemOffsets方法 如下:
通过parent获取postion信息,通过postion拿到数据里的每个bean里的分类,因为数据集已经有序,如果与前一个分类不一样,说明是一个新的分类,则需要绘制头部outRect.set(0, mTitleHeight, 0, 0);,否则不需要outRect.set(0, 0, 0, 0);。
@Override
public void getItemOffsets(Rect outRect, View view, RecyclerView parent, RecyclerView.State state) {
super.getItemOffsets(outRect, view, parent, state);
int position = ((RecyclerView.LayoutParams) view.getLayoutParams()).getViewLayoutPosition();
if (position > -1) {
if (position == 0) {
outRect.set(0, mTitleHeight, 0, 0);
} else {
if (null != mDatas.get(position).getTag() && !mDatas.get(position).getTag().equals(mDatas.get(position - 1).getTag())) {
outRect.set(0, mTitleHeight, 0, 0);
} else {
outRect.set(0, 0, 0, 0);
}
}
}
}
- 1
- 2
- 3
- 4
- 5
- 6
- 7
- 8
- 9
- 10
- 11
- 12
- 13
- 14
- 15
- 16
- 17
方法二的编写
public void onDraw(Canvas c, RecyclerView parent, RecyclerView.State state):
我们需要利用 parent和state变量,来获取需要的辅助信息,例如绘制的上下左右,childCount, childView等。。最终利用c调用Canvas的方法来绘制出我们想要的UI。会自定义View就会写本方法~
onDraw绘制出的内容是在ItemView下层,虽然它可以绘制超出getItemOffsets()里的Rect区域,但是超出区域最终不会显示,但被ItemView覆盖的区域会产生OverDraw。
本文如下编写:通过parent获取绘制UI的 left和right以及childCount, 遍历childView,根据childView的postion,和方法一中的判断方法一样,来决定是否绘制分类Title区域:
分类绘制title的方法就是自定义View的套路,根据确定的上下左右范围先drawRect绘制一个背景,然后drawText绘制文字。
(不会自定义View的可参考郭神 洋神 文章:
http://blog.csdn.net/lmj623565791/article/details/24252901http://blog.csdn.net/guolin_blog/article/details/17357967)。
@Override
public void onDraw(Canvas c, RecyclerView parent, RecyclerView.State state) {
super.onDraw(c, parent, state);
final int left = parent.getPaddingLeft();
final int right = parent.getWidth() - parent.getPaddingRight();
final int childCount = parent.getChildCount();
for (int i = 0; i < childCount; i++) {
final View child = parent.getChildAt(i);
final RecyclerView.LayoutParams params = (RecyclerView.LayoutParams) child
.getLayoutParams();
int position = params.getViewLayoutPosition();
if (position > -1) {
if (position == 0) {
drawTitleArea(c, left, right, child, params, position);
} else {
if (null != mDatas.get(position).getTag() && !mDatas.get(position).getTag().equals(mDatas.get(position - 1).getTag())) {
drawTitleArea(c, left, right, child, params, position);
} else {
}
}
}
}
}
/**
* 绘制Title区域背景和文字的方法
*
* @param c
* @param left
* @param right
* @param child
* @param params
* @param position
*/
private void drawTitleArea(Canvas c, int left, int right, View child, RecyclerView.LayoutParams params, int position) {
mPaint.setColor(COLOR_TITLE_BG);
c.drawRect(left, child.getTop() - params.topMargin - mTitleHeight, right, child.getTop() - params.topMargin, mPaint);
mPaint.setColor(COLOR_TITLE_FONT);
mPaint.getTextBounds(mDatas.get(position).getTag(), 0, mDatas.get(position).getTag().length(), mBounds);
c.drawText(mDatas.get(position).getTag(), child.getPaddingLeft(), child.getTop() - params.topMargin - (mTitleHeight / 2 - mBounds.height() / 2), mPaint);
}
- 1
- 2
- 3
- 4
- 5
- 6
- 7
- 8
- 9
- 10
- 11
- 12
- 13
- 14
- 15
- 16
- 17
- 18
- 19
- 20
- 21
- 22
- 23
- 24
- 25
- 26
- 27
- 28
- 29
- 30
- 31
- 32
- 33
- 34
- 35
- 36
- 37
- 38
- 39
- 40
- 41
- 42
- 43
- 44
- 45
写完 12 方法,就已经完成了分类列表title的绘制,方法3实现顶部悬停title效果:GO
方法三的编写
public void onDrawOver(Canvas c, RecyclerView parent, RecyclerView.State state):
和 onDraw()方法类似, 我们需要利用 parent和state变量,来获取需要的辅助信息,例如绘制的上下左右,position, childView等。。最终利用c调用Canvas的方法来绘制出我们想要的UI。同样是会自定义View就会写本方法~
onDrawOver绘制出的内容是在RecyclerView的最上层,会遮挡住ItemView,So天生自带悬停效果,用来绘制悬停View再好不过。
本文如下编写:首先通过parent获取LayoutManager(由于悬停分组列表的特殊性,写死了是LinearLayoutManger),然后获取当前第一个可见itemView以及postion,以及它所属的分类title(tag),然后绘制悬停View的背景和文字(tag),可参考方法2里的书写,大同小异。
@Override
public void onDrawOver(Canvas c, RecyclerView parent, RecyclerView.State state) {//最后调用 绘制在最上层
int pos = ((LinearLayoutManager)(parent.getLayoutManager())).findFirstVisibleItemPosition()
String tag = mDatas.get(pos).getTag()
//View child = parent.getChildAt(pos)
View child = parent.findViewHolderForLayoutPosition(pos).itemView
mPaint.setColor(COLOR_TITLE_BG)
c.drawRect(parent.getPaddingLeft(), parent.getPaddingTop(), parent.getRight() - parent.getPaddingRight(), parent.getPaddingTop() + mTitleHeight, mPaint)
mPaint.setColor(COLOR_TITLE_FONT)
mPaint.getTextBounds(tag, 0, tag.length(), mBounds)
c.drawText(tag, child.getPaddingLeft(),
parent.getPaddingTop() + mTitleHeight - (mTitleHeight / 2 - mBounds.height() / 2),
mPaint)
}
至此,我们的 带悬停头部的分组列表的ItemDecoration就编写完毕了,完整代码如下:
四 分类title ItemDecoration完整代码:
/**
* 有分类title的 ItemDecoration
* Created by zhangxutong .
* Date: 16/08/28
*/
public class TitleItemDecoration extends RecyclerView.ItemDecoration {
private List<CityBean> mDatas;
private Paint mPaint;
private Rect mBounds;
private int mTitleHeight;
private static int COLOR_TITLE_BG = Color.parseColor("#FFDFDFDF");
private static int COLOR_TITLE_FONT = Color.parseColor("#FF000000");
private static int mTitleFontSize;
public TitleItemDecoration(Context context, List<CityBean> datas) {
super();
mDatas = datas;
mPaint = new Paint();
mBounds = new Rect();
mTitleHeight = (int) TypedValue.applyDimension(TypedValue.COMPLEX_UNIT_DIP, 30, context.getResources().getDisplayMetrics());
mTitleFontSize = (int) TypedValue.applyDimension(TypedValue.COMPLEX_UNIT_SP, 16, context.getResources().getDisplayMetrics());
mPaint.setTextSize(mTitleFontSize);
mPaint.setAntiAlias(true);
}
@Override
public void onDraw(Canvas c, RecyclerView parent, RecyclerView.State state) {
super.onDraw(c, parent, state);
final int left = parent.getPaddingLeft();
final int right = parent.getWidth() - parent.getPaddingRight();
final int childCount = parent.getChildCount();
for (int i = 0; i < childCount; i++) {
final View child = parent.getChildAt(i);
final RecyclerView.LayoutParams params = (RecyclerView.LayoutParams) child
.getLayoutParams();
int position = params.getViewLayoutPosition();
if (position > -1) {
if (position == 0) {
drawTitleArea(c, left, right, child, params, position);
} else {
if (null != mDatas.get(position).getTag() && !mDatas.get(position).getTag().equals(mDatas.get(position - 1).getTag())) {
drawTitleArea(c, left, right, child, params, position);
} else {
}
}
}
}
}
/**
* 绘制Title区域背景和文字的方法
*
* @param c
* @param left
* @param right
* @param child
* @param params
* @param position
*/
private void drawTitleArea(Canvas c, int left, int right, View child, RecyclerView.LayoutParams params, int position) {
mPaint.setColor(COLOR_TITLE_BG);
c.drawRect(left, child.getTop() - params.topMargin - mTitleHeight, right, child.getTop() - params.topMargin, mPaint);
mPaint.setColor(COLOR_TITLE_FONT);
mPaint.getTextBounds(mDatas.get(position).getTag(), 0, mDatas.get(position).getTag().length(), mBounds);
c.drawText(mDatas.get(position).getTag(), child.getPaddingLeft(), child.getTop() - params.topMargin - (mTitleHeight / 2 - mBounds.height() / 2), mPaint);
}
@Override
public void onDrawOver(Canvas c, RecyclerView parent, RecyclerView.State state) {
int pos = ((LinearLayoutManager)(parent.getLayoutManager())).findFirstVisibleItemPosition();
String tag = mDatas.get(pos).getTag();
View child = parent.findViewHolderForLayoutPosition(pos).itemView;
mPaint.setColor(COLOR_TITLE_BG);
c.drawRect(parent.getPaddingLeft(), parent.getPaddingTop(), parent.getRight() - parent.getPaddingRight(), parent.getPaddingTop() + mTitleHeight, mPaint);
mPaint.setColor(COLOR_TITLE_FONT);
mPaint.getTextBounds(tag, 0, tag.length(), mBounds);
c.drawText(tag, child.getPaddingLeft(),
parent.getPaddingTop() + mTitleHeight - (mTitleHeight / 2 - mBounds.height() / 2),
mPaint);
}
@Override
public void getItemOffsets(Rect outRect, View view, RecyclerView parent, RecyclerView.State state) {
super.getItemOffsets(outRect, view, parent, state);
int position = ((RecyclerView.LayoutParams) view.getLayoutParams()).getViewLayoutPosition();
if (position > -1) {
if (position == 0) {
outRect.set(0, mTitleHeight, 0, 0);
} else {
if (null != mDatas.get(position).getTag() && !mDatas.get(position).getTag().equals(mDatas.get(position - 1).getTag())) {
outRect.set(0, mTitleHeight, 0, 0);
} else {
outRect.set(0, 0, 0, 0);
}
}
}
}
}
- 1
- 2
- 3
- 4
- 5
- 6
- 7
- 8
- 9
- 10
- 11
- 12
- 13
- 14
- 15
- 16
- 17
- 18
- 19
- 20
- 21
- 22
- 23
- 24
- 25
- 26
- 27
- 28
- 29
- 30
- 31
- 32
- 33
- 34
- 35
- 36
- 37
- 38
- 39
- 40
- 41
- 42
- 43
- 44
- 45
- 46
- 47
- 48
- 49
- 50
- 51
- 52
- 53
- 54
- 55
- 56
- 57
- 58
- 59
- 60
- 61
- 62
- 63
- 64
- 65
- 66
- 67
- 68
- 69
- 70
- 71
- 72
- 73
- 74
- 75
- 76
- 77
- 78
- 79
- 80
- 81
- 82
- 83
- 84
- 85
- 86
- 87
- 88
- 89
- 90
- 91
- 92
- 93
- 94
- 95
- 96
- 97
- 98
- 99
- 100
- 101
- 102
- 103
- 104
- 105
- 106
- 107
- 108
- 109
- 110
- 111
- 112
- 113
五 一些ItemDecoration的相关补充姿势:
一. 多个ItemDecoration,以及它们的绘制顺序。
就像第二节中的用法提到的,可以为一个RecyclerView添加多个ItemDecoration,那么多个ItemDecoration的绘制顺序是什么呢:我们看看源码吧:
第二节中提到,多个ItemDecoration最终是存储在RecyclerView里的mItemDecorations(ArrayList)变量中,那我们就去RecyclerView的 源码里搜一搜,看看哪些地方用到了mItemDecorations。
发现在draw()和onDraw()方法里:按照在mItemDecorations里的postion顺序,依次调用了每个ItemDecoration的onDrawOver和onDraw方法。所以后添加的ItemDecoration,如果和前面的ItemDecoration的绘制区域有重合的地方,会遮盖住前面的ItemDecoration(OverDraw)。
    @Override
    public void draw(Canvas c) {
        super.draw(c);

        final int count = mItemDecorations.size();
        for (int i = 0; i < count; i++) {
            mItemDecorations.get(i).onDrawOver(c, this, mState);
        }

    @Override
    public void onDraw(Canvas c) {
        super.onDraw(c);

        final int count = mItemDecorations.size();
        for (int i = 0; i < count; i++) {
            mItemDecorations.get(i).onDraw(c, this, mState);
        }
    }
- 1
- 2
- 3
- 4
- 5
- 6
- 7
- 8
- 9
- 10
- 11
- 12
- 13
- 14
- 15
- 16
- 17
- 18
二. ItemDecoration和RecyclerView的Item的绘制顺序。
在介绍ItemDecoration的三个方法时,我们提到过结论:
ItemDecoration的onDraw最先调用,绘制在最底层,
其上再绘制ItemView 中间层,
再上调用ItemDecoration的onDrawOver,绘制在最上层。
理由:
由上面代码可见,
RecyclerView的draw()方法中,在super.draw(c)方法调用完后,才调用mItemDecorations.get(i).onDrawOver(c, this, mState);
而super.draw(c)方法就是直接调用View的public void draw(Canvas canvas) 方法,如下所示:
其中又先调用了View(RecyclerView)的onDraw()方法,
在RecyclerView的onDraw()方法中,会调用mItemDecorations.get(i).onDraw(c, this, mState);
所以onDraw最先调用,绘制在最底层
后调用了View(ViewGroup)的dispatchDraw(canvas)方法;
在ViewGroup的dispatchDraw(canvas)方法里,会执行 drawChild(Canvas canvas, View child, long drawingTime)方法,绘制每个itemView。
所以ItemView绘制在中间层
最后super.draw(c)走完,调用mItemDecorations.get(i).onDrawOver(c, this, mState);
所以再上调用ItemDecoration的onDrawOver,绘制在最上层。(从方法名字也可以看出哈)
View的draw()方法如下,
/**
* This method is called by ViewGroup.drawChild() to have each child view draw itself.
*
* This is where the View specializes rendering behavior based on layer type,
* and hardware acceleration.
*/
boolean draw(Canvas canvas, ViewGroup parent, long drawingTime) {
............省略
if (!dirtyOpaque) onDraw(canvas);
dispatchDraw(canvas);


 849
849

 被折叠的 条评论
为什么被折叠?
被折叠的 条评论
为什么被折叠?
 到【灌水乐园】发言


