


两个部分弄了很久,记录过程:
request前后端交互
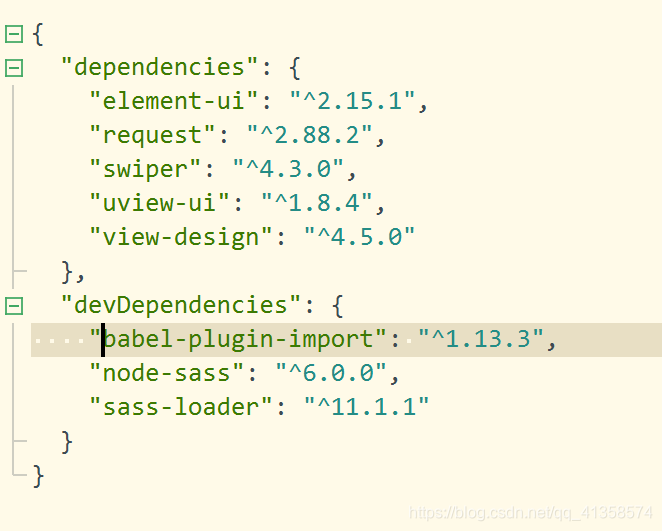
1.需要用到uni.request,记得先npm下载request(自己因为一开始没有下载就写代码而折腾了好久也没有成功发送请求)和uview-ui
自己现在下载了的依赖项:
下载了以后main.js:
import uView from “uview-ui”;
Vue.use(uView);
目录:
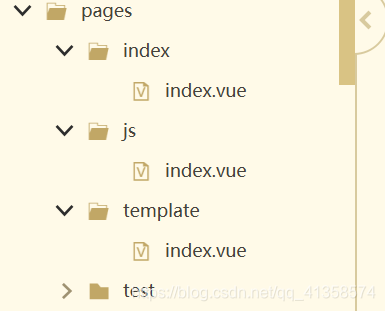
pages:
{
		"easycom": {
			"^u-(.*)": "uview-ui/components/u-$1/u-$1.vue"
		},

	"pages": [ //pages数组中第一项表示应用启动页,参考:https://uniapp.dcloud.io/collocation/pages
		{
			"path": "pages/index/index",
			"style": {
				"navigationBarTitleText": "一键洗涤"
			}
		},
			{
					"path": "pages/js/index",
					"style": {
						"navigationBarTitleText": "设置"
					}
				},
				{
					"path": "pages/template/index",
					"style": {
						"navigationBarTitleText": "数据查看"
					}
				},
				{
					"path": "pages/test/test",
					"style": {
						"navigationBarTitleText": "测试"
					}
				}
	],
	"globalStyle": {
		"navigationBarTextStyle": "black",
		"navigationBarTitleText": "uni-app",
		"navigationBarBackgroundColor": "#F8F8F8",
		"backgroundColor": "#F8F8F8"
	},
	"tabBar": {
			"color": "#909399",
			"selectedColor": "#303133",
			"backgroundColor": "#FFFFFF",
			"borderStyle": "black",
			"list": [{
					"pagePath": "pages/index/index",
					"iconPath": "static/uview/example/component.png",
					"selectedIconPath": "static/uview/example/component_select.png",
					"text": "组件"
				},
				{
					"pagePath": "pages/js/index",
					"iconPath": "static/uview/example/js.png",
					"selectedIconPath": "static/uview/example/js_select.png",
					"text": "工具"
				},
				{
					"pagePath": "pages/template/index",
					"iconPath": "static/uview/example/template.png",
					"selectedIconPath": "static/uview/example/template_select.png",
					"text": "模板"
				}
			]
		}

}
接收后端数据:
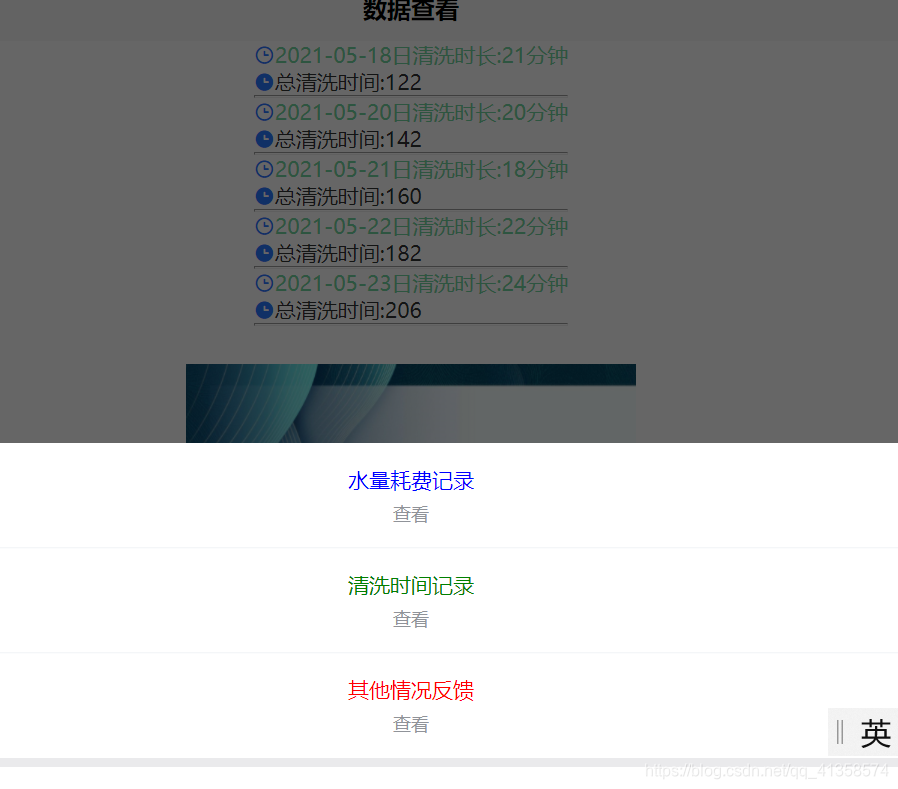
	<view v-for="(user,index) in users" :key="index">
		    <view style="color: #71D5A1;"><u-icon name="clock" color="#2979ff" size="28"></u-icon>{{user.time}}日清洗时长:{{user.lasttime}}分钟</view>
		    <view><u-icon name="clock-fill" color="#2979ff" size="28"></u-icon>总清洗时间:{{user.alltime}}</view>
		    <hr>
		   </view>
		<image class="logo" src="/static/wa2.png"></image>
		<view class="text-area">
			<text class="title">{{title}}</text>
		</view>

<script>
	export default {
		data() {
			return {
				   users:[],
								   title: '历史清洗记录',
				tabbar: '',
				list1: [{
									text: '水量耗费记录',
									color: 'blue',
									fontSize: 28,
									subText: '查看'
								}, {
									text: '清洗时间记录',
									color: 'green',
									fontSize: 28,
									subText: '查看'
								}, {
									text: '其他情况反馈' ,
									color: 'red',
									fontSize: 28,
									subText: '查看'
								}],
								show: false
			}
		},
		onLoad() {
			   this.getUsers();
			this.tabbar = [{
					iconPath: "/static/uview/example/component.png",
					selectedIconPath: "/static/uview/example/component_select.png",
					text: '一键洗碗',
					count: 2,
					isDot: true,
					pagePath: "/pages/index/index"
				},
				{
					iconPath: "/static/uview/example/js.png",
					selectedIconPath: "/static/uview/example/js_select.png",
					text: '机器参数设置',
					midButton: true,
					pagePath: "/pages/js/index"
				},
				{
					iconPath: "/static/uview/example/template.png",
							selectedIconPath: "/static/wa.png",
					text: '历史清洗记录',
					pagePath: "/pages/template/index"
				},
			]
		},
		methods:{
			  getUsers: function() {
			            var _this= this;
			// 详见官网:https://uniapp.dcloud.io/api/request/request
			            uni.request({

			                url:'http://localhost:9000/wash',
			                method: 'GET',

			                success: res => {
			                    _this.users = res.data.data;
								console.log(_this.users)

			                },

			                });
							console.log(22)
			            }
		}
	}
</script>

<style>
	.content {
		display: flex;
		flex-direction: column;
		align-items: center;
		justify-content: center;
	}

	.logo {
		height: 400rpx;
		width: 600rpx;
		margin-top: 50rpx;
		margin-left: auto;
		margin-right: auto;
		margin-bottom: 50rpx;
	}

	.text-area {
		display: flex;
		justify-content: center;
	}

	.title {
		font-size: 36rpx;
		color: #8f8f94;
	}
</style>
后端用的是之前的springboot框架:
Mapper层:
@Mapper
public interface WashDao {
    @Select("select id,lasttime,alltime,times,average,Time from wash")
    List<Wash> findAll();
}
service:
public interface WahService {
    List<Wash> allWash();
}

@Service
public class WashServiceImpl implements WahService{
    @Autowired
    WashDao washDao;
    @Override
    public List<Wash> allWash(){
        return washDao.findAll();
    }
}
controller:
@RestController
public class WashController {
    @Autowired
    private WashServiceImpl washService;
    @GetMapping("/wash")
    public ApiResult getWsah(){
        List<Wash>res = washService.allWash();
        return ApiResultHandler.buildApiResult(200,"查询所有洗涤时间",res);
    }
}
连接数据库并启动后端
注意:用真机调试的话localhost换成局域网下的ip地址
用ipconfig -all查看ip地址
使用swiper:
<view class="u-swiper-wrap" :style="{
			borderRadius: `${borderRadius}rpx`
		}">
			<swiper :current="elCurrent" @change="change" @animationfinish="animationfinish" :interval="interval" :circular="circular" :duration="duration" :autoplay="autoplay"
			 :previous-margin="effect3d ? effect3dPreviousMargin + 'rpx' : '0'" :next-margin="effect3d ? effect3dPreviousMargin + 'rpx' : '0'"
			 :style="{
					height: height + 'rpx',
					backgroundColor: bgColor
				}">
				<swiper-item class="u-swiper-item" v-for="(item, index) in list" :key="index">
					<view class="u-list-image-wrap" @tap.stop.prevent="listClick(index)" :class="[uCurrent != index ? 'u-list-scale' : '']" :style="{
							borderRadius: `${borderRadius}rpx`,
							transform: effect3d && uCurrent != index ? 'scaleY(0.9)' : 'scaleY(1)',
							margin: effect3d && uCurrent != index ? '0 20rpx' : 0,
						}">
						<image class="u-swiper-image" :src="item[name] || item" :mode="imgMode"></image>
						<view v-if="title && item.title" class="u-swiper-title u-line-1" :style="[{
								'padding-bottom': titlePaddingBottom
							}, titleStyle]">
							{{ item.title }}
						</view>
					</view>
				</swiper-item>
			</swiper>
			<view class="u-swiper-indicator" :style="{
					top: indicatorPos == 'topLeft' || indicatorPos == 'topCenter' || indicatorPos == 'topRight' ? '12rpx' : 'auto',
					bottom: indicatorPos == 'bottomLeft' || indicatorPos == 'bottomCenter' || indicatorPos == 'bottomRight' ? '12rpx' : 'auto',
					justifyContent: justifyContent,
					padding: `0 ${effect3d ? '74rpx' : '24rpx'}`
				}">
				<block v-if="mode == 'rect'">
					<view class="u-indicator-item-rect" :class="{ 'u-indicator-item-rect-active': index == uCurrent }" v-for="(item, index) in list"
					 :key="index"></view>
				</block>
				<block v-if="mode == 'dot'">
					<view class="u-indicator-item-dot" :class="{ 'u-indicator-item-dot-active': index == uCurrent }" v-for="(item, index) in list"
					 :key="index"></view>
				</block>
				<block v-if="mode == 'round'">
					<view class="u-indicator-item-round" :class="{ 'u-indicator-item-round-active': index == uCurrent }" v-for="(item, index) in list"
					 :key="index"></view>
				</block>
				<block v-if="mode == 'number'">
					<view class="u-indicator-item-number">{{ uCurrent + 1 }}/{{ list.length }}</view>
				</block>
			</view>
		</view>
<script>

import swiper from "swiper";

	export default {
		props: {
				// 轮播图的数据,格式如:[{image: 'xxxx', title: 'xxxx'},{image: 'yyyy', title: 'yyyy'}],其中title字段可选
				list: {
					type: Array,
					default () {
						return [{image: '../../static/wa2.png'},{image: '../../static/wa3.png'},{image: '../../static/wa4.png'},
						{image: '../../static/wa9.png'}];
					}
				},
				// 是否显示title标题
				title: {
					type: Boolean,
					default: false
				},
				// 用户自定义的指示器的样式
				indicator: {
					type: Object,
					default () {
						return {};
					}
				},
				// 圆角值
				borderRadius: {
					type: [Number, String],
					default: 8
				},
				// 隔多久自动切换
				interval: {
					type: [String, Number],
					default: 3000
				},
				// 指示器的模式,rect|dot|number|round
				mode: {
					type: String,
					default: 'round'
				},
				// list的高度,单位rpx
				height: {
					type: [Number, String],
					default: 900
				},
				// 指示器的位置,topLeft|topCenter|topRight|bottomLeft|bottomCenter|bottomRight
				indicatorPos: {
					type: String,
					default: 'bottomCenter'
				},
				// 是否开启缩放效果
				effect3d: {
					type: Boolean,
					default: false
				},
				// 3D模式的情况下,激活item与前后item之间的距离,单位rpx
				effect3dPreviousMargin: {
					type: [Number, String],
					default: 50
				},
				// 是否自动播放
				autoplay: {
					type: Boolean,
					default: true
				},
				// 自动轮播时间间隔,单位ms
				duration: {
					type: [Number, String],
					default: 500
				},
				// 是否衔接滑动,即到最后一张时接着滑动,是否自动切换到第一张
				circular: {
					type: Boolean,
					default: true
				},
				// 图片的裁剪模式
				imgMode: {
					type: String,
					default: 'aspectFill'
				},
				// 从list数组中读取的图片的属性名
				name: {
					type: String,
					default: 'image'
				},
				// 背景颜色
				bgColor: {
					type: String,
					default: '#f3f4f6'
				},
				// 初始化时,默认显示第几项
				current: {
					type: [Number, String],
					default: 0
				},
				// 标题的样式,对象形式
				titleStyle: {
					type: Object,
					default() {
						return {}
					}
				}
			},
			watch: {
				// 如果外部的list发生变化,判断长度是否被修改,如果前后长度不一致,重置uCurrent值,避免溢出
				list(nVal, oVal) {
					if(nVal.length !== oVal.length) this.uCurrent = 0;
				},
				// 监听外部current的变化,实时修改内部依赖于此测uCurrent值,如果更新了current,而不是更新uCurrent,
				// 就会错乱,因为指示器是依赖于uCurrent的
				current(n) {
					this.uCurrent = n;
				}
			},
		data() {
			return {
				  	uCurrent: this.current ,
				title: 'Hello Intelligent wash',
				tabbar: '',

				}

		},
		computed: {
			justifyContent() {
				if (this.indicatorPos == 'topLeft' || this.indicatorPos == 'bottomLeft') return 'flex-start';
				if (this.indicatorPos == 'topCenter' || this.indicatorPos == 'bottomCenter') return 'center';
				if (this.indicatorPos == 'topRight' || this.indicatorPos == 'bottomRight') return 'flex-end';
			},
			titlePaddingBottom() {
				let tmp = 0;
				if (this.mode == 'none') return '12rpx';
				if (['bottomLeft', 'bottomCenter', 'bottomRight'].indexOf(this.indicatorPos) >= 0 && this.mode == 'number') {
					tmp = '60rpx';
				} else if (['bottomLeft', 'bottomCenter', 'bottomRight'].indexOf(this.indicatorPos) >= 0 && this.mode != 'number') {
					tmp = '40rpx';
				} else {
					tmp = '12rpx';
				}
				return tmp;
			},
			// 因为uni的swiper组件的current参数只接受Number类型,这里做一个转换
			elCurrent() {
				return Number(this.current);
			}
		},
		methods: {
			// 按钮点击
		listClick(index) {
			this.$emit('click', index);
		},
		change(e) {
			let current = e.detail.current;
			this.uCurrent = current;
			// 发出change事件,表示当前自动切换的index,从0开始
			this.$emit('change', current);
		},
		// 头条小程序不支持animationfinish事件,改由change事件
		// 暂不监听此事件,因为不再给swiper绑定uCurrent属性
		animationfinish(e) {
			// #ifndef MP-TOUTIAO
			// this.uCurrent = e.detail.current;
			// #endif
		}

		}
	}
</script>
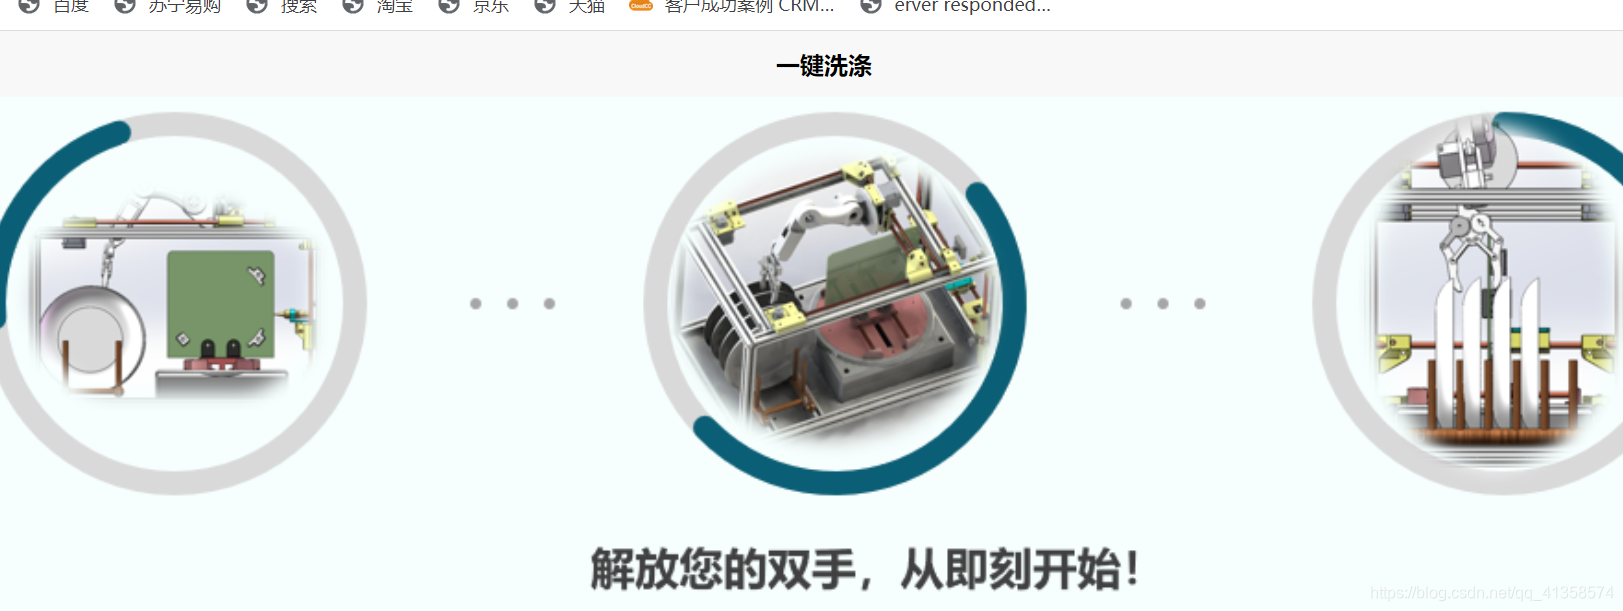
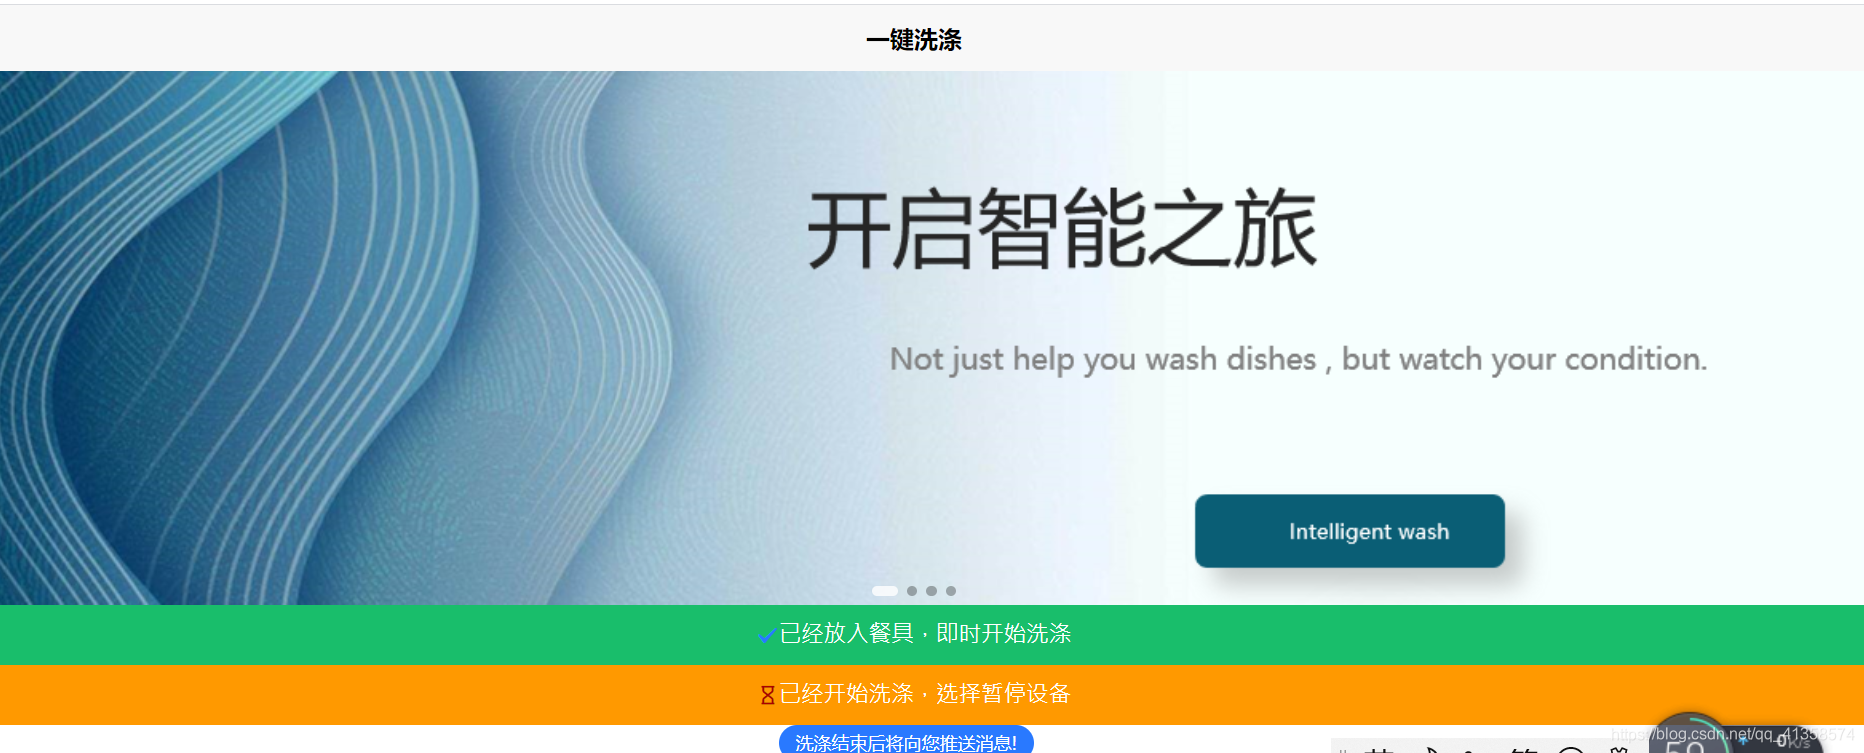
效果:
附:
引入iview:
按需引用 #
借助插件 babel-plugin-import可以实现按需加载组件,减少文件体积。首先安装,并在文件 .babelrc 中配置:
npm install babel-plugin-import --save-dev
// .babelrc
{
“plugins”: [[“import”, {
“libraryName”: “view-design”,
“libraryDirectory”: “src/components”
}]]
}
然后这样按需引入组件,就可以减小体积了:
import { Button, Table } from ‘view-design’;
Vue.component(‘Button’, Button);
Vue.component(‘Table’, Table);
特别提醒 #
按需引用仍然需要导入样式,即在 main.js 或根组件执行 import ‘view-design/dist/styles/iview.css’;
组件使用规范 #
使用:prop传递数据格式为 数字、布尔值或函数时,必须带:(兼容String除外,具体看组件文档),比如:
Correct usage:
Incorrect usage:
在非 template/render 模式下(例如使用 CDN 引用时),组件名要分隔,例如 DatePicker 必须要写成 date-picker。
以下组件,在非 template/render 模式下,需要加前缀 i-:
Button: i-button
Col: i-col
Table: i-table
Input: i-input
Form: i-form
Menu: i-menu
Select: i-select
Option: i-option
Progress: i-progress
Time: i-time
以下组件,在所有模式下,必须加前缀 i-,除非使用 iview-loader:
Switch: i-switch
Circle: i-circle


 723
723


 被折叠的 条评论
为什么被折叠?
被折叠的 条评论
为什么被折叠?
 到【灌水乐园】发言


