


 本文详细介绍了Git环境的搭建过程,包括在Windows系统下的安装配置,SSH密钥的生成,以及如何解决常见的Git问题,如忽略特定文件、解决git clone错误等,适合初学者快速上手。
常见问题及解决推荐
git是很好一个工具使用,可以执行liunx命令,有git环境后windows系统就可以进行shell命令操作,就可以添加其他liunx辅助软件进行执行,git也代码库管理工具,无论是上传,下载代码都可以使用git的环境,起到很好应用效果。
一 、常见问题并解决
1.1 Git 忽略.idea/workspace.xml文件
在使用idea进行提交代码时,执行提交时一直出现modified: .idea/workspace.xml 非常让人烦恼。
问题原因:
原因在于Git的忽略,Git在同步代码时,设置本地忽略文件的前提是,必须保证Git的远程端仓库中没有这个要忽略的文件。当远端包含有该文件时,本地设置的ignore将不再发挥作用。
解决方法:
在本地的.gitignore文件里面添加上.idea/workspace.xml文件。
如果已经将本地的文件提交到了远端,那么需要将远端提交的文件给删掉,删除指令为:
git rm -r --cached .idea 可以使用git status指令来查看删掉的文件,基本上都是***.xml文件。
1.2 常用命令
Git添加用户名、密码、修改用户名密码
git config --global user.name undefined
git config --global user.email huoxinyue5@jd.com
二、Git环境准备
2.1 Git的官方下载地址
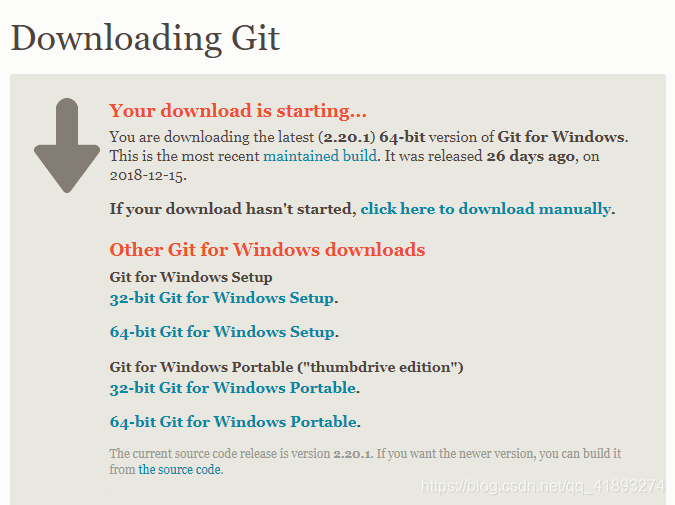
我这边使用的是window10的64位系统所以我选择的是 64-bit Git for Windows Portable
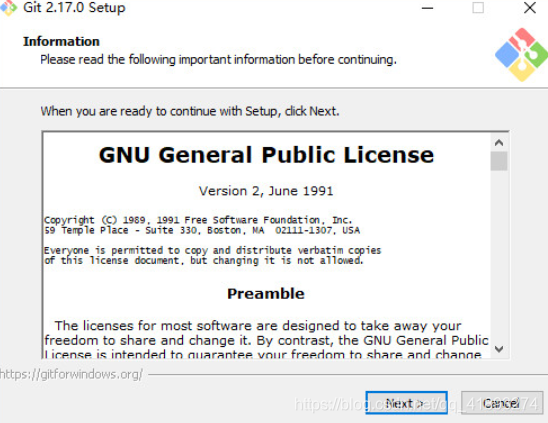
2.2 点击git.exe安装程序,点击【next】
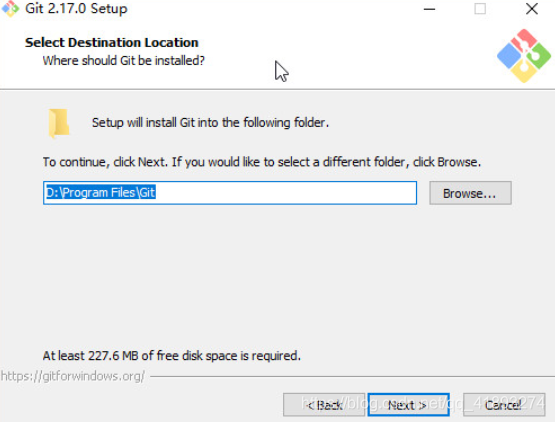
2.3 选择安装位置
2.4 选择组件
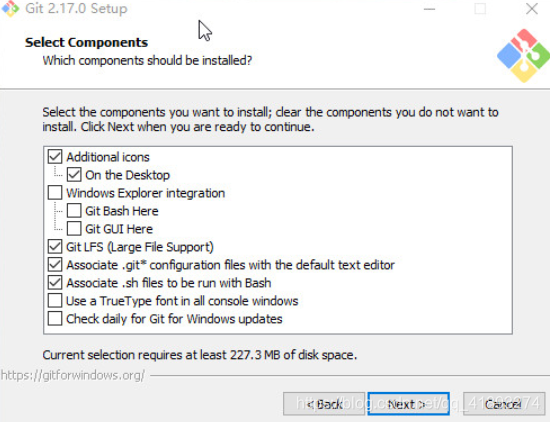
- Additional icons 附加图标
- On the Desktop 在桌面上
- Windows Explorer integration Windows资源管理器集成鼠标右键菜单
- Git Bash Here
- Git GUI Here
- Git LFS (Large File Support)
- 大文件支持
- Associate .git* configuration files with the default text editor
- 将 .git 配置文件与默认文本编辑器相关联
- Associate .sh files to be run with Bash
- 将.sh文件关联到Bash运行
- Use a TrueType font in all console windows
- 在所有控制台窗口中使用TrueType字体
- Check daily for Git for Windows updates
- 每天检查Git是否有Windows更新
2.5 创建开始菜单目录

2.6 选择Git使用的默认编辑器
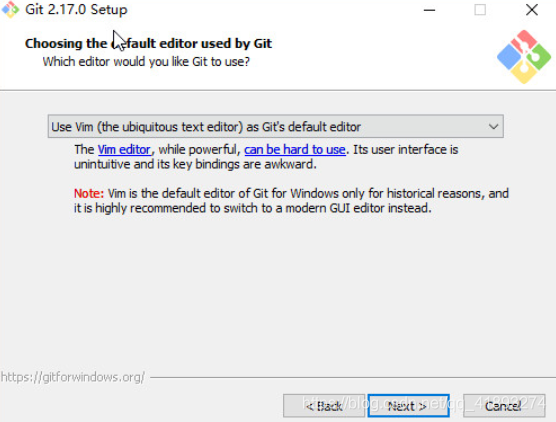
- Use the Nano editor by default
- 默认使用 Nano 编辑器
- Use Vim (The ubiquitous text editor) as Git's default editor
- 使用 Vim 作为 Git 的默认编辑器
- Use Notepad++ as Git's default editor
- 使用 Notepad++ 作为 Git 的默认编辑器
- Use Visual Studio Code as Git's default editor
- 使用 Visual Studio Code 作为 Git 的默认编辑器
2.7 编辑你的环境
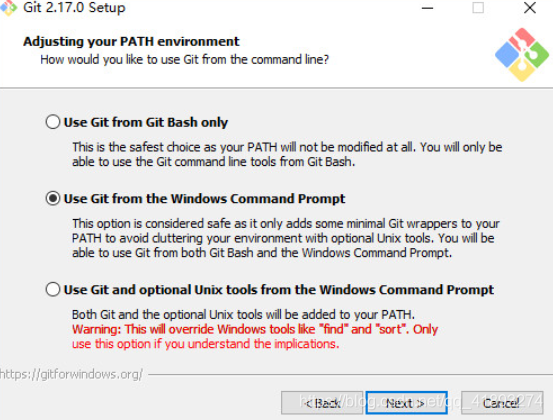
配置PATH环境
- Use Git from Git Bash only
- 这是最安全的选择,因为您的PATH根本不会被修改。您只能使用 Git Bash 的 Git 命令行工具。
- Use Git from the Windows Command Prompt
- 这个选项被认为是安全的,因为它只向PATH添加一些最小的 Git包,以避免使用可选的Unix工具混淆环境。 您将能够从 Git Bash 和 Windows 命令提示符中使用 Git。
- Use Git and optional Unix tools from the Windows Command Prompt
- 从Windows命令提示符使用Git和可选的Unix工具
- Both Git and the optional Unix tools will be added to you PATH
- Git和可选的Unix工具都将添加到您计算机的 PATH 中
- Warning:This will override Windows tools like "find and sort".Only use this option if you understand the implications.
- 警告:这将覆盖Windows工具,如 “ find 和 sort ”。只有在了解其含义后才使用此选项。
2.8 选择HTTPS传输后端
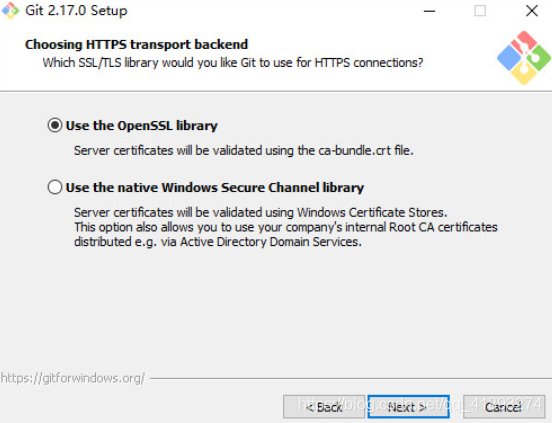
- Use the OpenSSL library
- 使用 OpenSSL 库
- Server certificates will be validated using the ca-bundle.crt file.
- 服务器证书将使用ca-bundle.crt文件进行验证。
- Use the native Windows Secure Channel library
- 使用本地 Windows 安全通道库
- Server certificates will be validated using Windows Certificate Stores.This option also allows you to use your company's internal Root CA certificates distributed e.g. via Active Directory Domain Services.
- 服务器证书将使用Windows证书存储验证。此选项还允许您使用公司的内部根CA证书,例如, 通过Active Directory Domain Services 。
2.9 配置行结束转换
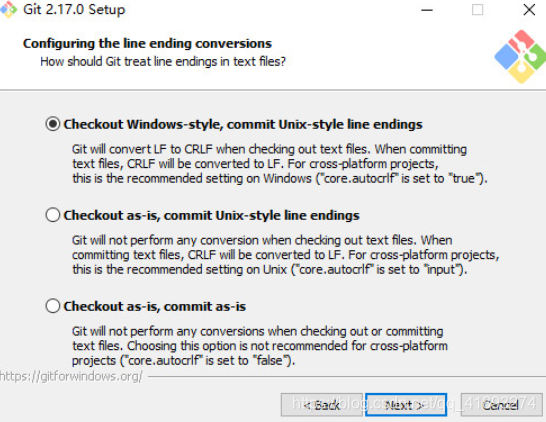
- Checkout Windows-style,commit Unix-style line endings
- Git will convert LF to CRLF when checking out text files.When committing text files,CRLF will be converted to LF .For cross-pltform projects,this is the recommended setting on Windows ("core.autocrlf" is set to "true")
- 在检出文本文件时,Git会将LF转换为CRLF。当提交文本文件时,CRLF将转换为LF。 对于跨平台项目,这是Windows上推荐的设置(“core.autocrlf”设置为“true”)
- Checkout as-is , commit Unix-style line endings
- Git will not perform any conversion when checking out text files. When committing text files, CRLF will be converted to LF. For cross-platform projects,this is the recommended setting on Unix ("core.autocrlf" is set to "input")
- 在检出文本文件时,Git不会执行任何转换。 提交文本文件时,CRLF将转换为LF。 对于跨平台项目,这是Unix上的推荐设置 (“core.autocrlf”设置为“input”)
- Checkout as-is,commit as-is
- Git will not perform any conversions when checking out or committing text files.Choosing this option is not recommended for cross-platform projects ("core.autocrlf"is set to "false")
- 在检出或提交文本文件时,Git不会执行任何转换。对于跨平台项目,不推荐使用此选项(“core.autocrlf”设置为“false”)
2.10 配置终端模拟器以与 Git Bash 一起使用
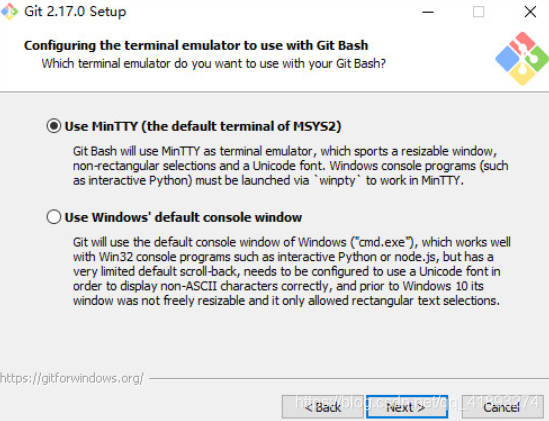
- Use MinTTY (the default terminal of MSYS2)
- Git Bash will use MinTTY as terminal emulator,which sports a resizable window,non-rectangular selections and a Unicode font. Windows console programs (such as interactive Python) must be launched via 'winpty' to work in MinTTY.
- Git Bash将使用MinTTY作为终端模拟器,该模拟器具有可调整大小的窗口,非矩形选区和Unicode字体。 Windows控制台程序(如交互式Python)必须通过'winpty'启动才能在MinTTY中运行。
- Use Windows' default console window
- Git will use the default console window of Windows ("cmd.exe"),which works well with Win32 console programs such as interactive Python or node.js , but has a very limited default scroll-back,needs to be configured to use aUnicode font in order to display non-ASCII characters correctly,and prior to Windows 10 its windows was not freely resizable and it only allowed rectangular text selections.
- Git将使用Windows的默认控制台窗口(“cmd.exe”),该窗口可以与Win32控制台程序(如交互式Python或node.js)一起使用,但默认的回滚非常有限,需要配置为使用unicode 字体以正确显示非ASCII字符,并且在Windows 10之前,其窗口不能自由调整大小,并且只允许矩形文本选择。
2.11 配置额外的选项
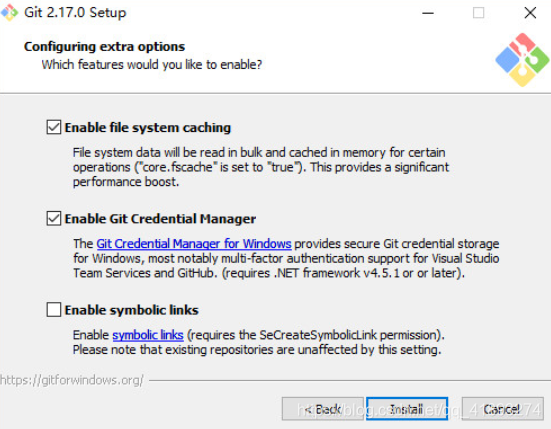
- Enable file system caching
- 启用文件系统缓存
- File system data will be read in bulk and cached in memory for certain operations ("core.fscache" is set to "true"). This provides a significant performance boost.
- 文件系统数据将被批量读取并缓存在内存中用于某些操作(“core.fscache”设置为“true”)。 这提供了显着的性能提升。
- Enable Git Credential Manager
- 启用Git凭证管理器
- The Git Credential Manager for Windows provides secure Git credential storage for Windows,most notably multi-factor authentication support for Visual Studio Team Services and GitHub. (requires .NET framework v4.5.1 or or later).
- Windows的Git凭证管理器为Windows提供安全的Git凭证存储,最显着的是对Visual Studio Team Services和GitHub的多因素身份验证支持。 (需要.NET Framework v4.5.1或更高版本)。
- Enable symbolic links
- 启用符号链接
- Enable symbolic links (requires the SeCreateSymbolicLink permission).Please note that existing repositories are unaffected by this setting.
- 启用符号链接(需要SeCreateSymbolicLink权限)。请注意,现有存储库不受此设置的影响。
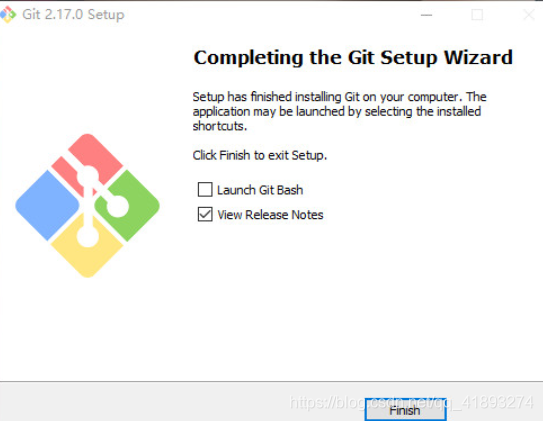
以上步骤操作完毕之后便能够开始使用git了。
打开安装路径,点击git-bash(当然了,为了方便起见你也可以把这个应用程序发送到桌面快捷方式)
准备工作:
第一步:
由于本地Git仓库和GitHub仓库之间的传输是通过SSH加密的,所以必须要让github仓库认证你SSH key,在此之前,必须要生成SSH key。
在Git控制台中输入如下命令:$ ssh-keygen -t rsa -C "youremail@example.com"

其中要求输入可以直接按Enter跳过,运行如上命令之后,
windows用户可以进入到 C:\Users\Administrator\.ssh 查看生成文件

第二步:登录你的github,然后访问:https://github.com/settings/ssh/new
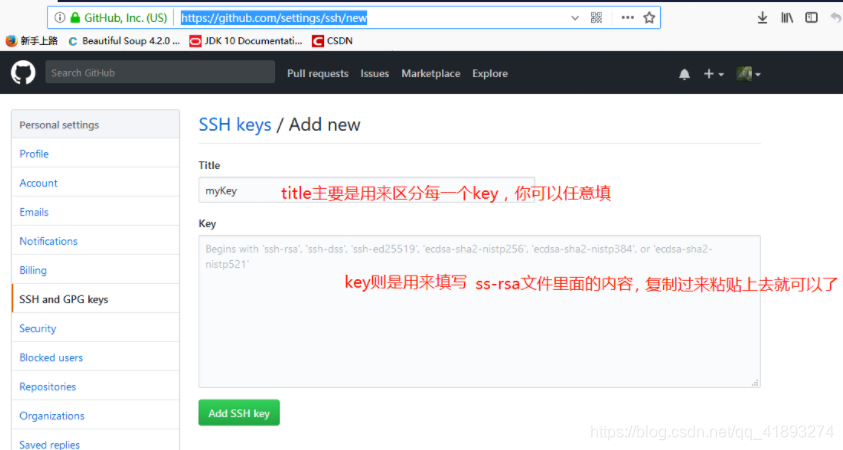
添加完SSH Keys之后,本地Git便与远程Github建立了连接
然后我们变开始我们的Git的使用:
1.首先,为了方便我们的版本控制,我们需要设置相应的用户明以及邮箱,命令如下

其中global这个参数表示这台机器上面的所有仓库都会使用这个配置(当然啦,你也可以对某个仓库使用不同的用户名以及邮箱。
2.进入到指定文件目录并通过init命令创建仓库(注意本地一个仓库对应与github上的一个仓库,可以使用 git remote查看当前的远程库)
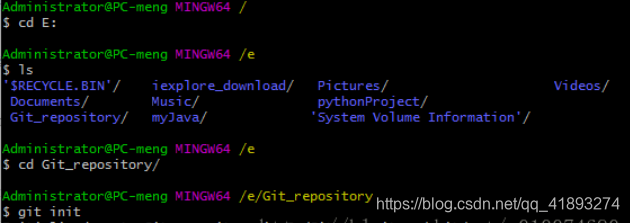
首先要明确下,所有的版本控制系统,只能跟踪文本文件的改动,比如txt文件,网页,所有程序的代码等,Git也不列外,版本控制系统可以告诉你每次的改动,但是图片,视频这些二进制文件,虽能也能由版本控制系统管理,但没法跟踪文件的变化,只能把二进制文件每次改动串起来,也就是知道图片从1kb变成2kb,但是到底改了啥,版本控制也不知道。
完成好以上步骤的话,一个Git的环境就基本搭建完毕了
注意:
- git add "文件名" //用户添加文件
- git add . //可以用来添加当前目录下的所有文件
- git commit -m "提交的内容" //提交版本信息
- git push //这一步才是真正的上传


 1139
1139

 被折叠的 条评论
为什么被折叠?
被折叠的 条评论
为什么被折叠?
 到【灌水乐园】发言


