


实战项目代码:SpringCloud_Test_GitHub
上一章:(一)初见SpringCloud、主要框架简介、与SpringBoot版本对应关系,实战环境搭建
完成了上一章的准备工作,我们终于能开工了,该章我们介绍SpringCloud中的“服务发现”和“服务调用”
1.服务发现——Netflix Eureka
我们在上章中大概介绍过Netflix Eureka,Eureka是由Netflix开发的服务发现框架,SpringCloud将它集成在自己的子项目spring-cloud-netflix中,在SpringCloud中实现服务发现,Eureka包含两个部分,Eureka Server和Eureka Client。
Eureka Server是服务发现的中心,负责管理各个客户端。各个节点启动后,会在Eureka Server中进行注册,这样EurekaServer中的服务注册表中将会存储所有可用服务节点的信息,服务节点的信息可以在界面中直观的看到。
Eureka Client是一个java客户端,用于简化与Eureka Server的交互,客户端同时也就别一个内置的、使用轮询(round-robin)负载算法的负载均衡器。在应用启动后,将会向Eureka Server发送心跳,默认周期为30秒,如果Eureka Server在多个心跳周期内没有接收到某个节点的心跳,Eureka Server将会从服务注册表中把这个服务节点移除(默认90秒)。
1.1 Eureka Server搭建
- 在springcloud_test父工程下创建子模块eureka
- 向模块中导入pom坐标
	<dependencies>
        <dependency>
            <groupId>org.springframework.cloud</groupId>
            <artifactId>spring-cloud-starter-netflix-eureka-server</artifactId>
        </dependency>
    </dependencies>
- 编写application.yml配置文件
server:
  port: 9010
eureka:
  client:
    registerWithEureka: false #是否将自己注册到Eureka服务中,本身就是所有无需注册
    fetchRegistry: false #是否从Eureka中获取注册信息
    serviceUrl: #Eureka客户端与Eureka服务端进行交互的地址
      defaultZone: http://127.0.0.1:${server.port}/eureka/
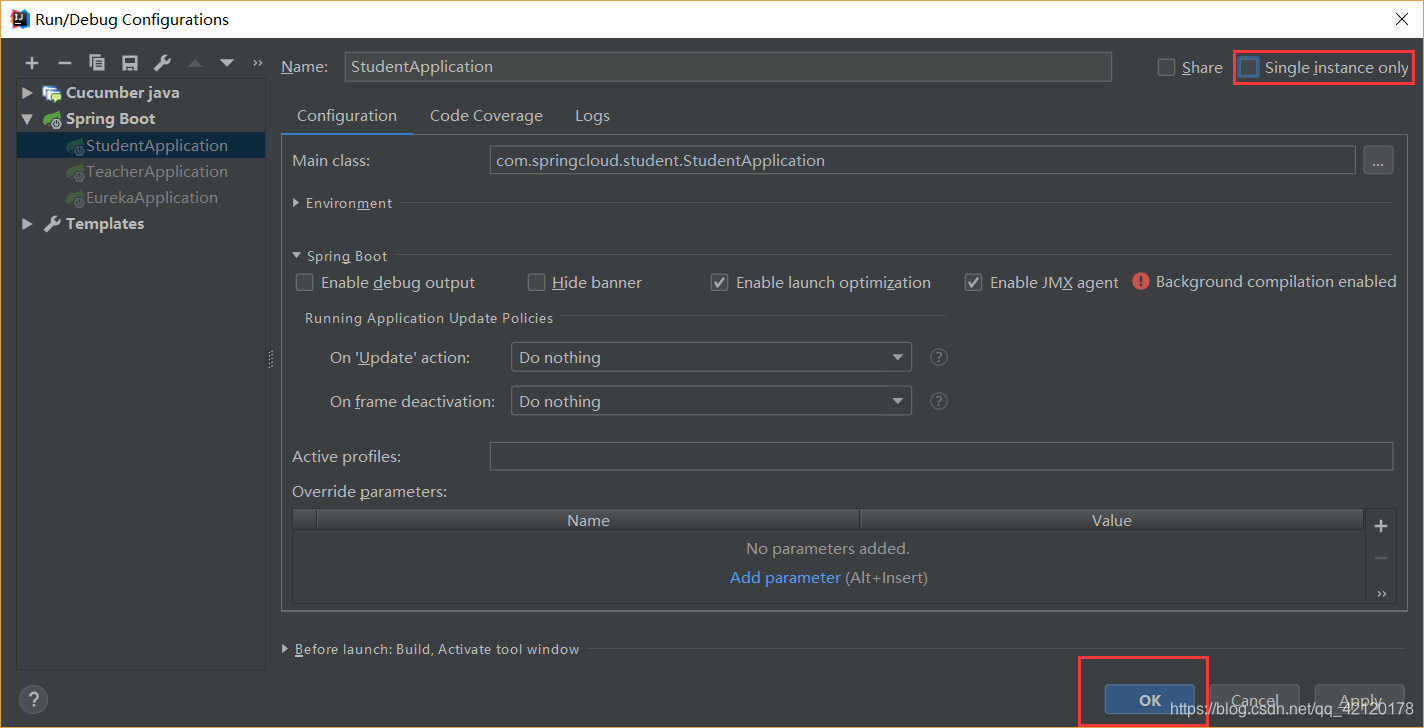
- 编写SpringBoot启动类,com.springcloud.eureka.EurekaApplication,注意加启动服务注释
@SpringBootApplication
@EnableEurekaServer
public class EurekaApplication {
    public static void main(String[] args) {
        SpringApplication.run(EurekaApplication.class,args);
    }
}
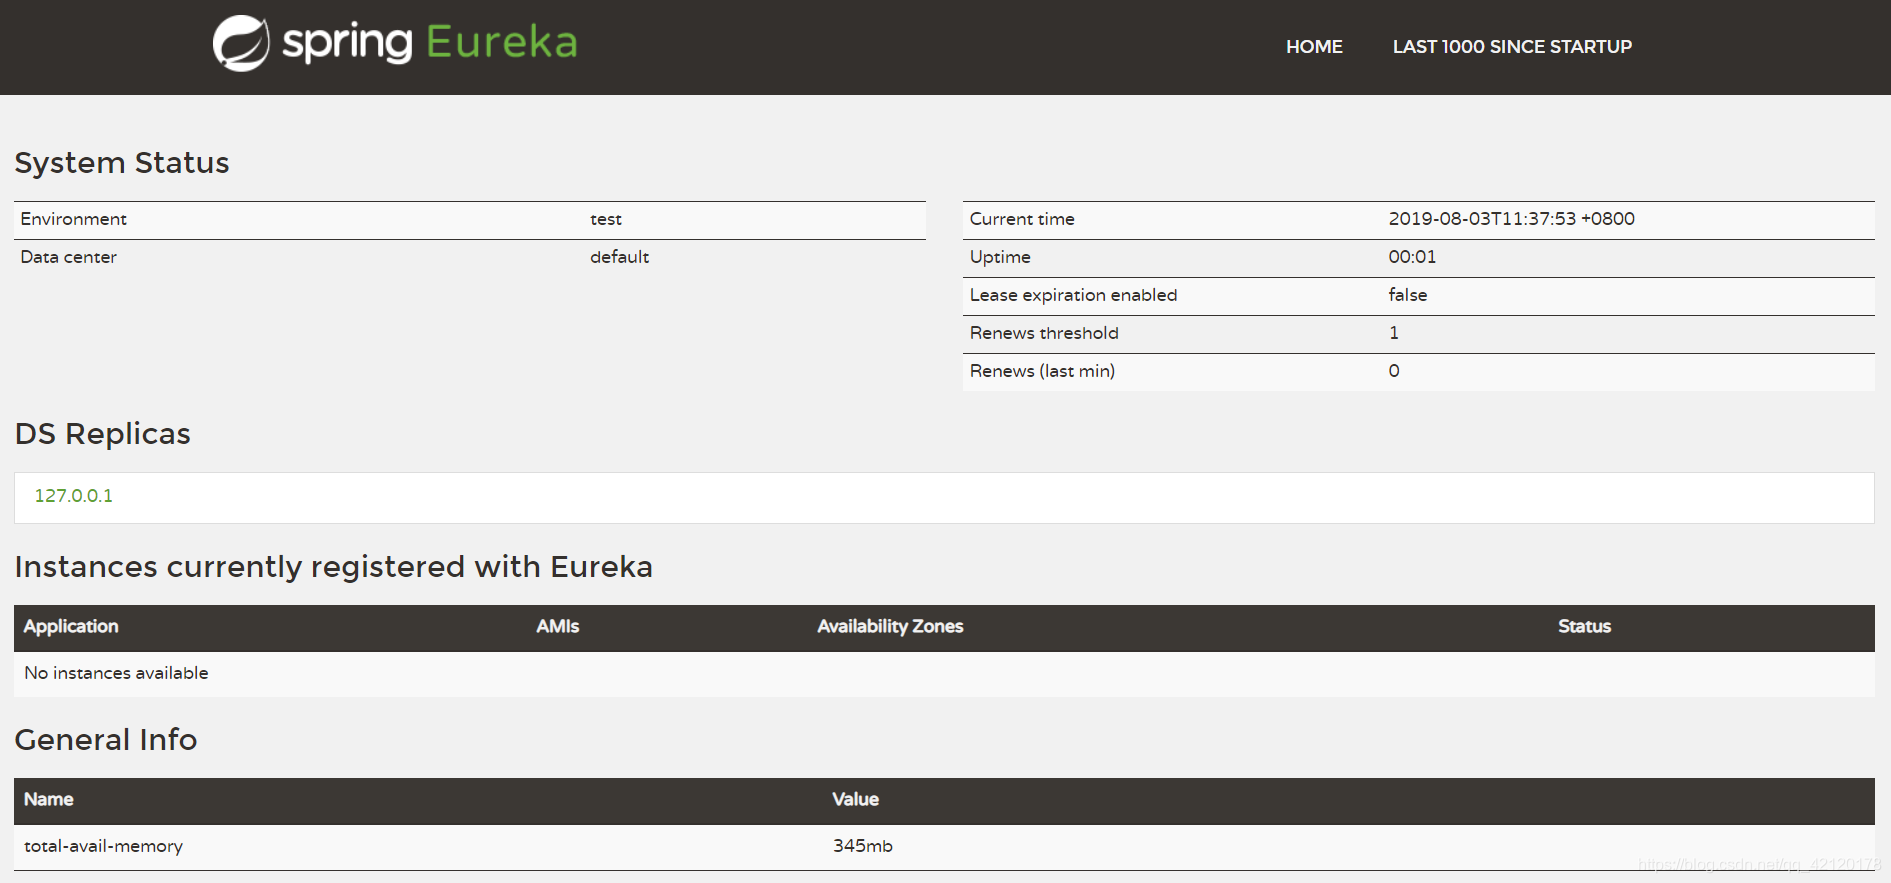
- 启动服务,使用浏览器访问http://localhost:9010,见到一下情况则说明搭建成功
1.2 服务注册
- 向student和teacher的pom文件添加坐标
		<dependency>
            <groupId>org.springframework.cloud</groupId>
            <artifactId>spring-cloud-starter-netflix-eureka-client</artifactId>
        </dependency>
- 向student和teacher的application.yml中添加配置
eureka:
  client:
    serviceUrl:
      defaultZone: http://127.0.0.1:9010/eureka/ #注意要与服务中心配置的url一致
  instance:
    prefer-ip-address: true #跨域访问
- 向student和teacher的启动类上加上注解@EnableEurekaClient(此步可以忽略,但一般还是写)
- 分别启动student和teacher,可以在浏览器中看到注册服务列表
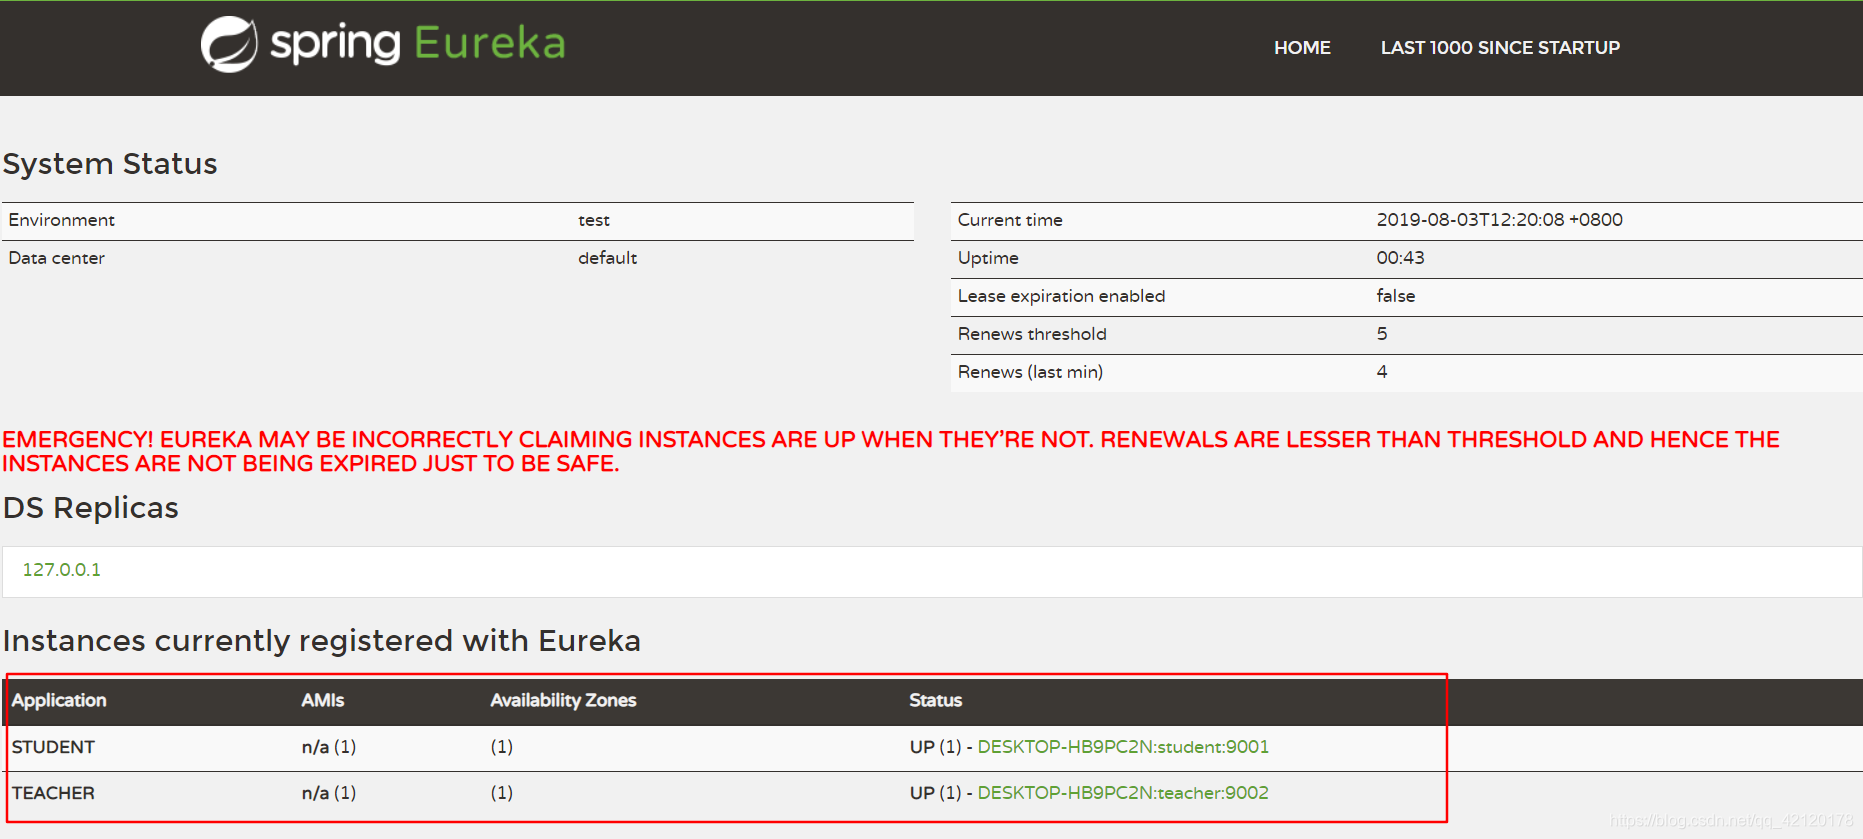
上面这张图片中有一排红字警告,这说明Eureka Service进入了保护模式。不用担心
Eureka Server在运行期间,会统计心跳失败的比例在15分钟之内是否低于85%,如果出现低于的情况(在单机调试的时候很容易满足,实际在生产环境上通常是由于网络不稳定导致),Eureka Server会将当前的实例注册信息保护起来,同时提示这个警告。保护模式主要用于一组客户端和Eureka Server之间存在网络分区场景下的保护。一旦进入保护模式,Eureka Server将会尝试保护其服务注册表中的信息,不再删除服务注册表中的数据(也就是不会注销任何微服务)。
2.服务调用——Netflix Feign
在“服务发现”的基础上,我们可以使用Feign来调用其他微服务中的方法。
2.1 Feign编写
我们写的例子是teacher服务调用student服务中的deleteById方法
- 在teacher服务的pom添加坐标
	<dependency>
		  <groupId>org.springframework.cloud</groupId>
		  <artifactId>spring-cloud-starter-openfeign</artifactId>
	</dependency>
- 修改teacher中的启动类,添加注解
@EnableDiscoveryClient
@EnableFeignClients
- 创建一个StudentClient接口,com.springcloud.teacher.client.StudentClient,用来映射我们在Student服务中需要用到的方法
@FeignClient("student") //value的值为需要调用的服务名称,application.yml中的spring.application.name
public interface StudentClient {
    @RequestMapping(value = "/student/{studentid}",method = RequestMethod.GET) //value中的uri需要补全,加上“/student”
    public Result findById(@PathVariable("studentid") int studentid); //PathVariable使用必须写value的值
}
该接口中有许多注意事项,我已经用注释标识出来了
- 修改TeacherController类,添加如下内容
	@Autowired
    private StudentClient studentClient;

    @RequestMapping(value = "/student/{studentid}",method = RequestMethod.GET)
    public Result findStudentById(@PathVariable int studentid){
        return studentClient.findById(studentid);
    }
注:你也许会发现studentClient在报错,但这并不是错,只是提示我们StudentClient 没有注入spring容器,StudentClient 是一个接口,接口没有实例,所有注入不注入都一样。如果觉得看着不舒服,可以在StudentClient 类上加@Component注解即可。
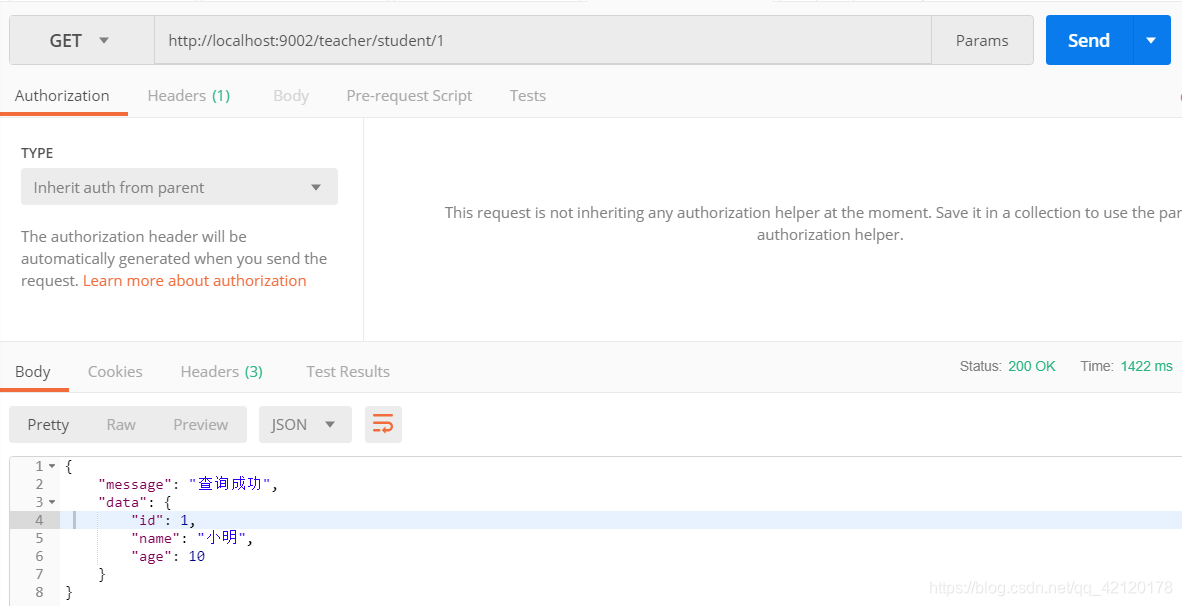
- 重启teacher服务,使用postman测试,结果如下图
2.2 负载均衡
SpringCloud是一个十分完善强大的框架,他已经为我们做了负载均衡,下面我们来看看是什么效果。
- 停止Student服务
- 将Student设置成可以多个运行
- 修改Student服务的端口,在application.yml中
server:
  port: 9101
- 修改StudentController中findById方法,给他打上“标记”
@RequestMapping(value = "/{studentid}",method = RequestMethod.GET)
    public Result findById(@PathVariable int studentid){
        System.out.println("1111111111");
        return new Result("查询成功",studentService.findById(studentid));
    }
- 运行Student服务
- 往复3-5的步骤,记得修改端口号和标记,端口号为9101、9201、9301,标记也是依次递增。
- 此时你能在浏览器中看见如下情况,这意味着Student有三个服务

- 使用postman向http://localhost:9002/teacher/student/1发送请求,每次发送完毕,记得查看三个Student服务的控制台输入情况
结论:我们可以看见,多次请求被平均分给了三个服务。这就实现了负载均衡
测试完毕后记得回复Student服务
上一章:(一)初见SpringCloud、主要框架简介、与SpringBoot版本对应关系,实战环境搭建
下一章:(三)SpringCloud 熔断器Netflix Hystrix、服务网关Netflix Zuul、分布式配置Spring Cloud Config、消息总线Spring Cloud Bus
相关内容:
(一)初见SpringCloud、主要框架简介、与SpringBoot版本对应关系,实战环境搭建
(二)SpringCloud 服务发现Netflix Eureka 和 服务调用Netflix Feign
(三)SpringCloud 熔断器Netflix Hystrix、服务网关Netflix Zuul、分布式配置Spring Cloud Config、消息总线Spring Cloud Bus
RabbitMQ简单入门教程(安装及工作模式介绍)图文教学通俗易懂
作者编写不易,转载请注明我的博客,如果觉得写的不错的话,请随手点个赞,谢谢!!!
作者编写不易,转载请注明我的博客,如果觉得写的不错的话,请随手点个赞,谢谢!!!
作者编写不易,转载请注明我的博客,如果觉得写的不错的话,请随手点个赞,谢谢!!!


 207
207


 被折叠的 条评论
为什么被折叠?
被折叠的 条评论
为什么被折叠?
 到【灌水乐园】发言


