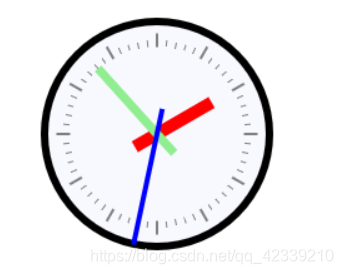
教你使用html+js手绘一个时钟

一、先看一下实现的结果

在这里插入图片描述

二、html部分

html部分只使用了画布元素<canvas>,具体代码如下:

<body>
<canvas id="diagonal" width="200" height="200"></canvas>
</body>
三、JavaScript部分

具体的时钟的绘制,以及时钟的动态效果都是由js实现的,具体代码如下:

var canvas;
function clock()
{
    canvas = document.getElementById("diagonal");//获取画布
    canvas.width=400;//设置画布的宽
    canvas.height=400;//设置画布的高
    var ctx = canvas.getContext('2d');//获取上下文,并指明绘制环境
    if (ctx) {
        var timerId;
        var frameRate = 60;

        function canvObject() {
            this.x = 0;
            this.y = 0;
            this.rotation = 0;
            this.borderWidth = 2;
            this.borderColor = '#000000';//设置表盘的边界颜色
            this.fill = false;
            this.fillColor = '#F8F8FF';
            this.update = function () {//更新的函数
                if (!this.ctx) throw new Error('你没有指定ctx对象。');
                var ctx = this.ctx
                ctx.save();
                ctx.lineWidth = this.borderWidth;
                ctx.strokeStyle = this.borderColor;
                ctx.fillStyle = this.fillColor;
                ctx.translate(this.x, this.y);//使用translate()函数实现秒针的移动
                if (this.rotation) ctx.rotate(this.rotation * Math.PI / 180);//使用rotate()实现旋转效果
                if (this.draw) this.draw(ctx);
                if (this.fill) ctx.fill();
                ctx.stroke();//绘制表盘的轮廓
                ctx.restore();//
            }
        };

        function Line() {
        };
        Line.prototype = new canvObject();
        Line.prototype.fill = false;
        Line.prototype.start = [0, 0];
        Line.prototype.end = [5, 5];
        Line.prototype.draw = function (ctx) {
            ctx.beginPath();//新建一条路径
            ctx.moveTo.apply(ctx, this.start);
            ctx.lineTo.apply(ctx, this.end);
            ctx.closePath();//闭合路径
        };

        function Circle() {
        };
        Circle.prototype = new canvObject();
        Circle.prototype.draw = function (ctx) {
            ctx.beginPath();
            //使用arc()函数画圆
            ctx.arc(0, 0, this.radius, 0, 2 * Math.PI, true);
            ctx.closePath();
        };

        //画表盘
        var circle = new Circle();
        circle.ctx = ctx;
        circle.x = 100;
        circle.y = 100;
        circle.radius = 90;
        circle.fill = true;
        circle.borderWidth = 6;
        circle.fillColor = '#F8F8FF';//设置表盘的填充色

        //画时针
        var hour = new Line();
        hour.ctx = ctx;
        hour.x = 100;
        hour.y = 100;
        hour.borderColor = "#FF0000";
        hour.borderWidth = 10;
        hour.rotation = 0;
        hour.start = [0, 20];
        hour.end = [0, -50];
        //画分针
        var minute = new Line();
        minute.ctx = ctx;
        minute.x = 100;
        minute.y = 100;
        minute.borderColor = "#90EE90";
        minute.borderWidth = 7;
        minute.rotation = 0;
        minute.start = [0, 20];
        minute.end = [0, -70];
        //画秒针
        var seconds = new Line();
        seconds.ctx = ctx;
        seconds.x = 100;
        seconds.y = 100;
        seconds.borderColor = "#0000FF";
        seconds.borderWidth = 4;
        seconds.rotation = 0;
        seconds.start = [0, 20];
        seconds.end = [0, -90];

        //画12个小短线代表小时
        for (var i = 0, ls = [], cache; i < 12; i++) {
            cache = ls[i] = new Line();
            cache.ctx = ctx;
            cache.x = 100;
            cache.y = 100;
            cache.borderColor = "gray";
            cache.borderWidth = 2;
            cache.rotation = i * 30;
            cache.start = [0, -70];
            cache.end = [0, -80];
        }
        //画60个短线表示分钟
        for (var i = 0,ls2=[],secondsCache; i < 60; i++) {
            secondsCache =ls2[i]=new Line();
            secondsCache.ctx = ctx;
            secondsCache.x = 100;
            secondsCache.y = 100;
            secondsCache.borderColor = "gray";
            secondsCache.borderWidth = 1;
            secondsCache.rotation = i * 6;
            secondsCache.start = [0, -70];
            secondsCache.end = [0, -75];
        }

        timerId = setInterval(function () {
            // 清除画布
            ctx.clearRect(0, 0, 200, 200);
            // 填充背景色
            ctx.fillStyle = 'white';
            ctx.fillRect(0, 0, 200, 200);
            // 表盘
            circle.update();
            // 刻度
            for (var i = 0; cache = ls[i++];) cache.update();
            for(var i=0;secondsCache=ls2[i++];)secondsCache.update();
            // 时针,获取当前的hour并设置
            hour.rotation = (new Date()).getHours() * 30;
            hour.update();
            // 分针,获取当前的minute并设置
            minute.rotation = (new Date()).getMinutes() * 6;
            minute.update();
            // 秒针,获取当前的seconds并设置
            seconds.rotation = (new Date()).getSeconds() * 6;
            seconds.update();
            // 中心圆
            center.update();
        }, (1000 / frameRate) | 0);
    } else {
        alert('获取绘制环境失败');
    }
}
clock();
  • 2
    点赞
  • 12
    收藏
    觉得还不错? 一键收藏
  • 0
    评论
### 回答1: 下面是一个简单的 HTML 手绘时钟的设计与实现设计图: ``` <!DOCTYPE html> <html> <head> <title>Hand-drawn Clock</title> <style> body { background-color: #f2f2f2; } .clock { margin: 50px auto; width: 200px; height: 200px; border-radius: 50%; background-color: #fff; position: relative; } .hour-hand { position: absolute; left: 100px; top: 70px; width: 0; height: 50px; border-radius: 20px; transform-origin: 50% 90%; background-color: #000; transform: rotate(60deg); z-index: 3; } .minute-hand { position: absolute; left: 100px; top: 50px; width: 0; height: 80px; border-radius: 20px; transform-origin: 50% 90%; background-color: #000; transform: rotate(120deg); z-index: 2; } .second-hand { position: absolute; left: 100px; top: 30px; width: 0; height: 100px; border-radius: 20px; transform-origin: 50% 90%; background-color: #f00; transform: rotate(180deg); z-index: 1; } .center-dot { position: absolute; left: 95px; top: 95px; width: 10px; height: 10px; border-radius: 50%; background-color: #000; z-index: 4; } .number { position: absolute; left: 90px; top: 5px; width: 20px; height: 20px; color: #000; font-size: 20px; text-align: center; z-index: 5; } .number-1 { transform: rotate(-30deg); left: 150px; top: 70px; } .number-2 { transform: rotate(0deg); left: 180px; top: 100px; } .number-3 { transform: rotate(30deg); left: 175px; top: 150px; } .number-4 { transform: rotate(60deg); left: 150px; top: 180px; } .number-5 { transform: rotate(90deg); left: 100px; top: 185px; } .number-6 { transform: rotate(120deg); left: 50px; top: 150px; } .number-7 { transform: rotate(150deg); left: 25px; top: 100px; } .number-8 { transform: rotate(180deg); left: 50px; top: 70px; } .number-9 { transform: rotate(210deg); left: 100px; top: 65px; } .number-10 { transform: rotate(240deg); left: 150px; top: 70px; } .number-11 { transform: rotate(270deg); left: 175px; top: 100px; } .number-12 { transform: rotate(300deg); left: 150px; top: 150px; } </style> </head> <body> <div class="clock"> <div class="hour-hand"></div> <div class="minute-hand"></div> <div class="second-hand"></div> <div class="center-dot"></div> <div class="number number-1">1</div> <div class="number number-2">2</div> <div class="number number-3">3</div> <div class="number number-4">4</div> <div class="number number-5">5</div> <div class="number number-6">6</div> <div class="number number-7">7</div> <div class="number number-8">8</div> <div class="number number-9">9</div> <div class="number number-10">10</div> <div class="number number-11">11</div> <div class="number number-12">12</div> </div> </body> </html> ``` 上面的代码实现了一个简单的手绘时钟,包括时、分、秒针、中心点和12个数字。每个数字都是用 `<div>` 元素实现的,通过设置 `transform` 属性来控制每个数字的位置。时、分、秒针也是用 `<div>` 元素实现的,通过设置 `transform` 和 `transform-origin` 属性来控制它们的旋转和位置。 ### 回答2: HTML手绘时钟的设计与实现设计图主要需要考虑以下几个方面: 1. 页面布局:设计一个合适的页面布局,包括时钟的显示区域、时钟的指针、时间显示等组件的位置和大小。可以使用HTML的div元素进行页面布局设置。 2. 时钟的样式:可以利用CSS样式来设置时钟的外观,包括时钟的边框、背景色、指针的颜色等。可以为整个页面设置一个时钟的主题样式,以增加视觉上的统一感。 3. 时间的获取与更新:使用JavaScript来获取当前的系统时间,并动态更新时钟的显示。可以使用setInterval函数每秒刷新一次时间,然后将获取到的时间显示在时钟的相应位置上。 4. 指针的转动:根据获取到的时间,计算时钟指针的旋转角度,并使用CSS的transform属性来设置指针的旋转效果。可以使用transition属性来添加过渡动画,使指针转动更加平滑。 5. 可交互性:可以为时钟添加一些鼠标事件,增加时钟的交互性。例如,可以实现点击指针时切换指针的颜色、点击时钟时显示当前时间等。 6. 响应式设计:考虑到不同设备和屏幕尺寸的适配,可以使用CSS的媒体查询来设置不同屏幕尺寸下时钟的布局和样式。 设计图的实现可以通过使用HTML和CSS进行静态页面的设计,然后结合JavaScript来实现动态的效果和交互。可以利用HTML5的canvas元素来绘制时钟的外观,然后使用JavaScript来操作和更新时钟的显示。同时,通过合理的CSS样式和布局设置,可以使时钟在不同设备和屏幕上呈现出良好的响应式效果。 ### 回答3: HTML手绘时钟的设计与实现设计图需要运用HTML、CSS和JavaScript技术来完成。以下是我给出的一个简单的设计和实现示例: 首先,我们需要使用HTML创建一个基本的页面结构。在<body>标签中,创建一个<div>元素,并为其添加一个特定的class名称,比如"clock"。然后在这个<div>元素中,我们可以使用<h1>元素来添加一个标题,比如"Hand-drawn Clock"。 接下来,我们需要为时钟的表盘创建一个圆形的容器。我们可以使用CSS来为这个容器添加样式,比如设置宽度和高度为300px,并将颜色设置为白色。然后,使用border-radius属性将边界设置为圆形。在这个圆形容器的中心,我们可以使用CSS的flexbox属性来将时钟的表盘放置在容器中心。 然后,我们需要使用CSS来创建时钟的刻度。我们可以使用伪元素(::before和::after)来添加刻度线的样式。使用绝对定位,将刻度线放置在时钟的表盘上。通过旋转这些刻度线,使它们围绕表盘均匀分布。 接下来,我们需要使用JavaScript来实现时钟的指针移动。首先,在JavaScript中获取到HTML中的容器元素和指针元素。然后,使用JavaScript中的Date对象来获取当前的时间。根据当前时间,计算时针、分针和秒针指示的角度,并将其应用到相应的指针元素中。使用JavaScript的setTimeout函数每秒钟调用一次这个函数,实现指针的动态移动。 最后,我们还可以通过CSS和JavaScript来添加一些额外的样式和交互效果,比如给指针元素添加动画效果,让指针平滑地移动。 这就是HTML手绘时钟的设计与实现的设计图。通过HTML、CSS和JavaScript的配合使用,我们可以创建一个简单而功能完整的手绘时钟。当然,这只是一个基础的示例,根据实际需求,我们可以进行更多的设计和改进。

“相关推荐”对你有帮助么?

  • 非常没帮助
  • 没帮助
  • 一般
  • 有帮助
  • 非常有帮助
提交
评论
添加红包

请填写红包祝福语或标题

红包个数最小为10个

红包金额最低5元

当前余额3.43前往充值 >
需支付:10.00
成就一亿技术人!
领取后你会自动成为博主和红包主的粉丝 规则
hope_wisdom
发出的红包
实付
使用余额支付
点击重新获取
扫码支付
钱包余额 0

抵扣说明:

1.余额是钱包充值的虚拟货币,按照1:1的比例进行支付金额的抵扣。
2.余额无法直接购买下载,可以购买VIP、付费专栏及课程。

余额充值