


Spring Boot 做的一个简单的增删改查,前台页面整合Thymeleaf模板,数据源druid,声明式事务,整合redis,并开启redis事务,整合ActiveMQ 项目下载地址:点此下载
如果有不需要使用的功能,只需要删除com.test.springboot.config下对应的配置再启动就行了
安装ActiveMQ
参考博客: ActiveMQ安装和基本使用
引入依赖
-
<!-- 整合activemq -->
-
<dependency>
-
<groupId>org.springframework.boot
</groupId>
-
<artifactId>spring-boot-starter-activemq
</artifactId>
-
</dependency>
application.properties
-
#mq.brokerURL=failover:(tcp://172.20.1.230:61616,tcp://172.20.1.231:61616,tcp://172.20.1.232:61616)?randomize=false&connectionTimeout=10000
-
spring.activemq.broker-url=tcp://
172.20
.1
.154:
61616
-
spring.activemq.user=ryx
-
spring.activemq.password=ryx
创建ActiveMQ基于java的配置类
-
package com.test.springboot.config;
-
-
-
import javax.jms.Queue;
-
-
-
import org.apache.activemq.command.ActiveMQQueue;
-
import org.springframework.context.annotation.Bean;
-
import org.springframework.context.annotation.Configuration;
-
-
-
@Configuration
-
public
class AmqConfig {
-
-
-
@Bean(name=
"counting")
-
public Queue counting() {
-
return
new ActiveMQQueue(
"ryx.consumption.counting");
-
}
-
-
@Bean(name=
"newriskmessage")
-
public Queue newriskmessage() {
-
return
new ActiveMQQueue(
"ryx.consumption.newriskmessage");
-
}
-
}
生产者Producer
-
package com.test.springboot.service;
-
-
import javax.jms.JMSException;
-
import javax.jms.Message;
-
import javax.jms.Queue;
-
import javax.jms.Session;
-
import javax.jms.TextMessage;
-
-
import org.springframework.beans.factory.annotation.Autowired;
-
import org.springframework.jms.core.JmsMessagingTemplate;
-
import org.springframework.jms.core.JmsTemplate;
-
import org.springframework.jms.core.MessageCreator;
-
import org.springframework.scheduling.annotation.EnableScheduling;
-
import org.springframework.scheduling.annotation.Scheduled;
-
import org.springframework.stereotype.Component;
-
-
/**
-
* 消息生产者
-
* @author xiyan
-
*
-
*/
-
@Component
-
@EnableScheduling
-
public
class Producer {
-
-
@Autowired
//也可以注入JmsTemplate,JmsMessagingTemplate对JmsTemplate进行了封装
-
private JmsMessagingTemplate jmsMessagingTemplate;
-
-
@Autowired
//也可以注入JmsTemplate,JmsMessagingTemplate对JmsTemplate进行了封装
-
private JmsTemplate jmsTemplate;
-
-
@Autowired
-
private Queue counting;
-
-
//发送消息,counting是发送到的队列,message是待发送的消息
-
//测试的时候,这个方法不要传参数,否则报错,定时任务,是不能有参数的
-
//Encountered invalid @Scheduled method 'sendMessage': Only no-arg methods may be annotated with @Scheduled
-
@Scheduled(fixedDelay=
3000)
-
public void sendMessage(){
-
jmsTemplate.send(counting,
new MessageCreator() {
-
-
@Override
-
public Message createMessage(Session session) throws JMSException {
-
TextMessage textMessage = session.createTextMessage(
"Hello,ActiveMQ!");
-
//序列化的对象
-
//session.createObjectMessage();
-
//流,可以用来传递文件等
-
//session.createStreamMessage();
-
//用来传递字节
-
//session.createBytesMessage();
-
//这个方法创建出来的就是一个map,可以把它当作map来用,当你看了它的一些方法,你就懂了
-
//session.createMapMessage();
-
//这个方法,拿到的是javax.jms.Message,是所有message的接口
-
//session.createMessage();
-
return textMessage;
-
}
-
});
-
}
-
}
消费者Consumer
-
package com.test.springboot.service;
-
-
-
import javax.jms.JMSException;
-
import javax.jms.Message;
-
import javax.jms.TextMessage;
-
-
-
import org.springframework.jms.annotation.JmsListener;
-
import org.springframework.stereotype.Component;
-
-
-
/**
-
* 消息消费者
-
* @author xiyan
-
*
-
*/
-
@Component
-
public
class Consumer {
-
-
-
//使用JmsListener配置消费者监听的队列
-
//日志打印最好使用INFO ,因为使用监听,后台DEBUG会有别的日志干扰
-
@JmsListener(destination =
"ryx.consumption.counting")
-
public void receiveQueue(Message message) throws JMSException {
-
TextMessage textMessage =(TextMessage)message;
-
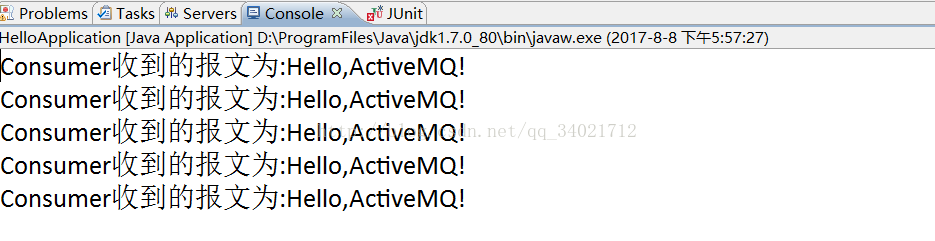
System.out.println(
"Consumer收到的报文为:"+textMessage.getText());
-
}
-
}
关于消费异常,重新消费问题
默认已经开启消费异常重新消费的功能,默认是消费6次,不算第一次消费,就是说第一次消费异常之后,再次消费6次,总共加起来7次!自己可以测试一下。测试的时候,把上面的 Producer类上的两个注解去掉,定时发送消息会有影响查看日志,可以使用下面的方法发送消息-
public static void send(Integer i) throws Exception {
-
//根据用户名,密码,url创建一个连接工厂
-
ConnectionFactory connectionFactory =
new ActiveMQConnectionFactory(
"ryx",
"ryx",
"tcp://172.20.1.154:61616");
-
//从工厂中获取一个连接
-
Connection connection = connectionFactory.createConnection();
-
connection.start();
-
//第一个参数:是否支持事务,如果为true,则会忽略第二个参数,被jms服务器设置为SESSION_TRANSACTED
-
//第二个参数为false时,paramB的值可为Session.AUTO_ACKNOWLEDGE,Session.CLIENT_ACKNOWLEDGE,DUPS_OK_ACKNOWLEDGE其中一个。
-
//Session.AUTO_ACKNOWLEDGE为自动确认,客户端发送和接收消息不需要做额外的工作。哪怕是接收端发生异常,也会被当作正常发送成功。
-
//Session.CLIENT_ACKNOWLEDGE为客户端确认。客户端接收到消息后,必须调用javax.jms.Message的acknowledge方法。jms服务器才会当作发送成功,并删除消息。
-
//DUPS_OK_ACKNOWLEDGE允许副本的确认模式。一旦接收方应用程序的方法调用从处理消息处返回,会话对象就会确认消息的接收;而且允许重复确认。
-
Session session = connection.createSession(Boolean.TRUE, Session.AUTO_ACKNOWLEDGE);
-
-
-
-
//=======================================================================
-
//创建一个到达的目的地(队列),如果这个队列不存在,将会被创建
-
//点对点模式 session.createQueue
-
Destination destination = session.createQueue(
"ryx.consumption.counting");
-
-
//发布订阅模式
-
//Destination destination = session.createTopic("ryx.consumption.counting");
-
//=======================================================================
-
-
-
-
-
//从session中,获取一个消息生产者
-
MessageProducer producer = session.createProducer(destination);
-
//设置生产者的模式,有两种可选
-
//DeliveryMode.PERSISTENT 当activemq关闭的时候,队列数据将会被保存
-
//DeliveryMode.NON_PERSISTENT 当activemq关闭的时候,队列里面的数据将会被清空
-
producer.setDeliveryMode(DeliveryMode.PERSISTENT);
-
-
-
//创建一条消息,当然,消息的类型有很多,如文字,字节,对象等,可以通过session.create..方法来创建出来
-
//通过消息生产者发出消息
-
TextMessage message = session.createTextMessage(
"这是数据第 "+i+
" 条!");
-
/*message.setLongProperty(ScheduledMessage.AMQ_SCHEDULED_DELAY, 5*1000);
-
message.setLongProperty(ScheduledMessage.AMQ_SCHEDULED_PERIOD, 5*1000);
-
message.setIntProperty(ScheduledMessage.AMQ_SCHEDULED_REPEAT, 9);*/
-
producer.send(message);
-
-
session.commit();
-
session.close();
-
connection.close();
-
}


 400
400


 被折叠的 条评论
为什么被折叠?
被折叠的 条评论
为什么被折叠?
 到【灌水乐园】发言


