


如何使用Vue实现一个图片水平瀑布流插件?这里给大家分享我在网上总结出来的一些知识,希望对大家有所帮助。

一.需求来源
今天碰到了一个需求,需要在页面里,用水平瀑布流的方式,将一些图片进行加载,这让我突然想起我很久以前写的一篇文章《JS两种方式实现水平瀑布流布局》
但是有个问题,这个需求是Vue项目的,那没办法,这里给大家分享下我的开发过程,项目主体用的是之前在学习的CRMEB的后端框架来开发,UI使用iView-UI,其余的场景与其他的vue项目一致。【相关推荐:vuejs视频教程】
二.逻辑设想
如果不是vue环境,我们的逻辑为
1.获取所有的p元素
2.获取盒子的宽度,宽度都是相同,高度不同
3.在浮动布局中每一行的盒子个数不固定,是根据屏幕宽度和盒子宽度决定
4.获取屏幕宽度
5.求出列数,屏幕宽度 / 盒子宽度 取整
6.瀑布流最关键的是第二行的盒子的排布方式,通过获取第一行盒子中最矮的一个的下标,绝对定位,top是最矮盒子的高度,left是最矮盒子的下标 * 盒子的宽度
7.循环遍历所有的盒子,通过列数找到第一行所有的盒子,将第一行盒子的高度放入数组,再取出数组中最小的一个的下标,就是第6步思路的第一行盒子中最矮盒子的下标。
8.循环继续,第二行第一个盒子,通过绝对定位,放进页面。
9.关键,需要将数组中最小的值加上放进的盒子的高度
10.继续循环,遍历所有
11.如果想要加载更多,需要判断最后一个盒子的高度和页面滚动的距离,再将数据通过创建元素,追加进页面,再通过瀑布流布局展示
但如果是Vue项目,我们可以把逻辑归结为以下几步
1.获取屏幕宽度
2..获取盒子的宽度,宽度都是相同,高度不同
3.在浮动布局中每一行的盒子个数不固定,是根据屏幕宽度和盒子宽度决定
4.求出列数,屏幕宽度 / 盒子宽度 取整
5.瀑布流最关键的是第二行的盒子的排布方式,通过获取第一行盒子中最矮的一个的下标,绝对定位,top是最矮盒子的高度,left是最矮盒子的下标 * 盒子的宽度
6.继续循环,遍历所有
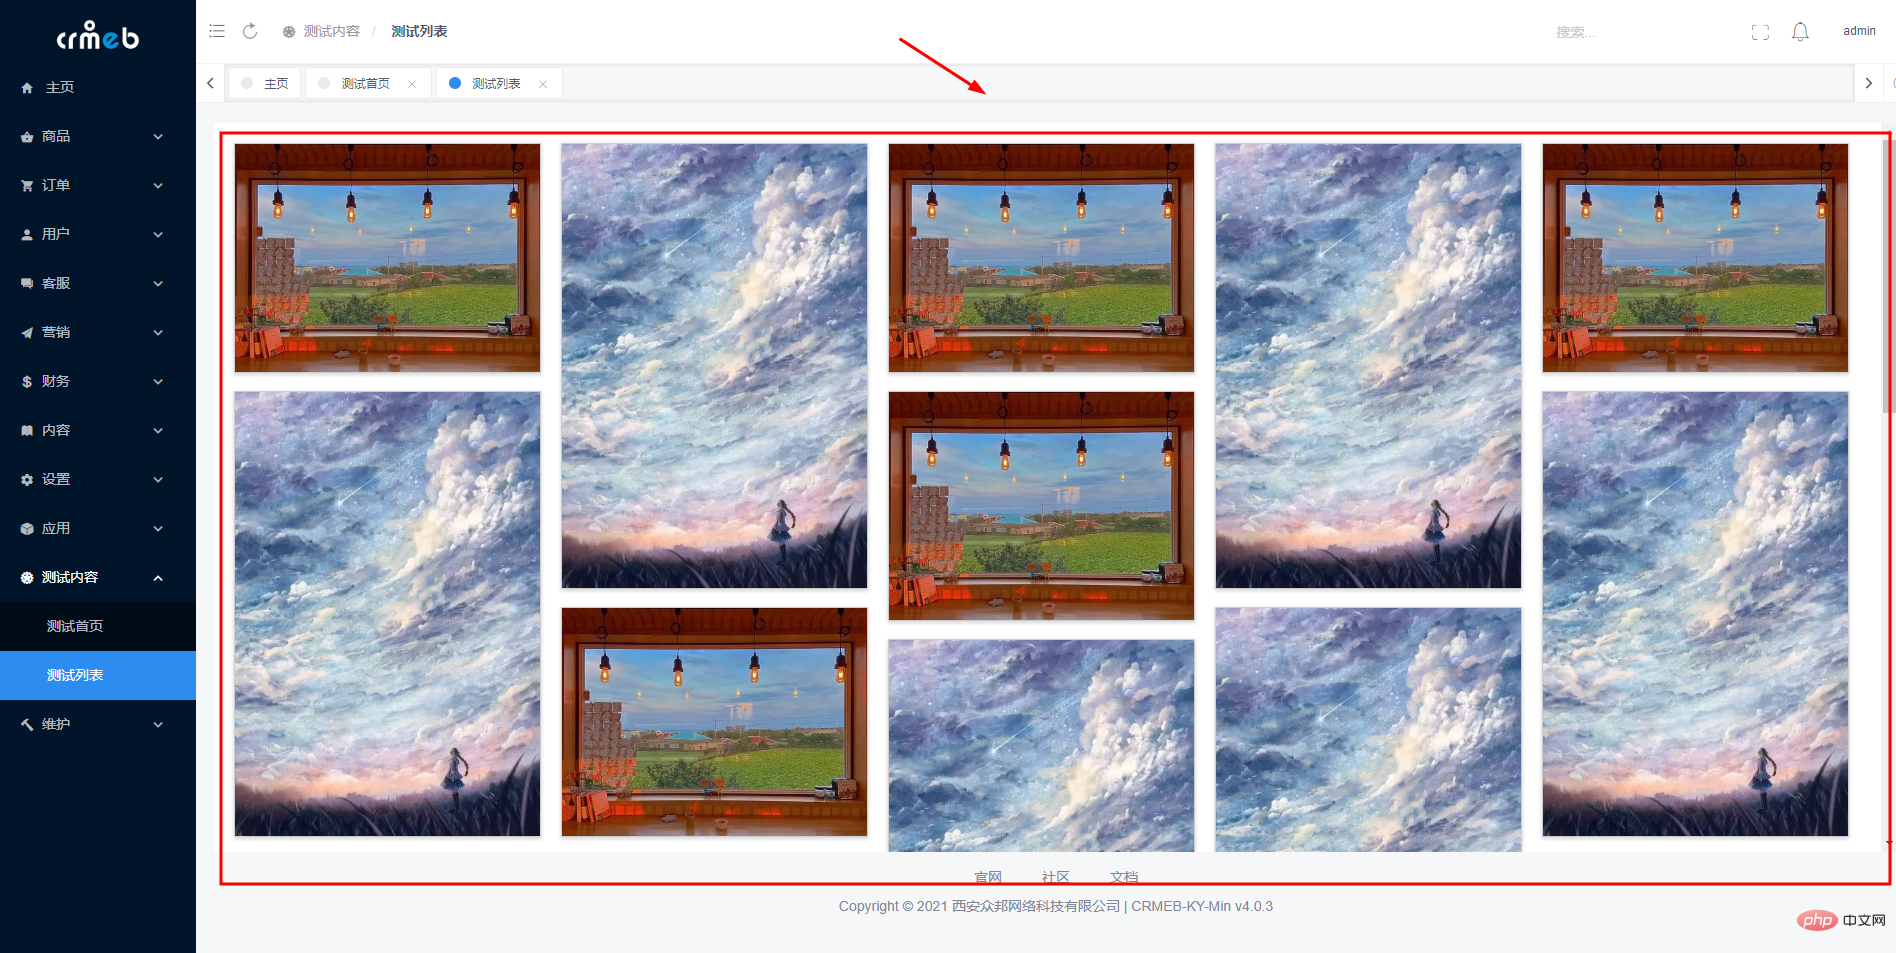
7.如果想要加载更多,需要判断最后一个盒子的高度和页面滚动的距离,再将数据通过创建元素,追加进页面,再通过瀑布流布局展示三.最终效果图片

四.代码分析
先看下我的html部分
<template>
  <div class="tab-container" id="tabContainer">
    <div class="tab-item" v-for="(item, index) in pbList" :key="index">
      <img :src="item.url" />
    </div>
  </div>
</template>

<style scoped>
* {
  margin: 0;
  padding: 0;
}
/* 最外层大盒子 */
.tab-container {
  padding-top: 20px;
  position: relative;
}
/* 每个小盒子 */
.tab-container .tab-item {
  position: absolute;
  height: auto;
  border: 1px solid #ccc;
  box-shadow: 0 2px 4px rgba(0, 0, 0, .12), 0 0 6px rgba(0, 0, 0, .04);
  background: white;
  /* 元素不能中断显示 */
  break-inside: avoid;
  text-align: center;
}
.tab-container .tab-item img {
  width: 100%;
  height: auto;
  display: block;
}
</style>
核心js部分
<script>
export default {
  name:'compList',
  props:{
    pbList:{
      type:Array,
      default:()=>{return []}
    }
  },
  data() {
    return {
    };
  },
  mounted() {
    this.$nextTick(()=>{
      this.waterFall("#tabContainer", ".tab-item"); //实现瀑布流
    })
  },
  methods: {
    waterFall(
        wrapIdName,
        contentIdName,
        columns = 5,
        columnGap = 20,
        rowGap = 20
    ) {
      // 获得内容可用宽度(去除滚动条宽度)
      const wrapContentWidth =
          document.querySelector(wrapIdName).offsetWidth;

      // 间隔空白区域
      const whiteArea = (columns - 1) * columnGap;

      // 得到每列宽度(也即每项内容宽度)
      const contentWidth = parseInt((wrapContentWidth - whiteArea) / columns);

      // 得到内容项集合
      const contentList = document.querySelectorAll(contentIdName);

      // 成行内容项高度集合
      const lineConentHeightList = [];

      for (let i = 0; i < contentList.length; i++) {
        // 动态设置内容项宽度
        contentList[i].style.width = contentWidth + "px";

        // 获取内容项高度
        const height = contentList[i].clientHeight;

        if (i < columns) {
          // 第一行按序布局
          contentList[i].style.top = "0px";
          contentList[i].style.left = contentWidth * i + columnGap * i + "px";

          // 将行高push到数组
          lineConentHeightList.push(height);
        } else {
          // 其他行
          // 获取数组最小的高度 和 对应索引
          let minHeight = Math.min(...lineConentHeightList);
          let index = lineConentHeightList.findIndex(
              (listH) => listH === minHeight
          );

          contentList[i].style.top = minHeight + rowGap +"px";
          contentList[i].style.left = (contentWidth + columnGap) * index + "px";

          // 修改最小列的高度 最小列的高度 = 当前自己的高度 + 拼接过来的高度 + 行间距
          lineConentHeightList[index] += height + rowGap;
        }
      }
    },
  },
};
</script>
这里要给大家提个醒,在当插件使用的时候,我们需要用this.$nextTick()来进行页面初始化,因为方法成功的前提是要等页面初始化加载完毕后才能进行获取和计算
总体插件代码为:
<template>
  <div class="tab-container" id="tabContainer">
    <div class="tab-item" v-for="(item, index) in pbList" :key="index">
      <img :src="item.url" />
    </div>
  </div>
</template>

<script>
export default {
  name:'compList',
  props:{
    pbList:{
      type:Array,
      default:()=>{return []}
    }
  },
  data() {
    return {
    };
  },
  mounted() {
    this.$nextTick(()=>{
      this.waterFall("#tabContainer", ".tab-item"); //实现瀑布流
    })
  },
  methods: {
    waterFall(
        wrapIdName,
        contentIdName,
        columns = 5,
        columnGap = 20,
        rowGap = 20
    ) {
      // 获得内容可用宽度(去除滚动条宽度)
      const wrapContentWidth =
          document.querySelector(wrapIdName).offsetWidth;

      // 间隔空白区域
      const whiteArea = (columns - 1) * columnGap;

      // 得到每列宽度(也即每项内容宽度)
      const contentWidth = parseInt((wrapContentWidth - whiteArea) / columns);

      // 得到内容项集合
      const contentList = document.querySelectorAll(contentIdName);

      // 成行内容项高度集合
      const lineConentHeightList = [];

      for (let i = 0; i < contentList.length; i++) {
        // 动态设置内容项宽度
        contentList[i].style.width = contentWidth + "px";

        // 获取内容项高度
        const height = contentList[i].clientHeight;

        if (i < columns) {
          // 第一行按序布局
          contentList[i].style.top = "0px";
          contentList[i].style.left = contentWidth * i + columnGap * i + "px";

          // 将行高push到数组
          lineConentHeightList.push(height);
        } else {
          // 其他行
          // 获取数组最小的高度 和 对应索引
          let minHeight = Math.min(...lineConentHeightList);
          let index = lineConentHeightList.findIndex(
              (listH) => listH === minHeight
          );

          contentList[i].style.top = minHeight + rowGap +"px";
          contentList[i].style.left = (contentWidth + columnGap) * index + "px";

          // 修改最小列的高度 最小列的高度 = 当前自己的高度 + 拼接过来的高度 + 行间距
          lineConentHeightList[index] += height + rowGap;
        }
      }
    },
  },
};
</script>

<style scoped>
* {
  margin: 0;
  padding: 0;
}
/* 最外层大盒子 */
.tab-container {
  padding-top: 20px;
  position: relative;
}
/* 每个小盒子 */
.tab-container .tab-item {
  position: absolute;
  height: auto;
  border: 1px solid #ccc;
  box-shadow: 0 2px 4px rgba(0, 0, 0, .12), 0 0 6px rgba(0, 0, 0, .04);
  background: white;
  /* 元素不能中断显示 */
  break-inside: avoid;
  text-align: center;
}
.tab-container .tab-item img {
  width: 100%;
  height: auto;
  display: block;
}
</style>
五.外层使用和懒加载
在使用这个插件的时候,有两个问题,就是因为内层是position: absolute;定位,不会撑开外部的p,会导致外层盒模型不好布局,还有就是页面下拉懒加载,那要怎么办呢?
这里我给出我的处理方法
整体代码如下:
<template>
  <div>
    <div class="list-box" @scroll="scrollFun">
      <compList :pbList="pbList" ref="compList"></compList>
    </div>
  </div>
</template>

<script>
import compList from "@/pages/test/components/compList";
export default {
  name:'testList',
  components:{
    compList
  },
  data() {
    return {
      //瀑布流数据
      pbList: [
        {
          url: "https://gimg2.baidu.com/image_search/src=http%3A%2F%2Fimg3.doubanio.com%2Fview%2Fphoto%2Fm%2Fpublic%2Fp2650049201.jpg&refer=http%3A%2F%2Fimg3.doubanio.com&app=2002&size=f9999,10000&q=a80&n=0&g=0n&fmt=auto?sec=1664935370&t=d4bf3e4d352c277a1bdebfcc8fda959f",
        },
        {
          url: "https://img1.baidu.com/it/u=2911909188,130959360&fm=253&fmt=auto&app=138&f=JPEG?w=440&h=641",
        },
        {
          url: "https://img1.baidu.com/it/u=2911909188,130959360&fm=253&fmt=auto&app=138&f=JPEG?w=440&h=641",
        }
      ],
      addList:[
        {
          url: "https://gimg2.baidu.com/image_search/src=http%3A%2F%2Fimg3.doubanio.com%2Fview%2Fphoto%2Fm%2Fpublic%2Fp2650049201.jpg&refer=http%3A%2F%2Fimg3.doubanio.com&app=2002&size=f9999,10000&q=a80&n=0&g=0n&fmt=auto?sec=1664935370&t=d4bf3e4d352c277a1bdebfcc8fda959f",
        },
        {
          url: "https://img1.baidu.com/it/u=2911909188,130959360&fm=253&fmt=auto&app=138&f=JPEG?w=440&h=641",
        },
        {
          url: "https://img1.baidu.com/it/u=2911909188,130959360&fm=253&fmt=auto&app=138&f=JPEG?w=440&h=641",
        }
      ],
      bottomMain:true
    };
  },
  methods:{
    scrollFun(e) {
      const  offsetHeight= e.target.offsetHeight
      const  scrollHeight= e.target.scrollHeight
      const  scrollTop= e.target.scrollTop
      if((scrollHeight - (offsetHeight+scrollTop)) < 10){
        if(this.bottomMain){
          this.bottomMain = false
          this.addListDataFun()
        }
      }
    },
    addListDataFun(){
      this.$Spin.show({
        render: (h) => {
          return h('div', [
            h('Icon', {
              'class': 'demo-spin-icon-load',
              props: {
                type: 'ios-loading',
                size: 18
              }
            }),
            h('div', '数据更新中...')
          ])
        }
      });
      setTimeout(() => {
        this.pbList = this.pbList.concat(this.addList)
        this.bottomMain = true
        this.$nextTick(()=>{
          this.$refs.compList.waterFall("#tabContainer", ".tab-item")
          this.$Spin.hide()
        })
      },1000)
    }
  }
};
</script>

<style scoped>
.list-box{
  position: relative;
  width: 100%;
  height: calc(100vh - 240px);
  background: white;
  padding: 20px 30px 20px 20px;
  margin-top: 20px;
  box-sizing: border-box;
  overflow: auto;
}
</style>
下拉的核心代码为:
scrollFun(e) {
  const  offsetHeight= e.target.offsetHeight
  const  scrollHeight= e.target.scrollHeight
  const  scrollTop= e.target.scrollTop
  if((scrollHeight - (offsetHeight+scrollTop)) < 10){
    if(this.bottomMain){
      this.bottomMain = false
      this.addListDataFun()
    }
  }
},
addListDataFun(){
  this.$Spin.show({
    render: (h) => {
      return h('div', [
        h('Icon', {
          'class': 'demo-spin-icon-load',
          props: {
            type: 'ios-loading',
            size: 18
          }
        }),
        h('div', '数据更新中...')
      ])
    }
  });
  setTimeout(() => {
    this.pbList = this.pbList.concat(this.addList)
    this.bottomMain = true
    this.$nextTick(()=>{
      this.$refs.compList.waterFall("#tabContainer", ".tab-item")
      this.$Spin.hide()
    })
  },1000)
}
这里使用的是iView-UI的全局加载事件,如果你要用其他的UI框架,也可以自行修改
到这里,所有的思路就结束了


 594
594


 被折叠的 条评论
为什么被折叠?
被折叠的 条评论
为什么被折叠?
 到【灌水乐园】发言


