


先简单介绍一下用到的插件
- koa:用来快速启动一个web服务器
- koa-router:koa的路由处理插件
- koa-static:获得某个目录下的静态文件
- path:获得当前项目绝对路径,和koa-static搭配使用
- koa2-cors:解决跨域问题
- @koa/multer:图片上传核心插件
- multer: @koa/multer 依赖于 multer,需要将 multer 一并安装上
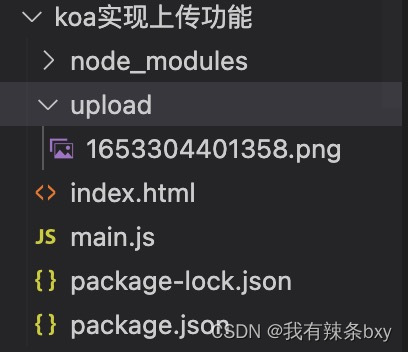
先确定一下代码结构
将koa框架搭建起来
//main.js
const Koa = require('koa') // 引入koa
const Router = require('koa-router') // 引入koa-router
const serve = require('koa-static')//koa获得静态内容
const path = require('path')
const cors = require('koa2-cors')//解决跨域问题
const app =new Koa()
const router =new Router()

app.use(serve(path.join(__dirname, './upload')))
app.use(cors())//注意这个配置要在router前使用不然不生效
app.use(router.routes())
    .use(router.allowedMethods())
router.get('/', async (ctx) => {
    ctx.type = 'html'
    ctx.body = '<h1>hello world!</h1>'
})
router.post('/upload', async (ctx) => {
    ctx.body = 'done'
})

// 启动服务监听本地3000端口
app.listen(3000, () => {
    console.log('应用已经启动,http://localhost:3000')
})
通过命令 node main.js将服务器启动起来,浏览器输入http://localhost:3000出现hello world!说明启动成功
接下来实现index.html的上传文件页面
<!DOCTYPE html>
<html lang="en">
<head>
    <meta charset="UTF-8">
    <meta http-equiv="X-UA-Compatible" content="IE=edge">
    <meta name="viewport" content="width=device-width, initial-scale=1.0">
    <title>koa实现图片上传</title>
</head>
<body>
    <input type="file" class="file" name="avatar">
    <button onclick="send()">上传</button>
    <script src="https://unpkg.com/axios/dist/axios.min.js"></script>
    <script>
        let formData = new FormData()
        document.querySelector('.file').addEventListener('change', function (e) {
            let files = e.target.files
            console.log(files)
            if (!files.length) return
            formData.append('file', files[0], files[0].name)
        })
        function send() {
            axios.post('http://localhost:3000/upload', formData, {
                Headers: {
                    "Content-type": "multipart/form-data"
                }
            })
        }
    </script>
</body>
</html>
接下来就是主角@koa/multer登场啦。使用方法如下:
const multer = require('@koa/multer') // 引入
const upload = multer() // 加载multer
multer(options)的参数属性有以下3种
1.dest
文件保存路径,如果不存在会自动创建。如果省略options,文件将保存在内存中,不会写入磁盘。使用方法如下
//multer是一个函数,需要执行一下
 const upload = multer({
     dest: './upload'
 })
2.storage
和dest类似,但是功能比dest强大一些。Multer 具有 DiskStorage 和 MemoryStorage 两个存储引擎;另外还可以从第三方获得更多可用的引擎
//multer调用diskStorage方法可控制磁盘存储引擎
const storage = multer.diskStorage({
    destination: function (req, file, cb) {
        cb(null, './upload')//文件存储目录,注意必须存在该目录,否则报错
    },
    filename: function (req, file, cb) {
        const fileFormat = (file.originalname).split('.')
        cb(null, Date.now() + '.' + fileFormat[fileFormat.length - 1])//定义文件名
    }
})
//multer是一个函数,需要执行一下
const upload = multer({ storage })
3.limits
指定一些数据大小(做限制的)
const limits = {
    fields: 10,//非文件字段的数量
    fileSize: 500 * 1024,//文件大小 单位 b
    files: 1//文件数量
}
const upload = multer({
    storage,
    limits
})
定义完upload后,下面介绍如何使用upload。
多文件上传使用upload.single(‘file’) ,下面是一个完整例子
//main.js
const Koa = require('koa') // 引入koa
const Router = require('koa-router') // 引入koa-router
const serve = require('koa-static')//koa获得静态内容
const path = require('path')
const cors = require('koa2-cors')//解决跨域问题
const multer = require('@koa/multer')//图片上传的插件
const app =new Koa()
const router =new Router()
app.use(serve(path.join(__dirname, './upload')))
app.use(cors())//注意这个配置要在router前使用不然不生效
app.use(router.routes())
    .use(router.allowedMethods())
const storage = multer.diskStorage({
    destination: function (req, file, cb) {
        cb(null, './upload')
    },
    filename: function (req, file, cb) {
        const fileFormat = (file.originalname).split('.')
        cb(null, Date.now() + '.' + fileFormat[fileFormat.length - 1])
    }
})
const upload = multer({ storage })
router.get('/', async (ctx) => {
    ctx.type = 'html'
    ctx.body = '<h1>hello world!</h1>'
})
//单文件上传中间件挂载到路由上
//note:需要注意的是upload.single('file'),中的file需要和上方的index.html中的formData字段一致,这个字段前后端必须一致
router.post('/upload', upload.single('file'), async (ctx) => {
    console.log('ctx.request.body', ctx.request.body)
    ctx.body = 'done'
})
// 启动服务监听本地3000端口
app.listen(3000, () => {
    console.log('应用已经启动,http://localhost:3000')
})
多文件上传使用upload.array(‘file’, maxCount) ,参数二为上传文件的最大数量
router.post('/upload', upload.array('file'), async (ctx) => {
    console.log('ctx.request.body', ctx.request.body)
    ctx.body = 'done'
})


 396
396

 被折叠的 条评论
为什么被折叠?
被折叠的 条评论
为什么被折叠?
 到【灌水乐园】发言


