


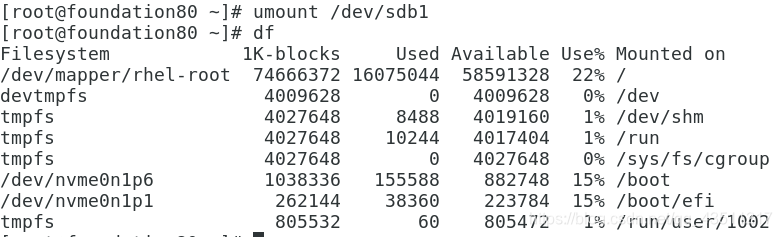
1.本地存储设备的识别
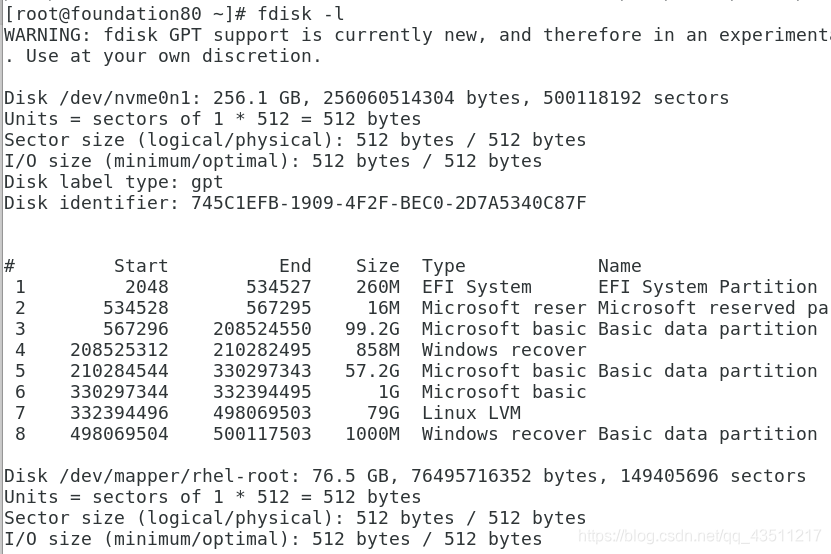
fdisk -l ##真实存在的设备
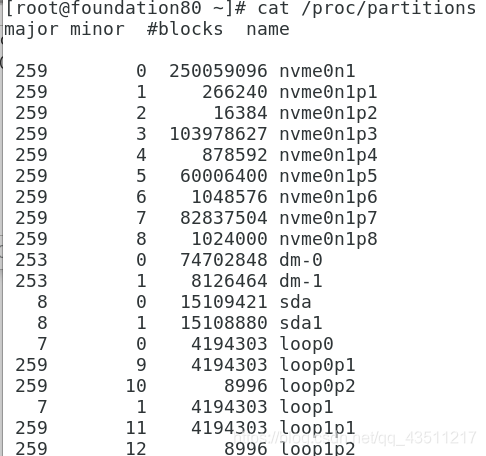
cat /proc/partition ##系统识别的设备
blkid ##系统可使用的设备

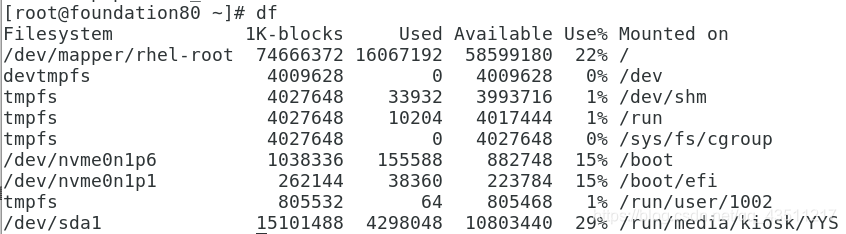
df ##系统正在挂载的设备
2.设备的挂载和卸载
1.设备名称
/dev/xdx			##/dev/hd0  /dev/hd1  /dev/sda /dev/sdb /dev/sda1 /dev/sdb1
/dev/sr0			##光驱
/dev/mapper/*  	 	##虚拟设备
2.设备的挂载
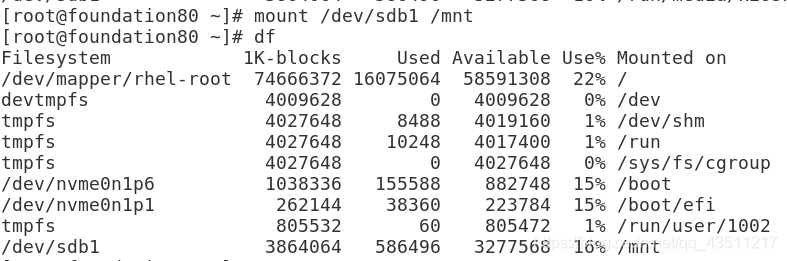
mount 设备 \挂载点
mount /dev/sdb1 /mnt ##挂载sdb1到/mnt
umount /mnt| /dev/sdb1 ##卸载
mount -o ro /dev/sdb1 /mnt ##只读挂载
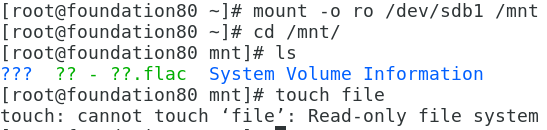
mount ##查看挂载信息

mount -o remount,rw /dev/sdb1 | /mnt ##重新读写挂载

3.解决设备正忙情况
[root@foundation80 ~]# umount /mnt/
umount: /mnt:target is basy.		##有程序在使用本设备
        (In some cases useful info about processes that use
         the device is found by lsof(8) or fuser(1))

解决方法1.
fuser -kvm /mnt			##停止占用设备的进程
umount /mnt
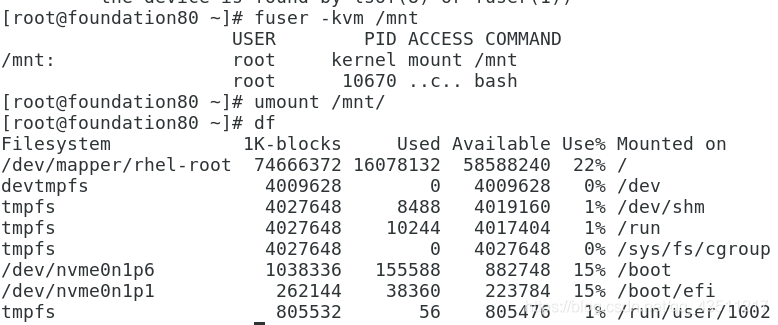
占用设备的进程被杀掉

解决方法2
	 lsof /mnt/				##查询占用设备的进程
     kill -9 PID		 	##关闭进程
     umount /mnt			##卸载
示例:
[root@foundation80 ~]# umount /mnt/
umount: /mnt: target is busy.
        (In some cases useful info about processes that use
         the device is found by lsof(8) or fuser(1))
[root@foundation80 ~]# lsof /mnt/
lsof: WARNING: can't stat() fuse.gvfsd-fuse file system /run/user/1002/gvfs
      Output information may be incomplete.
COMMAND   PID USER   FD   TYPE DEVICE SIZE/OFF NODE NAME
bash    12100 root  cwd    DIR   8,17    32768    1 /mnt
[root@foundation80 ~]# kill -9 12100
[root@foundation80 ~]# umount /mnt/

3.磁盘分区
1.硬盘0磁道1扇区的512个字节中记录的信息如下
512=446			+		64		+		2
     ^					^				^
mbr(主引导记录)			mpt(主分区标)  55aa(硬盘的有效性标示)
硬盘分区标
64
1个分区占用16个字节
1块硬盘上最多可以划分4个主分区
4.分区步骤
1.fdisk -l
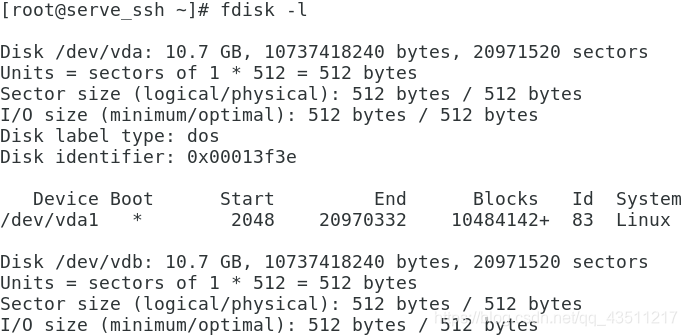
2.fdisk /dev/vdb
m
Command action
   a   toggle a bootable flag
   b   edit bsd disklabel
   c   toggle the dos compatibility flag
   d   delete a partition						##删除
   g   create a new empty GPT partition table
   G   create an IRIX (SGI) partition table
   l   list known partition types
   m   print this menu
   n   add a new partition						##新建
   o   create a new empty DOS partition table
   p   print the partition table				##显示分区信息
   q   quit without saving changes				##退出
   s   create a new empty Sun disklabel
   t   change a partition's system id			##修改分区id
   u   change display/entry units
   v   verify the partition table
   w   write table to disk and exit				##保存分区标信息到硬盘
   x   extra functionality (experts only)
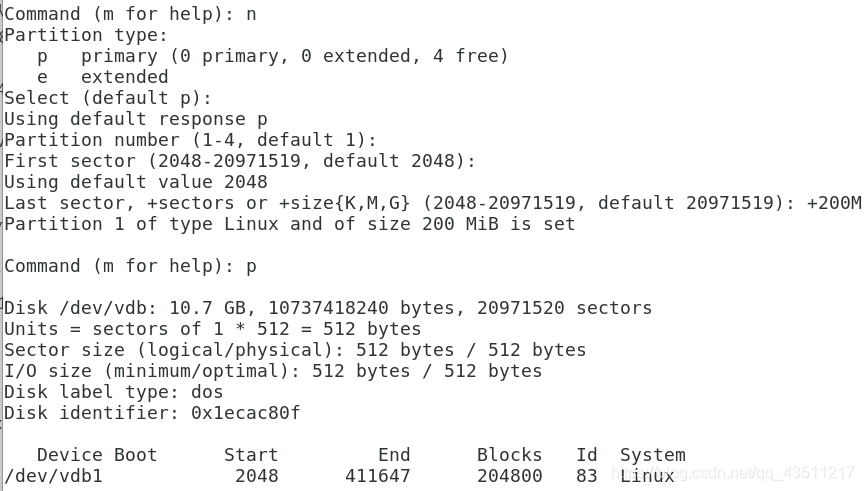
3.建立主分区
Command (m for help): n								##新建
Partition type:
   p   primary (0 primary, 0 extended, 4 free)
   e   extended
Select (default p): p								##主分区
Partition number (1-4, default 1): 					##id默认
First sector (2048-20971519, default 2048):		 	##分区起始
Using default value 2048
Last sector, +sectors or +size{K,M,G} (2048-20971519, default 20971519): +100M						##分区大小
Partition 1 of type Linux and of size 100 MiB is set

Command (m for help): p								##显示信息

Disk /dev/vdb: 10.7 GB, 10737418240 bytes, 20971520 sectors
Units = sectors of 1 * 512 = 512 bytes
Sector size (logical/physical): 512 bytes / 512 bytes
I/O size (minimum/optimal): 512 bytes / 512 bytes
Disk label type: dos
Disk identifier: 0x39edd6be

   Device Boot      Start         End      Blocks   Id  System
/dev/vdb1            2048      206847      102400   83  Linux
Command (m for help): wq			##保存退出
The partition table has been altered!

4.当系统已经有三个主分区时
Command (m for help): n
Partition type:
   p   primary (3 primary, 0 extended, 1 free)
   e   extended
Select (default e): e					##3个主分区出现要先划分扩展分区
Selected partition 4
First sector (616448-20971519, default 616448):
Using default value 616448
Last sector, +sectors or +size{K,M,G} (616448-20971519, default 20971519): 					##默认将所有剩余空间划给扩展分区
Using default value 20971519
Partition 4 of type Extended and of size 9.7 GiB is set

Command (m for help): p

Disk /dev/vdb: 10.7 GB, 10737418240 bytes, 20971520 sectors
Units = sectors of 1 * 512 = 512 bytes
Sector size (logical/physical): 512 bytes / 512 bytes
I/O size (minimum/optimal): 512 bytes / 512 bytes
Disk label type: dos
Disk identifier: 0x39edd6be

   Device Boot      Start         End      Blocks   Id  System
/dev/vdb1            2048      206847      102400   83  Linux
/dev/vdb2          206848      411647      102400   83  Linux
/dev/vdb3          411648      616447      102400   83  Linux
/dev/vdb4          616448    20971519    10177536    5  Extended		##默认所有空间给e

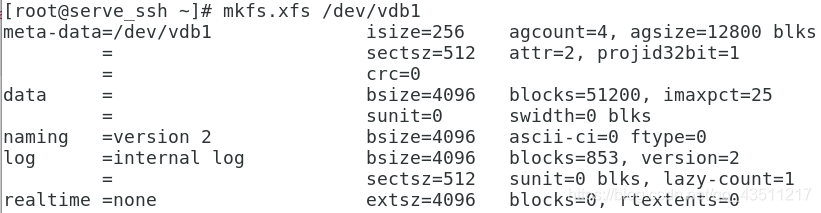
5.给设备安装文件系统
ext3	rhel5及之前版本	最多支持32T的文件系统和2T文件,实际上2tb文件系统,16G文件
ext4	rehl6					1EB			16TB
xfs		rhel7					18EB		9eb		7G/s	4G/s
mkfs.xfs	/dev/vdb1			##格式化
[root@serve_ssh ~]# mkfs.xfs /dev/vdb1
meta-data=/dev/vdb1              isize=256    agcount=4, agsize=12800 blks
         =                       sectsz=512   attr=2, projid32bit=1
         =                       crc=0
data     =                       bsize=4096   blocks=51200, imaxpct=25
         =                       sunit=0      swidth=0 blks
naming   =version 2              bsize=4096   ascii-ci=0 ftype=0
log      =internal log           bsize=4096   blocks=853, version=2
         =                       sectsz=512   sunit=0 blks, lazy-count=1
realtime =none                   extsz=4096   blocks=0, rtextents=0
mount /dev/vdb1 /mnt ##挂载

vim /etc/fstab
设备			挂载点	文件系统		挂载参数		是否备份		是否检测
/dev/vdb1	/mnt	xfs			defaults	0			0

mount -a ##检测书写是否正确

不出现任何信息则书写正确
6.swap分区管理
1.swap分区建立
划分分区并设定分区标签
mkswap /dev/vdb6				##格式化/dev/vdb6, 无法格式化使用partprobe更新分区表
swapon -a /dev/vdb6				##设定swap分区
swapon -s						##查看swap分区

vim /etc/fstab ##设定开机自动挂载swap
/dev/vdb6 swap swap defaults 0 0

2.swap分区删除
vim /etc/fstab ##在文件中删除
swapoff	/dev/vdb6			##设定不使用此分区
swapon -s					##查询

[root@localhost ~]# vim /etc/fstab
[root@localhost ~]# swapon -s
Filename				Type		Size	Used	Priority
/dev/vdb6                              	partition	1048572	0	-1
[root@localhost ~]# swapoff /dev/vdb6
[root@localhost ~]# swapon -s
[root@localhost ~]# fdisk -l

Disk /dev/vda: 10.7 GB, 10737418240 bytes, 20971520 sectors
Units = sectors of 1 * 512 = 512 bytes
Sector size (logical/physical): 512 bytes / 512 bytes
I/O size (minimum/optimal): 512 bytes / 512 bytes
Disk label type: dos
Disk identifier: 0x00013f3e

   Device Boot      Start         End      Blocks   Id  System
/dev/vda1   *        2048    20970332    10484142+  83  Linux

Disk /dev/vdb: 10.7 GB, 10737418240 bytes, 20971520 sectors
Units = sectors of 1 * 512 = 512 bytes
Sector size (logical/physical): 512 bytes / 512 bytes
I/O size (minimum/optimal): 512 bytes / 512 bytes
Disk label type: dos
Disk identifier: 0x39edd6be

   Device Boot      Start         End      Blocks   Id  System
/dev/vdb1            2048      206847      102400   83  Linux
/dev/vdb2          206848      411647      102400   83  Linux
/dev/vdb3          411648      616447      102400   83  Linux
/dev/vdb4          616448    20971519    10177536    5  Extended
/dev/vdb5          618496     1642495      512000   83  Linux
/dev/vdb6         1644544     3741695     1048576   82  Linux swap / Solaris
[root@localhost ~]# fdisk /dev/vdb
Welcome to fdisk (util-linux 2.23.2).

Changes will remain in memory only, until you decide to write them.
Be careful before using the write command.

Command (m for help): d
Partition number (1-6, default 6): 6
Partition 6 is deleted

Command (m for help): wq
The partition table has been altered!

Calling ioctl() to re-read partition table.
Syncing disks.
[root@localhost ~]# partprobe ##同步分区表
7.配额
配额是针对设备分区的
1.格式化分区(格式化后成为系统可使用设备,可以用blkid查询)
mkfs.xfs /dev/vdb5
2.激活配额的挂载
mount -o usrquota,grpquota /dev/vdb5 /pub/
3.给挂载的文件权限(必须先挂载再给权限)
chmod 1777 /pub/
ls -ld /pub/			##查询权限
4.给student配额
edquota -u student /dev/vdb5

Disk quotas for user student (uid 1000):
  Filesystem                   blocks       soft       hard   	  inodes     soft     hard
  /dev/vdb5                     0            0	       20480          0        0        0
								已有大小	    软限(警告)硬限(禁止写入)文件个数   软限     硬限
student用户配额为20M,写入文件大于20M时禁止写入,文件个数不做限制。
5.设定开机自动限额
vim /etc/fstab
 9 UUID=9bf6b9f7-92ad-441b-848e-0257cbb883d1 	  /         xfs     defaults    		    1 1
 10 /dev/vdb5      								 /pub 	    xfs     defaults,usrquota       0 0
测试:
[root@localhost ~]# su - student					##切换student用户
Last login: Tue Jan 22 01:34:00 EST 2019 on pts/0
[student@localhost ~]$ dd if=/dev/zero of=/pub/studentfile bs=1M count=15		##占用15M内存
15+0 records in													##成功
15+0 records out
15728640 bytes (16 MB) copied, 0.0428315 s, 367 MB/s
[student@localhost ~]$ dd if=/dev/zero of=/pub/studentfile bs=1M count=22	##占用22M内存
dd: error writing ‘/pub/studentfile’: Disk quota exceeded		##出现错误
21+0 records in
20+0 records out
20971520 bytes (21 MB) copied, 0.0247407 s, 848 MB/s
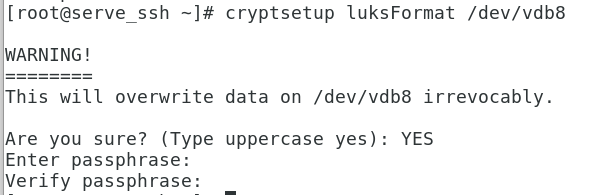
8.磁盘加密
1.加密
cryptsetup luksFormat /dev/vdb8 ##加密,使用命令后要使用大写的YES确定。
注意:密码必须有英文和字母,且必须多与8位!
cryptsetup open /dev/vdb5 westos ##解密使设备可用

mkfs.xfs /dev/mapper/westos ##格式化
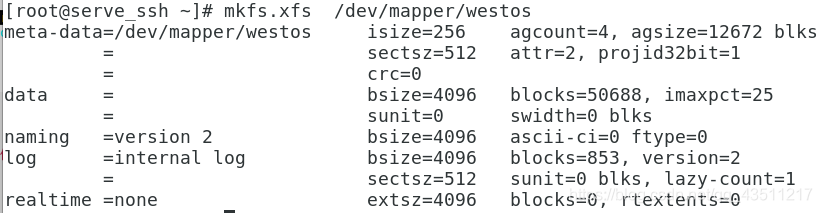
mount /dev/mapper/westos /mnt/ ##挂载

touch /mnt/file{1..10} ##创建文件

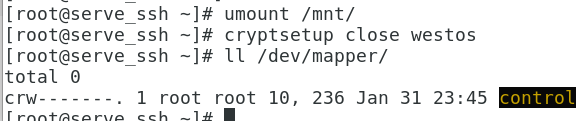
umount /mnt/							##卸载
cryptsetup close westos					##锁上,至此磁盘加密完成,磁盘内文件没有密码无法查看。
cryptsetup open /dev/vdb8 hahaha		##解密
mount /dev/mapper/westos  /mnt/			##挂载

解密后重新挂载即可查看加密磁盘文件
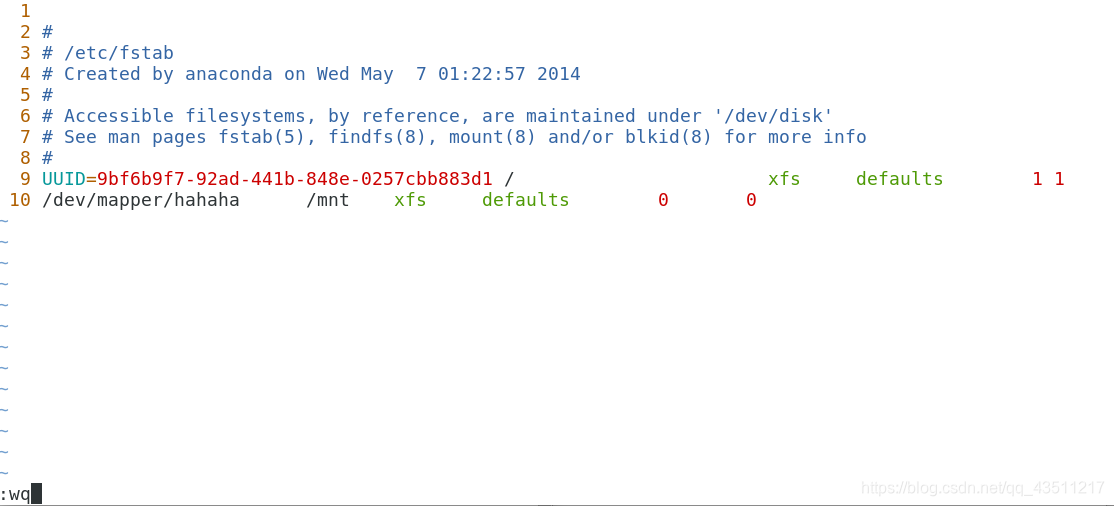
2.加密磁盘开机自动挂载
vim /etc/fstab
/dev/mapper/hahaha      /mnt    xfs     defaults        0 0
vim /etc/crypttab
hahaha  /dev/vdb8       /root/hahahakey

vim /root/westoskey
westos2019
cryptsetup luksAddKey /dev/vdb8 /root/westoskey

测试:
重启后再次查看
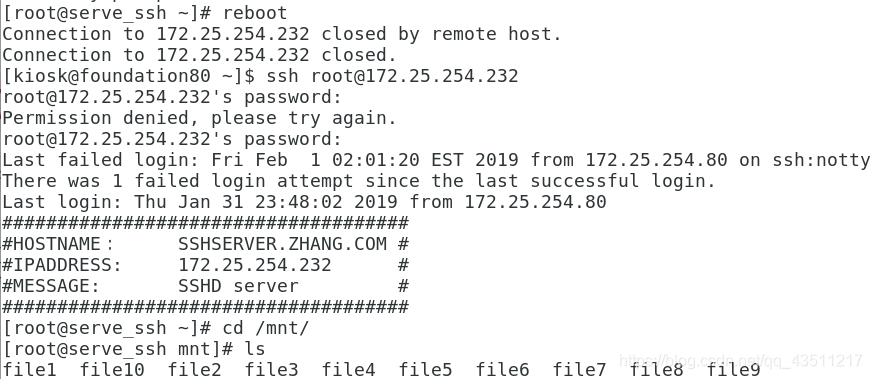
挂载成功。


 148
148


 被折叠的 条评论
为什么被折叠?
被折叠的 条评论
为什么被折叠?
 到【灌水乐园】发言


