


Vue.js学习第六天——父子组件之间访问及插槽使用相关
继昨天学习了父子组件之间的通信后,有一个案例可以帮助我们加以巩固,需求如下图:
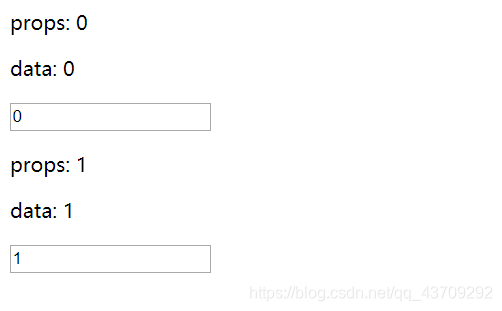
当我们在第一个文本框中输入数据时,第一个父组件中的data和子组件中的props会一起改变,并且第二个父组件中的data要是第一个的100倍。步骤大致如下:
- 父组件向子组件传递数据,拿到数据后props和data就会有值了;
- 此时修改文本框中的值,虽然界面上的data改变了,但是实际我们发现父组件中的data并未发生改变,所以我们要将子组件中的数据(即input中的值)传递到父组件中,并修改父组件中的值,这时候vue有个关于类型的警号,我们在拿到数据后将它转换以下即可;
- 至于最后一点100倍的需求,只要在上一步的子组件传递数据给父组件的方法当中将数据乘以100再发送一个请求让父组件监听denumber2值的改变即可。完整代码如下:
<body>
    <div id="container">
        <cpn :number1="num1" :number2="num2" @change1='chang1' @change2='chang2'></cpn>
    </div>
    <template id="tpl">
        <div>
            <p>props: {{number1}}</p>
            <p>data: {{dnumber1}}</p>
            <!-- <input type="text" v-model="dnumber1"> -->
            <input type="text" :value="dnumber1" @input="num1input">
            <p>props: {{number2}}</p>
            <p>data: {{dnumber2}}</p>
            <!-- <input type="text" v-model="dnumber2"> -->
            <input type="text" :value="dnumber2" @input="num2input">
        </div>

    </template>
    <script src="./vue.js"></script>
    <script>
        const app = new Vue({
            el: '#container',
            data: {
                num1: 0,
                num2: 1
            },
            methods: {
                chang1(dnumber1) {
                    final1 = parseInt(dnumber1);
                    this.num1 = final1;
                },
                chang2(dnumber2) {
                    final2 = parseInt(dnumber2);
                    this.num2 = final2;
                }
            },
            components: {
                cpn: {
                    template: '#tpl',
                    props: {
                        // 改变一定要来自父组件
                        number1: Number,
                        number2: Number
                    },
                    data() {
                        return {
                            dnumber1: this.number1,
                            dnumber2: this.number2
                        }
                    },
                    methods: {
                        num1input() {
                            this.dnumber1 = event.target.value;
                            this.$emit('change1', this.dnumber1);
                            this.dnumber2 = this.dnumber1 * 100;
                            this.$emit('change2', this.dnumber2);
                        },
                        num2input() {
                            this.dnumber2 = event.target.value;
                            this.$emit('change2', this.dnumber2);
                            this.dnumber1 = this.dnumber2 / 100;
                            this.$emit('change1', this.dnumber1);
                        }
                    }
                }
            }
        })
    </script>
</body>
- 父子组件之间的访问
在上面的案例中,我们了解了父子组件之间的通信,指的是父子组件之间可以互相传递数据,但是现在如果我们只是想要调用一下子组件或是父组件之间的方法或一些值,并不想改变它,我们应该怎么做呢?所以Vue提供了父子组件的访问方式。
-
父组件访问子组件
$children这个方式主要是通过拿到下标的方式访问的,children返回的是一个数组,所以可以通过下标的方式访问,但是一般真实案例中,用的较少,因为方法本身不是很灵活$refsreference的缩写,采用引用的方式,在父组件中调用模板时,在模板上添加属性实现<tpl ref="aaa"></tpl>实际开发中这个方式采用的较多
-
子组件访问父组件
$parents,实际开发中也使用的较少,因为子组件访问父组件的方式,破坏了组件之间的耦合性,所以不建议使用。一些基本的使用见代码
<body>
    <div id="container">
        <tpl ref="aaa"></tpl>
        <button @click='showMessage'>我是父组件中的按钮</button>
    </div>
    <template id="tpl">
        <div>
            <p>我是模板</p>
            <button @click='showPar'>我是子组件中的按钮</button>
            <son></son>
        </div>
    </template>
    <template id="son">
        <div>
            <p>我是孙子</p>
            <button @click='showParents'>我是孙组件中的按钮</button>
        </div>
    </template>
    <script src="./vue.js"></script>
    <script>
        const app = new Vue({
            el: '#container',
            data:{
                name:'beanBag'
            },
            methods:{
                showMessage(){
                    console.log(this.$children);
                    this.$children[0].show();
                    console.log(this.$refs);
                    this.$refs.aaa.show();
                },
                showKey(){
                    console.log('子组件可以访问父组件啦!');
                }
            },
            components:{
                tpl:{
                    template:'#tpl',
                    methods:{
                        show(){
                            console.log('hello 父组件可以访问到子组件中啦');
                        },
                        showPar(){
                            console.log(this.$parent);
                            console.log(this.$parent.name);
                            this.$parent.showKey();
                            console.log(this.$root);
                        }
                    },
                    components:{
                        son:{
                            template:'#son',
                            methods:{
                                showParents(){
                                    console.log(this.$parent);
                                    console.log(this.$root);
                                }
                            }
                        }
                    }
                }
            }
        })
    </script>
</body>
插槽的使用(slot)
插槽的使用是为了让我们封装的组件更加具有拓展性,让使用者可以决定组件内部的一些内容到底展示什么。
1. 插槽的基本使用
<body>
    <div id="container">
        <tpl></tpl>
        <tpl>
            <div>1</div>
            <p>2</p>
            <i>3</i>
        </tpl>
        <tpl>ss</tpl>
        <tpl></tpl>
    </div>
    <template id="tpl">
        <div>
            <p>haha</p>
            <!-- 1.插槽的基本使用 -->
            <!-- <slot></slot> -->
            <!-- 2.插槽的默认值 -->
            <!-- <slot>
                    <button>hello</button>
                </slot> -->
            <!-- 3.插槽中如果有多个值,同时放入组件进行替换时,一起作为替换元素 -->
            <slot>
                <p>beanBag</p>
            </slot>
        </div>

    </template>
    <script src="./vue.js"></script>
    <script>
        const app = new Vue({
            el: '#container',
            components: {
                tpl:{
                    template:'#tpl'
                }
            }
        })
    </script>
</body>
2. 具名插槽的使用
以上案例我们可以看出当我们需要有多个插槽时,如果想要具体修改某一个插槽,从而不影响其它插槽是非常困难的,所以有具名插槽的提出,类似上面的$refs的一个使用,给每一个插槽起一个名字区分它们即可
<body>
    <div id="container">
        <tpl>
            <p slot="center">标题</p>
        </tpl>
        <tpl>
            <i slot="right">hello</i>
        </tpl>
        <tpl></tpl>
    </div>
    <template id="tpl">
        <div>
            <slot name="left">
                <p>左边</p>
            </slot>
            <slot name="center">
                <p>中间</p>
            </slot>
            <slot name="right">
                <p>右边</p>
            </slot>
        </div>
    </template>
    <script src="./vue.js"></script>
    <script>
        const app = new Vue({
            el: '#container',
            components:{
                tpl:{
                    template:'#tpl'
                }
            }
        })
    </script>
</body>
3. 作用域插槽
在这之前,我们需要了解一个知识点,就是编译的作用域问题:父组件模板的所有东西都会在父级作用域内编译,子组件也是同理,简单来说,就是在template的标签下的模板,都只能访问到子组件中的东西,而不能访问父组件,也就是Vue实例中的东西的,在我们引用这个模板时,编译器在编译到此 tpl(模板名称) 时,已经提前将它要使用的本身子组件中的东西拼接好了,不会再访问父组件中的任何东西,所以子组件此时也是不能访问到父组件中的内容的。
作用域插槽就是可以解决此问题,父组件替换插槽的标签,但是内容由子组件来提供,这样就解决了我们在父组件中不能访问子组件中的数据,但是又必须将子组件中的数据进行修改显示的情况,代码如下
<body>
    <div id="container">
        <tpl></tpl>
        <tpl>
            <template slot-scope="slot">
                <!-- <span v-for="attr in slot.data">{{attr}}</span> -->
                <span>{{slot.data.join(' - ')}}</span>
            </template>
        </tpl>
        <tpl></tpl>
    </div>
    <template id="tpl">
        <div>
            <slot :data='languages'>
                <ul>
                    <li v-for='attr in languages'>{{attr}}</li>
                </ul>
            </slot>
        </div>
    </template>
    <script src="./vue.js"></script>
    <script>
        const app = new Vue({
            el: '#container',
            components:{
                tpl:{
                    template:'#tpl',
                    data() {
                        return {
                            languages:['c++','c','java','javascript']
                        }
                    },
                }
            }
        })
    </script>
</body>


 被折叠的 条评论
为什么被折叠?
被折叠的 条评论
为什么被折叠?
 到【灌水乐园】发言


