


 本文详细展示了如何使用Python的smtplib库通过QQ邮箱发送包含图片和文本附件的电子邮件。步骤包括设置SMTP参数、构造邮件对象、添加内容和附件,并最终发送邮件。
废话不多说上代码:
import smtplib
from email.mime.text import MIMEText
from email.header import Header
from email.mime.image import MIMEImage
from email.mime.multipart import MIMEMultipart

# 设置smtp所需要的参数
smtp_server = "smtp.qq.com"  # 邮箱服务器
username = "12517xxxxx@qq.com"  # 账号
password = "lzuawxxxxxx"  # 授权码
sender = "12517xxxxx@qq.com"  # 发邮件的人
receiver = ['158812xxxxx@163.com', '12517xxxxx@qq.com']  # 2个收邮件的人
subject = "邮件测试"  # 邮件主题

# 构造邮件对象MIMEMultipart
# 主题、发件人、收件人、日期显示在邮件页面上
msg = MIMEMultipart('mixed')
msg['Subject'] = subject
msg['From'] = '12517xxxxx@qq.com <12517xxxxx@qq.com>'
msg['TO'] = ";".join(receiver)
msg['Date'] = '2022.11.10'

# 构造文字内容
text = "你好\n这是一个\n测试邮件"
text_plain = MIMEText(text, 'plain', 'utf-8')
msg.attach(text_plain)

# 构造图片附件
send_image_file = open(r'bizhi.jpg', 'rb').read()  # 打开文件,可以使用相对路劲和绝对路径
image = MIMEImage(send_image_file)
image.add_header('Content-ID', '<image1>')
image["Content-Disposition"] = 'attachment; filename="bizhi.jpg"'
msg.attach(image)

# 构造附件
send_file = open(r'programming.txt', 'rb').read()
text_att = MIMEText(send_file, 'base64', 'utf-8')
text_att["Content-Type"] = 'application/octet-stream'
# 重命名附件文件
text_att.add_header('Content-Disposition', 'attachment', filename='测试.txt')
msg.attach(text_att)

# 发送邮件
s = smtplib.SMTP()
s.connect(smtp_server, 25)
s.login(username, password)
s.sendmail(sender, receiver, msg.as_string())
s.quit()
print('发送成功')
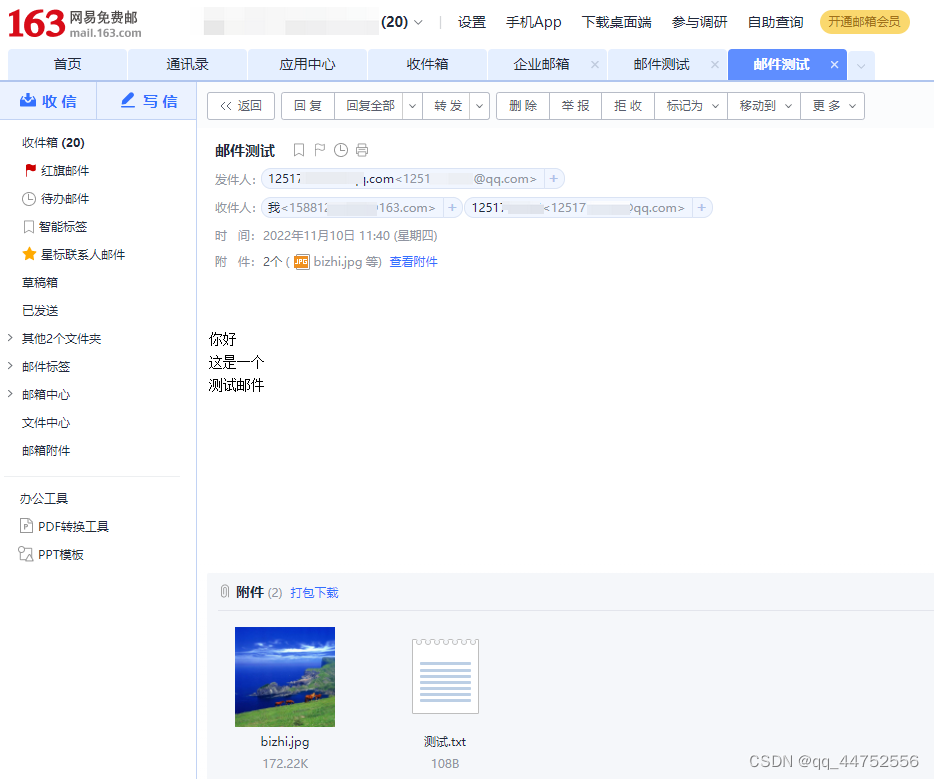
效果:
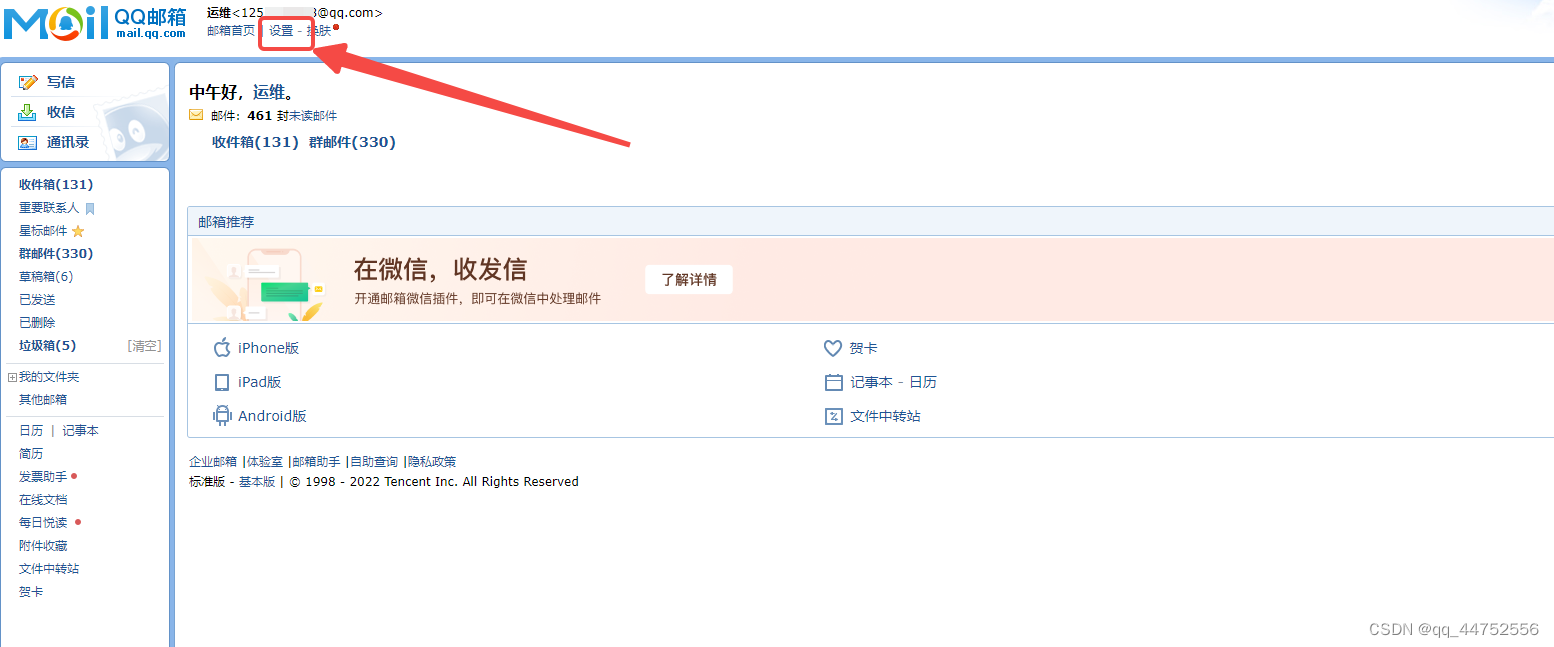
问题1:如何获取授权码?
点击设置。
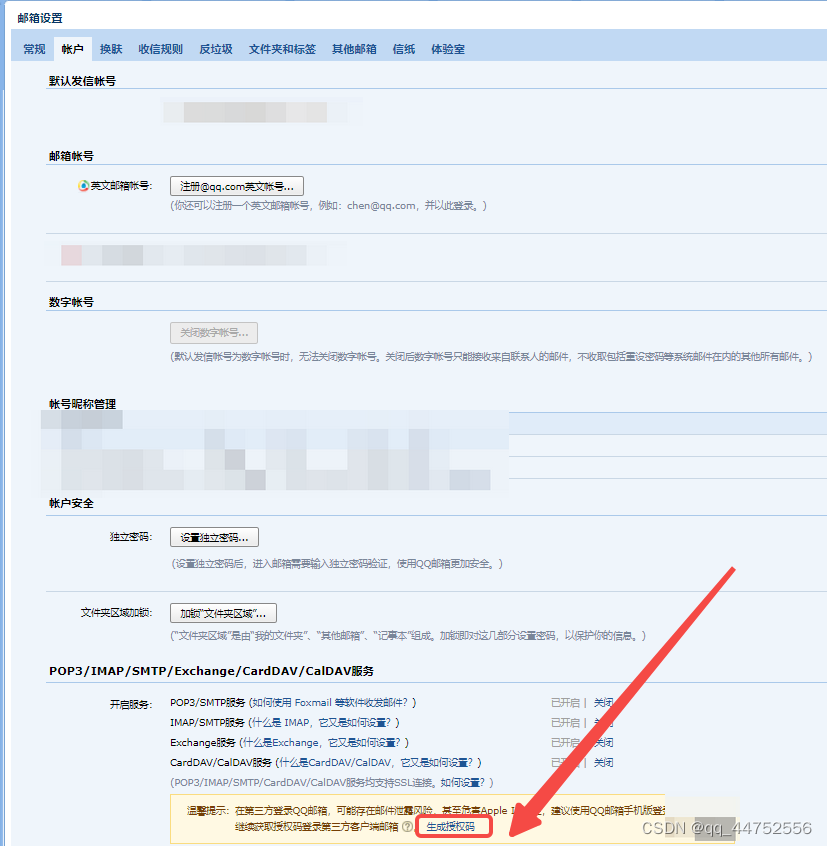
点击生成授权码。


 514
514


 被折叠的 条评论
为什么被折叠?
被折叠的 条评论
为什么被折叠?
 到【灌水乐园】发言


