


什么是消息中间件
消息中间件顾名思义实现的就是在两个系统或两个客户端之间进行消息传送。

什么是ActiveMQ
ActiveMQ是一种开源的基于JMS(Java Message Servie)规范的一种消息中间件的实现,ActiveMQ的设计目标是提供标准的,面向消息的,能够跨越多语言和多系统的应用集成消息通信中间件。
什么时候需要用ActiveMQ
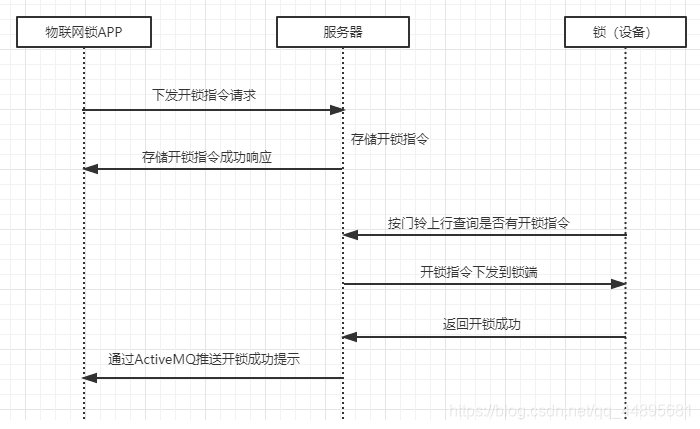
ActiveMQ常被应用与系统业务的解耦,异步消息的推送,增加系统并发量,提高用户体验。例如以我在工作中的使用,在比较耗时且异步的远程开锁操作时。
如何使用ActiveMQ
1.AcitveMQ的数据传送流程

2.ActiveMQ的两种消息传递类型
(1)点对点模式
- 每个消息只有一个消费者(Consumer),即一旦被消费,消息就不再在消息队列中。
- 发送者和接收者之间在时间上没有依赖性,也就是说当发送者发送了消息之后,不管接收者有没有正在运行,它不会影响到消息被发送到队列。
- 接收者在成功接收消息之后需向队列应答成功。
(2)基于发布/订阅模式
包含三个角色:主题(Topic),发布者(Publisher),订阅者(Subscriber) 。多个发布者将消息发送到Topic,系统将这些消息传递给多个订阅者。
- 每个消息可以有多个消费者
- 发布者和订阅者之间有时间上的依赖性。针对某个主题(Topic)的订阅者,它必须创建一个订阅者之后,才能消费发布者的消息。
- 为了消费消息,订阅者必须保持运行的状态。
为了缓和这样严格的时间相关性,JMS允许订阅者创建一个可持久化的订阅。这样,即使订阅者没有被激活(运行),它也能接收到发布者的消息。
如果希望发送的消息可以不被做任何处理、或者只被一个消息者处理、或者可以被多个消费者处理的话,那么可以采用Pub/Sub模型。
两种消息传递类型的不同,点对点传输消费者可以接收到在连接之前生产者所推送的数据,而基于发布/订阅模式的传输方式消费者只能接收到连接之后生产者推送的数据。
集群方案(Master / Slave)
Pure Master Slave
- 无单点故障;
- 不需要依赖共享文件系统或是共享数据库,使用 KahaDB的方式持久化存储;
- 一个Master只能带一个Slave;
- Master工作期间,会将消息状况自动同步到Slave;
- Master一旦崩溃,Slave自动接替其工作,已发送并尚未消费的消息继续有效;
- Slave接手后,必须停止Slave才能重启先前的Master;
Shared File System Master Slave
JDBC Master Slave
- 配置上,不存在Master和Slave的区分,多个共享数据源的Broker构成JDBC Master Slave;
- 首先抢到资源(数据库锁)的Broker成为Master,其他Broker定期尝试抢占资源;
- 一旦Master崩溃,其他Broker抢占资源,最终只有一台抢到,立刻成为Master,之前的Master即便重启成功,也只能作为Slave等待;
ActiveMQ部署
1.查找activemq镜像
[root@test2 ~]# docker search activemq
NAME                                     DESCRIPTION                                     STARS               OFFICIAL            AUTOMATED
webcenter/activemq                       ActiveMQ 5.14.3 with OpenJDK-jre-8-headless …   173                                     [OK]
rmohr/activemq                           Various versions of ActiveMQ neatly packet i…   118                                     [OK]
vromero/activemq-artemis                 ActiveMQ Artemis image (Debian and Alpine ba…   29
2.拉取activemq镜像
[root@test2 ~]# docker pull webcenter/activemq
Using default tag: latest
latest: Pulling from webcenter/activemq
7dcf5a444392: Downloading [==================>                                ]  18.68MB/51.07MB
9eebba75a87f: Download complete
1f0440d87cc7: Download complete
dacd0555c1b4: Download complete
b0f19aa05a94: Downloading [===========================================>       ]  48.25MB/55.76MB
4796f64423b2: Downloading [====>                                              ]  1.973MB/24.05MB
5d994b710cb9: Waiting

[root@test2 ~]# docker images
webcenter/activemq              latest                   3af156432993        3 years ago         422MB
3.运行activemq容器
61616是 activemq 的容器使用端口,8161是 web 页面管理端口
-d:后台运行容器
--name:指定容器名
-p:指定服务运行的端口(61616:应用访问端口;8161:控制台Web端口号)
webcenter/activemq:镜像名
[root@test2 ~]# docker run -itd --name activemq -p 61616:61616 -p 8161:8161 webcenter/activemq
6f3ad16a8abdfa16eea6e86cf096061da1118c9d648d2ab84600fe24d987def4

[root@test2 ~]# docker ps
CONTAINER ID        IMAGE                 COMMAND                  CREATED             STATUS              PORTS                                                                                        NAMES
6f3ad16a8abd        webcenter/activemq    "/app/run.sh"            4 minutes ago       Up 3 minutes        1883/tcp, 5672/tcp, 0.0.0.0:8161->8161/tcp, 61613-61614/tcp, 0.0.0.0:61616->61616/tcp        activemq

[root@test2 ~]# ss -antulp | grep :61616
tcp    LISTEN     0      128      :::61616                :::*                   users:(("docker-proxy",pid=81001,fd=4))

[root@test2 ~]# ss -antulp | grep :8161
tcp    LISTEN     0      128      :::8161                 :::*                   users:(("docker-proxy",pid=81013,fd=4))
4.查看ActiveMQ容器进程信息
[root@test2 ~]# docker top activemq
UID                 PID                 PPID                C                   STIME               TTY                 TIME                CMD
root                81039               81019               0                   17:29               pts/0               00:00:01            /usr/bin/python /usr/bin/supervisord -n -c /etc/supervisor/supervisord.conf
root                81079               81039               0                   17:29               pts/0               00:00:00            /usr/sbin/cron -f
root                81080               81039               0                   17:29               pts/0               00:00:00            sh -c "/usr/bin/java" -Xms64M -Xmx1G -Djava.util.logging.config.file=logging.properties -Djava.security.auth.login.config=/opt/activemq/conf.tmp/login.config -Dcom.sun.management.jmxremote -Djava.awt.headless=true -Djava.io.tmpdir="/opt/activemq//tmp" -Dactivemq.classpath="/opt/activemq/conf.tmp:/opt/activemq//../lib/:" -Dactivemq.home="/opt/activemq/" -Dactivemq.base="/opt/activemq/" -Dactivemq.conf="/opt/activemq/conf.tmp" -Dactivemq.data="/data/activemq" -jar "/opt/activemq//bin/activemq.jar" start ;
root                81123               81080               14                  17:29               pts/0               00:01:05            /usr/bin/java -Xms64M -Xmx1G -Djava.util.logging.config.file=logging.properties -Djava.security.auth.login.config=/opt/activemq/conf.tmp/login.config -Dcom.sun.management.jmxremote -Djava.awt.headless=true -Djava.io.tmpdir=/opt/activemq//tmp -Dactivemq.classpath=/opt/activemq/conf.tmp:/opt/activemq//../lib/: -Dactivemq.home=/opt/activemq/ -Dactivemq.base=/opt/activemq/ -Dactivemq.conf=/opt/activemq/conf.tmp -Dactivemq.data=/data/activemq -jar /opt/activemq//bin/activemq.jar start
修改访问密码
[root@test2 ~]# docker exec -it activemq /bin/bash
root@6f3ad16a8abd:/opt/activemq# ls
LICENSE  README.txt               bin   conf.tmp  docs      lib  webapps
NOTICE   activemq-all-5.14.3.jar  conf  data      examples  tmp  webapps-demo

root@6f3ad16a8abd:/opt/activemq# vim conf.tmp/jetty-realm.properties
...
# Defines users that can access the web (console, demo, etc.)
# username: password [,rolename ...]
admin: admin, admin         //修改密码
user: user, user
配置连接密码
编辑activemq.xml文件,配置放到 shutdownHooks 下方。
root@6f3ad16a8abd:/opt/activemq# vim conf.tmp/activemq.xml
...
121         <shutdownHooks>
122             <bean xmlns="http://www.springframework.org/schema/beans" class="org.apache.activemq.hooks.SpringContextHook" /    >
123         </shutdownHooks>
<!-- 此处添加访问ActiveMQ的账号密码 -->
<plugins>
    <simpleAuthenticationPlugin>
        <users>
            <authenticationUser username="${activemq.username}" password="${activemq.password}" groups="users,admins"/>
        </users>
    </simpleAuthenticationPlugin>
</plugins>
...
                 ||
                 ||
root@6f3ad16a8abd:/opt/activemq# vim conf.tmp/credentials.properties
# Defines credentials that will be used by components (like web console) to access the broker
activemq.username=system      //修改用户
activemq.password=manager     //修改密码
guest.password=password
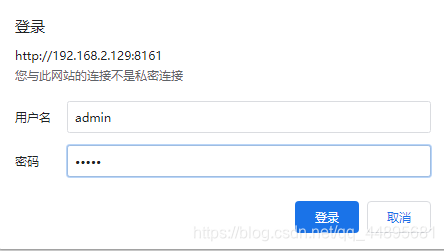
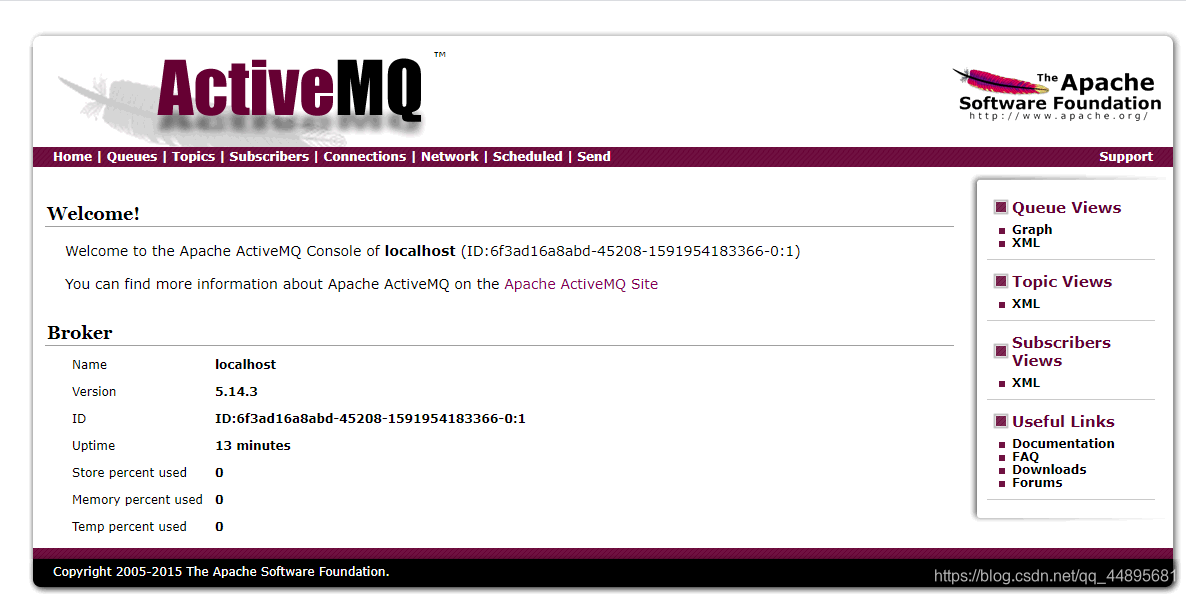
访问ActiveMQ控制台
默认账号/密码:admin/admin
8161是 web 页面管理端口
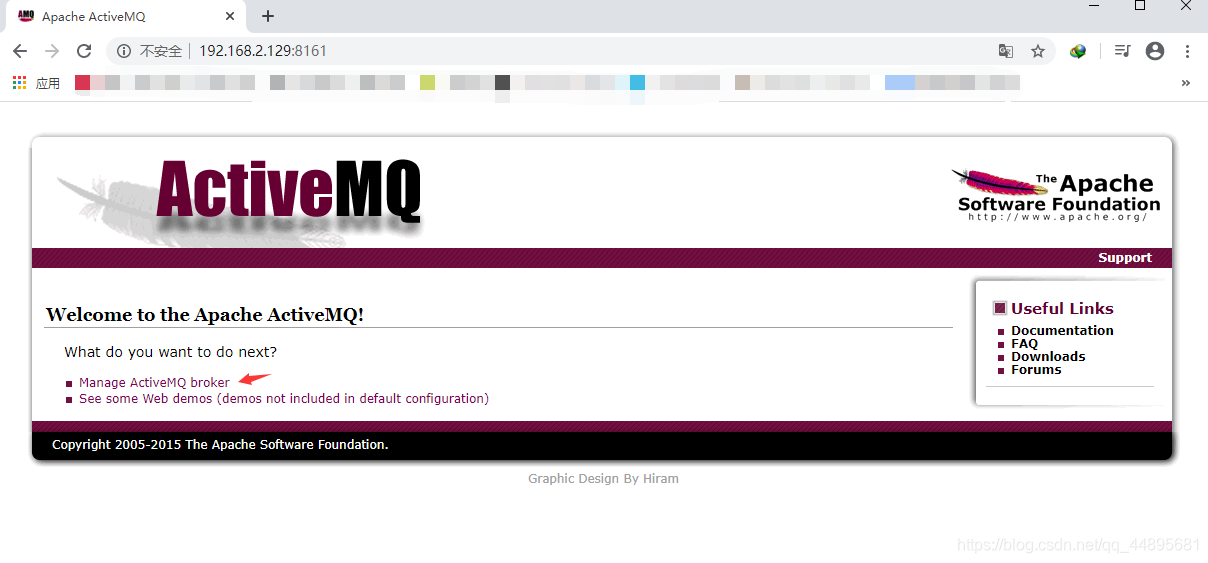
↓↓↓↓↓↓
最近刚申请了个微信公众号,上面也会分享一些运维知识,大家点点发财手关注一波,感谢大家。 【原创公众号】:非著名运维 【福利】:公众号回复 “资料” 送运维自学资料大礼包哦!


 339
339


 被折叠的 条评论
为什么被折叠?
被折叠的 条评论
为什么被折叠?
 到【灌水乐园】发言


