


blog分享站---测试用例设计之自动化测试
首先看看系统的界面如下:
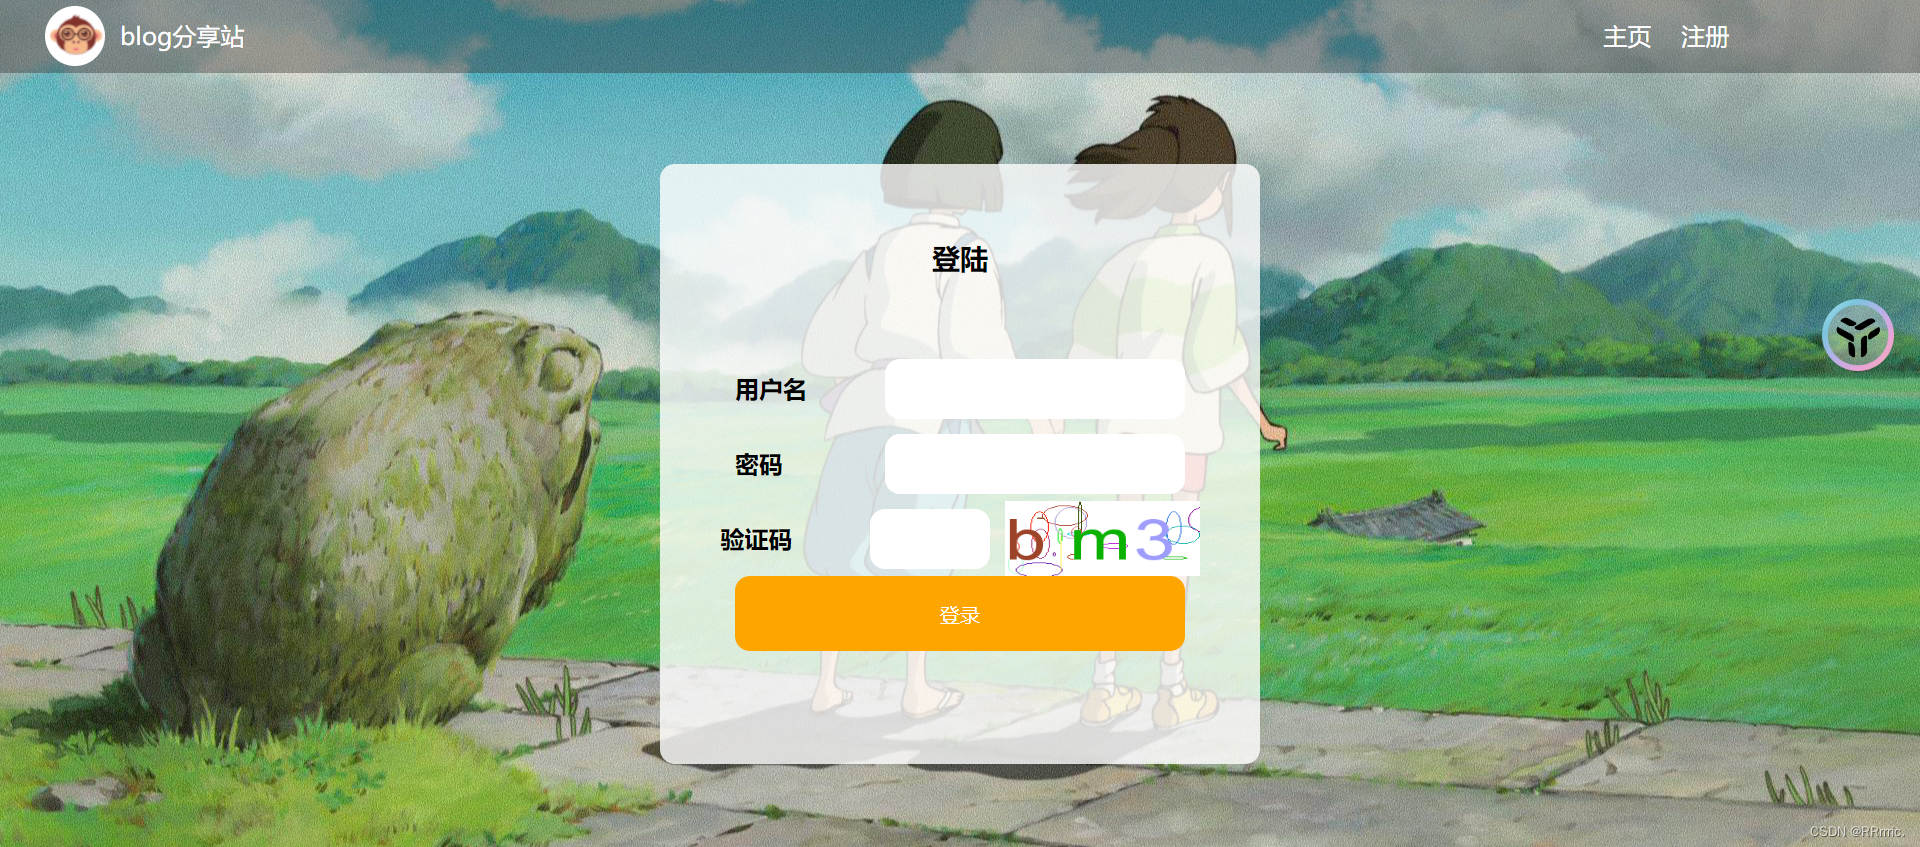
(1)登录界面
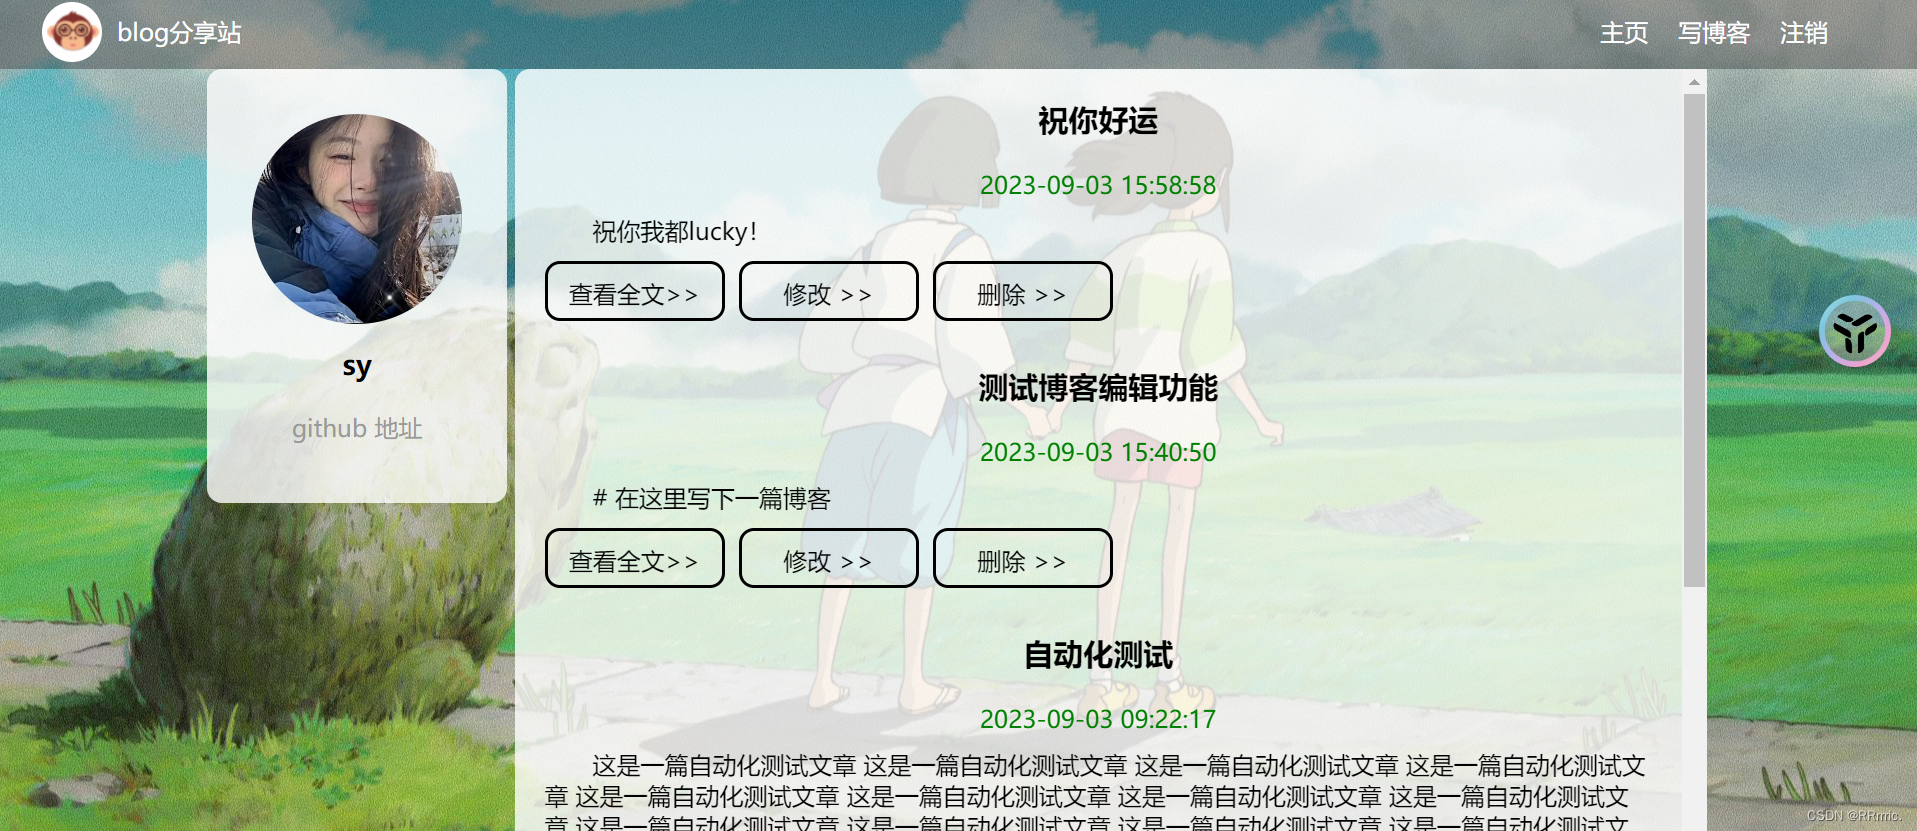
(2)个人博客列表界面:
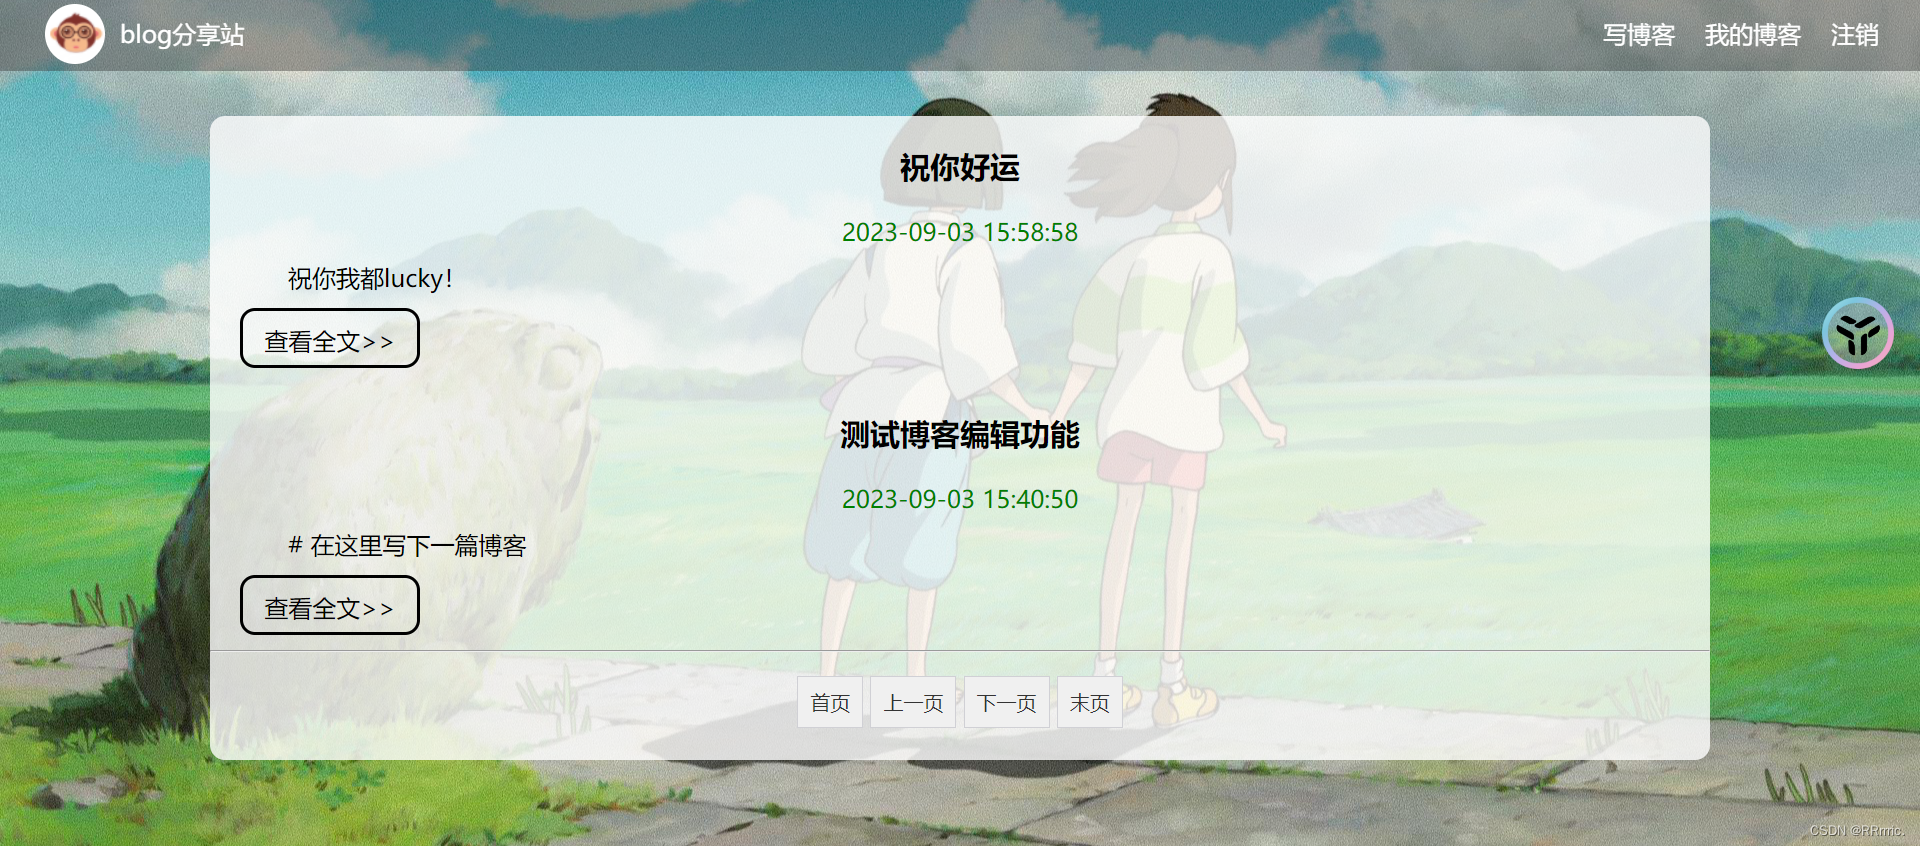
(3) 博客主页:
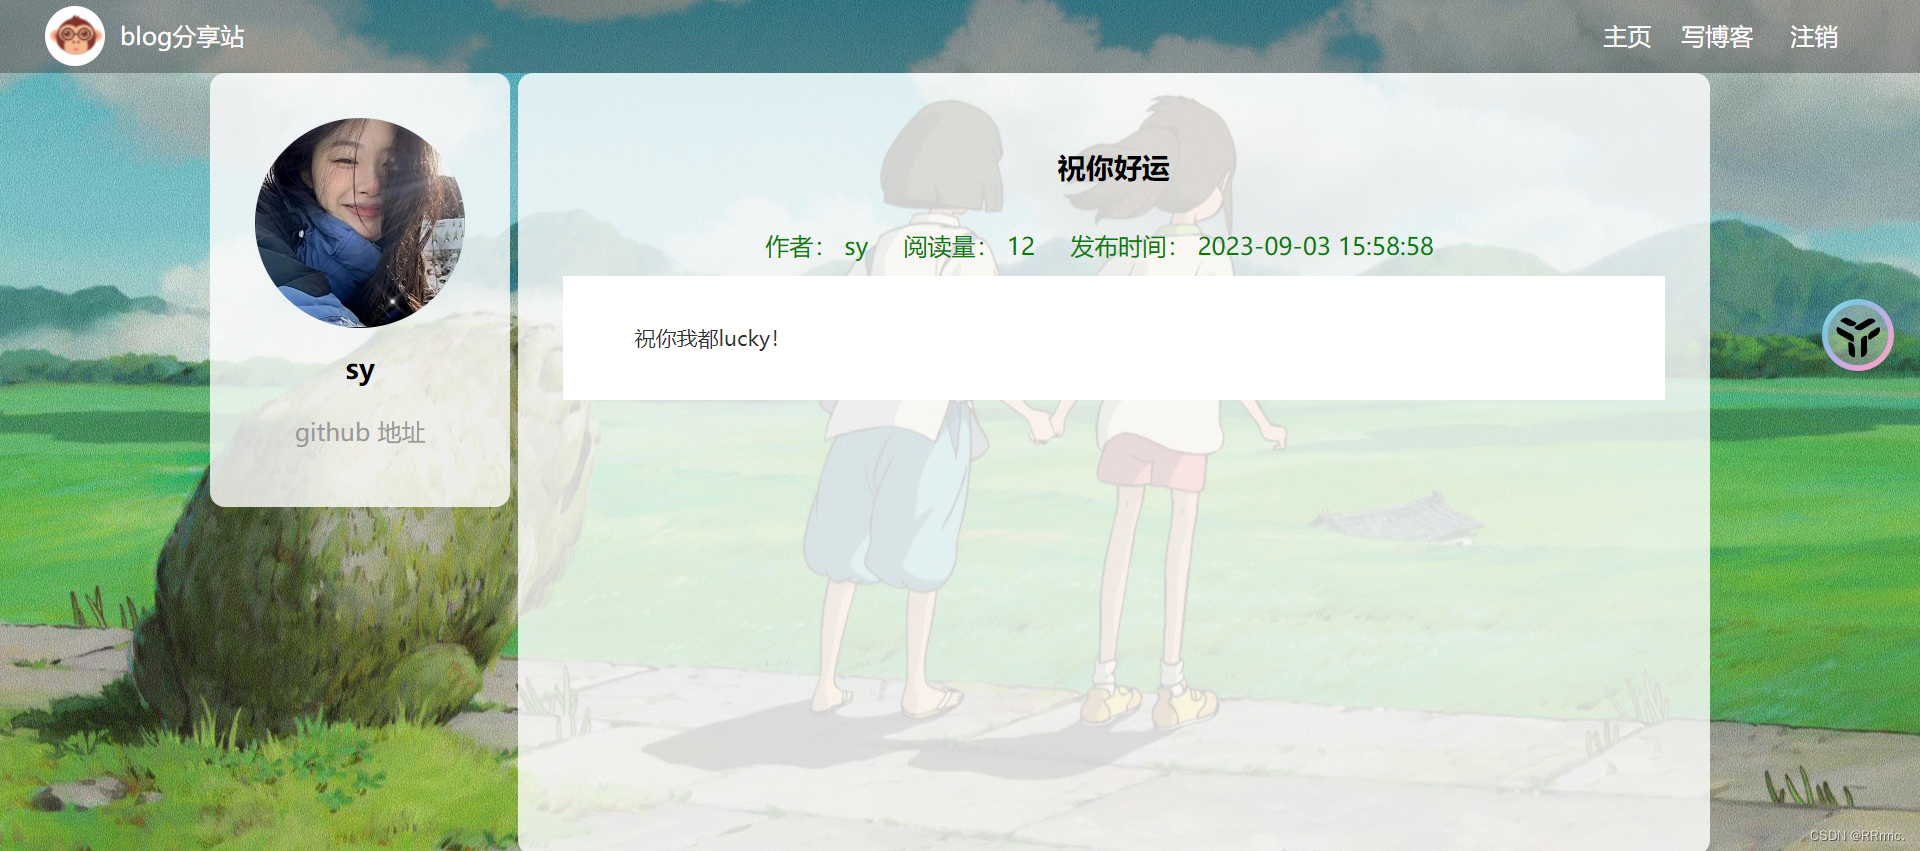
(4)博客详情页界面:
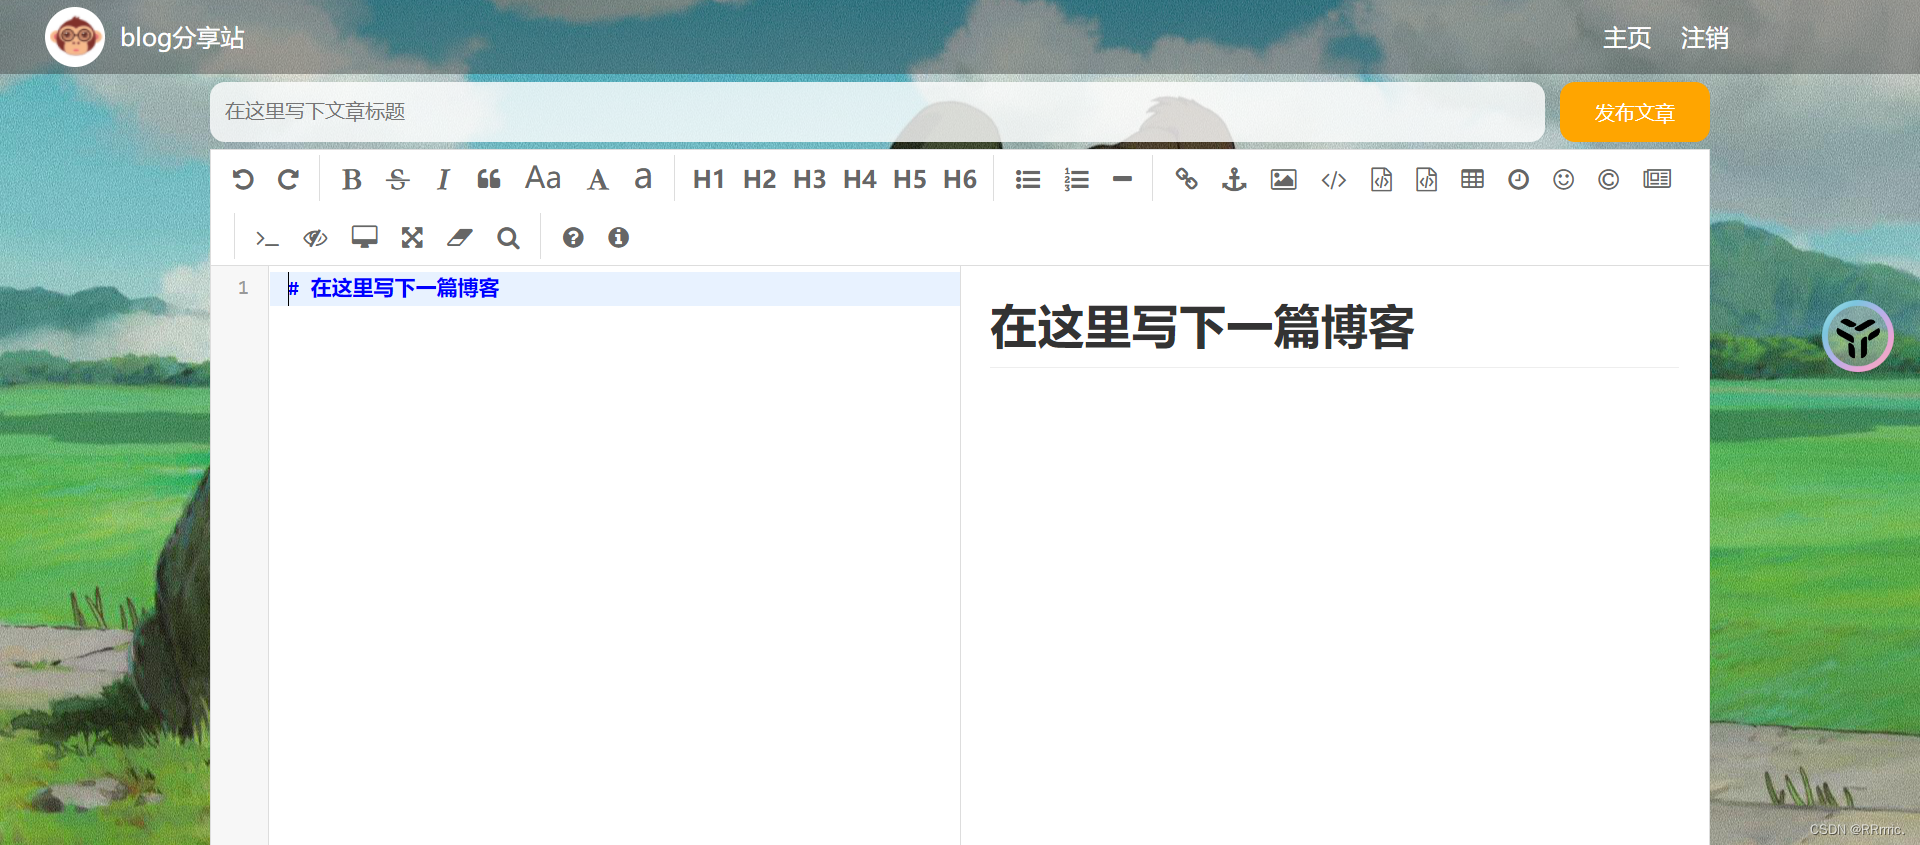
(5)博客编辑界面:
🌷 一 测试用例设计
测试用例一般从这几个方面进行设计:功能、界面、兼容、性能、易用性、安全性、网络。但由于是本人的一个小项目,所以涉及到的方面有限。
项目的完整测试用例点击下方链接:
🌷 二 自动化测试
因为自动化测试是测试一些核心的并且重复性高的功能,所以此处对主要的核心功能进行了自动化测试。
首先需要创建一个类来初始化 webDriver用来加载浏览器驱动执行完测试之后并退出浏览器,然后让测试类继承该类:
public class InitAndEnd {
    static WebDriver webDriver;
    @BeforeAll
    static void SetUp() {
        // 加载浏览器驱动
        webDriver = new ChromeDriver();
    }
    @AfterAll
    static void TearDown() {
        // 退出浏览器
        webDriver.quit();
    }
}
🌺 1 登录测试
输入正确的账号以及密码会登陆成功,此处的账号为“sy”,密码“123”,这里使用 CSV 来获取文件参数的方式进行传参,CSV文件内容如下:

第一个为用户名 username,第二个为用户密码 123,第三个参数为博客列表页 url(用于检测登录成功后是否会跳转到该页面)
/**
     * 测试用例 1:登录测试:登录成功
     * 输入正确的账号、密码,才能登陆成功。因为验证码随机生成,所以屏蔽掉了验证码
     */
    @Order(2)
    @ParameterizedTest
    @CsvFileSource(resources = "LoginSuccess.csv")
     void LoginSuccess(String username, String password, String myblog_list_url) throws InterruptedException {
//        System.out.println(username + password + myblog_list_url);
        // 1.打开博客登录页面
        webDriver.get("http://localhost:8080/login.html");
        sleep(300); // 显示等待
        // 隐式等待 3 s
        webDriver.manage().timeouts().implicitlyWait(3, TimeUnit.SECONDS);

        // 2.输入账号 sy
        webDriver.findElement(By.cssSelector("#username")).sendKeys(username);
        webDriver.manage().timeouts().implicitlyWait(3, TimeUnit.SECONDS);

        // 3.输入密码 123
        webDriver.findElement(By.cssSelector("#password")).sendKeys(password);
        webDriver.manage().timeouts().implicitlyWait(3, TimeUnit.SECONDS);

        // 4.点击登录
        webDriver.findElement(By.cssSelector("#submit")).click();
        webDriver.manage().timeouts().implicitlyWait(3, TimeUnit.SECONDS);

        // 5.跳转到我的个人博客列表 --- 获取到当前页面的url,如果等于目标url,则成功,否则跳转失败
        String cur_url = webDriver.getCurrentUrl();
        Assertions.assertEquals(myblog_list_url, cur_url);
        sleep(300);

        // 6.我的博客列表页展示的用户信息是"sy",当做验证条件
        String cur_username = webDriver.findElement(By.cssSelector
                ("body > div.container > div.container-left > div > h3")).getText();
        Assertions.assertEquals(username, cur_username);
    }
设计一个登录失败的测试用例,当输入不正确的用户名或密码时,点击登录,页面还是会在登录页面,校验当前页面的 url 为登录页面的 url,则测试成功。
/**
     * 测试用例 2: 登陆失败
     * 输入账号密码错误之后,页面还是会在登录页面,不跳转,所以用这个点来验证失败
     */
    @Order(1)
    @Test
    void LoginFail() {
        webDriver.get("http://localhost:8080/login.html");

        webDriver.manage().timeouts().implicitlyWait(3, TimeUnit.SECONDS);
        webDriver.findElement(By.cssSelector("#username")).sendKeys("1");
        webDriver.manage().timeouts().implicitlyWait(3, TimeUnit.SECONDS);

        webDriver.findElement(By.cssSelector("#password")).sendKeys("123");
        webDriver.manage().timeouts().implicitlyWait(3, TimeUnit.SECONDS);

        webDriver.findElement(By.cssSelector("#submit")).click();
        webDriver.manage().timeouts().implicitlyWait(3, TimeUnit.SECONDS);

        // 切换到 alert 弹窗上,accept():点击确认按钮,点击确认之后才能获取到当前页面url
        webDriver.switchTo().alert().accept();
        webDriver.manage().timeouts().implicitlyWait(3, TimeUnit.SECONDS);

        String cur_url = webDriver.getCurrentUrl();
        Assertions.assertEquals("http://localhost:8080/login.html", cur_url);
    }
🌺 2 我的个人博客列表页的测试
通过判断列表页的博客数量不为 0,即可判断
/**
     * 测试用例 3:我的个人博客列表页的测试
     * 通过判断列表页的博客数量不为 0,即可进行测试
     */
    @Order(3)
    @Test
    void MyBlogList() {
        // 1. 打开博客列表页
        webDriver.get("http://localhost:8080/myblog_list.html");

        // 2. 获取到页面上所有博客标题对应的元素,找到的是一批元素,所以 findElements
        webDriver.manage().timeouts().implicitlyWait(3, TimeUnit.SECONDS);
        int title_num = webDriver.findElements(By.cssSelector(".title")).size();

        // 3. 如果元素的数量不为0,测试通过
        Assertions.assertNotEquals(0, title_num);
    }
🌺 3 博客主页的测试
判断主页博客的数量不为 0,并且可以找到翻页的按钮,一共有 4个,判断数量为 4,校验按钮的数量以及博客的数量来验证主页的展示功能。
/**
     * 测试用例 4:博客主页的测试
     * 判断主页博客的数量不为 0,并且可以找到翻页的按钮,一共有 4个,判断数量为 4
     */
    @Order(4)
    @Test
    void BlogList(){
        // 1. 打开博客列表页
        webDriver.get("http://localhost:8080/blog_list.html");

        // 2. 获取到页面上所有博客标题对应的元素,找到的是一批元素,所以 findElements
        webDriver.manage().timeouts().implicitlyWait(3, TimeUnit.SECONDS);
        int title_num = webDriver.findElements(By.cssSelector(".title")).size();
        int button_num = webDriver.findElements(By.cssSelector(".blog-pagnation-item")).size();

        // 3. 如果元素的数量不为0,测试通过
        Assertions.assertNotEquals(0, title_num);
        Assertions.assertEquals(4, button_num);
    }
🌺 4 编写博客测试
在此用例中,编写完文章并发布之后,页面会跳转到个人博客列表页,所以判断跳转的页面 url 与预期的 url 是否一致。
/**
  * 测试用例 4:写博客
  */
 @Test
 @Order(4)
 void EditBlog() throws InterruptedException {
     // 打开博客列表页,找到写博客按钮,点击
     webDriver.findElement(By.cssSelector("body > div.nav > a:nth-child(5)")).click();
     webDriver.manage().timeouts().implicitlyWait(3, TimeUnit.SECONDS);
     // 通过 js 将标题进行输入,需要将 webDriver 进行强制转换为 JavascriptExecutor 类型
     ((JavascriptExecutor)webDriver).executeScript(
             "document.getElementById(\"title\").value=\"自动化测试\"");
     sleep(3000);
     // 点击发布
     webDriver.findElement(By.cssSelector("#submit")).click();
     sleep(3000);
     // 进行校验
     // 获取当前的 url
     String cur_url = webDriver.getCurrentUrl();
     Assertions.assertEquals(
             "http://localhost:8080/blog_system-2/blog_list.html", cur_url);
 }
🌺 5 博客详情页的测试
通过方法来传参,方法如下:
public static Stream<Arguments> Generator() {
        return Stream.of(Arguments.arguments("http://localhost:8080/blog_content.html?id=",
                "博客正文", "祝你好运"));
    }
判断验证博客详情页第一篇博客以及博客的标题:
/**
     * 测试用例 5:博客详情页的测试
     * 通过方法传参
     */
    @Order(5)
    @ParameterizedTest
    @MethodSource("Generator")
    void BlogDetail(String expected_url, String expected_title, String expected_blog_title) {
//        webDriver.get("http://localhost:8080/myblog_list.html");
        // 1. 找到第一篇博客的“查看全文”按钮,并点击
        webDriver.manage().timeouts().implicitlyWait(3, TimeUnit.SECONDS);
        webDriver.findElement(By.xpath("//*[@id=\"artlist\"]/div[1]/a[1]")).click();
        // 2. 获取当前页面的 url --- 此时是没有窗口切换的,它是在一个页面的,
        // 窗口切换是指重新开启了一个新窗口才是窗口的切换
        String cur_url = webDriver.getCurrentUrl();
        webDriver.manage().timeouts().implicitlyWait(3, TimeUnit.SECONDS);

        // 3. 获取当前页面的title
        String cur_title = webDriver.getTitle();
        webDriver.manage().timeouts().implicitlyWait(3, TimeUnit.SECONDS);

        // 4. 获取博客标题,获取标题的文本
        String blog_title = webDriver.findElement(By.xpath("//*[@id=\"title\"]")).getText();
        webDriver.manage().timeouts().implicitlyWait(3, TimeUnit.SECONDS);

        // 5. 校验
//        Assertions.assertEquals(expected_url, cur_url);
        // 方法中传入的 expected_url 不同给 id 传参,因为上边的测试用例会新增博客,每次增加的博客 id 都会有变化
        if(cur_url.contains(expected_url)) {
            System.out.println("测试通过");
        } else {
            System.out.println("测试不通过");
        }
        Assertions.assertEquals(expected_title, cur_title);
        Assertions.assertEquals(expected_blog_title, blog_title);
    }
🌺 6 写博客功能的测试
*写完博客发布时会出现弹框(询问是否继续添加文章)点击确定,会刷新当前页面(依旧在博客编辑页面), 单击取消会返回到 个人博客页面
 /**
     * 测试用例 6:写博客功能的测试
     * 写完博客发布时会出现弹框(询问是否继续添加文章)点击确定,会刷新当前页面(依旧在博客编辑页面),
     * 单击取消会返回到 个人博客页面
     */
    @Order(6)
    @Test
    void EditBlog() throws InterruptedException {
        // 1. 找到写博客按钮,点击
        webDriver.findElement(By.cssSelector("#userElement > a:nth-child(1)")).click();
        webDriver.manage().timeouts().implicitlyWait(3, TimeUnit.SECONDS);
        // 2. 找到输入框,输入标题(不采用这个方式)
        // 通过 js 将标题输入 (采取这个方式)
        ((JavascriptExecutor)webDriver).executeScript(
                "document.getElementById(\"title\").value=\"study\"");
        sleep(1000);
        // 3. 点击发布
        webDriver.findElement(By.cssSelector("body > div.blog-edit-container > div.title > button")).click();
        sleep(1000);

        // 4.1 获取当前 url,校验页面跳转是否正确。点击确定添加文章,url仍然是编辑页的
        webDriver.switchTo().alert().accept();
        String cur_url = webDriver.getCurrentUrl();
        Assertions.assertEquals("http://localhost:8080/blog_add.html", cur_url);
        // 4.2 获取当前 url,校验页面跳转是否正确。点击取消添加文章,页面跳转到个人博客列表页
//        webDriver.switchTo().alert().dismiss();
//        String cur_url = webDriver.getCurrentUrl();
//        Assertions.assertEquals("http://localhost:8080/myblog_list.html", cur_url);
    }
🌺 7 发布博客之后进行校验
发布博客之后对个人博客页面的验证,测试新博客的 标题以及时间 是否正确
/**
     * 测试用例 7:发布博客之后进行校验
     * 验证新博客的 标题以及时间 是否正确
     */
    @Order(7)
    @Test
    void BlogInfoChecked() {
        webDriver.get("http://localhost:8080/myblog_list.html");
        // 1. 获取到第一篇博客标题
        String first_blog_title = webDriver.findElement(
                By.cssSelector("#artlist > div:nth-child(1) > div.title")).getText();
        // 2. 获取第一篇博客发布时间
        String first_blog_time = webDriver.findElement(
                By.xpath("//*[@id=\"artlist\"]/div[1]/div[2]")).getText();
        // 3. 校验标题和时间是否正确
        Assertions.assertEquals("study", first_blog_title);
        if(first_blog_time.contains("2023-09-03")){
            System.out.println("测试通过");
        } else {
            System.out.println("测试未通过");
        }
    }
🌺 8 删除博客功能的测试。
点击删除,出现是否确认删除的弹框,然后点击确认,通过查看当前第一篇文章的标题来判断是否删除成功
/**
     * 测试用例 8:删除博客功能
     * 点击删除,出现是否确认删除的弹框,然后点击确认,通过查看当前第一篇文章的标题来判断是否删除成功
     */
    @Order(8)
    @Test
    void DelBlog() {
        // 1. 打开博客列表页面
        webDriver.get("http://localhost:8080/myblog_list.html");
        webDriver.manage().timeouts().implicitlyWait(3, TimeUnit.SECONDS);

        // 2. 找到删除按钮并点击点击删除按钮
        webDriver.findElement(By.cssSelector
                ("#artlist > div:nth-child(1) > a:nth-child(6)")).click();
        webDriver.manage().timeouts().implicitlyWait(3, TimeUnit.SECONDS);

        // 3.1 点击取消删除按钮,判断当前标题如果是"study",那么测试成功
//        webDriver.switchTo().alert().dismiss();
//        webDriver.manage().timeouts().implicitlyWait(3, TimeUnit.SECONDS);
//        String cur_title = webDriver.findElement(By.cssSelector
//                ("#artlist > div:nth-child(1) > div.title")).getText();
//        Assertions.assertEquals("study", cur_title);

        // 3.2 点击弹框中的“确认”
        webDriver.switchTo().alert().accept();
        webDriver.manage().timeouts().implicitlyWait(3, TimeUnit.SECONDS);
        // 判断当前第一个文章的标题是不是“祝你好运”,如果是那么删除成功
        String cur_title = webDriver.findElement(By.cssSelector
                ("#artlist > div:nth-child(1) > div.title")).getText();
        Assertions.assertEquals("祝你好运", cur_title);
    }
🌺 8 注销功能
点击注销,出现弹框,点击确认之后,会回到博客主页(主页是不需要登录就可以看到的),然后验证url是否正确。
/**
     * 测试用例 9:注销功能
     */
    @Order(9)
    @Test
    void Logout() {
        webDriver.manage().timeouts().implicitlyWait(3, TimeUnit.SECONDS);
        webDriver.findElement(By.cssSelector("body > div.nav > a:nth-child(6)")).click();
        webDriver.switchTo().alert().accept();
        // 校验url,回到了博客主页
        String cur_url = webDriver.getCurrentUrl();
        Assertions.assertEquals("http://localhost:8080/blog_list.html", cur_url);
    }
📢完结撒🌸
以上便是完整的测试用例以及自动化测试啦~~~


 4508
4508


 到【灌水乐园】发言


