


在一些对并发业务要求较高的场景下,对页面数据的响应是个急需解决的问题,对后端来说,ehcache+redis实现双缓存是解决这一问题的不错思路,而且在不少的电商项目中得到了很好的验证,但我在网上搜寻资料的时候总觉得一些材料不能很好的说明这个问题,要么太复杂,要么太简单,最近抽空思考了一下这一思路的简单实现,下面就用springboot整合ehcache和redis来说明一下实现的过程,
需求说明,这里有个商品,加入页面需要查询这个商品的基本信息,正常情况下,我们会执行一次sql查询即可查询出商品信息,但并发量大的情况下,大量的查询导致数据库连接开销非常大,所以首先走redis缓存,redis没有查到,则走本地的ehcache堆缓存,如果ehcache也没有找到,则走mysql,然后把查询到的数据放入到redis和ehcache中,下面就来整合一下这个思路,
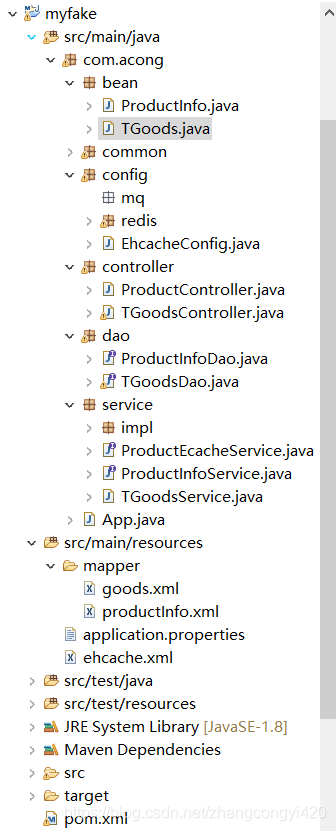
1、整个项目的结构如图所示,这里为了交互方便,我使用的框架是mybatis
2、pom依赖文件
<!-- 新版本springboot使用2.0.3 -->
<parent>
<groupId>org.springframework.boot</groupId>
<artifactId>spring-boot-starter-parent</artifactId>
<version>2.0.1.RELEASE</version>
<relativePath />
</parent>
<properties>
<project.build.sourceEncoding>UTF-8</project.build.sourceEncoding>
<project.reporting.outputEncoding>UTF-8</project.reporting.outputEncoding>
<java.version>1.8</java.version>
</properties>
<dependencies>
<dependency>
<groupId>org.springframework.boot</groupId>
<artifactId>spring-boot-starter-web</artifactId>
</dependency>
<dependency>
<groupId>org.springframework.boot</groupId>
<artifactId>spring-boot-starter-test</artifactId>
<scope>test</scope>
</dependency>
<!-- redis依赖 -->
<dependency>
<groupId>org.springframework.boot</groupId>
<artifactId>spring-boot-starter-data-redis</artifactId>
</dependency>
<!-- Redis客户端jedis依赖 ,2.0.3之前的版本可以去掉该依赖,直接使用上面的即可 -->
<dependency>
<groupId>redis.clients</groupId>
<artifactId>jedis</artifactId>
<version>2.9.0</version>
</dependency>
<!-- fastjson 依赖 -->
<dependency>
<groupId>com.alibaba</groupId>
<artifactId>fastjson</artifactId>
<version>1.2.8</version>
</dependency>
<!-- mybatis依赖 -->
<dependency>
<groupId>org.mybatis.spring.boot</groupId>
<artifactId>mybatis-spring-boot-starter</artifactId>
<version>1.3.0</version>
</dependency>
<dependency>
<groupId>mysql</groupId>
<artifactId>mysql-connector-java</artifactId>
<scope>runtime</scope>
</dependency>
<dependency>
<groupId>com.alibaba</groupId>
<artifactId>druid-spring-boot-starter</artifactId>
<version>1.1.10</version>
</dependency>
<dependency>
<groupId>commons-collections</groupId>
<artifactId>commons-collections</artifactId>
<version>3.2.2</version>
</dependency>
<!-- https://mvnrepository.com/artifact/net.sourceforge.jexcelapi/jxl -->
<dependency>
<groupId>net.sourceforge.jexcelapi</groupId>
<artifactId>jxl</artifactId>
<version>2.6.12</version>
</dependency>
<dependency>
<groupId>com.google.code.gson</groupId>
<artifactId>gson</artifactId>
<version>2.8.2</version>
</dependency>
<!-- https://mvnrepository.com/artifact/net.sf.ehcache/ehcache -->
<dependency>
<groupId>net.sf.ehcache</groupId>
<artifactId>ehcache</artifactId>
<version>2.10.4</version>
</dependency>
<!-- https://mvnrepository.com/artifact/org.projectlombok/lombok -->
<dependency>
<groupId>org.projectlombok</groupId>
<artifactId>lombok</artifactId>
<version>1.18.2</version>
<scope>provided</scope>
</dependency>
<!-- https://mvnrepository.com/artifact/org.apache.httpcomponents/httpclient -->
<dependency>
<groupId>org.apache.httpcomponents</groupId>
<artifactId>httpclient</artifactId>
<version>4.5.2</version>
</dependency>
<dependency>
<groupId>org.javassist</groupId>
<artifactId>javassist</artifactId>
<version>3.24.0-GA</version>
</dependency>
<!-- https://mvnrepository.com/artifact/org.springframework.kafka/spring-kafka -->
<dependency>
<groupId>org.springframework.kafka</groupId>
<artifactId>spring-kafka</artifactId>
<version>2.1.11.RELEASE</version>
</dependency>
<!-- https://mvnrepository.com/artifact/org.apache.kafka/kafka-clients -->
<dependency>
<groupId>org.apache.kafka</groupId>
<artifactId>kafka-clients</artifactId>
<version>1.1.0</version>
</dependency>
<!-- redis依赖 -->
<dependency>
<groupId>org.springframework.boot</groupId>
<artifactId>spring-boot-starter-data-redis</artifactId>
</dependency>
<!-- Redis客户端jedis依赖 ,2.0.3之前的版本可以去掉该依赖,直接使用上面的即可 -->
<dependency>
<groupId>redis.clients</groupId>
<artifactId>jedis</artifactId>
<version>2.9.0</version>
</dependency>
</dependencies>
<!-- 指定maven版本 -->
<build>
<plugins>
<plugin>
<groupId>org.springframework.boot</groupId>
<artifactId>spring-boot-maven-plugin</artifactId>
</plugin>
</plugins>
</build>
3、application.properties配置
server.port=8082
spring.datasource.url=jdbc:mysql://localhost:3306/babaytun?useUnicode=true&characterEncoding=utf-8&useSSL=false
spring.datasource.driver-class-name=com.mysql.jdbc.Driver
spring.datasource.username=root
spring.datasource.password=root
spring.jackson.date-format=yyyy-MM-dd HH:mm:ss
spring.jackson.locale=GMT+8
#mybatis配置
#mybatis.type-aliases-package=com.acong.entity
mybatis.mapper-locations=classpath:/mapper/*.xml
mybatis.configuration.map-underscore-to-camel-case=true
#打印sql语句
logging.level.com.acong.dao= debug
#整合redis
spring.redis.database=3
spring.redis.port=6379
spring.redis.host=localhost
spring.redis.database=2
spring.redis.jedis.pool.max-active=100
spring.redis.jedis.pool.max-idle=100
spring.redis.jedis.pool.min-idle=10
spring.redis.jedis.pool.max-wait=50000ms
4、ehchche配置
关于ehcache的使用,大家可自行查找一下相关资料补习一下,用起来很简单,只要xml的配置文件没问题就可以,更深入的其实都在ehcache的配置文件中,作为本地的堆缓存,在应对数据量不是特别大的场景,使用ehcache是个不错的选择,一般是配合redis和其他的缓存工具以一起使用,这里直接贴上,提供参考,
<?xml version="1.0" encoding="UTF-8"?>
<ehcache xmlns:xsi="http://www.w3.org/2001/XMLSchema-instance"
xsi:noNamespaceSchemaLocation="http://ehcache.org/ehcache.xsd"
updateCheck="false">
<!-- diskStore:ehcache其实是支持内存+磁盘+堆外内存,几个层级的缓存 -->
<!-- 在这里设置一下,但是一般不用的 ,这里是基于磁盘的缓存-->
<diskStore path="java.io.tmpdir/Tmp_EhCache" />
<!-- defaultCache,是默认的缓存策略 -->
<!-- 如果你指定的缓存策略没有找到,那么就用这个默认的缓存策略 -->
<!-- external:如果设置为true的话,那么timeout就没有效果,缓存就会一直存在,一般默认就是false -->
<!-- maxElementsInMemory:内存中可以缓存多少个缓存条目,在实践中,
你是需要自己去计算的,比如你计算你要缓存的对象是什么?有多大?最多可以缓存多少MB,或者多少个G的数据?除以每个对象的大小,计算出最多可以放多少个对象 -->
<!-- overflowToDisk:如果内存不够的时候,是否溢出到磁盘 -->
<!-- diskPersistent:是否启用磁盘持久化的机制,在jvm崩溃的时候和重启之间,不用 -->
<!-- timeToIdleSeconds:对象最大的闲置的时间,如果超出闲置的时间,可能就会过期,我们这里就不用了,缓存最多闲置5分钟就被干掉了 -->
<!-- timeToLiveSeconds:对象最多存活的时间,我们这里也不用,超过这个时间,缓存就过期,就没了 -->
<!-- memoryStoreEvictionPolicy:当缓存数量达到了最大的指定条目数的时候,需要采用一定的算法,
从缓存中清除一批数据,LRU,最近最少使用算法,最近一段时间内,最少使用的那些数据,就被干掉了 -->
<defaultCache
eternal="false"
maxElementsInMemory="1000"
overflowToDisk="false"
diskPersistent="false"
timeToIdleSeconds="300"
timeToLiveSeconds="0"
memoryStoreEvictionPolicy="LRU" />
<!-- 手动指定的缓存策略 -->
<!-- 比如你一个应用吧,可能要缓存很多种不同的数据,比如说商品信息,或者是其他的一些数据 -->
<!-- 对不同的数据,缓存策略可以在这里配置多种 -->
<cache
name="local"
eternal="false"
maxElementsInMemory="1000"
overflowToDisk="false"
diskPersistent="false"
timeToIdleSeconds="300"
timeToLiveSeconds="0"
memoryStoreEvictionPolicy="LRU" />
<!-- ehcache这种东西,简单实用,是很快速的,1小时上手可以用在项目里了,没什么难度的 -->
<!-- ehcache这个技术,如果讲深了,里面的东西还是很多的,高级的feature,但是我们这里就不涉及了 -->
</ehcache>
5、接下来是ehcache的配置类和redis的配置类
springboot在启动的时候会自动将这两个配置类纳入全局的bean容器管理中,
/**
* 本地堆缓存配置类
* @author asus
*/
@Configuration
@EnableCaching
public class EhcacheConfig {
@Bean
public EhCacheManagerFactoryBean ehCacheManagerFactoryBean() {
EhCacheManagerFactoryBean cacheManagerFactoryBean = new EhCacheManagerFactoryBean();
cacheManagerFactoryBean.setConfigLocation(new ClassPathResource("ehcache.xml"));
cacheManagerFactoryBean.setShared(true);
return cacheManagerFactoryBean;
}
@Bean
public EhCacheCacheManager eCacheCacheManager(EhCacheManagerFactoryBean bean) {
return new EhCacheCacheManager(bean.getObject());
}
}
/**
* redis序列化bean
* @author asus
*
*/
@Configuration
public class RedisConfig {
@Bean
public RedisTemplate<String, String> redisTemplate(RedisConnectionFactory factory) {
StringRedisTemplate template = new StringRedisTemplate(factory);
//定义value的序列化方式
Jackson2JsonRedisSerializer jackson2JsonRedisSerializer = new Jackson2JsonRedisSerializer(Object.class);
ObjectMapper om = new ObjectMapper();
om.setVisibility(PropertyAccessor.ALL, JsonAutoDetect.Visibility.ANY);
om.enableDefaultTyping(ObjectMapper.DefaultTyping.NON_FINAL);
jackson2JsonRedisSerializer.setObjectMapper(om);
template.setValueSerializer(jackson2JsonRedisSerializer);
template.setHashValueSerializer(jackson2JsonRedisSerializer);
template.afterPropertiesSet();
return template;
}
}
6、接下来就是具体的业务代码部分
6.1 创建一个实体类,和数据库的表相对应,
1
/**
* 商品实体类
* @author asus
*
*/
public class ProductInfo {
private int id;
private String name;
private Double price;
public int getId() {
return id;
}
public void setId(int id) {
this.id = id;
}
public String getName() {
return name;
}
public void setName(String name) {
this.name = name;
}
public Double getPrice() {
return price;
}
public void setPrice(Double price) {
this.price = price;
}
}
6.2 这里主要来看看ehcache的一个service类,使用ehcache作为缓存,其实基本上有两个注解就够了,一个是加入缓存的注解,@CachePut ,一个是取出缓存数据的@Cacheable注解,当然还有一个删除缓存的@CacheEvict 使缓存失效的,用法很简单,只需要在方法上面添加即可,
/**
* 商品堆缓存操作类
* @author asus
*
*/
@Service("productEcacheService")
public class ProductEcacheServiceImpl implements ProductEcacheService{
private static final String CACHE_NAME = "local";
/**
* 将商品信息放入本地堆缓存
*/
@CachePut(value=CACHE_NAME,key="'key_'+#productInfo.getId()")
public ProductInfo saveLocalCache(ProductInfo productInfo) {
return productInfo;
}
/**
* 从本地缓存获取商品信息
*/
@Cacheable(value=CACHE_NAME,key="'key_'+#id")
public ProductInfo getLocalCache(int id) {
return null;
}
}
6.3 xml中写了个查询的方法,
<?xml version="1.0" encoding="UTF-8"?>
<!DOCTYPE mapper
PUBLIC "-//mybatis.org//DTD Mapper 3.0//EN"
"http://mybatis.org/dtd/mybatis-3-mapper.dtd">
<mapper namespace="com.acong.dao.ProductInfoDao">
<select id="getProductInfoById" parameterType="java.lang.Integer" resultType="com.acong.bean.ProductInfo">
select * from product_info where id = #{id}
</select>
<select id="getAll" resultType="com.acong.bean.ProductInfo">
select * from product_info;
</select>
</mapper>
6.4 最后来看看测试的controller,
/**
* 商品测试controller
* @author asus
*
*/
@Controller
public class ProductController {
@Autowired
private ProductInfoService productInfoService;
@RequestMapping("/getSingleProductInfo")
@ResponseBody
public ProductInfo getSingleProductInfo(int id){
return productInfoService.getProductInfoById(id);
}
}
/**
* 商品测试service
* @author asus
*
*/
@Service("productInfoService")
public class ProductInfoServiceImpl implements ProductInfoService{
@Autowired
private ProductInfoDao productInfoDao;
@Autowired
private ProductEcacheService productEcacheService;
@Autowired
private StringRedisTemplate redisTemplate;
@Override
public ProductInfo getProductInfoById(int id) {
String productInfoStr = redisTemplate.opsForValue().get("product:"+id);
if(!StringUtils.isEmpty(productInfoStr)){
JSONObject object = JSON.parseObject(productInfoStr);
ProductInfo productInfo = JSONObject.toJavaObject(object, ProductInfo.class);
System.out.println("我是从redis中查出来的: ======= >>>" + id);
return productInfo;
}else{
//如果redis里面不存在,则去查一下ehcache
ProductInfo cacheInfo = productEcacheService.getLocalCache(id);
if(cacheInfo != null){
System.out.println("我是从ehcache中查出来的: ======= >>>" + id);
return cacheInfo;
}else{//ehcache 也不存在,则就需要查询数据库了
ProductInfo dbInfo = productInfoDao.getProductInfoById(id);
if(dbInfo != null){
redisTemplate.opsForValue().set("product:"+id, JSONObject.toJSONString(dbInfo));
System.out.println("我是从mysql中查出来的: ======= >>>" + id);
productEcacheService.saveLocalCache(dbInfo);
return dbInfo;
}else{
return null;
}
}
}
}
@Override
public List<ProductInfo> getAll() {
return productInfoDao.getAll();
}
}
数据库里面我提前建一个测试用的表,初始化了两条数据,
然后来启动一下我们的项目,验证一下整个流程,springboot的启动类,
@SpringBootApplication
public class App {
public static void main(String[] args) {
SpringApplication.run(App.class, args);
}
}
启动后,我们来到浏览器上输入一下,这里要注意将本地的redis启动,否则会报错的,
http://localhost:8082/getSingleProductInfo?id=11212
第一次查询,可以看到直接走了数据库,因为这时我们还没有在redis和ehcache中放过任何数据,但第一次查询出来后,数据会同步存到redis和ehcache中,
第二次请求,可以看到这时候走了redis,而且页面的响应速度快了很多,
这时候我们在redis的客户端执行一下,flushall的命令,清除一下redis中的数据,再请求一次试试,
可以看到,这一次走的是ehcache缓存,响应速度同样很快,至少比直接查询数据库要快很多
顺便附上源码下载地址,有需要的小伙伴可自行下载:
https://download.csdn.net/download/zhangcongyi420/11058883
-------------------------------------------------------------------------------------------
原文:https://blog.csdn.net/zhangcongyi420/article/details/88808390


 2736
2736


 被折叠的 条评论
为什么被折叠?
被折叠的 条评论
为什么被折叠?
 到【灌水乐园】发言


