


这期呢主要说一说Linux中文件备份与压缩命令,一共6个命令。这6个命令都是平常工作中非常非常常用的。
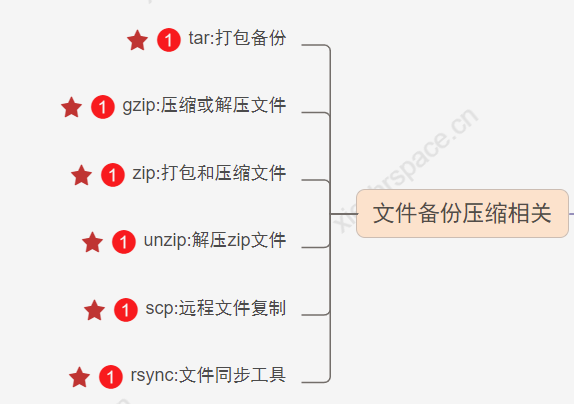
tar 打包备份
1、简介
tar 可以将多个文件压缩打包、压缩。是工作中经常用到的命令
2、语法格式
tar [参数选项] [文件或目录]
3、参数说明
| 参数 | 参数说明 |
|---|---|
| z | 通过gzip压缩或解压 |
| c | 创建新的tar包 |
| v | 显示详细的tar命令执行过程 |
| f | 指定压缩文件名字 |
| t | 不解压查看tar包的内容 |
| p | 保持文件的原有属性 |
| j | 通过bzip2命令压缩或解压 |
| x | 解开tar包 |
| C | 指定解压的目录路径 |
| –exclude=PATTERN | 打包时排除不需要处理的文件或目录 |
| -h | 打包软连接文件指向的真实源文件 |
| -hard-dereference | 打包硬链接文件 |
4、实践操作
① 打包博客文件(将/home/hexoBlog 打包成hexoBlog.tar.gz)
[root@xiezhr home]# tar zcvf hexoBlog.tar.gz hexoBlog
hexoBlog/
hexoBlog/page/
hexoBlog/page/3/
hexoBlog/page/3/index.html
hexoBlog/page/2/
hexoBlog/page/2/index.html
hexoBlog/contact/
hexoBlog/contact/index.html
hexoBlog/baidusitemap.xml
hexoBlog/movies/
hexoBlog/movies/index.html
hexoBlog/images/
hexoBlog/images/0.jpg
hexoBlog/images/2020年年终总结.jpg
hexoBlog/archives/
hexoBlog/archives/87a8e6ef.html
hexoBlog/archives/93a2b0e4.html
hexoBlog/archives/b55ad976.html
hexoBlog/archives/page/
hexoBlog/archives/page/3/

[root@xiezhr home]# ll
drwxr-xr-x 30 git    git        4096 Jun  6 20:42 hexoBlog
-rw-r--r--  1 root   root   43478804 Jun 14 22:43 hexoBlog.tar.gz
② 不解压查看压缩包的内容
[root@xiezhr home]# tar ztvf hexoBlog.tar.gz
drwxr-xr-x git/git           0 2022-06-06 20:42 hexoBlog/
drwxr-xr-x git/git           0 2022-02-26 16:43 hexoBlog/page/
drwxr-xr-x git/git           0 2022-06-03 14:57 hexoBlog/page/3/
-rw-r--r-- git/git       56427 2022-06-03 14:57 hexoBlog/page/3/index.html
drwxr-xr-x git/git           0 2022-06-03 14:57 hexoBlog/page/2/
-rw-r--r-- git/git       63574 2022-06-03 14:57 hexoBlog/page/2/index.html
drwxr-xr-x git/git           0 2022-06-03 14:57 hexoBlog/contact/
-rw-r--r-- git/git       43745 2022-06-03 14:57 hexoBlog/contact/index.html
-rw-r--r-- git/git        4169 2022-06-03 14:57 hexoBlog/baidusitemap.xml
drwxr-xr-x git/git           0 2022-06-03 14:57 hexoBlog/movies/
-rw-r--r-- git/git       43246 2022-06-03 14:57 hexoBlog/movies/index.html
drwxr-xr-x git/git           0 2021-02-13 19:32 hexoBlog/images/
-rw-r--r-- git/git      570852 2020-11-29 16:42 hexoBlog/images/0.jpg
-rw-r--r-- git/git      133945 2021-02-13 19:32 hexoBlog/images/2020年年终总结.jpg
drwxr-xr-x git/git           0 2022-06-06 20:42 hexoBlog/archives/
-rw-r--r-- git/git       97587 2022-06-03 14:57 hexoBlog/archives/87a8e6ef.html
③ 解压文件到指定目录
[root@xiezhr home]# tar -zxvf hexoBlog.tar.gz -C /home/test/
hexoBlog/
hexoBlog/page/
hexoBlog/page/3/
hexoBlog/page/3/index.html
hexoBlog/page/2/
hexoBlog/page/2/index.html
hexoBlog/contact/
hexoBlog/contact/index.html
hexoBlog/baidusitemap.xml
hexoBlog/movies/
hexoBlog/movies/index.html
hexoBlog/images/
hexoBlog/images/0.jpg
hexoBlog/images/2020年年终总结.jpg
hexoBlog/archives/
hexoBlog/archives/87a8e6ef.html

[root@xiezhr home]# cd /home/test/
[root@xiezhr test]# ll
total 1
drwxr-xr-x 30 git    git      4096 Jun  6 20:42 hexoBlog
④ 排除指定文件后打包
# hexoBlog/books 目录下的文件将被排除后打包
[root@xiezhr home]#  tar zcvf hexoBlog.tar.gz  hexoBlog --exclude=hexoBlog/books
hexoBlog/
hexoBlog/page/
hexoBlog/page/3/
hexoBlog/page/3/index.html
hexoBlog/page/2/
hexoBlog/page/2/index.html
⑤ 使用-h参数打包链接文件
[root@xiezhr etc]# tar zcfh local_h.tar.gz ./rc.local
[root@xiezhr etc]# tar tfv local_h.tar.gz
-rwxr-xr-x root/root       749 2022-03-22 09:10 ./rc.local
tar 使用小结
-
打包一个目录时,一般需要进入到目录的上级目录,然后再执行打包命令。解压时需要非常注意,文件是否会覆盖原文件
-
打包记忆:**tar zcvf /路径/篮子.tar.gz 相对路径/鸡蛋 ** 【把鸡蛋放到篮子里】
gzip 压缩或解压文件
1、简介
gzip 命令用于将一个大的文件通过压缩算法变成一个小文件。
注意: gzip 命令不能直接压缩目录,如果要压缩目录时,先要用tar 将目录打包成一个文件,然后tar 再调用gzip压缩
2、语法格式
gzip [参数选项] [文件]
3、参数说明
| 参数 | 参数说明 |
|---|---|
| -d | 解压文件 |
| -v | 显示命令执行的过程 |
| -l | 列出压缩文件的内容信息 |
| -c | 将内容输出到标准输出,不改变原始文件 |
| -r | 对目录下的所有文件递归进行压缩 |
| -数字<1-9> | 指定压缩率,默认是6,值越大压缩率越高 |
| -t | 测试,检查压缩文件是否完整 |
4、实践操作
① 把目录下的每个文件都单独压缩成.gz文件
[root@xiezhr dir3]# ls
a.txt  b.txt  c.txt  money.java  test.java  test.txt  tt.txt  user.java  xiezhr.java  xiezhr.txt
[root@xiezhr dir3]# gzip *.txt
[root@xiezhr dir3]# ls
a.txt.gz  b.txt.gz  c.txt.gz  money.java  test.java  test.txt.gz  tt.txt.gz  user.java  xiezhr.java  xiezhr.txt.gz
② 不解压显示压缩文件信息
[root@xiezhr dir3]# gzip -l xiezhr.txt.gz
         compressed        uncompressed  ratio uncompressed_name
                 31                   0   0.0% xiezhr.txt
③解压文件,并显示解压过程
[root@xiezhr dir3]# ls
a.txt.gz  b.txt.gz  c.txt.gz  money.java  test.java  test.txt.gz  tt.txt.gz  user.java  xiezhr.java  xiezhr.txt.gz
[root@xiezhr dir3]# gzip -dv *.gz
a.txt.gz:         0.0% -- replaced with a.txt
b.txt.gz:         0.0% -- replaced with b.txt
c.txt.gz:         0.0% -- replaced with c.txt
test.txt.gz:     15.9% -- replaced with test.txt
tt.txt.gz:        0.0% -- replaced with tt.txt
xiezhr.txt.gz:    0.0% -- replaced with xiezhr.txt
[root@xiezhr dir3]# ls
a.txt  b.txt  c.txt  money.java  test.java  test.txt  tt.txt  user.java  xiezhr.java  xiezhr.txt
注: 以上实践我们看到gzip命令在压缩和解压文件时,都会把源文件删除。当然也有其他方法可以解决这个问题,但是使用起来有点麻烦。
zip 打包和压缩文件
1、简介
zip 压缩格式是Windows和Linux通用的压缩格式。和gzip命令相比,zip命令压缩文件不会删除源文件,还可以压缩目录。所以相比gzip命令,我们使用zip命令会更多一些
2、语法格式
zip [参数选项] [文件或目录]
3、参数说明
| 参数 | 参数说明 |
|---|---|
| -r | 指定目录下的所有文件和子目录一并压缩 |
| -x | 压缩文件时排除某个文件 |
| -q | 不显示压缩信息 |
4、实践操作
① 压缩文件
[root@xiezhr testdir]# ls
xiezhr.txt
[root@xiezhr testdir]# zip xiezhr.zip xiezhr.txt
  adding: xiezhr.txt (deflated 17%)
[root@xiezhr testdir]# ls
xiezhr.txt  xiezhr.zip
②压缩目录
# 这里只将testdir这个目录压缩了,目录下的文件并没有压缩
[root@xiezhr test]# zip testdir.zip ./testdir/
  adding: testdir/ (stored 0%)
# 使用-r参数可以将目录及目录下的文件也递归压缩了
[root@xiezhr test]# zip -r testdir.zip ./testdir/
updating: testdir/ (stored 0%)
  adding: testdir/xiezhr.txt (deflated 17%)
③ 排除压缩
# 将abc.txt 文件排除到压缩之外
[root@xiezhr testdir]# ll
total 8
-rw-r--r-- 1 root root  49 Jun 26 16:01 abc.txt
-rw-r--r-- 1 root root 527 Jun 26 15:50 xiezhr.txt
[root@xiezhr testdir]# cd ..
[root@xiezhr test]# zip -r testdir.zip ./testdir/ -x testdir/abc.txt
updating: testdir/ (stored 0%)
updating: testdir/xiezhr.txt (deflated 17%)xxxxxxxxxx -[root@xiezhr testdir]# lltotal 8-rw-r--r-- 1 root root  49 Jun 26 16:01 abc.txt-rw-r--r-- 1 root root 527 Jun 26 15:50 xiezhr.txt[root@xiezhr testdir]# cd ..[root@xiezhr test]# zip -r testdir.zip ./testdir/ -x testdir/abc.txt updating: testdir/ (stored 0%)updating: testdir/xiezhr.txt (deflated 17%)shell
unzip 解压zip文件
1、简介
unzip 命令可以解压zip格式的文件,一般与zip配套使用
2、语法格式
unzip [参数选项] [压缩文件]
3、参数选项
| 参数 | 参数说明 |
|---|---|
| -l | 在不解压的情况下显示压缩包的内容 |
| -o | 解压时不提示是否覆盖文件 |
| -d | 指定解压目录 |
| -v | 解压时显示详细信息 |
4、实践操作
①不解压查看压缩包里的文件
[root@xiezhr test]# unzip -l testdir.zip
Archive:  testdir.zip
  Length      Date    Time    Name
---------  ---------- -----   ----
        0  06-26-2022 16:01   testdir/
      527  06-26-2022 15:50   testdir/xiezhr.txt
---------                     -------
      527                     2 files
② 解压文件
# 不带参数解压文件时,会提示是否覆盖文件
# [y]es, [n]o, [A]ll, [N]one, [r]ename
# y--是  n--否  A--所有文件都替换 N--所有文件都不替换 r--重命名
[root@xiezhr test]# unzip testdir.zip
Archive:  testdir.zip
replace testdir/xiezhr.txt? [y]es, [n]o, [A]ll, [N]one, [r]ename: y
  inflating: testdir/xiezhr.txt
# -o 参数,解压时不提示覆盖
[root@xiezhr test]# unzip -o testdir.zip
Archive:  testdir.zip
  inflating: testdir/xiezhr.txt
③ 指定解压目录解压文件
# 将testdir.zip 解压到指定目录dir7下
[root@xiezhr test]# mkdir dir7
[root@xiezhr test]# unzip -d /home/test/dir7/ testdir.zip
Archive:  testdir.zip
   creating: /home/test/dir7/testdir/
  inflating: /home/test/dir7/testdir/xiezhr.txt
[root@xiezhr test]# cd dir7/
[root@xiezhr dir7]# ls
testdir
scp 远程文件复制
1、简介
scp 命令用于不同主机之间文件复制。scp命令每次都是全量完整复制,因此效率不高,适合第一次复制时候使用,增量复制建议使用rsync命令
2、语法格式
scp [参数选择] [用户@主机1:文件1] [用户@主机2:文件2]
3、参数选项
| 参数 | 参数说明 |
|---|---|
| -C | 压缩传输 |
| -l | 指定传输占用的宽带,单位Kbit/s |
| -P | 指定传输的端口号 |
| -p | 传输后保留文件原始属性 |
| -q | 不显示传输进度 |
| -r | 递归复制整个目录 |
4、实践操作
① 将本地文件或目录复制到远程服务器
[root@xiezhr ~]# scp  /home/test/xie.txt  42.192.46.248:/tmp
root@42.192.46.248's password:
② 从远程服务器将数据复制到本地
[root@xiezhr ~]# scp 42.192.21.248:/tmp .
rsync 文件同步工具
1、简介
rsync 可以实现全量或增量的文件复制的开源工具。 可以在本地计算机与远程计算机之间,或者两个本地目录之间同步文件 。 它也可以当作文件复制工具,替代
cp和mv命令
2、语法格式
# 1、本地模式
rsync [参数选项] [源文件] [目标文件]
# 2、远程同步模式
# 拉取文件
rsync [参数选项] [用户@主机:源文件] [目标文件]
# 推送文件
rsync [参数选项] [源文件] [用户@主机:目标文件]
3、参数选项
| 参数 | 参数说明 |
|---|---|
| -r | 递归方式同步目录 |
| -a | 可以替代-r参数,除了可以递归同步,还可以同步文件属性(修改时间、权限等) |
| -n | 不确定 rsync 执行后会产生什么结果,可以先用-n参数模拟执行结果 |
| –delete | 使目标目录内容和源保持目录一致,删除不同文件 |
| –exclude | 同步时,排除不需要的文件或目录 |
| –include | 同步时,必须包含的文件 |
4、实践操作
注: 有些Linux系统中可能没有默认安装rsync ,我们只需按照如下命令安装即可
yum -y install rsync
① 将当前目录下的hexoBlog 同步到 dir7目录下
[root@xiezhr test]# rsync -r hexoBlog/ dir7/hexoBlog
[root@xiezhr test]# cd dir7/
[root@xiezhr dir7]# ll
total 4
drwxr-xr-x 30 root root 4096 Jun 29 20:54 hexoBlog
② 将当前目录下的logo.png 和hexoBlog 同步到dir8/test 目录下
[root@xiezhr test]# rsync -r logo.png hexoBlog/  dir8/test
[root@xiezhr test]# cd dir8/test/
[root@xiezhr test]# ll
total 1420
drwxr-xr-x  2 root root   4096 Jun 29 21:00 about
drwxr-xr-x  6 root root   4096 Jun 29 21:00 archives
drwxr-xr-x  2 root root   4096 Jun 29 21:00 artitalk
注: -r表示递归,即包含子目录。注意,-r是必须的,否则 rsync 运行不会成功
③-a 参数,递归同步,同步修改时间、权限等信息
# rsync -a hexoBlog hexoBlog_new
# 目标目录hexoBlog_new 如果不存在,rsync 会自动创建。
# 执行上面的命令后,源目录hexoBlog被完整地复制到了目标目录hexoBlog_new下面,hexoBlog_new/hexoBlog的目录结构。

[root@xiezhr test]# ll
total 16
drwxr-xr-x  2 xiezhr xiezhr 4096 Mar 26 21:46 dir
drwxr-xr-x 30 git    git    4096 Jun  6 20:42 hexoBlog
-rw-r--r--  1 root   root     35 May  9 21:36 xie.txt
-rw-r--r--  1 root   root    527 Apr  9 10:55 xiezhr.txt
[root@xiezhr test]# rsync -a hexoBlog hexoBlog_new
[root@xiezhr test]# ll
total 20
drwxr-xr-x  2 xiezhr xiezhr 4096 Mar 26 21:46 dir
drwxr-xr-x 30 git    git    4096 Jun  6 20:42 hexoBlog
drwxr-xr-x  3 root   root   4096 Jul  2 09:15 hexoBlog_new
-rw-r--r--  1 root   root     35 May  9 21:36 xie.txt
-rw-r--r--  1 root   root    527 Apr  9 10:55 xiezhr.txt

#如果只想同步源目录 hexoBlog 里面的内容到目标目录hexoBlog_new,则需要在源目录后面加上斜杠。
[root@xiezhr test]# rsync -a hexoBlog/ hexoBlog_new
#上面命令执行后,hexoBlog目录里面的内容,就都被复制到了hexoBlog_new目录里面,并不会在hexoBlog_new下面创建一个hexoBlog子目录。
④ -n参数模拟执行结果
注: 如果不确定 rsync 执行后会产生什么结果,可以先用-n 参数模拟执行结果
[root@xiezhr test]# rsync -anv xie.txt testdir
sending incremental file list
xie.txt

sent 49 bytes  received 19 bytes  136.00 bytes/sec
total size is 35  speedup is 0.51 (DRY RUN)

# -n参数模拟命令执行的结果,并不真的执行命令。-v参数则是将结果输出到终端,这样就可以看到哪些内容会被同步。
⑤ --delete 参数的使用,保持源目录和目标目录文件一致
[root@xiezhr test]# rsync -av --delete hexoBlog hexoBlog_0702
sending incremental file list
created directory hexoBlog_0702
hexoBlog/
hexoBlog/Staticfile.txt
hexoBlog/baidu_urls.txt
hexoBlog/baidusitemap.xml
hexoBlog/favicon.png
hexoBlog/tags/问卷调查/index.html

sent 63,638,655 bytes  received 8,246 bytes  42,431,267.33 bytes/sec
total size is 63,597,216  speedup is 1.00
注: 默认情况下,rsync 只确保源目录的所有内容(明确排除的文件除外)都复制到目标目录。它不会使两个目录保持相同,并且不会删除文件。使用--delete参数,这将删除只存在于目标目录、不存在于源目录的文件。
⑥ --exclude 参数 的使用,同步时排除某些文件
[root@xiezhr test]# rsync -av --exclude '*.txt' hexoBlog hexoBlog_test
sending incremental file list
created directory hexoBlog_test
hexoBlog/
hexoBlog/baidusitemap.xml
hexoBlog/favicon.png
hexoBlog/favicon1.png
hexoBlog/tags/问卷调查/index.html

sent 63,638,026 bytes  received 8,208 bytes  127,292,468.00 bytes/sec
total size is 63,596,717  speedup is 1.00
注: 上面脚本将hexoBlog 目录下除了.txt外的文件都同步到了hexoBlog_test 目录下
⑦--include 参数的使用,同步时必须包含某些文件
[root@xiezhr test]# rsync  -av --include "*.txt" --exclude "*" hexoBlog hexo_xie
sending incremental file list

sent 18 bytes  received 12 bytes  60.00 bytes/sec
total size is 0  speedup is 0.00
**注:**上述命令将hexoBlog目录下的所有文件排除,但包含txt文件同步到hexo_xie目录下
⑧远程同步资源
注: rsync 命令除了可以本地同步之外,还支持远程同步资源
# 以下命令是将本地资源source 同步到远程服务器destination
[root@xiezhr test]# rsync -av source/ username@remote_host:destination
# 以下命令是将远程服务器资源source同步到本地 destination
[root@xiezhr test]# rsync -av username@remote_host:source/ destination
由于博主比较穷,手上只有一台云服务器,这里就没法做具体演示了🙁
⑨增量备份
[root@xiezhr test]# rsync -a --delete --link-dest /compare/path /source/path /target/path
上述命令解释
-
--link-dest参数指定基准目录/compare/path -
/source/path代表源目录 -
/target/path代表目标目录 -
命令的第一次备份时是全量备份,后面 源目录
/source/path跟基准目录/compare/path进行比较,找出变动的文件,将它们拷贝到目标目录/target/path实现增量更新
注: 上面命令可以写成shell脚本,然后添加到Linux任务调度里,就实现了增量备份文件的功能。
关于rsync命令小结
- rsync 用法很多,所以上面说了好多常用例子,当然还有很多用法没法一一例举出来。
- rsync 不仅用于Linux,也同样可以再Windows上使用,用于文章上关于Linux的,所以没列举Windows上使用方法。感兴趣的小伙伴可自行查找资料,或者后面出一篇文章具体介绍
- 关于rsync命令的用法,阮一峰大佬也写了一篇文章,讲的也非常好。大家可以去看看,文章地址:https://www.ruanyifeng.com/blog/2020/08/rsync.html
这期主要是说了Linux系统文件备份与压缩相关命令,大概内容就这些了。下期根据思维导图就到了 软件安装相关 的命令了。
涉及到的命令有: rpm、 yum两个命令
这些命令呢比较基础,但也是比较常用比较重要的
敬请期待哦(●’◡’●)
专栏目录:快速上手Linux核心命令专栏目录
上一篇:快速上手Linux核心命令(七):Linux系统信息相关命令x
下一篇:快速上手Linux核心命令(十):软件安装命令(博主正在玩命更新中)


 4万+
4万+


 被折叠的 条评论
为什么被折叠?
被折叠的 条评论
为什么被折叠?
 到【灌水乐园】发言


