


java服务端(go也可) + vue 或者 js ,实现断点续传、秒传、暂停上传、多文件并行上传,可拖拽,可选择文件。
简介
本人java服务器开发菜鸡儿一枚,公司项目中涉及文件上传的功能有很多,不乏大文件的,所以从那时起就一直奔波于github、gitee 等开发者的天堂中想寻求一款能满足需求的demo,期间接触了很多前端插件,像百度的很多年前的开源插件webUploader(毕竟很多年前的了)多了也就不说了…
前端插件:uppy.io 支持 js、vue、react、svelte
官网:uppy.io
uppy前端demo
<!doctype html>
<html>
<head>
	<meta charset="utf-8">
	<title>Uppy</title>
	<!-- 1. Add CSS to `<head>` -->
	<link href="https://transloadit.edgly.net/releases/uppy/v1.5.0/uppy.min.css" rel="stylesheet">
</head>
<body>
<div id="uppy-dashboard-area"></div>
<!-- 2. Add JS before the closing `</body>` -->
<script src="https://transloadit.edgly.net/releases/uppy/v1.5.0/uppy.min.js"></script>
<script>
	var zhcn = {
		strings: {
			// When `inline: false`, used as the screen reader label for the button that closes the modal.
			closeModal: '关闭弹框',
			// Used as the screen reader label for the plus (+) button that shows the “Add more files” screen
			addMoreFiles: '添加更多文件',
			// Used as the header for import panels, e.g., “Import from Google Drive”.
			importFrom: '从 %{name} 导入',
			// When `inline: false`, used as the screen reader label for the dashboard modal.
			dashboardWindowTitle: 'Uppy Dashboard Window (Press escape to close)',
			// When `inline: true`, used as the screen reader label for the dashboard area.
			dashboardTitle: 'Uppy Dashboard',
			// Shown in the Informer when a link to a file was copied to the clipboard.
			copyLinkToClipboardSuccess: '链接已复制',
			// Used when a link cannot be copied automatically — the user has to select the text from the
			// input element below this string.
			copyLinkToClipboardFallback: '复制下面的链接',
			// Used as the hover title and screen reader label for buttons that copy a file link.
			copyLink: '复制链接',
			// Used as the hover title and screen reader label for file source icons, e.g., “File source: Dropbox”.
			fileSource: '文件来源: %{name}',
			// Used as the label for buttons that accept and close panels (remote providers or metadata editor)
			done: '完成',
			// Used as the screen reader label for buttons that remove a file.
			removeFile: '移除文件',
			// Used as the screen reader label for buttons that open the metadata editor panel for a file.
			editFile: '编辑文件',
			// Shown in the panel header for the metadata editor. Rendered as “Editing image.png”.
			editing: '正在编辑 %{file}',
			// Text for a button shown on the file preview, used to edit file metadata
			edit: '编辑',
			// Used as the screen reader label for the button that saves metadata edits and returns to the
			// file list view.
			finishEditingFile: '结束编辑文件',
			// Used as the label for the tab button that opens the system file selection dialog.
			myDevice: '我的设备',
			// Shown in the main dashboard area when no files have been selected, and one or more
			// remote provider plugins are in use. %{browse} is replaced with a link that opens the system
			// file selection dialog.
			dropPasteImport: 'Drop files here, paste, %{browse} or import from',
			// Shown in the main dashboard area when no files have been selected, and no provider
			// plugins are in use. %{browse} is replaced with a link that opens the system
			// file selection dialog.
			dropPaste: '拖拽文件到这里 or %{browse}',
			// This string is clickable and opens the system file selection dialog.
			browse: '浏览本地文件',
			// Used as the hover text and screen reader label for file progress indicators when
			// they have been fully uploaded.
			uploadComplete: '上传完成',
			// Used as the hover text and screen reader label for the buttons to resume paused uploads.
			resumeUpload: '继续',
			// Used as the hover text and screen reader label for the buttons to pause uploads.
			pauseUpload: '暂停',
			// Used as the hover text and screen reader label for the buttons to retry failed uploads.
			retryUpload: '重试',

			// Used in a title, how many files are currently selected
			xFilesSelected: {
				0: '%{smart_count} 个文件已选择',
				1: '%{smart_count} 个文件已选择'
			},

			// uppy/status-bar strings:
			uploading: '上传中...',
			complete: '完成'
			// ...etc
		}
	};
	var uppy = Uppy.Core({
		autoProceed: false,
		allowMultipleUploads: true, // 上传完成之后,是否可继续添加文件上传
		restrictions: {
			maxFileSize: 1024 * 1024 * 1024 * 4, // 以字节为单位
			maxNumberOfFiles: 100,
			minNumberOfFiles: 1,
			//allowedFileTypes: ['image/*', 'video/*', 'img/*','text/*','html/*'] // mime类型(image/png)或者文件后缀名(.jpg)
		}
	})
			.use(Uppy.Dashboard, {
				id: 'Dashboard',
				metaFields: [
					{ id: 'name', name: 'Name', placeholder: 'file name' }
				],
				target: '#uppy-dashboard-area',
				note: 'image and video only',
				inline: true,
				showLinkToFileUploadResult: true,
				showProgressDetails: true,
				hideUploadButton: false,
				hideRetryButton: false,
				hidePauseResumeButton: false,
				hideCancelButton: false,
				hideProgressAfterFinish: false,
				closeModalOnClickOutside: false,
				closeAfterFinish: false,
				disableStatusBar: false,
				disableInformer: false,
				disableThumbnailGenerator: false,
				disablePageScrollWhenModalOpen: true,
				animateOpenClose: true,
				proudlyDisplayPoweredByUppy: true,
				onRequestCloseModal: () => this.closeModal(),
				showSelectedFiles: true,
				locale: zhcn,
				browserBackButtonClose: false
			})
			.use(Uppy.Tus, {
				endpoint: 'http://127.0.0.1:8012/netdisk-web-perpc/disk/fileupload' //这个地方填写你的server地址
			})


	uppy.on('file-added', (file) => {
		uppy.setFileMeta(file)
	})
	uppy.on('file-removed', (file) => {
		console.log('Removed file', file)
	})
	uppy.on('upload-success', (file, response) => {

	})
	uppy.on('complete', (result) => {
		console.log('Upload complete! We’ve uploaded these files:', result.successful)
	})
</script>
</body>
</html>
以上的代码是整个html文件的内容,自己新建一个html文件拖到浏览器打开就行了,没有任何其它依赖,uppy的依赖js是通过链接的方式引入的。
java服务端demo
服务端是基于tus协议,外国大牛使用java编写的;
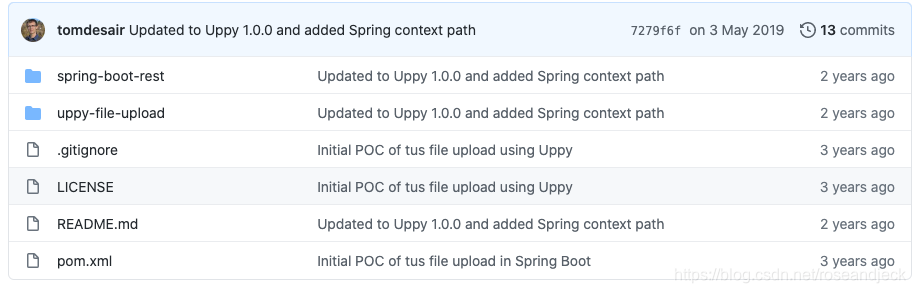
github地址:tus-java-server-spring-demo
一下是结构图,只需要运行spring-boot-rest 即可,前端使用上面的前端demo即可,(因为大神写的uppy-file-upload我这里运行不了😂)
此处说一个小坑:需要在控制器上加上跨域注解(或者自己写一个配置文件,我这里就暂且使用注解了)
@CrossOrigin(exposedHeaders = { "Location", "Upload-Offset","Upload-Length"})
spring-boot-rest 是一个demo,底层依赖了具体的实现,具体实现都是同一个大神提供。
具体实现github地址:tus-java-server
java代码我就不贴出来了,大家去github下载吧,下载完不要忘记给原作者一个star哦!下面给几张图片(服了,csdn 无法上传视频!!只能;链接或者 gif,gif只能文件大小只能小于5m,emmmmmmm)😁
文件的图标按道理是可以显示的,不知道我这个demo哪里有问题,不管了!!哈哈
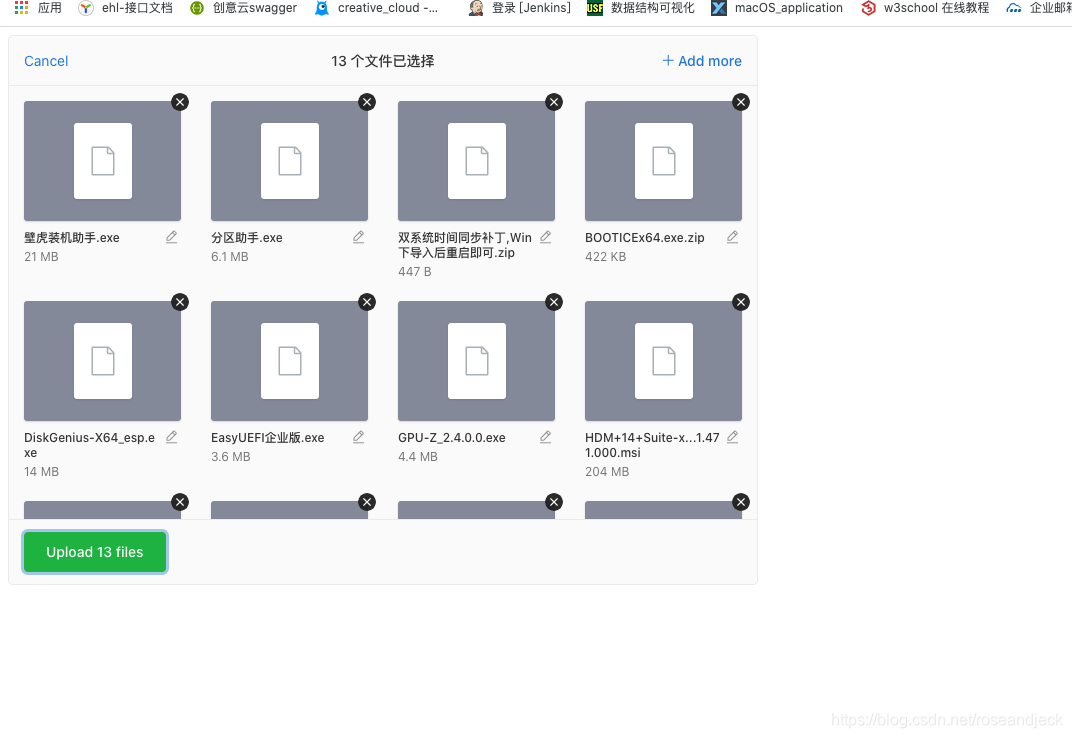
所有的文件都是并行上传的~~,可以随便暂停某个文件。
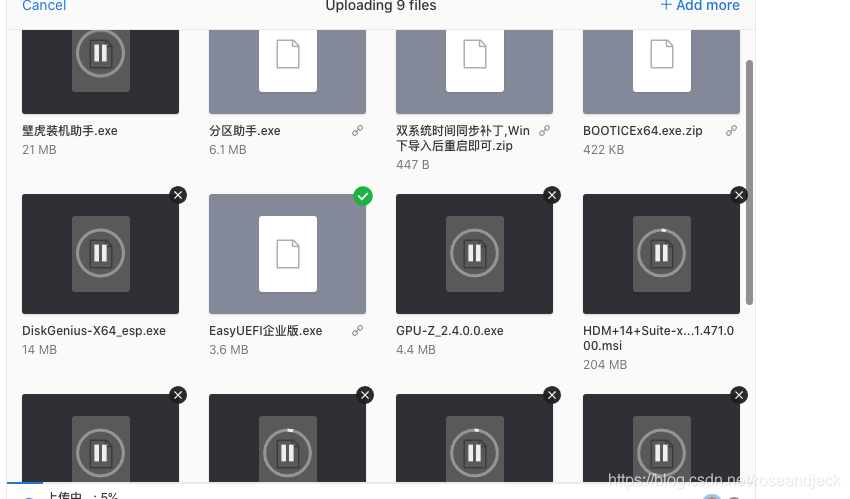


暂停继续后进度不丢失,perfect!


 1750
1750


 被折叠的 条评论
为什么被折叠?
被折叠的 条评论
为什么被折叠?
 到【灌水乐园】发言


