


最近在研究spring MVC和Maven,工作中也是使用Spring MVC、Mybatis及Maven整合,出于好奇,自己也搭建了一个Spring+Spring MVC+Mybatis+Maven的多模块框架,先介绍一下我的工程结构
bug.root:根模块,不包含任何代码
bug.model:对象模块,所有的实体对象都放到这里
bug.dao:数据库交互模块,Mybatis的mapper.xml文件及Dao层的接口就写到这里
bug.service:业务模块,业务接口及其实现都放到这里,事务控制也是在Service中
bug.web:控制层,页面发送的请求,都通过这里接收和响应
bug.common:公共模块,一些公共组件,工具类都放到这个模块中
下面开始模块的创建,首页需要创建bug.root根模块,后面所有的模块都是基于根模块创建的
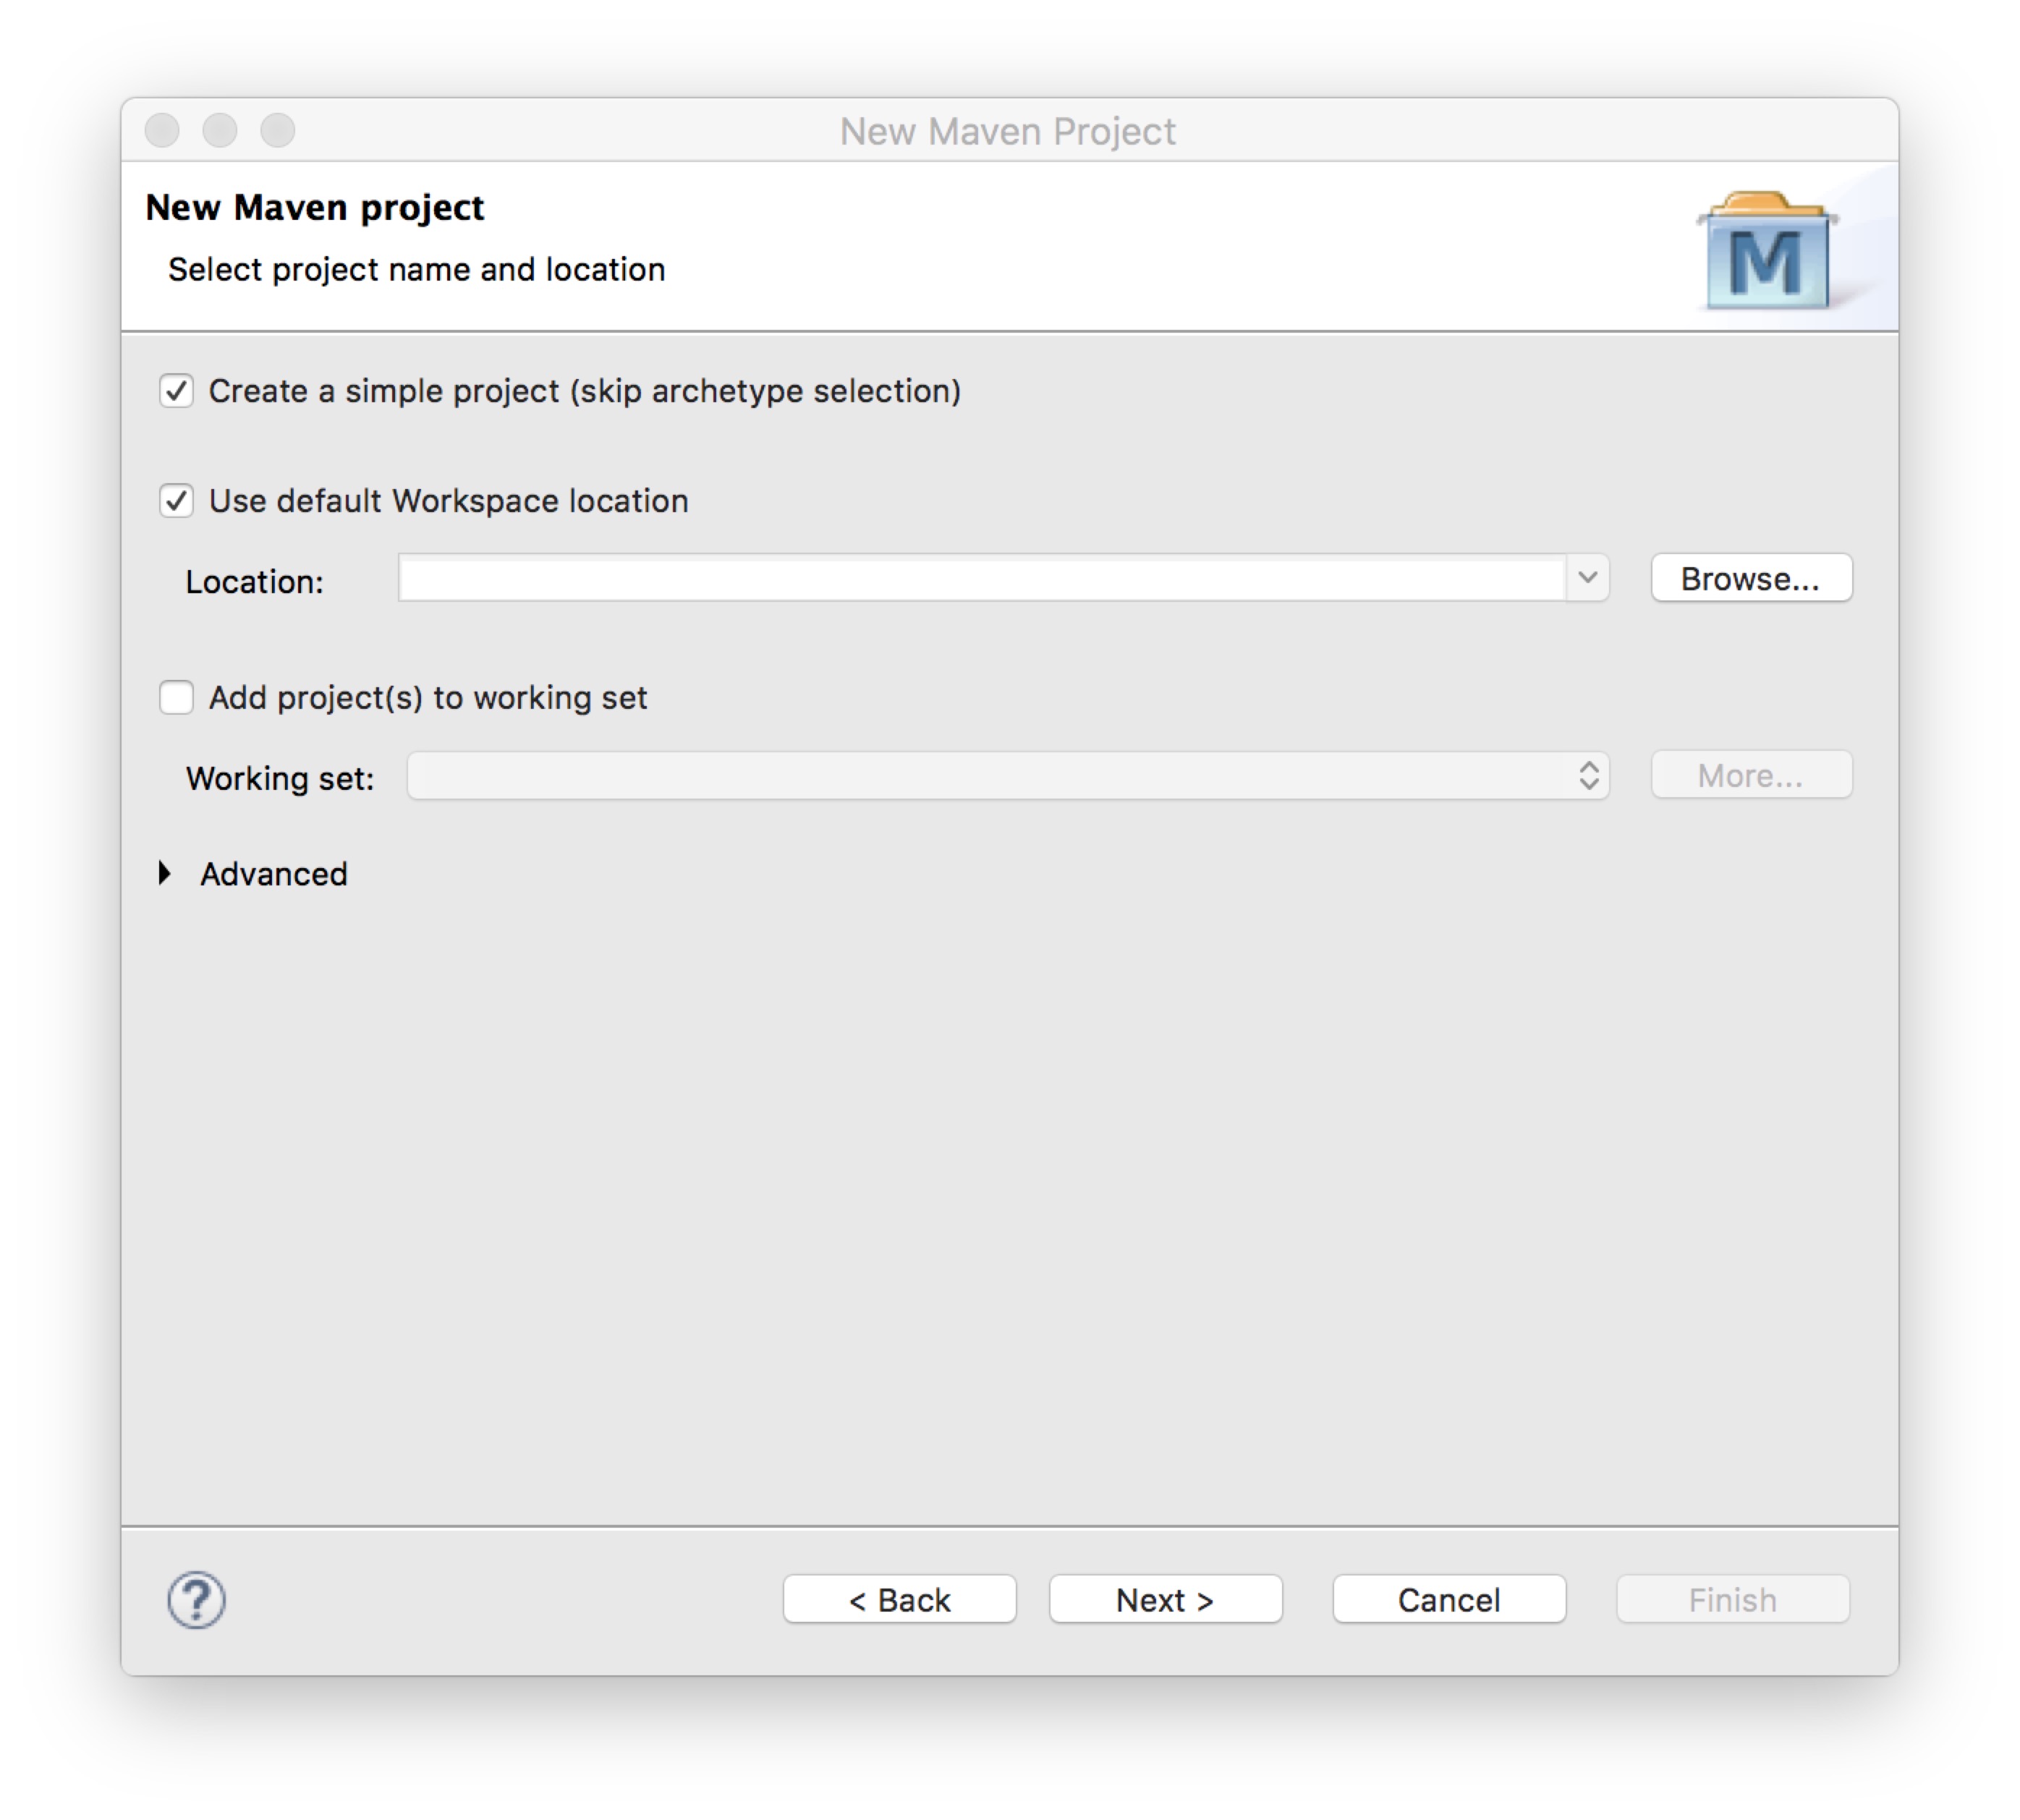
右键->new->选择Maven Project,点击下一步,把Create a simple project勾上,
点击下一步,输入Group Id:com.bug,Artifact Id:bug.root,Packaging:pom,如下图
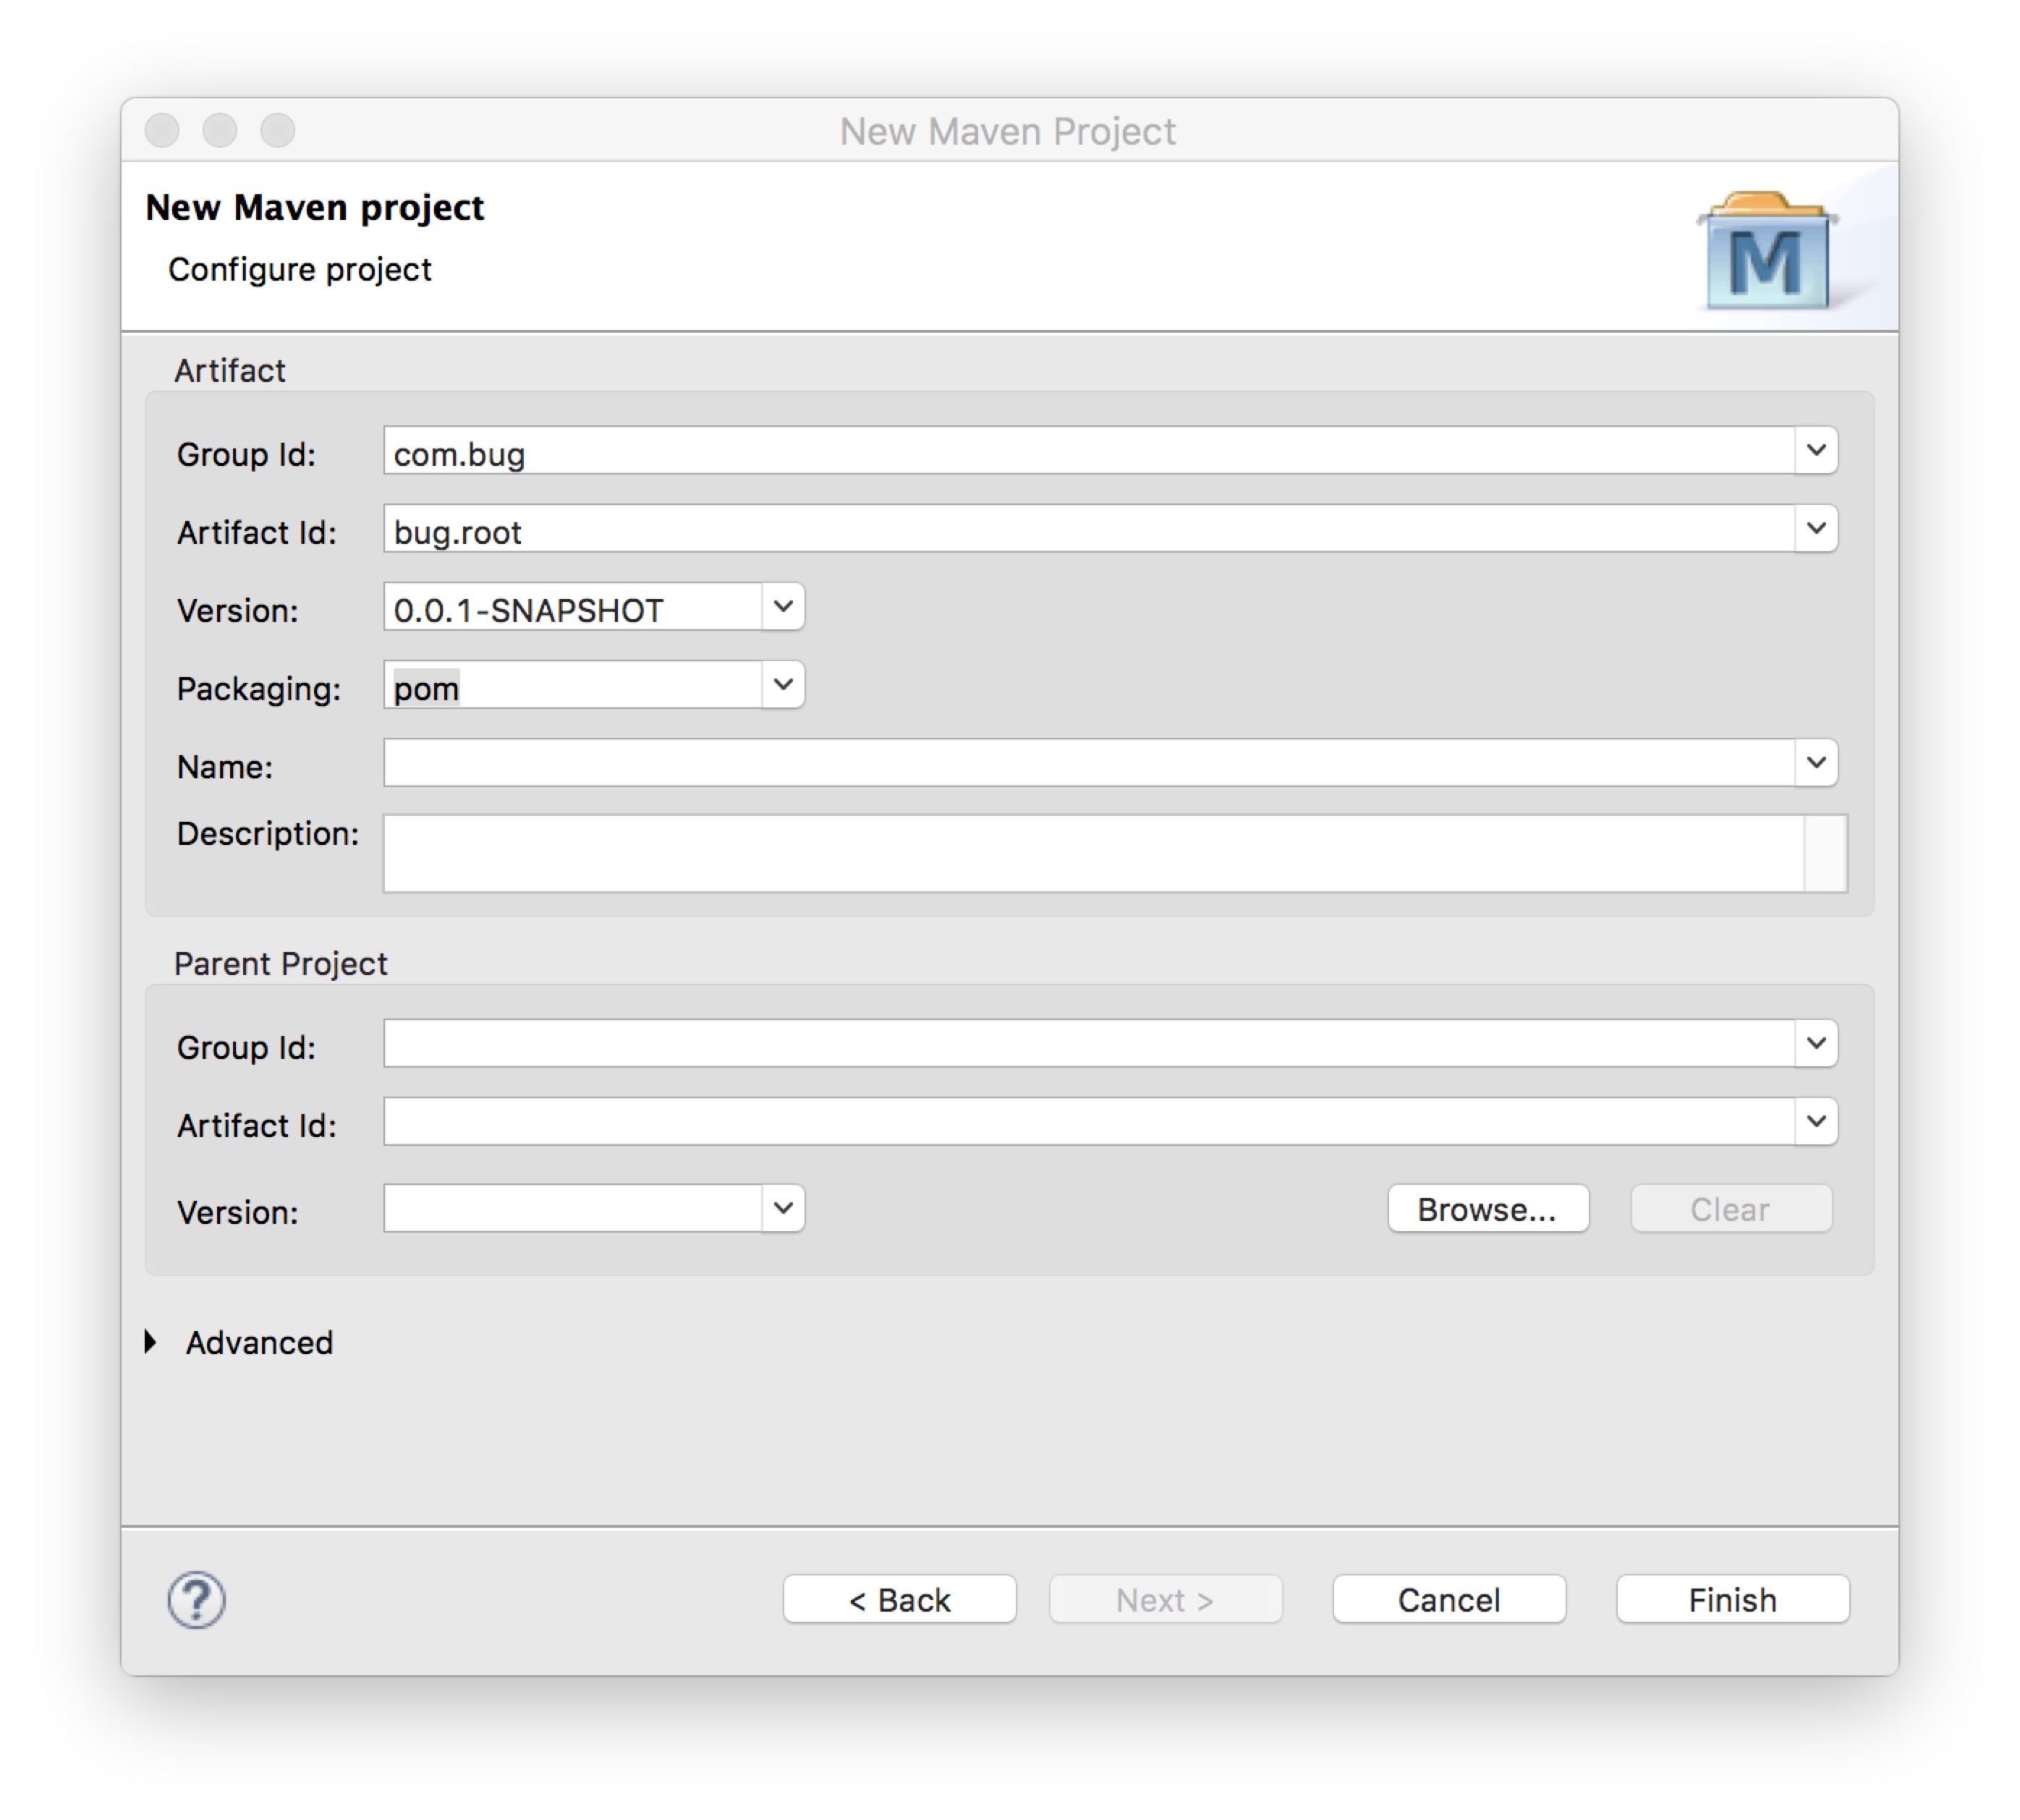
点击finish按钮生成bug.root项目,把bug.root目录下的其他文件都删除,只保留pom.xml文件,pom.xml文件内容如下
- 1
- 2
- 3
- 4
- 5
- 6
- 7
- 8
- 1
- 2
- 3
- 4
- 5
- 6
- 7
- 8
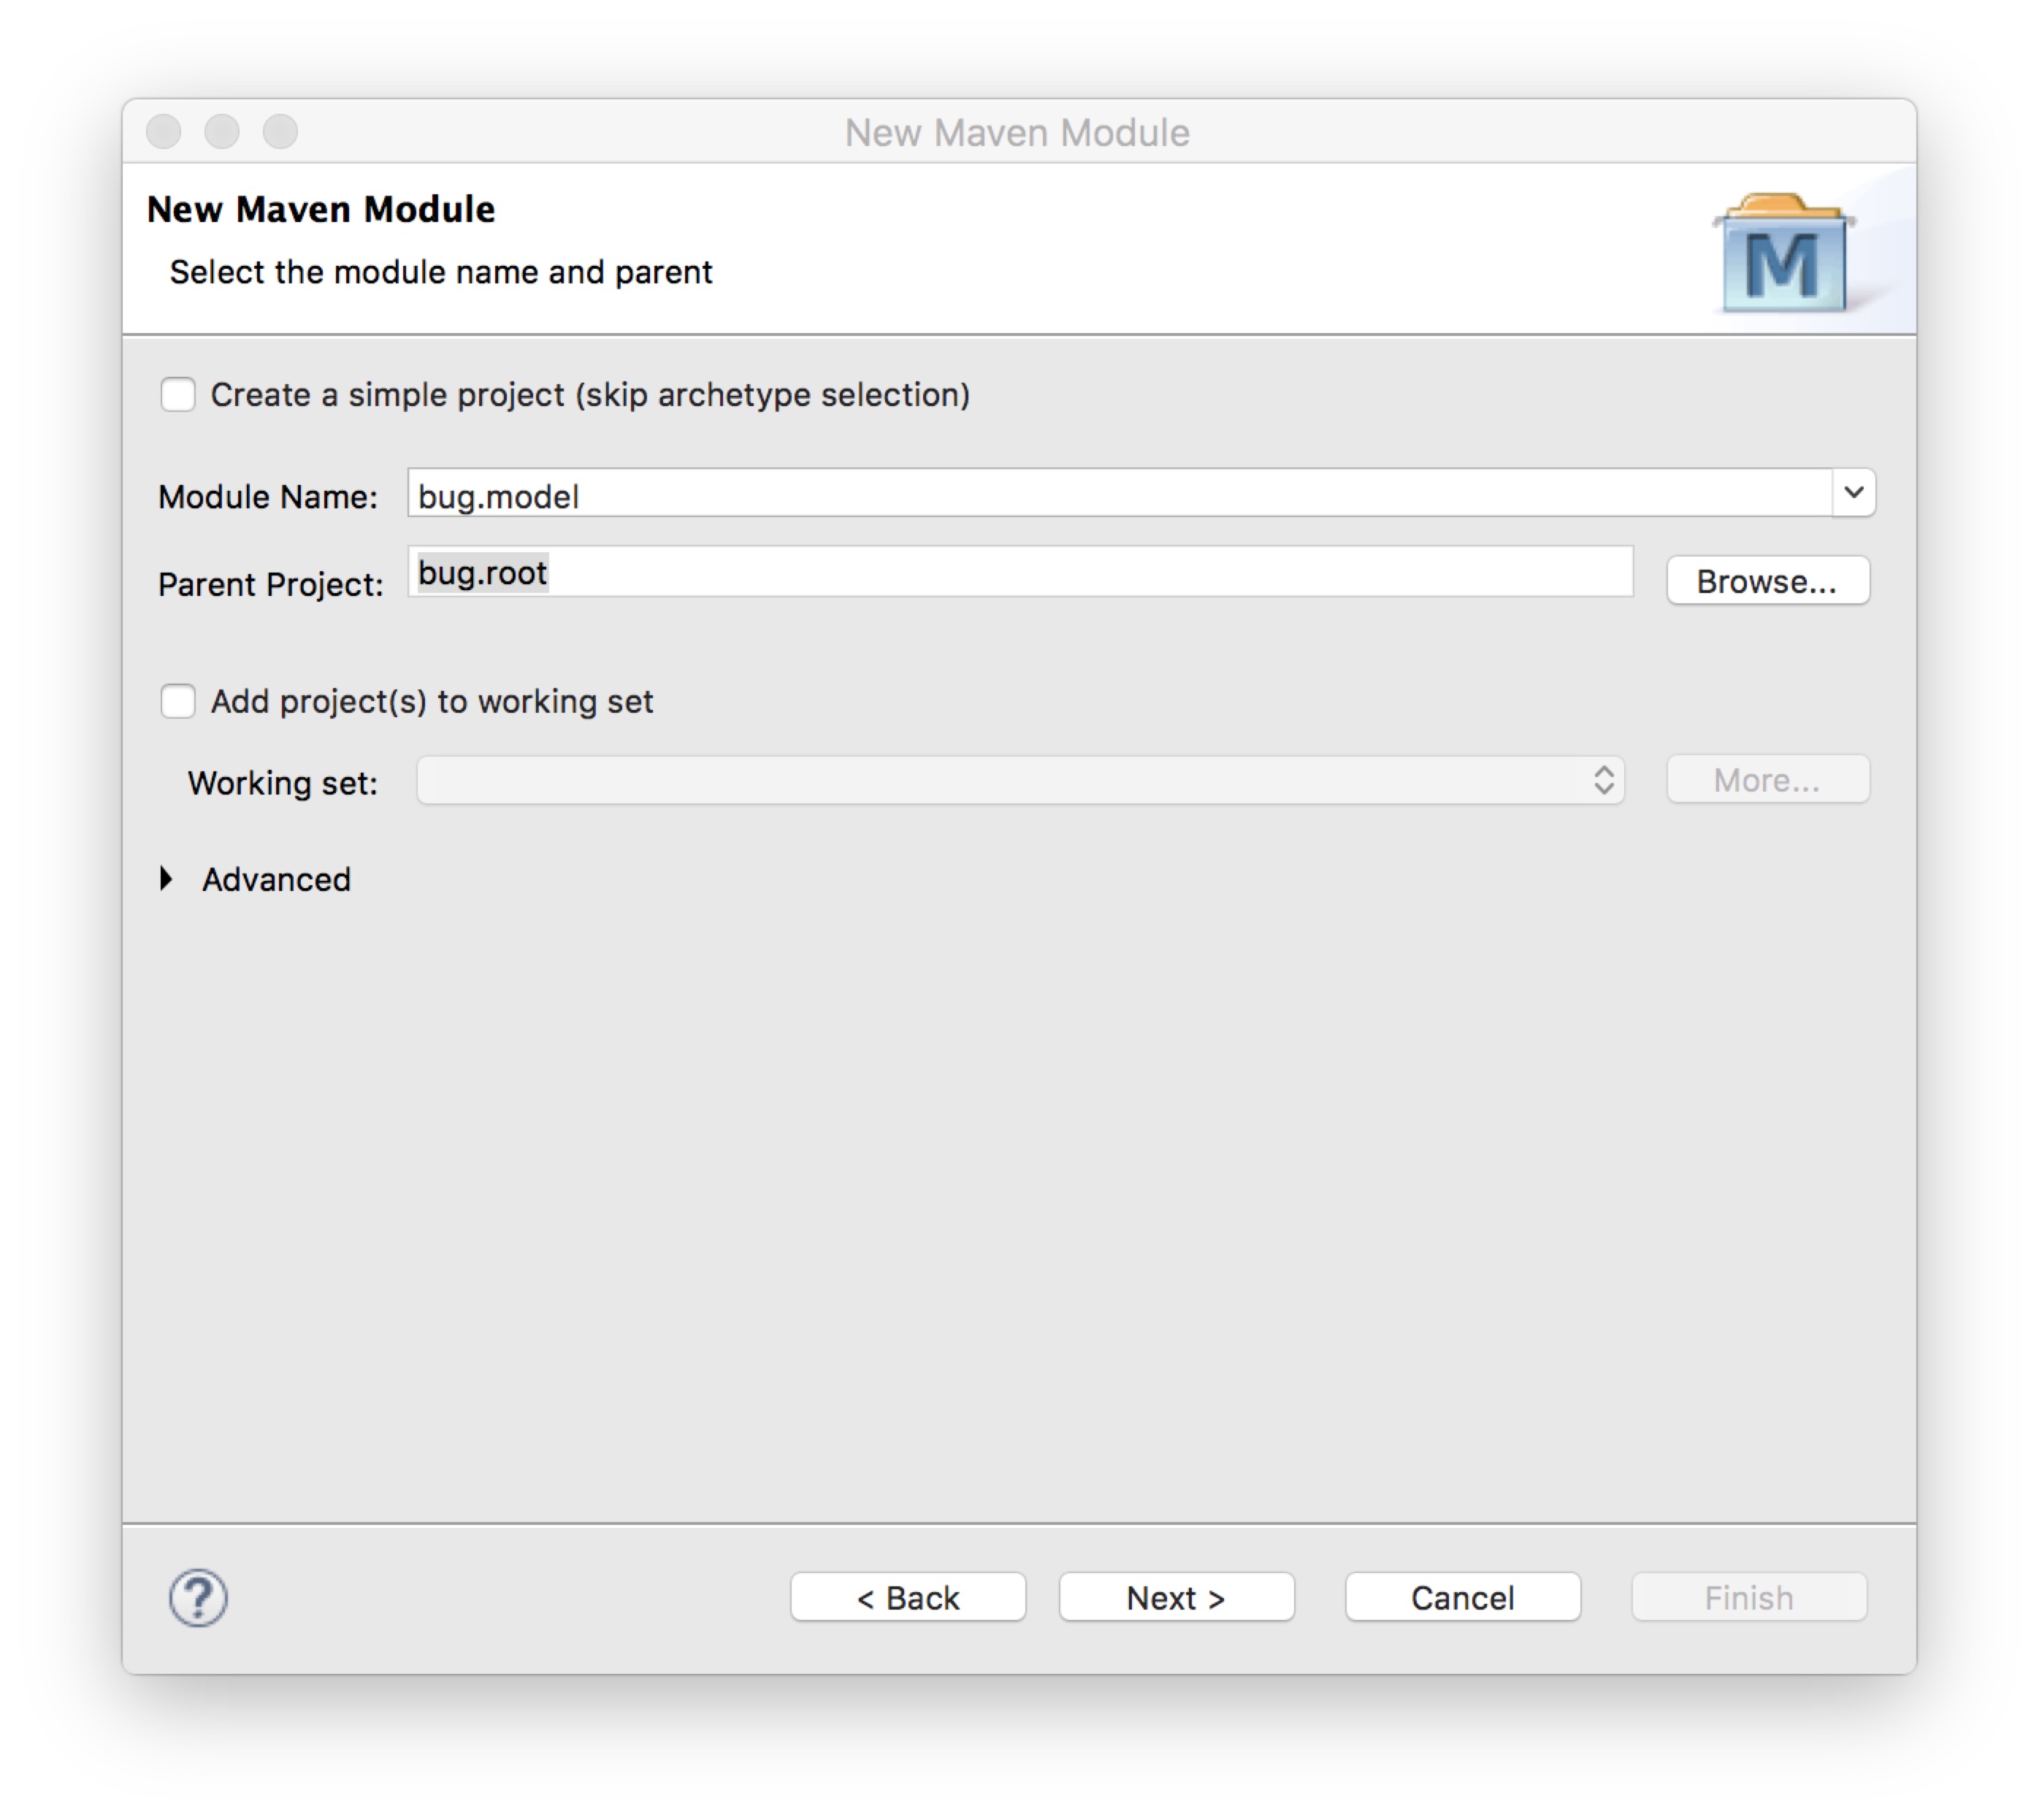
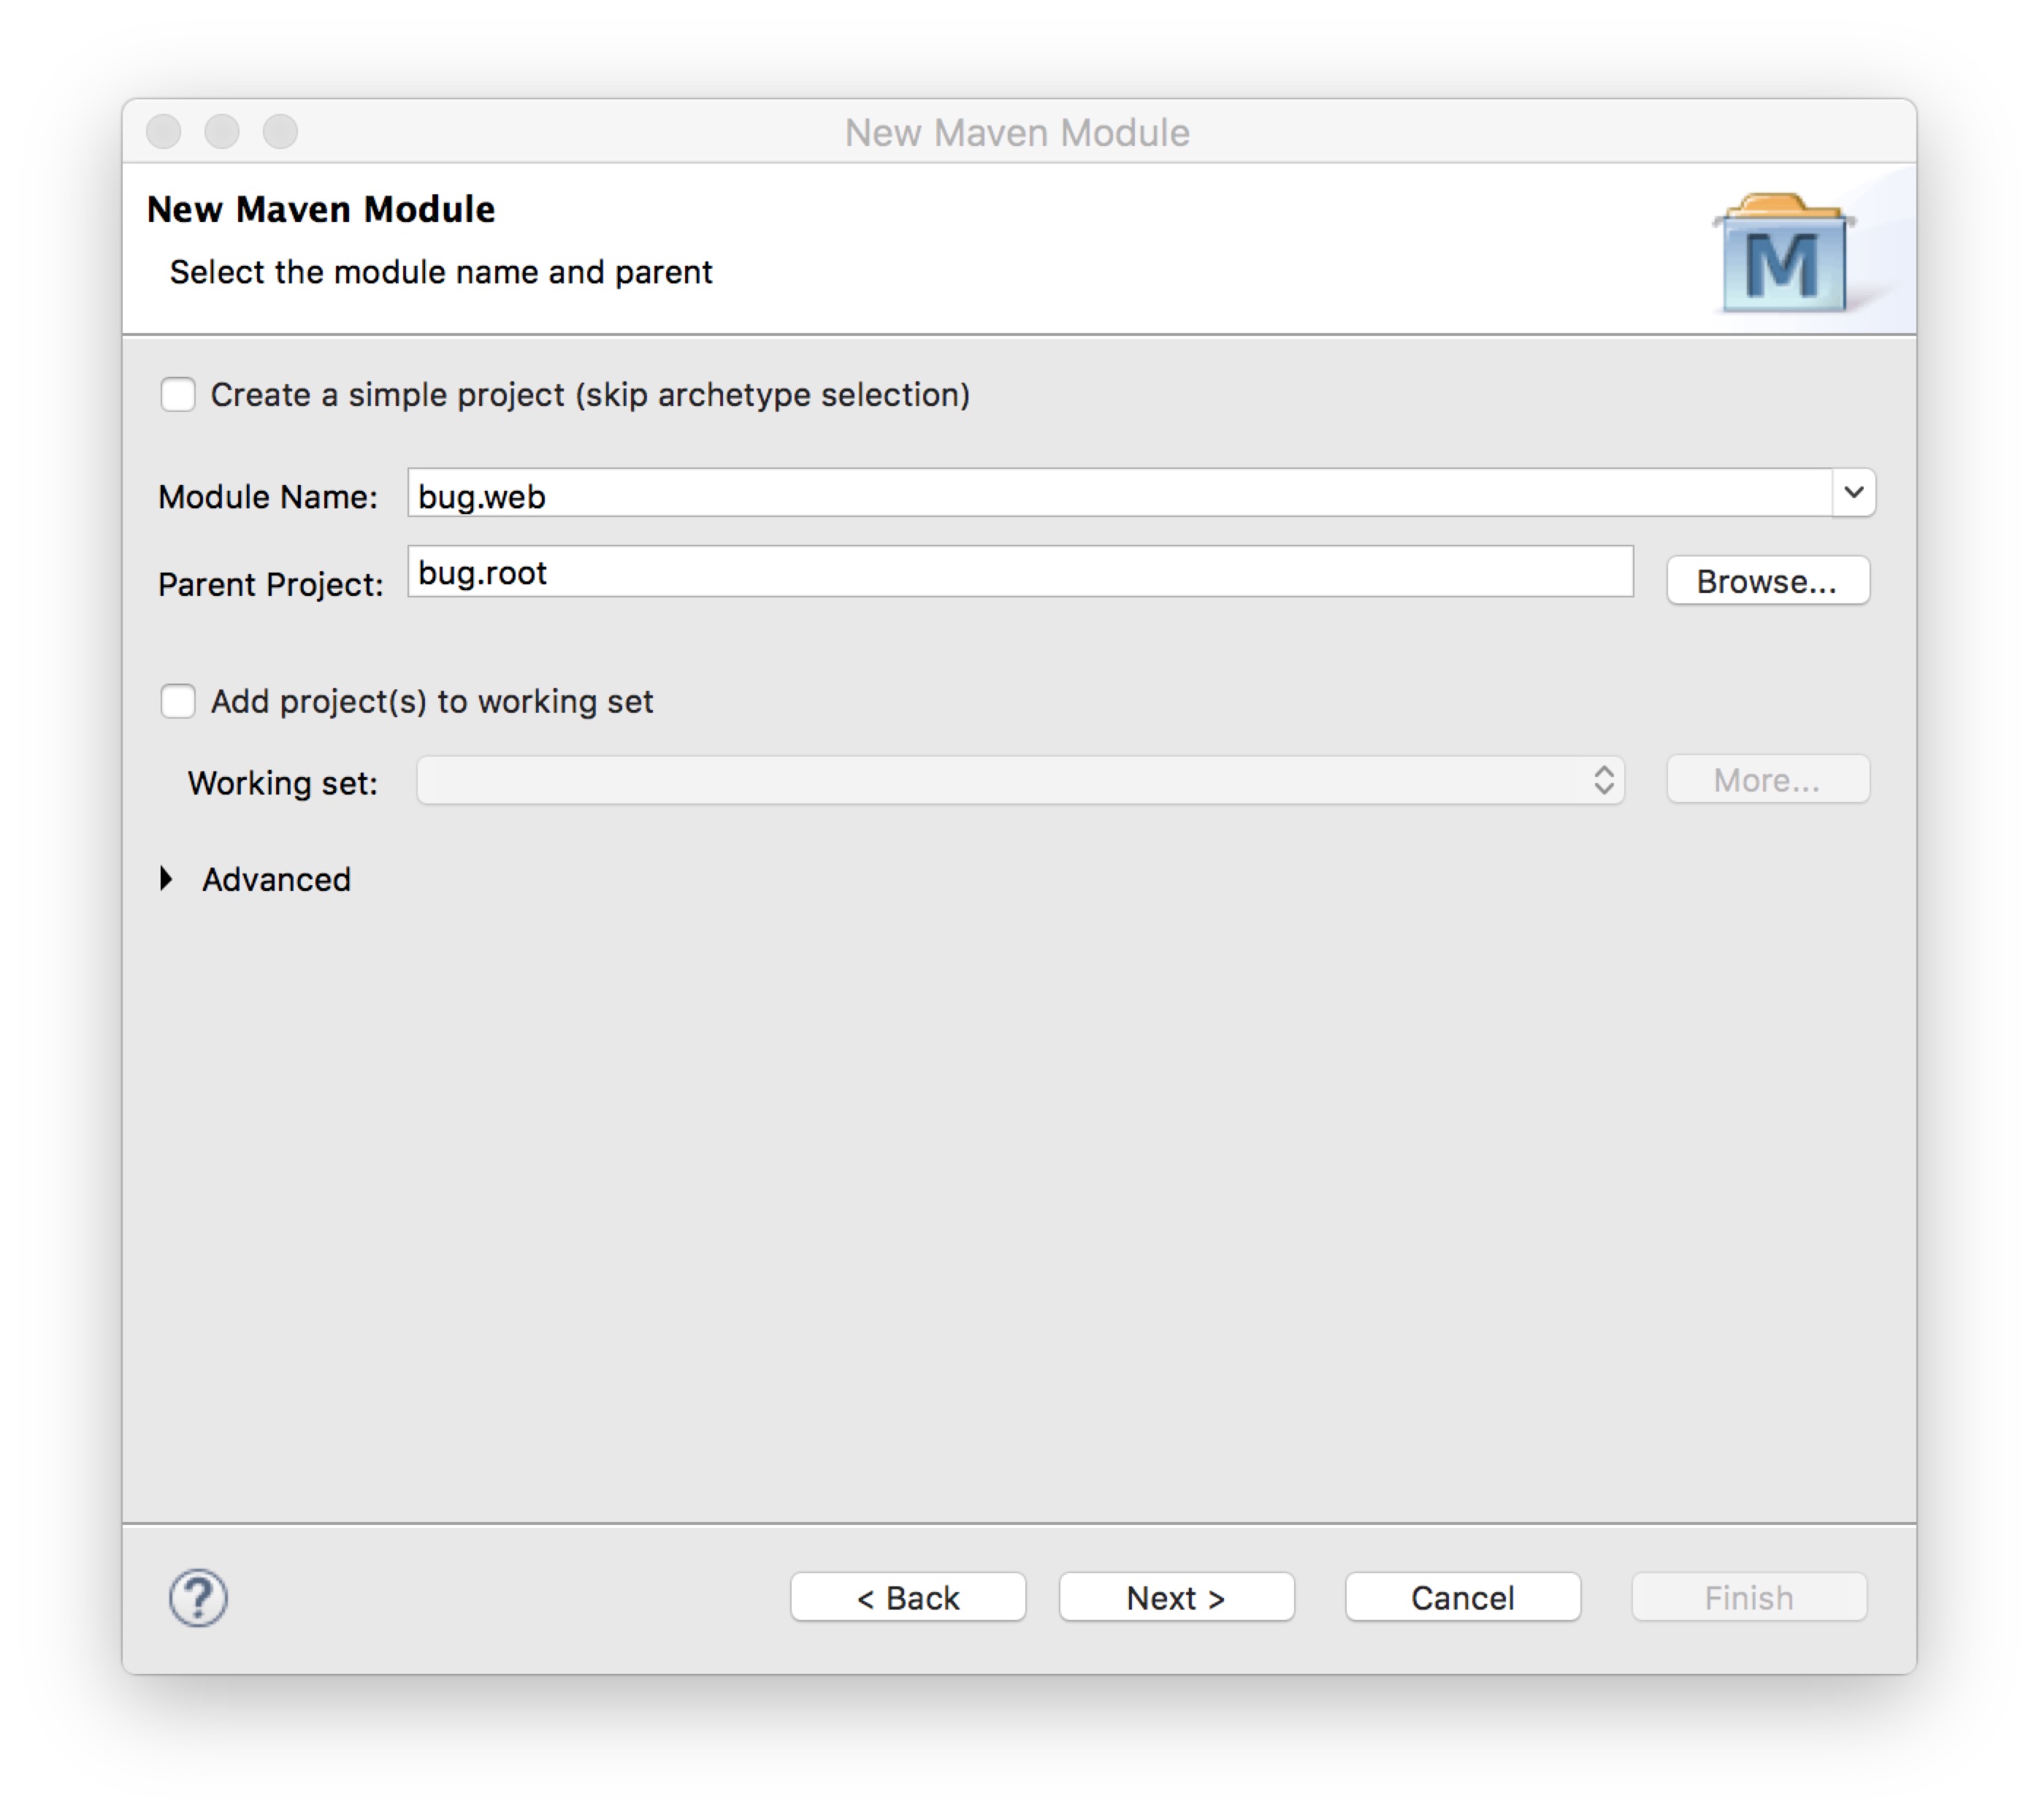
接下来创建bug.model模块,右键new->Maven Module,在打开的页面中输入Module Name:bug.model,Parent Project:bug.root
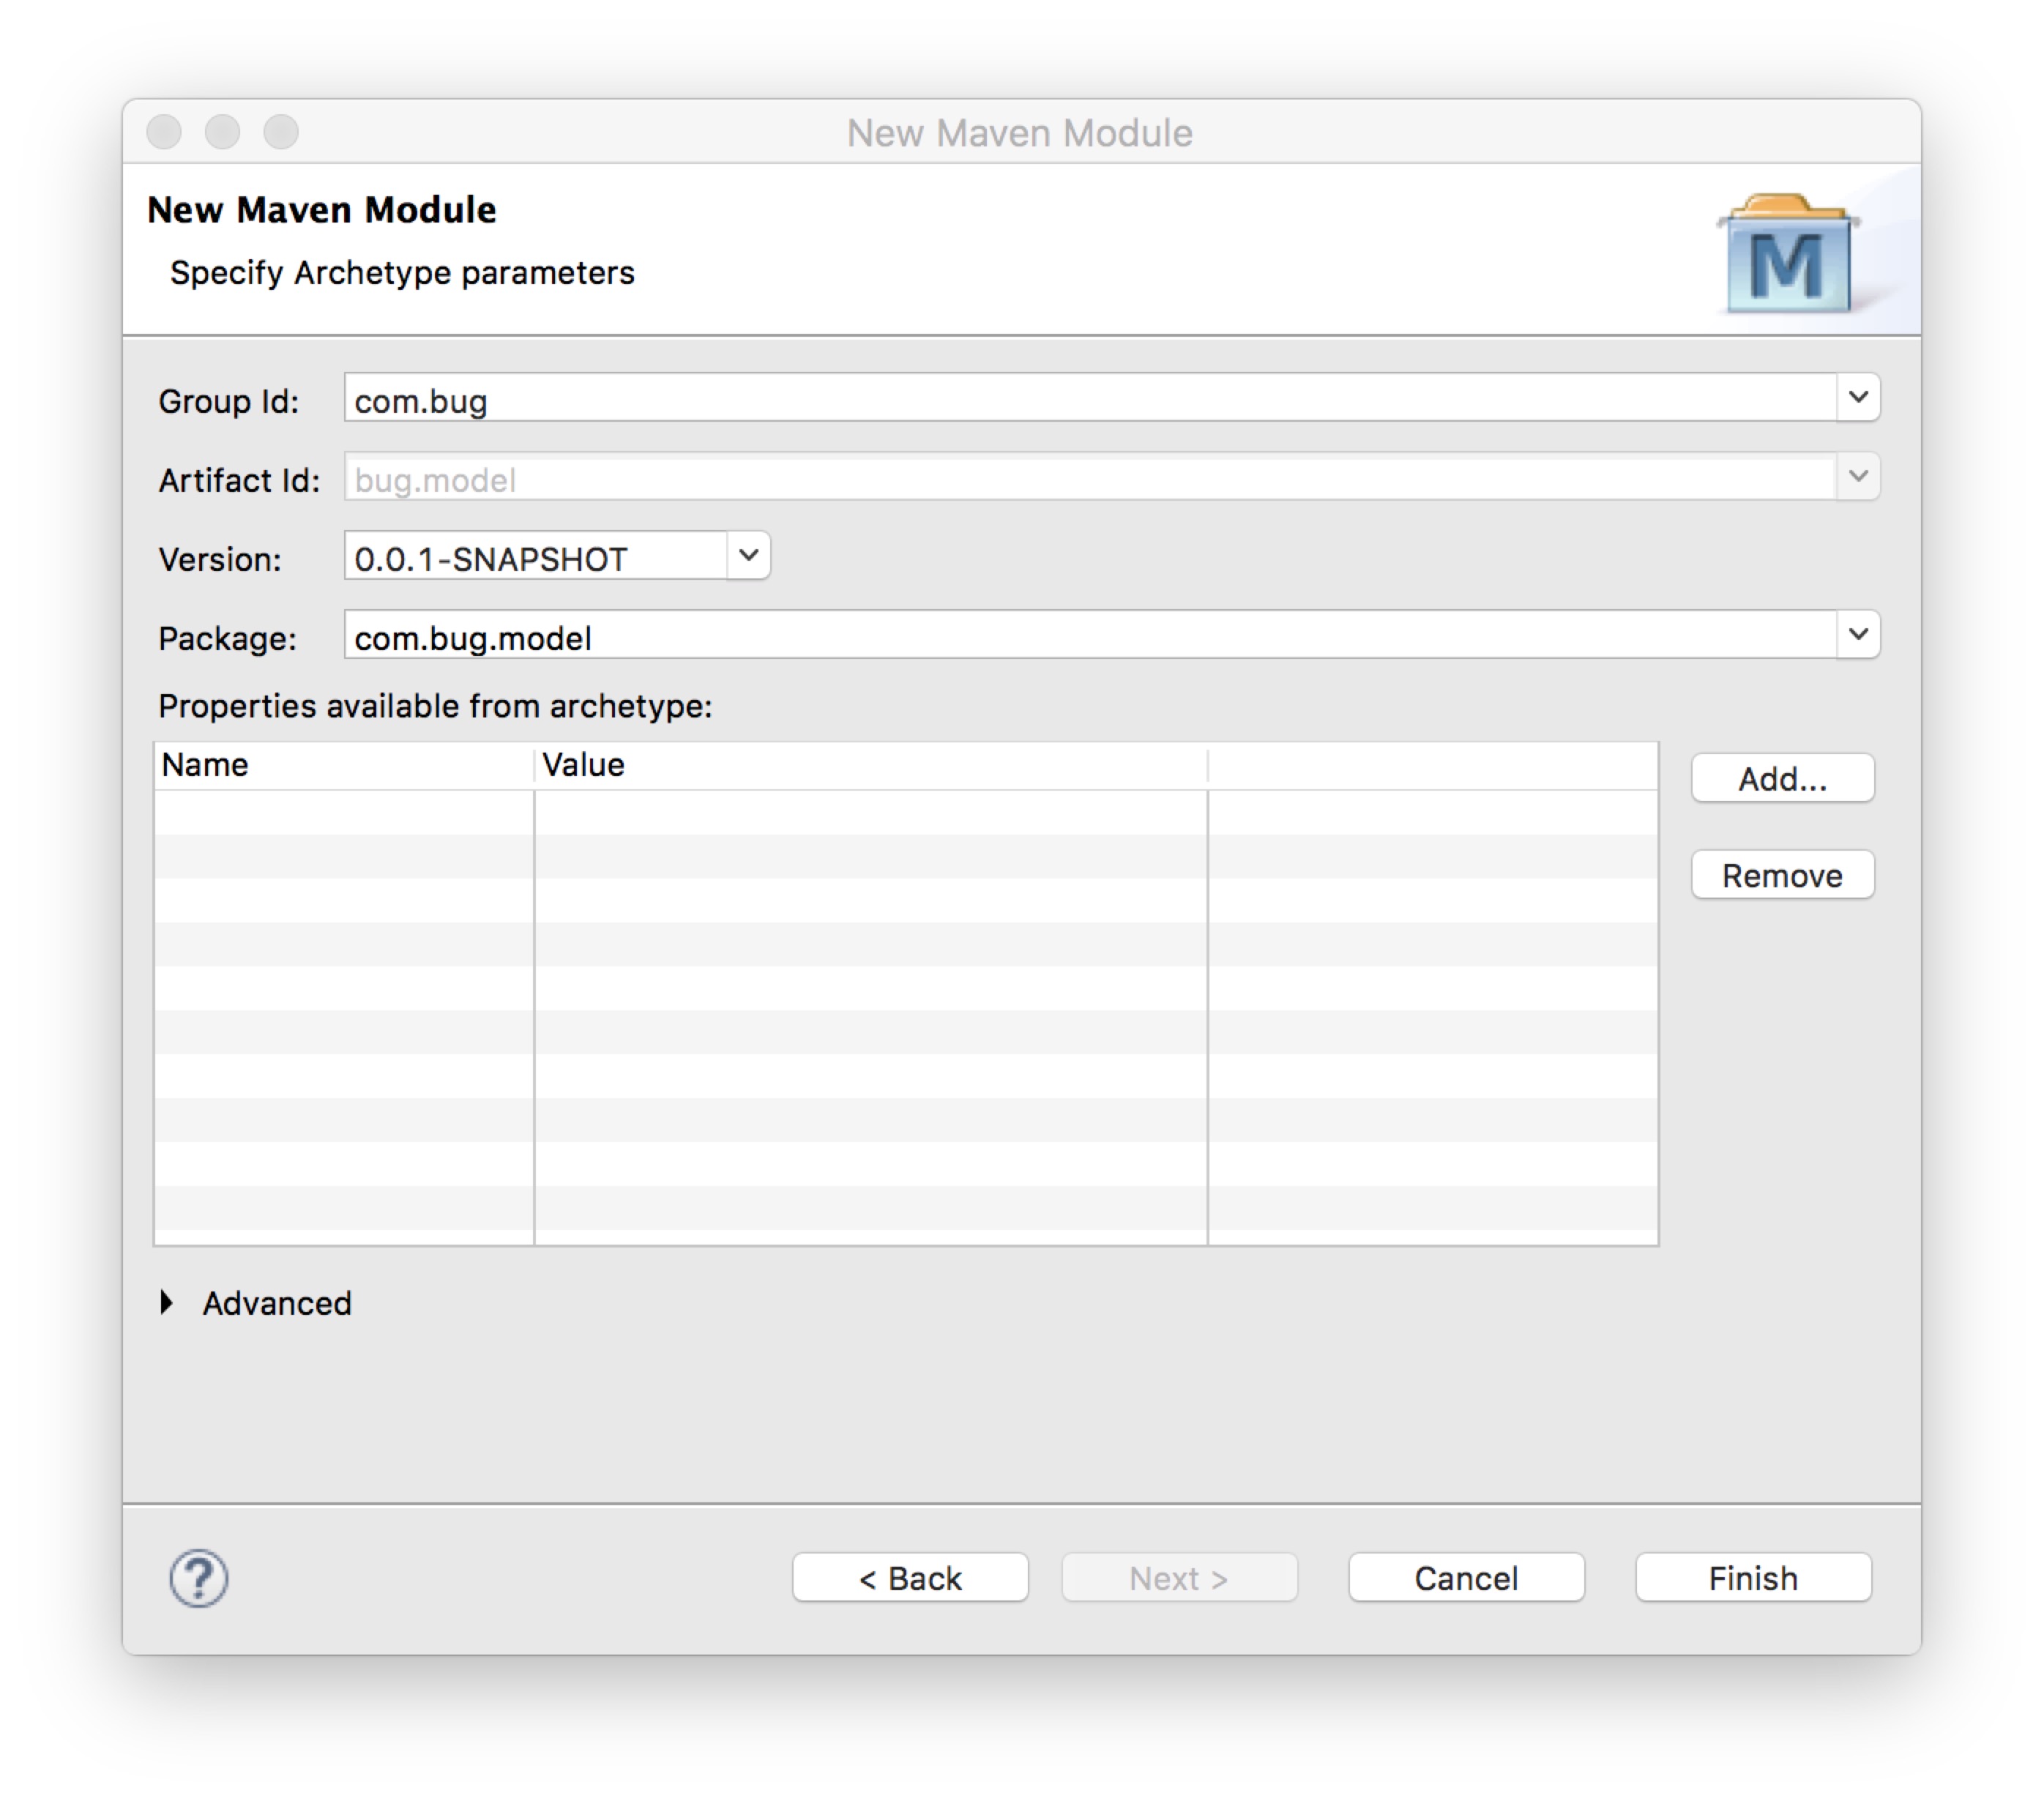
点击下一步,在Select an Archetype中选择maven-archetype-quickstart,点击next,输入Group Id:,Package:com.bug.model然后点击finish
修改bug.model模块下的pom.xml文件,修改后内容如下
- 1
- 2
- 3
- 4
- 5
- 6
- 7
- 8
- 9
- 10
- 11
- 12
- 13
- 14
- 15
- 16
- 17
- 1
- 2
- 3
- 4
- 5
- 6
- 7
- 8
- 9
- 10
- 11
- 12
- 13
- 14
- 15
- 16
- 17
按创建bug.model模块的方式,创建bug.dao,bug.service,bug.common模块
由于bug.web模块和其他模块有点不一样,所以拿出来单独说明一下
右键->new->Maven Module->在打开的页面中输入Module Name:bug.web,Parent Project:bug.root
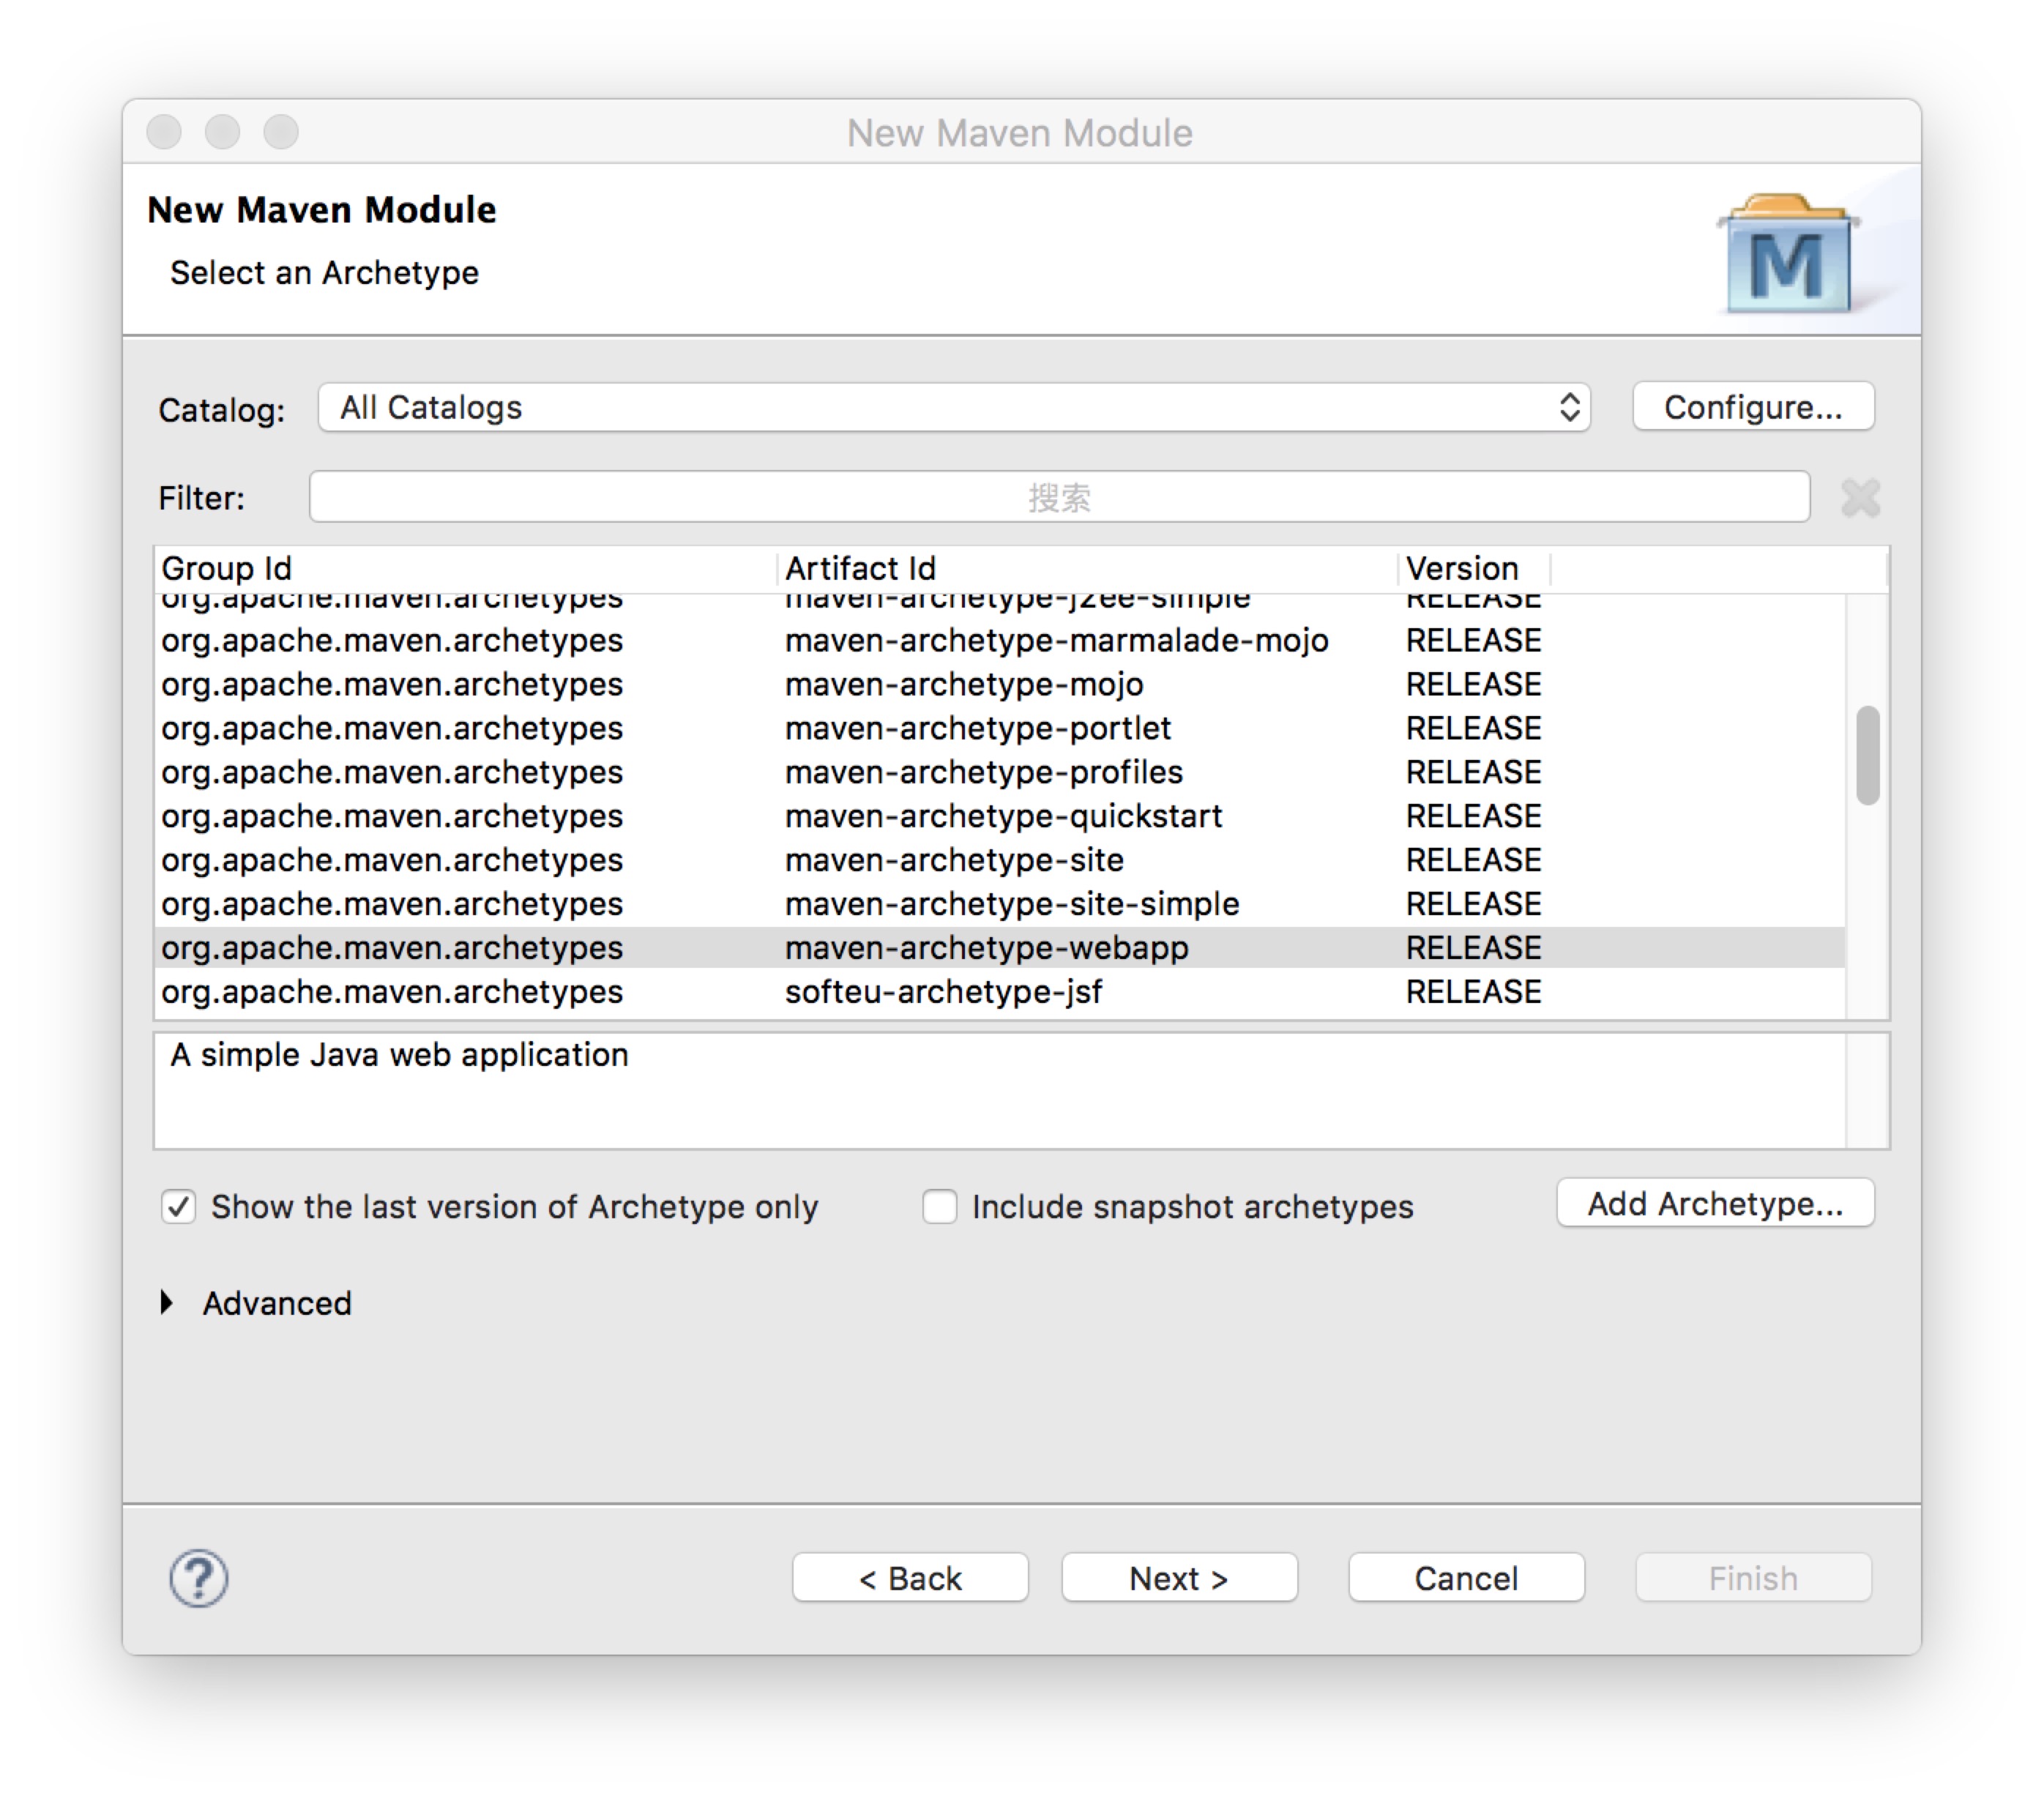
点击下一步,在Select an Archetype中选择maven-archetype-webapp(这里就是不一样的地方)
点击下一步,输入Group Id:com.bug,Package:com.bug.web,点击Finish完成

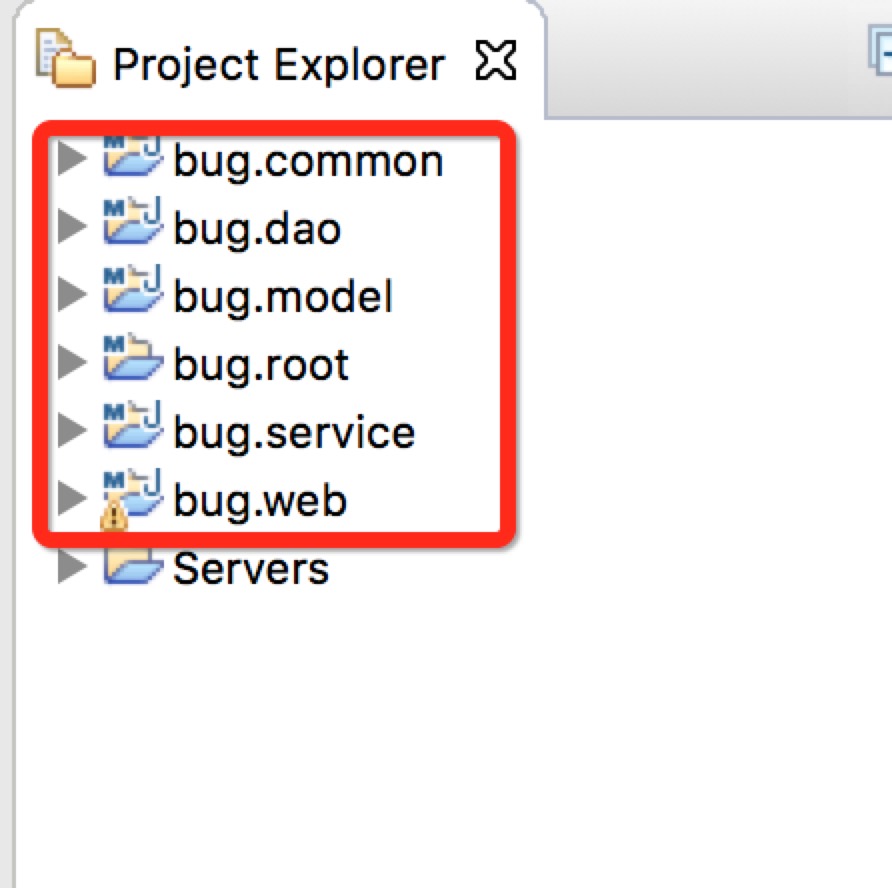
到这里,整个项目结构就创建完成了,工程结构如下
bug.root根模块下的pom.xml文件内容如下
- 1
- 2
- 3
- 4
- 5
- 6
- 7
- 8
- 9
- 10
- 11
- 12
- 13
- 14
- 15
- 16
- 1
- 2
- 3
- 4
- 5
- 6
- 7
- 8
- 9
- 10
- 11
- 12
- 13
- 14
- 15
- 16
接下来需要在pom.xml文件中设置模块之间的依赖关系
bug.dao:依赖于bug.model
bug.service:依赖于bug.model、bug.dao、bug.common
bug.web:依赖于bug.service、bug.model、bug.common,由于Maven的依赖关系是传递性的,因此bug.web只需要依赖于bug.service,就会间接的依赖bug.model、bug.dao、bug.common,修改后各模块的pom.xml文件内容如下
bug.dao的pom.xml文件
- 1
- 2
- 3
- 4
- 5
- 6
- 7
- 8
- 9
- 10
- 11
- 12
- 13
- 14
- 15
- 16
- 17
- 18
- 19
- 20
- 21
- 22
- 23
- 24
- 1
- 2
- 3
- 4
- 5
- 6
- 7
- 8
- 9
- 10
- 11
- 12
- 13
- 14
- 15
- 16
- 17
- 18
- 19
- 20
- 21
- 22
- 23
- 24
bug.service的pom.xml文件
- 1
- 2
- 3
- 4
- 5
- 6
- 7
- 8
- 9
- 10
- 11
- 12
- 13
- 14
- 15
- 16
- 17
- 18
- 19
- 20
- 21
- 22
- 23
- 24
- 25
- 26
- 27
- 28
- 29
- 30
- 31
- 32
- 33
- 34
- 1
- 2
- 3
- 4
- 5
- 6
- 7
- 8
- 9
- 10
- 11
- 12
- 13
- 14
- 15
- 16
- 17
- 18
- 19
- 20
- 21
- 22
- 23
- 24
- 25
- 26
- 27
- 28
- 29
- 30
- 31
- 32
- 33
- 34
bug.web的pom.xml文件
- 1
- 2
- 3
- 4
- 5
- 6
- 7
- 8
- 9
- 10
- 11
- 12
- 13
- 14
- 15
- 16
- 17
- 18
- 19
- 20
- 21
- 22
- 23
- 24
- 25
- 26
- 27
- 28
- 29
- 30
- 31
- 32
- 33
- 34
- 35
- 36
- 1
- 2
- 3
- 4
- 5
- 6
- 7
- 8
- 9
- 10
- 11
- 12
- 13
- 14
- 15
- 16
- 17
- 18
- 19
- 20
- 21
- 22
- 23
- 24
- 25
- 26
- 27
- 28
- 29
- 30
- 31
- 32
- 33
- 34
- 35
- 36
接下来需要引入Spring+Spring MVC+Mybatis相关Jar包到项目中,由于我使用的是Maven,因此就不需要将Jar包放到在WEB-INF/lib下了,Maven会自己管理Jar包,但是jar包的依赖放到哪个模块下的pom.xml文件中呢,由于bug.root是所有模块的根模块,因此jar包的依赖需要放到bug.root根模块下的pom.xml文件中,最后完整的pom.xml内容如下
- 1
- 2
- 3
- 4
- 5
- 6
- 7
- 8
- 9
- 10
- 11
- 12
- 13
- 14
- 15
- 16
- 17
- 18
- 19
- 20
- 21
- 22
- 23
- 24
- 25
- 26
- 27
- 28
- 29
- 30
- 31
- 32
- 33
- 34
- 35
- 36
- 37
- 38
- 39
- 40
- 41
- 42
- 43
- 44
- 45
- 46
- 47
- 48
- 49
- 50
- 51
- 52
- 53
- 54
- 55
- 56
- 57
- 58
- 59
- 60
- 61
- 62
- 63
- 64
- 65
- 66
- 67
- 68
- 69
- 70
- 71
- 72
- 73
- 74
- 75
- 76
- 77
- 78
- 79
- 80
- 81
- 82
- 83
- 84
- 85
- 86
- 87
- 88
- 89
- 90
- 91
- 92
- 93
- 94
- 95
- 96
- 97
- 98
- 99
- 100
- 101
- 102
- 103
- 104
- 105
- 106
- 107
- 108
- 109
- 110
- 111
- 112
- 113
- 114
- 115
- 116
- 117
- 118
- 119
- 120
- 121
- 122
- 123
- 124
- 125
- 126
- 127
- 128
- 129
- 130
- 131
- 132
- 133
- 134
- 135
- 136
- 137
- 138
- 139
- 140
- 141
- 142
- 143
- 144
- 145
- 146
接下来需要配置spring mvc需要的支持文件spring-servlet.xml及spring和mybatis整合需要的applicationContext.xml配置文件
在bug.web模块中的resources资源文件夹下创建config目录,在目录中创建以下文件
applicationContext.xml
jdbc.properties
log4j.properties – 内容暂时可以不写,留空
spring-servlet.xml
applicationContext.xml是Spring及Mybatis整合的配置文件,数据库的数据源,事务控制,Service层,Dao层的扫描都到这里配置,完整的applicationContext.xml的内容如下
- 1
- 2
- 3
- 4
- 5
- 6
- 7
- 8
- 9
- 10
- 11
- 12
- 13
- 14
- 15
- 16
- 17
- 18
- 19
- 20
- 21
- 22
- 23
- 24
- 25
- 26
- 27
- 28
- 29
- 30
- 31
- 32
- 33
- 34
- 35
- 36
- 37
- 38
- 39
- 40
- 41
- 42
- 43
- 44
- 45
- 46
- 47
- 48
- 49
- 50
- 51
- 52
- 53
- 54
- 55
- 56
- 57
- 58
- 59
- 60
- 61
- 62
- 63
- 64
- 65
- 66
- 67
- 68
- 69
- 70
- 71
从上面的配置可看出,事务在Servie层控制,如果Service层成功,在Controller层异常,事务一样会提交,这里要强调一点,如果是Service A调Service B,要做到B的失败不影响A事务的提交,只需要在B异常时,在A中try…catch掉,异常不抛给Controller层就可以了,但是要注意,B失败后事务要回滚,在B中异常,异常一定要往外抛,不然B的事务回滚不了
jdbc.properties是数据库连,账号,密码配置文件,内容如下
- 1
- 2
- 3
- 4
- 1
- 2
- 3
- 4
spring-servlet.xml是mvc控制层的配置文件,控制层的扫描,静态资源文件,视图解析器都到这里设置,完整的spring-servlet.xml文件内容如下
- 1
- 2
- 3
- 4
- 5
- 6
- 7
- 8
- 9
- 10
- 11
- 12
- 13
- 14
- 15
- 16
- 17
- 18
- 19
- 20
- 21
- 22
- 23
- 24
- 25
- 26
- 27
- 28
- 29
- 30
- 31
- 32
- 33
- 34
- 35
- 36
- 1
- 2
- 3
- 4
- 5
- 6
- 7
- 8
- 9
- 10
- 11
- 12
- 13
- 14
- 15
- 16
- 17
- 18
- 19
- 20
- 21
- 22
- 23
- 24
- 25
- 26
- 27
- 28
- 29
- 30
- 31
- 32
- 33
- 34
- 35
- 36
这里说明一下,由于我使用的是Spring的Restful风格,URL路径不需要有.do,.action之类的后辍,因此在web.xml中设置拦截所有请求,这时候就有一个问题,静态资源也会被拦截,因此我就使用标签指定静态资源路径,凡是到指定路径下的文件,都不会被拦截,这只是其中一种处理方式,还有另外一种是启用servlet-default,在web.xml中指定不需要拦截的文件
视图解析器指定了只能以.jsp结尾的文件为渲染文件,并且所有的jsp文件都需要放到/WEB-INF/jsp/目录下才能被渲染
最后一步,修改web.xml文件,修改后的web.xml文件内容如下
- 1
- 2
- 3
- 4
- 5
- 6
- 7
- 8
- 9
- 10
- 11
- 12
- 13
- 14
- 15
- 16
- 17
- 18
- 19
- 20
- 21
- 22
- 23
- 24
- 25
- 26
- 27
- 28
- 29
- 30
- 31
- 32
- 33
- 1
- 2
- 3
- 4
- 5
- 6
- 7
- 8
- 9
- 10
- 11
- 12
- 13
- 14
- 15
- 16
- 17
- 18
- 19
- 20
- 21
- 22
- 23
- 24
- 25
- 26
- 27
- 28
- 29
- 30
- 31
- 32
- 33
到这里,整个配置就完成了,接下来写一个示例,从页面发送请求到Controller –>service–>Dao层,体验一下MVC的强大之处,请看《Spring+Spring MVC+Mybatis+Maven搭建多模块项目(二)》


 1485
1485

 被折叠的 条评论
为什么被折叠?
被折叠的 条评论
为什么被折叠?
 到【灌水乐园】发言


