


C# 11 中的 required members
Intro
在 C# 11 中引入了一个新的特性 —— Required Members,引入了一个新的 required 关键词,可以用来表示字段或者属性在类型初始化的时候必须要进行初始化,这一特性也进一步的改进了可空引用类型的用法。
Sample
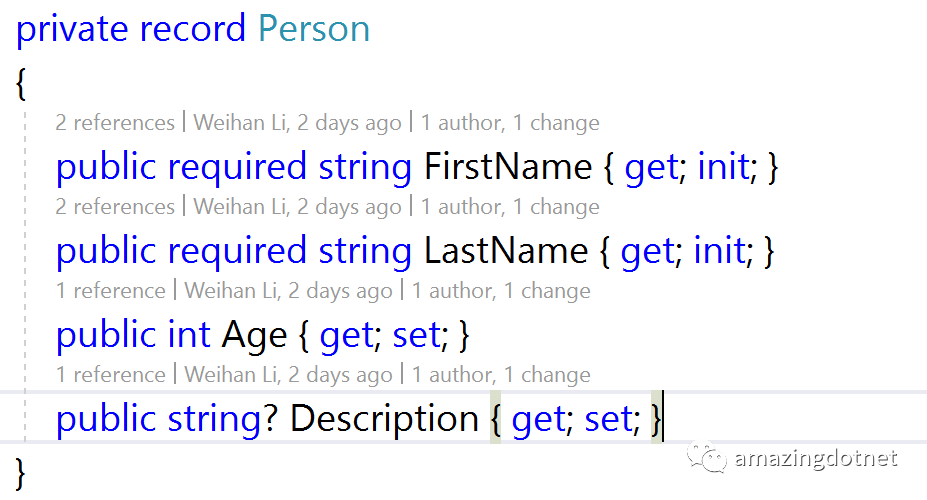
示例如下:
private record Person
{
    public required string FirstName { get; init; }
    public required string LastName { get; init; }
    public int Age { get; set; }
    public string? Description { get; set; }
}
在现在的 C# 中,如果没有 required 启用了可空引用类型, FirstName 和 LastName 就会有下面这样的编译器警告

目前的做法基本上是声明一个默认值比如:
public string FirstName { get; init; } = string.Empty;
public string FirstName { get; init; } = null!;
有了 required 修饰符后,就不需要再这样写了也不会有警告了
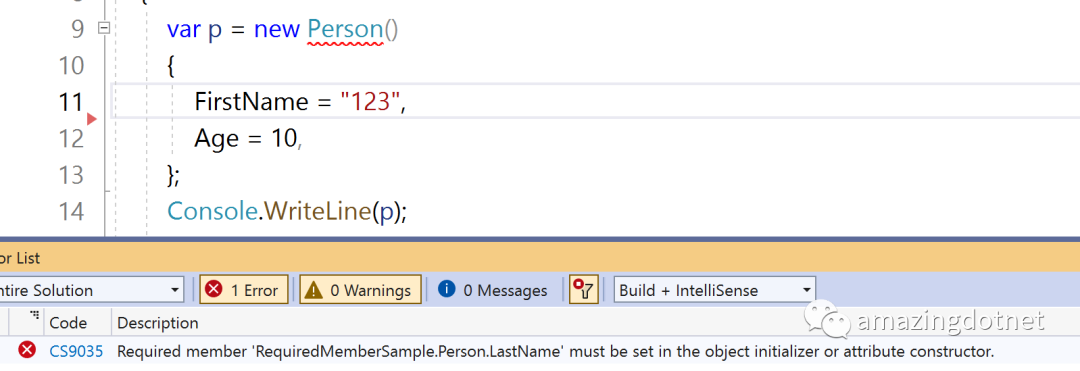
声明为 required 之后在对象初始化的时候就必须要进行赋值如果不赋值编译器就会报错
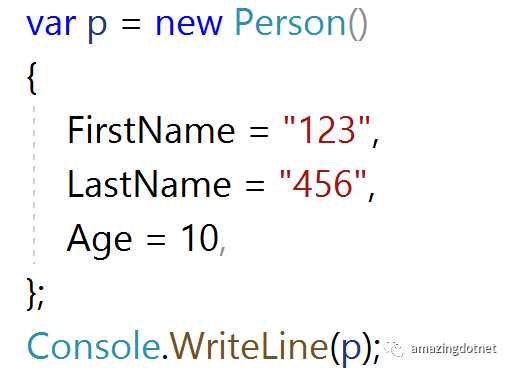
对所有的 required 成员进行初始化之后就不会再报错了
那么它只能用于启用了可空引用类型的不可为空的引用类型吗,并不是的,对于值类型和可以为空的引用类型也是可以使用的,required 只表示成员需要进行初始化,对于可空引用类型的分析做了一些优化
例如:
private record Person
{
public required string FirstName { get; init; }
public required string LastName { get; init; }
public int Age { get; set; }
public required string? Description { get; set; }
}
private sealed class Pet
{
public required string Name { get; init; }
public required int Age { get; init; }
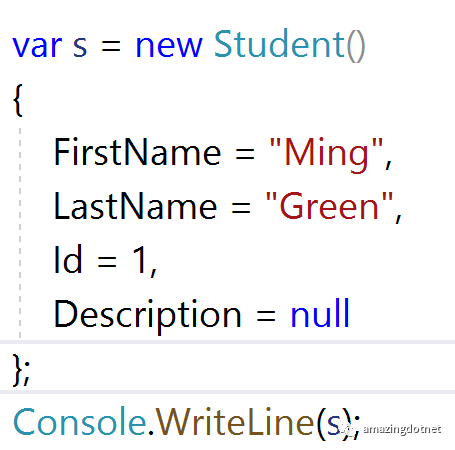
}你也可以使用继承来扩展
private record Person
{
    public required string FirstName { get; init; }
    public required string LastName { get; init; }
    public int Age { get; set; }
    public string? Description { get; set; }
}

private sealed record Student : Person
{
    public required int Id { get; set; }
}
这样我们初始化的时候 Student 类型中的 Id 和继承于 Person 的 required 成员都需要进行初始化
如果我们类型中有特殊的构造方法,我们在构造方法上对这些 required 成员进行了初始化,那么我们就不需要再初始化这些 required 成员了但是目前编译器还没做到这一点,目前需要我们手动的在初始化了 required 成员的构造方法上添加一个 SetsRequiredMembers atrribute,以告知编译我们在这个构造方法中已经初始化了 required 成员,不要再报告错误了,这一点感觉也是现在体验一个不太好的一个地方
private sealed class Pet
{
    public required string Name { get; init; }
    public required int Age { get; init; }
    public Pet()
    {
    }

    [SetsRequiredMembers]
    public Pet(string name) => Name = name;
}

var pet = new Pet { Name = "0.0", Age = 1 };
Console.WriteLine($"{pet.Name} -- {pet.Age}");
var pet2 = new Pet("test");
Console.WriteLine($"{pet2.Name} -- {pet2.Age}");
如果不加 SetsRequiredMembers Attribute 在调用对应成员的构造方法时编译器仍然会提示必须要初始化 required 成员,错误如下:
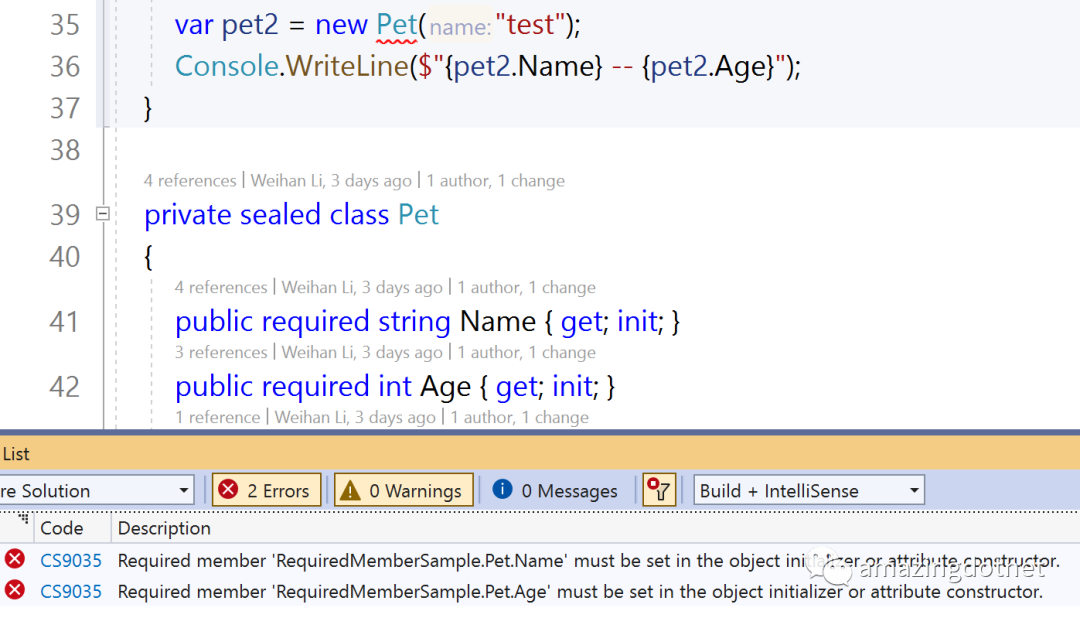
但仔细观察前面的示例的话也能看出来其实是有点问题的,就是 Age 是 required 成员,但是我们在构造方法中并没有进行初始化编译器也没有报错,相当于我们欺骗了编译器,我们通过 SetsRequiredMembers 告诉编译器我们在这个构造方法中会初始化所有的 required 成员,但是实际上有些成员并没有进行初始化,然而编译器也没报错,感觉这点上后面可以再优化优化
More
required 成员只是编译器层面的一个检查,实际运行时和普通的成员是一样的,所以就序列化反序列化而言和此前一样,前面示例的成员都是属性,required 也可以用于字段,可以用在结构体中
对我来言,很大的意义是对于可空引用类型而言,就不用再写 = null!; 这样的代码了
大家可以在最新的 .NET 7 Preview 7 中进行体验,前面的示例可以从 Github 上获取:https://github.com/WeihanLi/SamplesInPractice/blob/master/CSharp11Sample/RequiredMemberSample.cs
References
https://docs.microsoft.com/en-us/dotnet/csharp/language-reference/keywords/required
https://github.com/WeihanLi/SamplesInPractice/blob/master/CSharp11Sample/RequiredMemberSample.cs
https://github.com/dotnet/csharplang/blob/main/proposals/required-members.md
https://github.com/dotnet/csharplang/issues/3630


 317
317


 被折叠的 条评论
为什么被折叠?
被折叠的 条评论
为什么被折叠?
 到【灌水乐园】发言


