BCVP 开发者社区出品
BCVP V3开发
数字化
服务化
绿色化
放假不停歇,趁着假期学习下VUE3相关的内容,一方面是自己保持活力,另一方面也是工作需要,本系列是我的自学教程,如果有从0开始学习VUE3的,可以跟着一起练习下,毕竟前端我也是泥腿子出身,这一系列会使用Vite、TS、Pinia、Element-Plus等新知识点,既是查漏补缺,也是知识分享。
代码地址:
https://github.com/anjoy8/bcvp.vue3.git
这是每篇文章一节课一个分支,方便大家学习,会慢慢的将blog.admin项目进行翻新,使用的后端接口还是BlogCore。
系列文章:
0、本文介绍
本文参考的是开源项目
https://gitee.com/HalseySpicy/Geeker-Admin/tree/template
分步骤讲解各个核心逻辑。
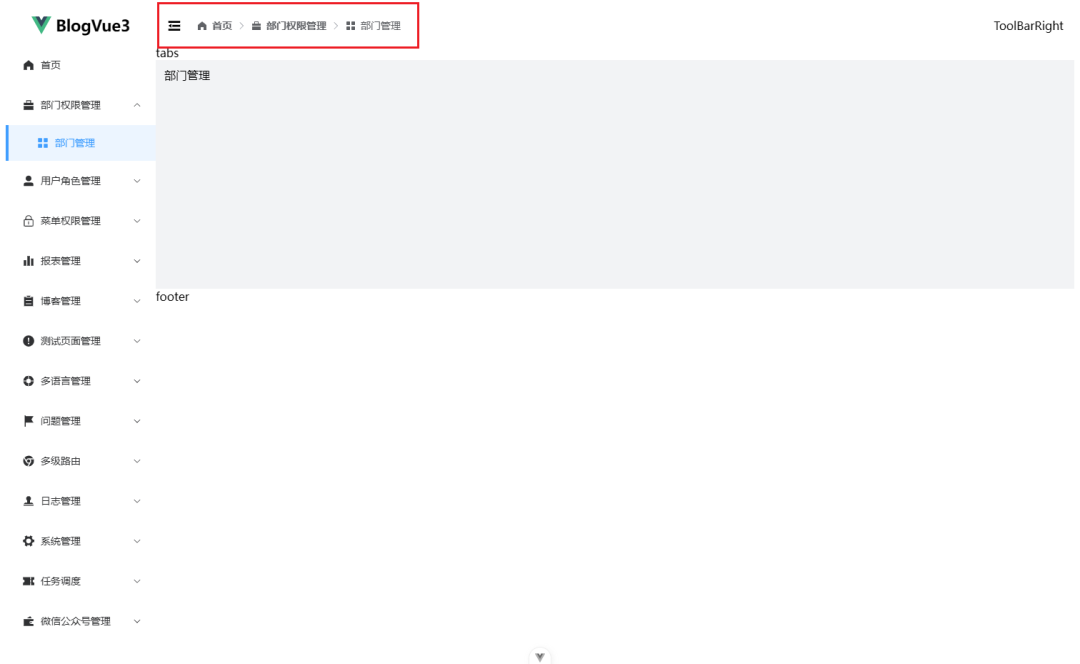
今天说一下布局Header中的左侧功能菜单——面包屑,同时也把左侧菜单的图标给换一下,整体效果如下。

1、封装ToolBarLeft组件
还是老规矩,定义一个新的功能组件,
新建文件src\layouts\components\Header\ToolBarLeft.vue:
<template>
  <div class="tool-bar-lf">
    <CollapseIcon id="collapseIcon" />
    <Breadcrumb v-if="globalStore.breadcrumb" id="breadcrumb" />
  </div>
</template>


<script setup lang="ts">
import { useGlobalStore } from "@/stores/modules/global";
import CollapseIcon from "./components/CollapseIcon.vue";
import Breadcrumb from "./components/Breadcrumb.vue";
const globalStore = useGlobalStore();
</script>


<style scoped lang="scss">
.tool-bar-lf {
  display: flex;
  align-items: center;
  justify-content: center;
  overflow: hidden;
  white-space: nowrap;
}
</style>
包含两个子组件,一个是左侧菜单的折叠与展开,另一个就是面包屑。
2、封装菜单展开/折叠功能
新建文件src\layouts\components\Header\components\CollapseIcon.vue
<template>
  <el-icon class="collapse-icon" @click="changeCollapse">
    <component :is="globalStore.isCollapse ? 'expand' : 'fold'"></component>
  </el-icon>
</template>


<script setup lang="ts">
import { useGlobalStore } from "@/stores/modules/global";


const globalStore = useGlobalStore();
const changeCollapse = () => globalStore.setGlobalState("isCollapse", !globalStore.isCollapse);
</script>


<style scoped lang="scss">
.collapse-icon {
  margin-right: 20px;
  font-size: 22px;
  color: var(--el-header-text-color);
  cursor: pointer;
}
</style>
这里还是用到了状态管理器,可以响应式的更新菜单的展开和折叠状态,保证多个组件状态是同步响应。
3、封装面包屑组件
继续新建文件src\layouts\components\Header\components\Breadcrumb.vue,添加内容:
<template>
  <div :class="['breadcrumb-box mask-image', !globalStore.breadcrumbIcon && 'no-icon']">
    <el-breadcrumb :separator-icon="ArrowRight">
      <transition-group name="breadcrumb">
        <el-breadcrumb-item v-for="(item, index) in breadcrumbList" :key="item.path">
          <div class="el-breadcrumb__inner is-link" @click="onBreadcrumbClick(item, index)">
            <el-icon v-show="item.meta.title && globalStore.breadcrumbIcon" class="breadcrumb-icon">
              <component :is="item.meta.icon"></component>
            </el-icon>
            <span class="breadcrumb-title">{{ item.meta.title }}</span>
          </div>
        </el-breadcrumb-item>
      </transition-group>
    </el-breadcrumb>
  </div>
</template>


<script setup lang="ts">
import { computed } from "vue";
import { useRoute, useRouter } from "vue-router";
import { ArrowRight } from "@element-plus/icons-vue";
import { useAuthMenuStore } from "@/stores/modules/authMenu";
import { useGlobalStore } from "@/stores/modules/global";


const route = useRoute();
const router = useRouter();
const authStore = useAuthMenuStore();
const globalStore = useGlobalStore();


const breadcrumbList = computed(() => {
  let breadcrumbData = authStore.breadcrumbListGet[route.matched[route.matched.length - 1].path] ?? [];
  // 把首页也加上,方便快速返回首页
  if (breadcrumbData[0].path !== '/') {
    breadcrumbData = [{ path: '/', meta: { icon: "HomeFilled", title: "首页" } }, ...breadcrumbData];
  }
  return breadcrumbData;
});


// Click Breadcrumb
const onBreadcrumbClick = (item: Menu.MenuOptions, index: number) => {
  if (index < breadcrumbList.value.length - 2) router.push(item.path);
};
</script>
主要利用element-plus的官方组件,循环遍历当前路由的父级路由和祖级路由,进行渲染,(这个遍历的数据源是左侧菜单的数据集合),同时还追加了一个首页面包屑,提供一个首页入口,可以快速方便的返回首页。
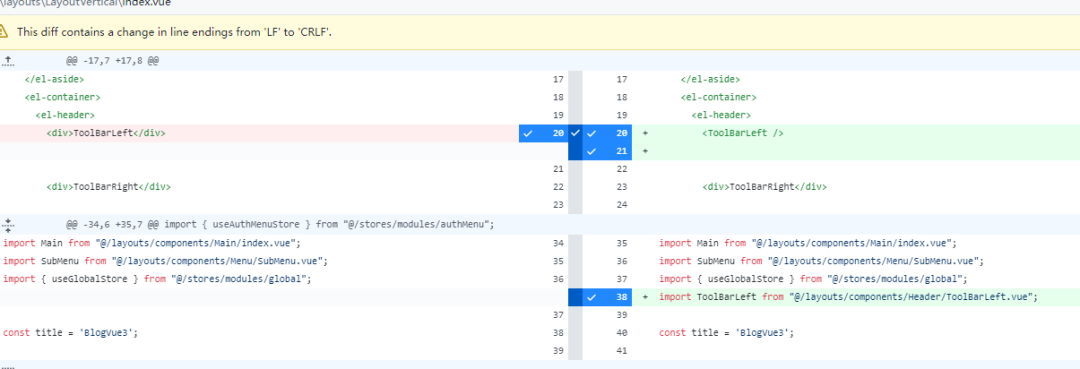
然后直接在Layout模板中,引用ToolBarLeft组件即可

4、修改左侧菜单的图标
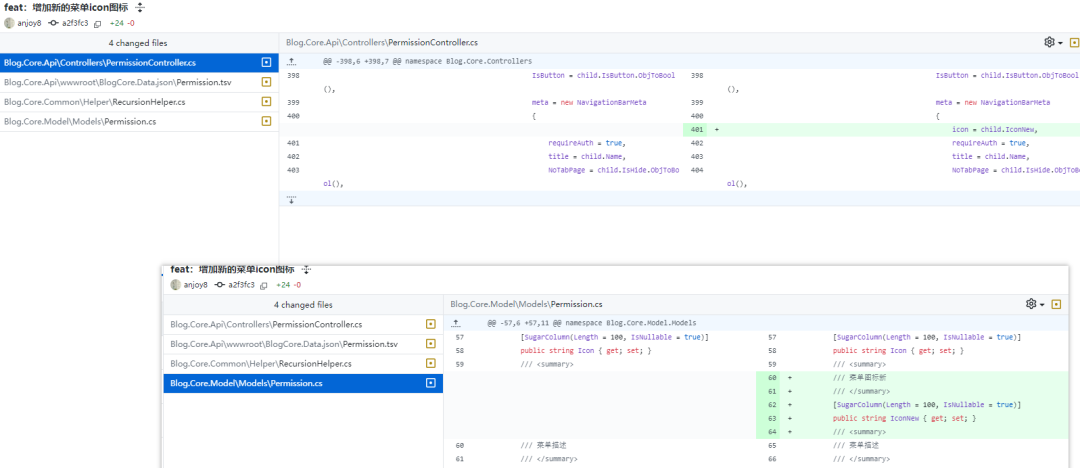
这里需要在BlogCore中做一个简单的优化,之前的icon是针对fa图库的,在vue3以后就打算使用element-plus自带的图标,所以就新增了一个iconNew字段,赋值新的图标,后端修改的内容很少,就是增加个字段:

前端也比较简单,直接修改Submenu组件

刷新页面,就能看到本节课的效果了,

下篇文章我们继续讲解下一个核心功能点——页面tabs标签功能,敬请期待。


 676
676

 被折叠的 条评论
为什么被折叠?


