


点击上方蓝字关注“汪宇杰博客”

今天我在为一个从TFVC迁移到Git的老项目重新配置发布到Azure App Service的CI/CD管线的时候,Azure DevOps竟然爆了。这是一个微软已知的bug,目前还未修复,我来带大家看看如何手工workaround这个问题。
首先,部署的时候报错消息如下:

Failed to get resource ID for resource type 'Microsoft.Web/Sites' and resourcename 'moonglade'. Error: Could not fetch access token for Managed ServicePrincipal. Please configure Managed Service Identity (MSI) for virtual machine'https://aka.ms/azure-msi-docs'.Status code: 400, status message: Bad Request
本质上是因为Azure DevOps到Azure的连接无效,或者过期了。但是当我尝试重新认证的时候,竟然又爆了:
TF14045: The identity with type 'Microsoft.IdentityModel.Claims.ClaimsIdentity' could not be found.

对此,微软有个已知bug可以追踪:https://developercommunity.visualstudio.com/content/problem/412380/tf14045-the-identity-with-type-microsoftidentitymo-1.html
解决方法
进入 Azure Active Directory > App registrations (Preview)
点击 "+ New registration"
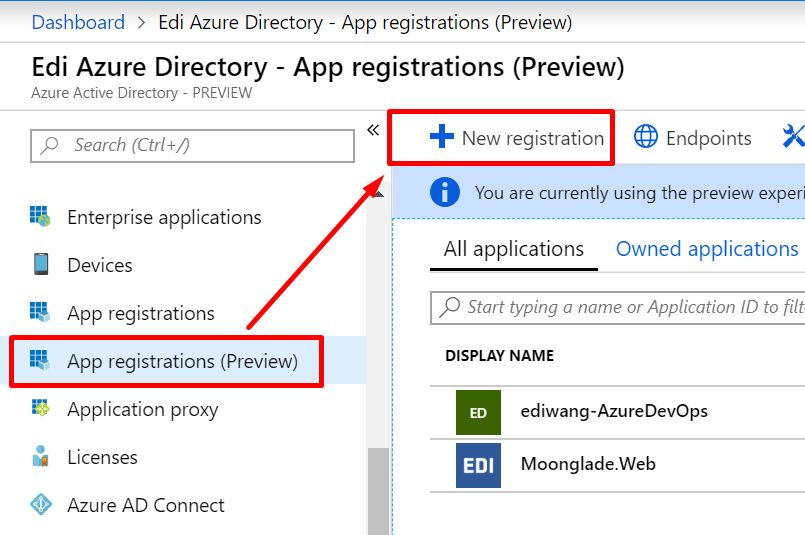
指定一个 Name,如 ediwang-AzureDevOps
选择 "Accounts in this organizational directory only"
Redirection URL 填: https://VisualStudio/SPN

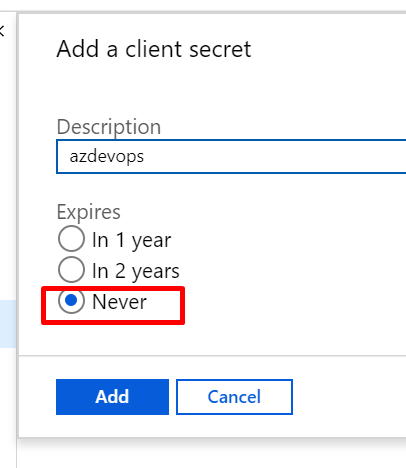
Description 任意,Expires 建议选 Never
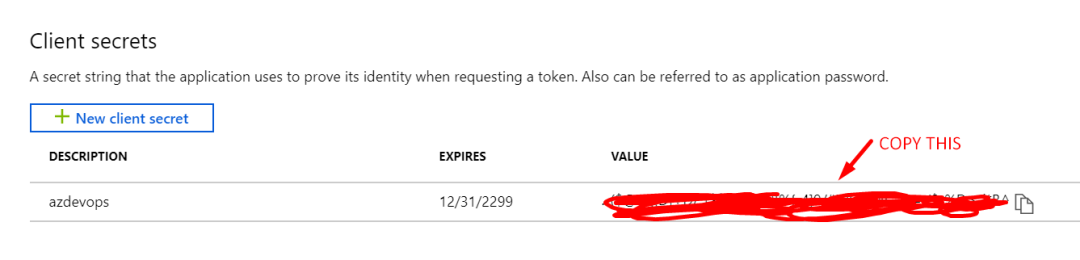
然后把 Client Secrets 里的密钥复制出来
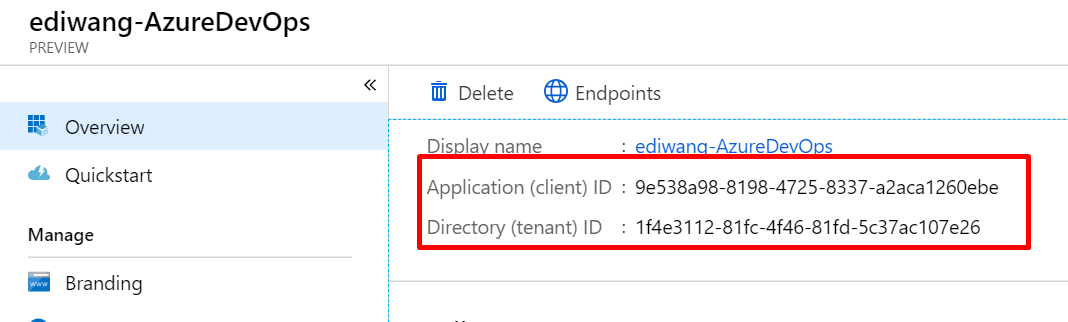
还有Overview 里的 Application (client) ID 以及 Directory (tenant) ID
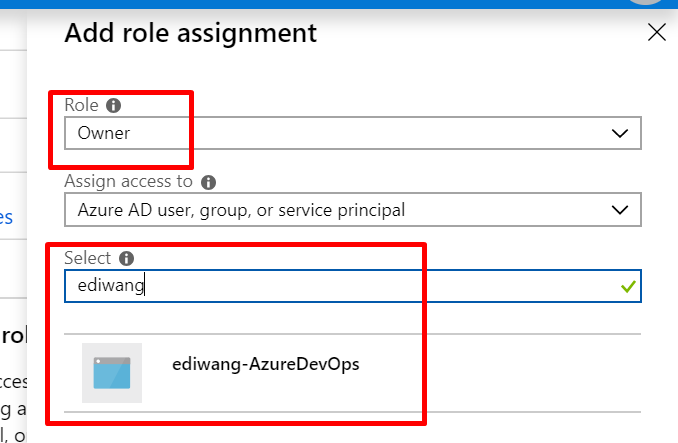
然后到 Subscription > Access control (IAM) 里搜索刚才创建的App名字,搜到以后,Add a role assignment

然后安排一个 Owner,Azure这边就搞定了!
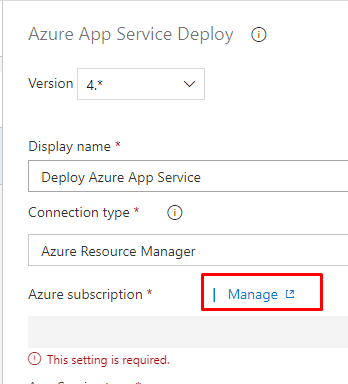
然后回到 Azure DevOps
在 Azure App Service Deploy 的任务里点 Manage
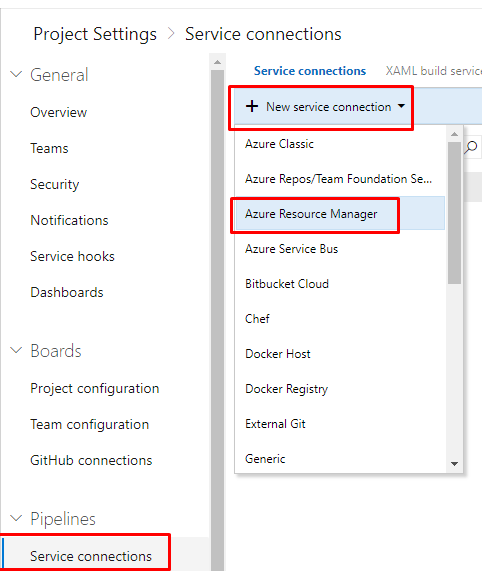
在 Service Connections 里添加一个 Azure Resource Manager
然后点“use the full version of the service connection dialog.”
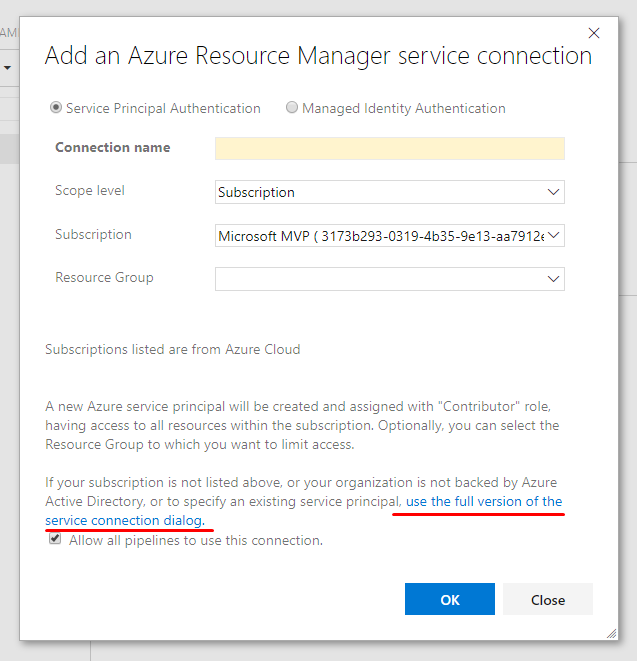
选择和输入对应的值。其中 Service pricipal client ID 就是刚才复制的 Application (client) ID,Service pricipal key 就是刚才 Client Secrets 里复制的 VALUE
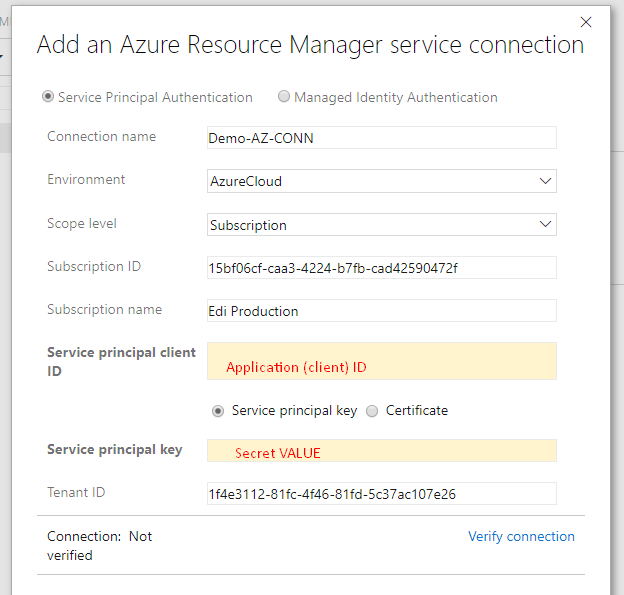
最后点击 Verify connection,不成功便成仁!
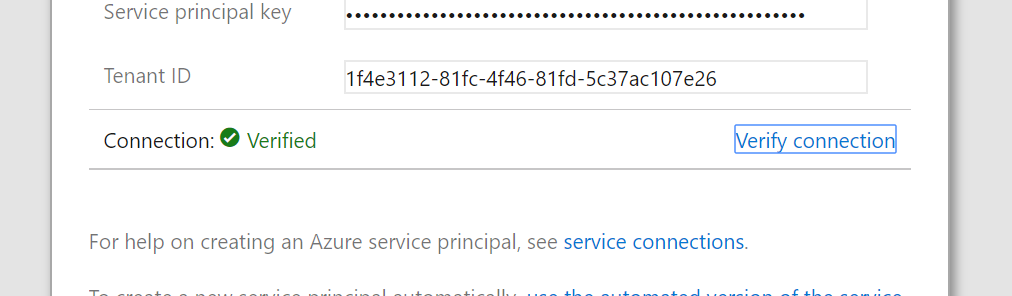
到此为止,就全部搞定了。重新回到你的部署任务里,就能成功选择目标Azure App Service上的网站了,并且能部署成功。
真是不容易……


 957
957


 被折叠的 条评论
为什么被折叠?
被折叠的 条评论
为什么被折叠?
 到【灌水乐园】发言


