


由于在android的丝线机制综fragment和acitivty会被分别实例化为两个不相干的对象,他们之间的联系由activity的一个成员对象FragmntManager来维护,Fragment实例化后到activity中的fragmentManager去注册一下,这个动作封装在Fragment对象的OnAttach中,所以你可以在fragment中声明一些回调接口,当fragment调用onAttach时,将这些回调接口实例化,这样fragment就能调用各个acivity的成员函数了,当然activity必须implements这些接口,否则会报ClassCastExceptionfragment和activity的回调机制又是OOP的又一次完美演绎!
下面通过一个例子来说明
实现的目的:将一个activity用两个fragment分割填充,左侧的fragment中有3个Button,右侧作为内容显示,当点击左侧的按钮,显示对应的文字信息。
首先是activity_main.xml的布局文件
|
1
2
3
4
5
6
7
8
9
10
11
12
13
14
15
16
17
18
19
20
|
<
LinearLayout
xmlns:android
=
"http://schemas.android.com/apk/res/android"
xmlns:tools
=
"http://schemas.android.com/tools"
android:layout_width
=
"match_parent"
android:layout_height
=
"match_parent"
android:orientation
=
"horizontal"
tools:context
=
".MainActivity"
>
<
FrameLayout
android:id
=
"@+id/ui_container"
android:layout_width
=
"0dp"
android:layout_height
=
"match_parent"
android:layout_weight
=
"1"
>
</
FrameLayout
>
<
FrameLayout
android:id
=
"@+id/details_container"
android:layout_width
=
"0dp"
android:layout_height
=
"match_parent"
android:layout_weight
=
"1"
android:background
=
"@android:color/holo_blue_light"
>
</
FrameLayout
>
</
LinearLayout
>
|
效果图如下所示:

左侧的fragment布局left_fragment.xml如下所示:
|
1
2
3
4
5
6
7
8
9
10
11
12
13
14
15
16
17
18
19
20
|
<?
xml
version
=
"1.0"
encoding
=
"utf-8"
?>
<
LinearLayout
xmlns:android
=
"http://schemas.android.com/apk/res/android"
android:orientation
=
"vertical"
android:layout_width
=
"match_parent"
android:layout_height
=
"match_parent"
>
<
Button
android:id
=
"@+id/firstButton"
android:layout_width
=
"wrap_content"
android:layout_height
=
"wrap_content"
android:text
=
"@string/first_button"
/>
<
Button
android:id
=
"@+id/secondButton"
android:layout_width
=
"wrap_content"
android:layout_height
=
"wrap_content"
android:text
=
"@string/second_button"
/>
<
Button
android:id
=
"@+id/thenButton"
android:layout_width
=
"wrap_content"
android:layout_height
=
"wrap_content"
android:text
=
"@string/then_button"
/>
</
LinearLayout
>
|
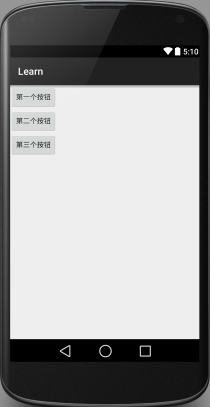
效果图如下所示:
右侧的fragment布局right_fragment.xml如下:
|
1
2
3
4
5
6
7
8
9
|
<?
xml
version
=
"1.0"
encoding
=
"utf-8"
?>
<
LinearLayout
xmlns:android
=
"http://schemas.android.com/apk/res/android"
android:orientation
=
"vertical"
android:layout_width
=
"match_parent"
android:layout_height
=
"match_parent"
>
<
TextView
android:id
=
"@+id/content"
android:layout_width
=
"match_parent"
android:layout_height
=
"match_parent"
/>
</
LinearLayout
>
|
上面的布局文件都很简单,没有什么好说的,下面 ,我将对java文件的代码进行相应的解释:
先将LeftFragment.java
|
1
2
3
4
5
6
7
8
9
10
11
12
13
14
15
16
17
18
19
20
21
22
23
24
25
26
27
28
29
30
31
32
33
34
35
36
37
38
39
40
41
42
43
44
45
46
47
48
49
50
51
52
53
54
55
56
57
58
59
60
61
62
63
64
65
66
67
68
69
70
71
72
73
74
75
76
77
78
|
package
learn.dreamcoder.com.learn;
import
android.app.Activity;
import
android.app.Fragment;
import
android.graphics.Color;
import
android.os.Bundle;
import
android.support.annotation.Nullable;
import
android.view.LayoutInflater;
import
android.view.View;
import
android.view.ViewGroup;
import
android.widget.Button;
/**
* Description:
* User: Dream_Coder(chenchen_839@126.com)
* Date: 2015-07-29
* Time: 15:15
*/
public
class
LeftFragment
extends
Fragment{
public
interface
MyListener{
public
void
showMessage(
int
index);
}
private
MyListener mListener;
private
Button mButton1;
private
Button mButton2;
private
Button mButton3;
public
Button lastButton;
@Override
public
void
onAttach(Activity activity) {
/*判断宿主activity是否实现了接口MyListener*/
super
.onAttach(activity);
try
{
mListener = (MyListener) activity;
}
catch
(ClassCastException e) {
throw
new
ClassCastException(getActivity().getClass().getName()
+
" must implements interface MyListener"
);
}
}
@Nullable
@Override
public
View onCreateView(LayoutInflater inflater, ViewGroup container, Bundle savedInstanceState) {
View view = inflater.inflate(R.layout.left_fragment,container,
false
);
return
view;
}
@Override
public
void
onResume() {
super
.onResume();
mButton1 = (Button) getActivity().findViewById(R.id.firstButton);
mButton2 = (Button) getActivity().findViewById(R.id.secondButton);
mButton3 = (Button) getActivity().findViewById(R.id.thenButton);
mButton1.setOnClickListener(
new
MyButtonClickListener());
mButton2.setOnClickListener(
new
MyButtonClickListener());
mButton3.setOnClickListener(
new
MyButtonClickListener());
}
class
MyButtonClickListener
implements
View.OnClickListener{
@Override
public
void
onClick(View v) {
Button button = (Button) v;
if
(lastButton !=
null
) {
lastButton.setBackgroundColor(
0
);
}
button.setBackgroundColor(Color.parseColor(
"#00FF00"
));
lastButton= button;
if
(button == mButton1) {
mListener.showMessage(
1
);
}
if
(button == mButton2) {
mListener.showMessage(
2
);
}
if
(button == mButton3) {
mListener.showMessage(
3
);
}
}
}
}
|
该文件中的MyListener是这个交互过程的关键,将这个接口暴露出去,交于宿主activity来实现,而宿主activity实现该接口,根据传入的参数,做出对于的操作,并发出适当的命令交付给第二个Fragment,从而可以改变第二个fragment中的组件状态。
整个过程可以理解为:Fragement1 ----》 activity -----》 Fragment2
Fragment之间一般是不会直接进行交互的,而是需要通过宿主activity作为桥梁来进行通话。
宿主activity负责Fragement之间的业务通话,而Fragment仅仅负责维护自己的组件状态就可以了,需要业务操作的部分暴露出去,交给宿主来做,这个暴露过程就是通过接口的方式。
例如在上述代码中,类MyButtonClickListener中需要执行mListener.showMessage()函数来在Fragment2中展示信息,但是在该Fragment中并没有任何语句来对该接口进行实现,而是直接使用,因为我们的目的就是不直接与Fragment2进行交互,但是我们可以把这个接口交付给宿主activity,让它来实现,让它来操作这一切,于是乎,对于LeftFragment来讲就不用担心这个问题,直接使用就好了,因为宿主已经解决了这一切。
下面讲解MainActivity.java代码:
|
1
2
3
4
5
6
7
8
9
10
11
12
13
14
15
16
17
18
19
20
21
22
23
24
25
26
27
28
29
30
31
32
33
34
35
36
37
38
39
40
|
package
learn.dreamcoder.com.learn;
import
android.app.Activity;
import
android.app.FragmentManager;
import
android.app.FragmentTransaction;
import
android.os.Bundle;
import
android.view.View;
import
android.widget.TextView;
import
android.widget.Toast;
public
class
MainActivity
extends
Activity
implements
LeftFragment.MyListener{
private
TextView showMessageView;
@Override
public
void
onCreate(Bundle savedInstanceState) {
super
.onCreate(savedInstanceState);
setContentView(R.layout.activity_main);
FragmentManager manager = getFragmentManager();
FragmentTransaction transaction = manager.beginTransaction();
transaction.add(R.id.ui_container,
new
LeftFragment());
transaction.add(R.id.details_container,
new
RightFragment());
transaction.commit();
}
@Override
public
void
showMessage(
int
index) {
if
(
1
== index) {
showMessageView.setText(R.string.first_page);
}
else
if
(
2
== index) {
showMessageView.setText(R.string.second_page);
}
else
{
showMessageView.setText(R.string.then_page);
}
}
@Override
protected
void
onResume() {
super
.onResume();
showMessageView = (TextView) findViewById(R.id.content);
}
}
|
在宿主activity中首先要做的事情就是要实现刚才的接口,这个接口的目的就是要根据刚才暴露出来是时候传入的参数来向RightFragment发出命令,改变它的内容。所以要得到RightFragment中显示的TextView 的引用,然后设置文字即可了。这就很好理解了
下面是RightFragment.java
|
1
2
3
4
5
6
7
8
9
10
11
12
13
14
15
16
17
18
19
20
21
22
23
24
25
26
27
|
package
learn.dreamcoder.com.learn;
import
android.app.Fragment;
import
android.os.Bundle;
import
android.support.annotation.Nullable;
import
android.view.LayoutInflater;
import
android.view.View;
import
android.view.ViewGroup;
/**
* Description:
* User: Dream_Coder(chenchen_839@126.com)
* Date: 2015-07-29
* Time: 15:16
*/
public
class
RightFragment
extends
Fragment{
@Override
public
void
onCreate(Bundle savedInstanceState) {
super
.onCreate(savedInstanceState);
}
@Nullable
@Override
public
View onCreateView(LayoutInflater inflater, ViewGroup container, Bundle savedInstanceState) {
return
inflater.inflate(R.layout.right_fragment,container,
false
);
}
}
|
这个很简单,没有什么好说的,相信你们都能看明白。就不讲解了。
总结一下,对于两个Fragment之间的交互过程,如果想向Fragment发出什么请求,直接把这个请求封装成一个接口,暴露出去,交由宿主来实现就好了。
本人只是为了学习和理解,感觉这个代码还是很有意义的,但是没有太多的讲解,我根据自己的理解写了一些注解。
在这里对原作者表示感谢
该文的原地址:http://www.360doc.com/content/14/0519/10/17121610_378958268.shtml


 2386
2386

 被折叠的 条评论
为什么被折叠?
被折叠的 条评论
为什么被折叠?
 到【灌水乐园】发言


