


Fragment
一、什么是Fragment?
1、Fragment是activity的界面中的一部分;多个Fragment们组合到一个activity中;多个activity中可重用一个Fragment。即Fragment相当于模块化的一段activity;
2、具有自己的生命周期,接收自己的事件;
3、在activity运行时被添加或删除。
二、为什么要使用Fragment?
1、支持更动态灵活的界面设计;2、activity的layout分成Fragment。
三、如何使用Fragment?
1、Create Fragment类 — onCreate() onCreateView() onPause()
2、Add Fragment
(1) Layout
<?xml version="1.0" encoding="utf-8"?>
<LinearLayout xmlns:android="http://schemas.android.com/apk/res/android"
android:orientation="vertical"
android:layout_width="match_parent"
android:layout_height="match_parent">
<fragment
android:id="@+id/fragment_test"
android:layout_width="match_parent"
android:layout_height="200dp"
android:name="com.example.chenjinhua.redcircle.FragmentTest"
></fragment>
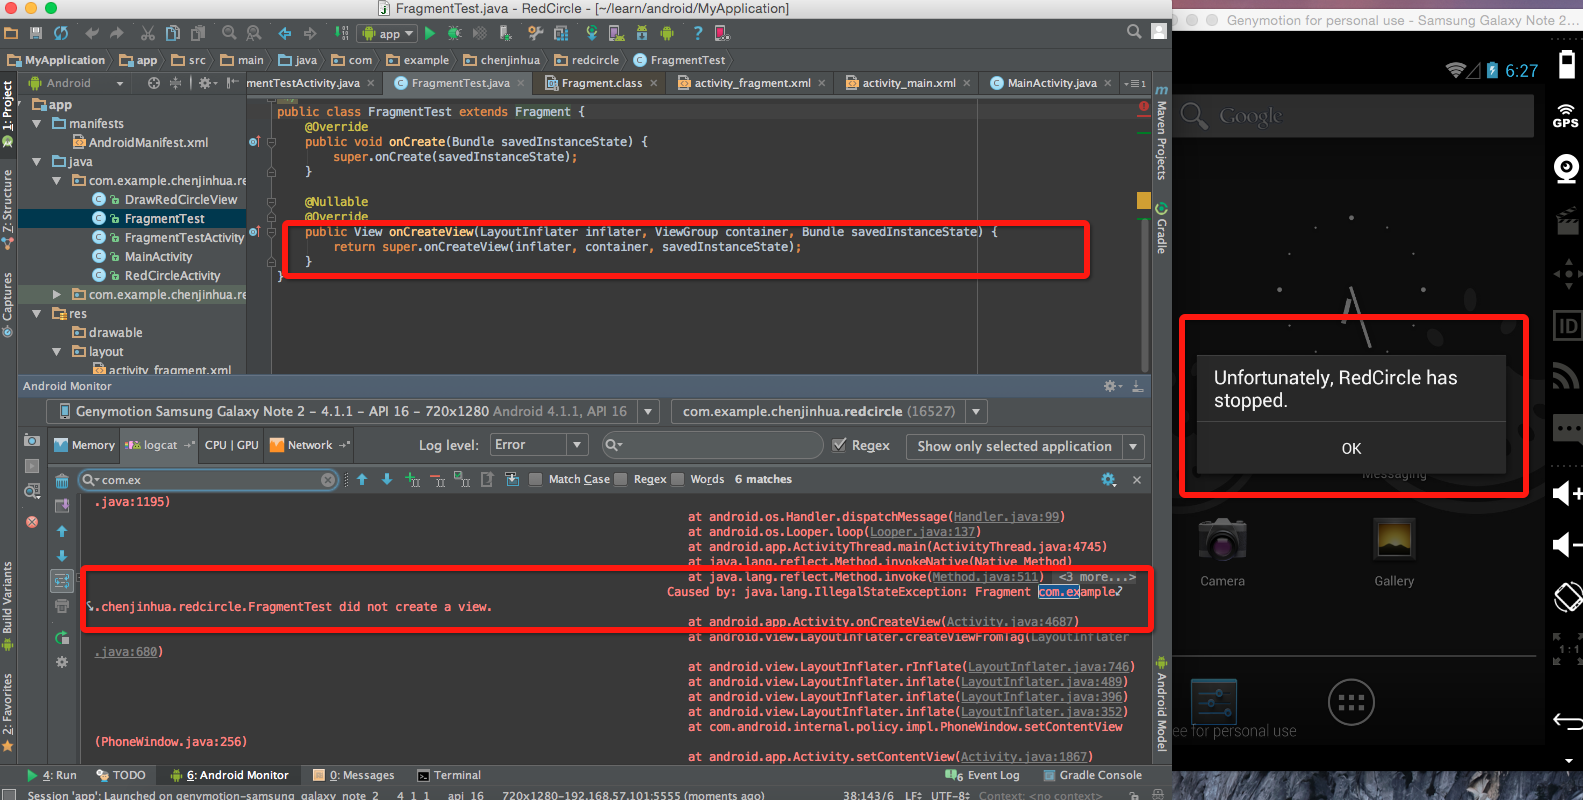
</LinearLayout>activity_fragment.xml布局文件里添加如上代码后,运行,报如下错误:非法状态异常,Fragment没有创建View。
解决方法:
首先新建一个view布局文件如之前第二周写的item_listview.xml:
<?xml version="1.0" encoding="utf-8"?>
<RelativeLayout xmlns:android="http://schemas.android.com/apk/res/android"
                android:layout_width="match_parent"
                android:layout_height="match_parent"
                android:layout_marginTop="5dp">

    <ImageView
        android:id="@+id/avatar_imageview"
        android:layout_width="50dp"
        android:layout_height="40dp"
        />
    <TextView
        android:id="@+id/item_name"
        android:layout_width="match_parent"
        android:layout_height="wrap_content"
        android:text="name"
        android:layout_toRightOf="@+id/avatar_imageview"/>

    <TextView
        android:id="@+id/item_age"
        android:layout_width="match_parent"
        android:layout_height="wrap_content"
        android:text="age"
        android:layout_below="@+id/item_name"
        android:layout_toRightOf="@+id/avatar_imageview"/>

</RelativeLayout>
然后在FragmentTest类的onCreateView()方法里获取view:
    @Override
    public View onCreateView(LayoutInflater inflater, ViewGroup container, Bundle savedInstanceState) {
        View view = inflater.inflate(R.layout.item_listview,container);
        return view;
    }
(2)Java Code
FragmentManager;
FragmentTransaction;
Add/Remove
FragmentTestActivity类
package com.example.chenjinhua.redcircle;

import android.app.Activity;
import android.app.FragmentManager;
import android.app.FragmentTransaction;
import android.os.Bundle;

/**
 * Created by chenjinhua on 16/3/19.
 */
public class FragmentTestActivity extends Activity {
    @Override
    protected void onCreate(Bundle savedInstanceState) {
        super.onCreate(savedInstanceState);
        setContentView(R.layout.activity_fragment);

        FragmentManager fragmentManager = getFragmentManager();
        FragmentTransaction fragmentTransaction = fragmentManager.beginTransaction();

        FragmentTest fragmentTest = new FragmentTest();
        fragmentTransaction.add(R.id.fragment_test_view,fragmentTest).commit();
    }
}
activity_fragment.xml布局文件:
<?xml version="1.0" encoding="utf-8"?>
<LinearLayout xmlns:android="http://schemas.android.com/apk/res/android"
              android:orientation="vertical"
              android:background="@color/red"
              android:layout_width="match_parent"
              android:layout_height="match_parent">

    <fragment
        android:id="@+id/fragment_test"
        android:layout_width="match_parent"
        android:layout_height="wrap_content"
        android:name="com.example.chenjinhua.redcircle.FragmentTest"
        ></fragment>

    <RelativeLayout
        android:layout_marginTop="100dp"
        android:id="@+id/fragment_test_view"
        android:layout_width="match_parent"
        android:layout_height="match_parent"
        />
</LinearLayout>
FragmentTest类 同上。
运行报如下错误:
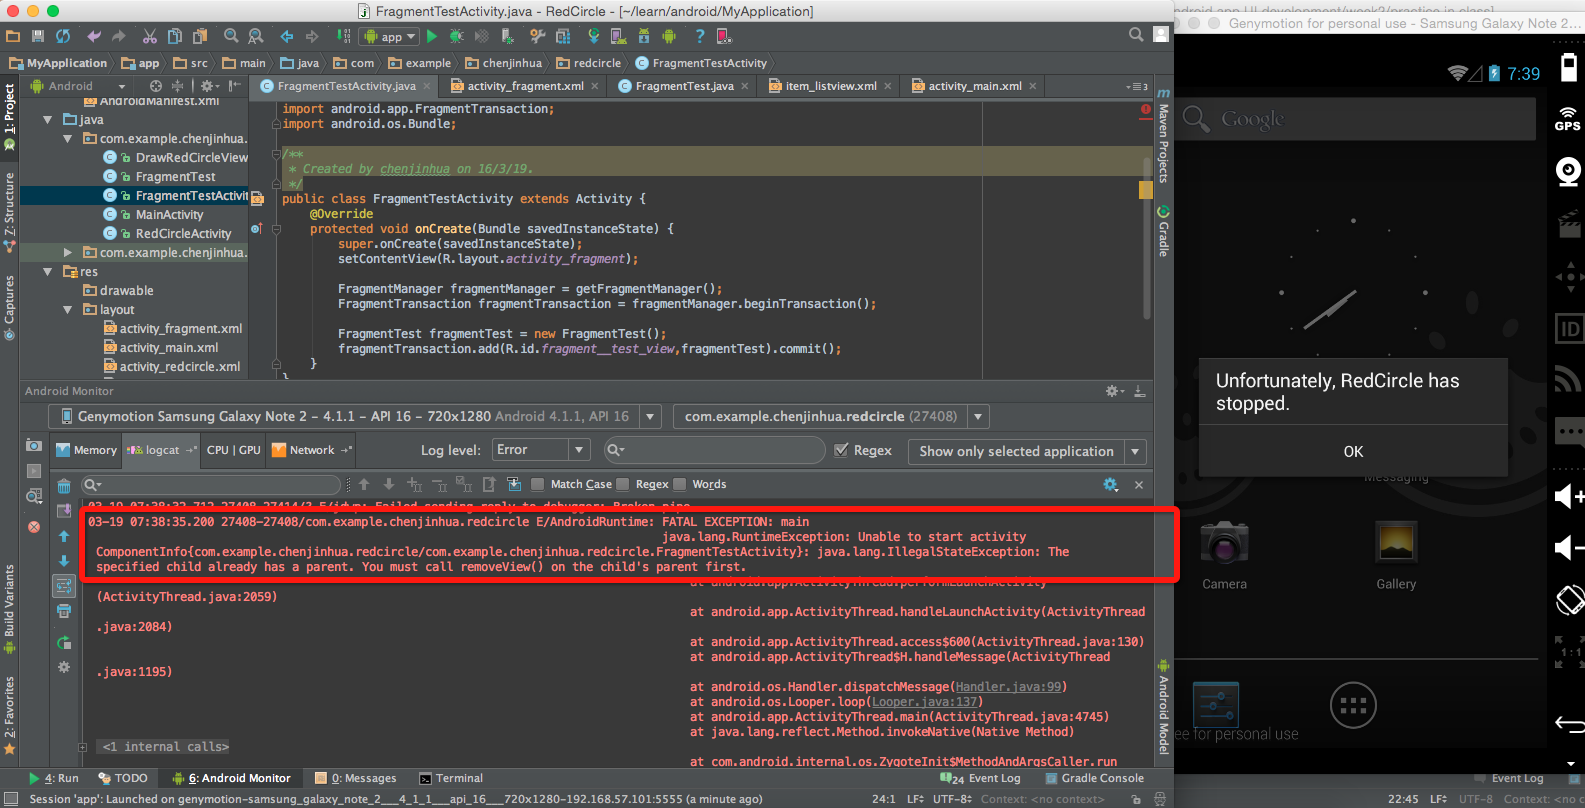
FragmentTestActivity类里fragment_test_view是父view;FragmentTest类里item_listview是子view。
解决办法:修改FragmentTest类里的onCreateView()方法
 @Override
    public View onCreateView(LayoutInflater inflater, ViewGroup container, Bundle savedInstanceState) {
        //解析出来的xml视图放到container里,不绑定
        View view = inflater.inflate(R.layout.item_listview,container,false);
        return view;
    }
程序运行结果:
第一个Fragment是通过布局文件生成的,第二个Fragment是通过java code生成的。

删除fragment:修改FragmentTestActivity类代码为d
 fragmentTransaction.add(R.id.fragment_test_view,fragmentTest);
        fragmentTransaction.remove(fragmentTest).commit();
四、如何管理Fragment?
1、查找Fragment — findFragmentById() 和 findFragmentByTag()
    Fragment fragment = fragmentManager.findFragmentById(R.id.fragment_test);
        if (fragment instanceof FragmentTest){
            // TODO: Do your Action.
        }else{
            throw new IllegalStateException("iis not fragmentTest");
        }
java里面的二元运算符,判断左边的对象是否是右边类的实例。假如是的话,返回true;假如不是的话,返回false
2、Fragment的后退 — Fragment Stack; popBackStack(); addOnBackStackChangedListener()
五、Fragment 生命周期
参考博客:
http://blog.csdn.net/forever_crying/article/details/8238863/
Handler
多线程与异步
Handler用来做什么?
1、定时执行Message和MessageQueue;
2、在不同线程中执行Runnable。
Handler怎么使用?
obtainMessage() //取得消息
sendMessage() //发送消息
handlerMessage() //处理消息
Message、 MessageQueue、Looper
Message 有2个整型数值 和 1个Object;
MessageQueue是Message的队列
Looper消息泵
Looper的原理
如何使用:
1、是MessageQueue的管理者;
2、Looper.prepare()
3、每一个Looper对象和一个线程关联
4、Looper.myLooper()可以获得当前线程的Looper对象
Looper从MessageQueue中取出Message,交由Handler的handlerMessage进行处理;调用Message.recycle()将其放入Message Pool中。
自定义控件、自定义属性、画视图
一、提取布局属性 theme & style
把视图控件中大部分相同的属性抽取出来
1、Theme是针对窗体级别的,改变窗体样式;Style 是针对窗体元素级别的,改变指定控件或者Layout的样式;
2、抽象view的共同属性;
3、可继承
使用步骤:
1、创建属性; 2、布局中设置。
1、创建属性
比如有3个TextView,他们有一些相同的属性;
在res - values - styles.xml里创建属性。
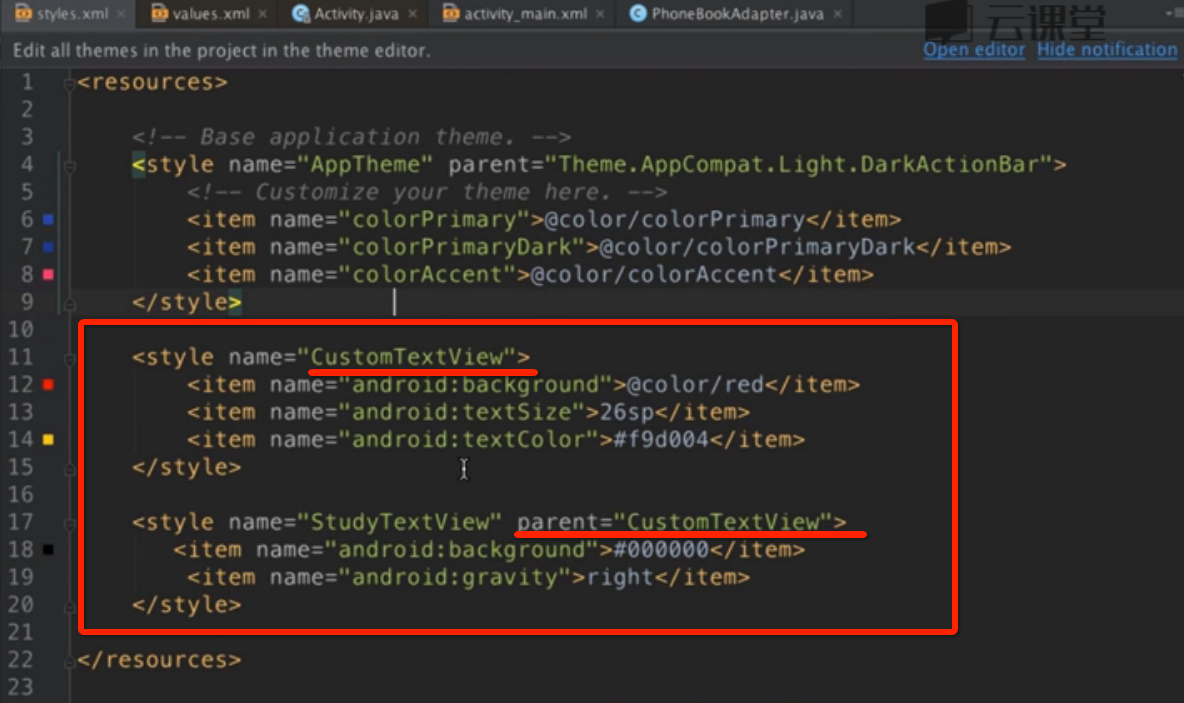
2、布局中设置
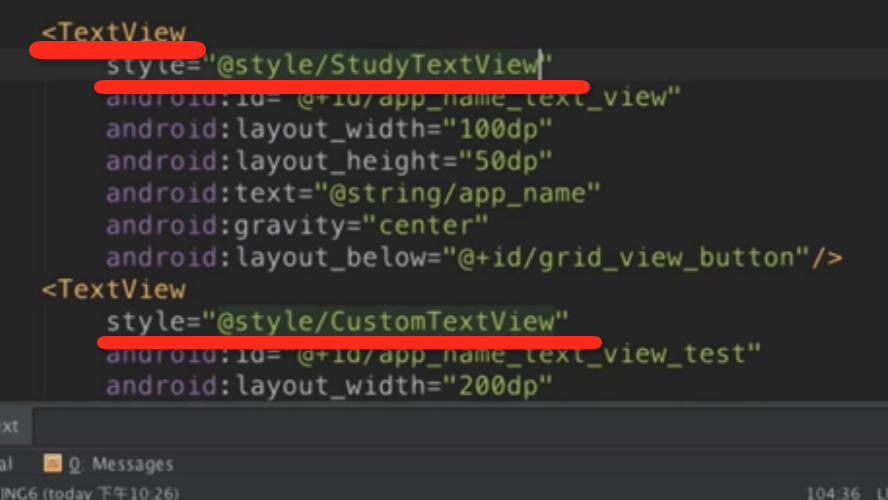
style.xml里子控件属性可以继承父控件属性,子控件的属性会覆盖父控件的属性。
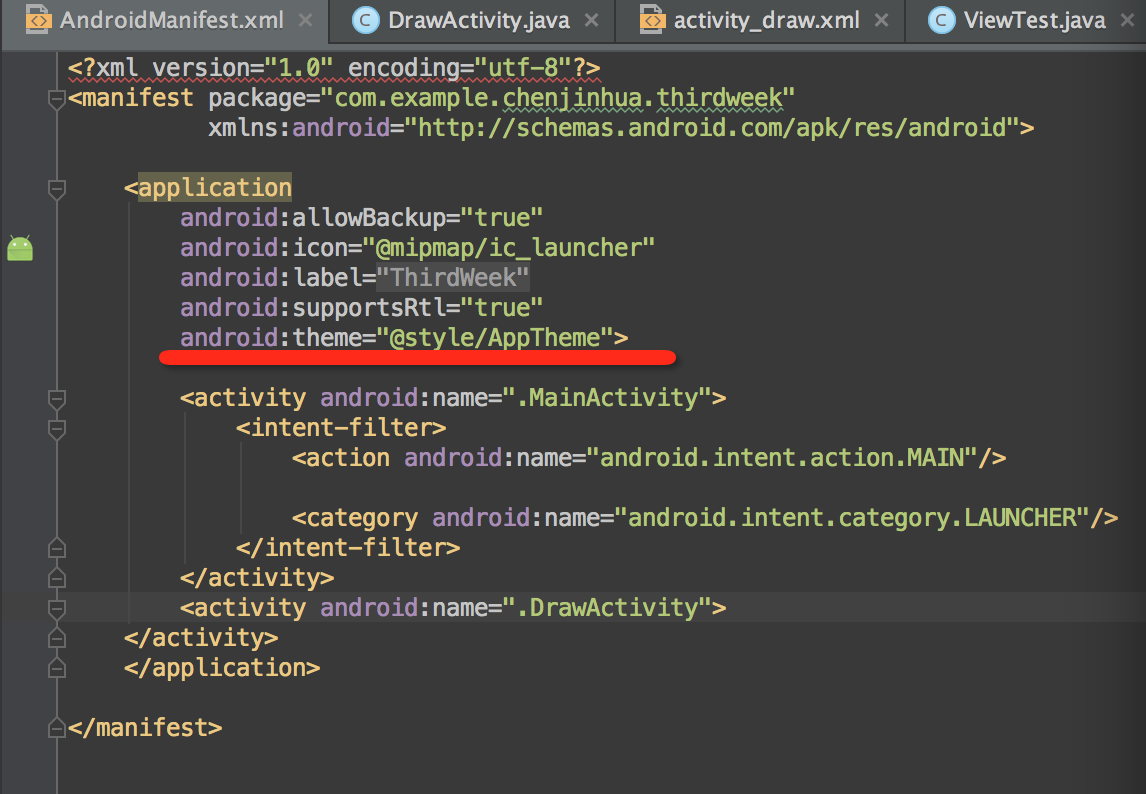
同理,Theme也是,在styles.xml里创建theme;在Manifest里设置。
如下图设置了整个application的theme,也可以对每个activity设置theme。
三、View是如何工作的? – 自定义控件
1、构造器 —> 初始化
2、onMesure() 定大小
3、onLayout() 定位置
4、onDraw() 绘制
5、invalidate() 刷新
自定义控件的三种主要创建形式
1、继承已有的控件来实现自定义控件,如 Button、 CheckedTextView;
2、通过继承一个布局文件实现自定义控件,如RelativeLayout;
3、通过继承view类来实现自定义控件。
栗子:做一个简单的自定义控件
1、做一个圆形的红色按钮;
2、中间有一个白色的数字;
3、数字起始为20;
4、每点击一次减少1。
1、代码里onDraw() - 自定义控件;

2、视图xml文件里引用自定义控件。
DrawRedCircleView类
package com.example.chenjinhua.redcircle;

import android.content.Context;
import android.graphics.Canvas;
import android.graphics.Color;
import android.graphics.Paint;
import android.graphics.Rect;
import android.util.AttributeSet;
import android.view.View;

public class DrawRedCircleView extends View implements View.OnClickListener{
    private Paint mPaint;
    private Rect mRect;
    private int mNumber = 20;

    public DrawRedCircleView(Context context) {
        this(context, null);
    }

    public DrawRedCircleView(Context context, AttributeSet attrs) {
        this(context, attrs, 0);
    }

    public DrawRedCircleView(Context context, AttributeSet attrs, int defStyleAttr) {
        super(context, attrs, defStyleAttr);
        init();
    }

    private void init() {
        mPaint = new Paint();
        mRect = new Rect();
    }

    @Override
    protected void onDraw(Canvas canvas) {
        super.onDraw(canvas);
        mPaint.setColor(Color.RED);
        canvas.drawCircle(getWidth() / 2, getWidth() / 2, getWidth() / 2, mPaint);

        mPaint.setColor(Color.WHITE);
        mPaint.setTextSize(100);
        String textNumber = String.valueOf(mNumber);
        mPaint.getTextBounds(textNumber,0,textNumber.length(),mRect);
        int textWidth = mRect.width();
        int textHight = mRect.height();
        canvas.drawText(textNumber,getWidth()/2 - textWidth/2,getWidth()/2 + textHight/2,mPaint);

        View view = findViewById(R.id.redCircle_view);
        view.setOnClickListener(this);

    }

    @Override
    public void onClick(View view) {
       if ( mNumber > 0 ){
           mNumber --;
       }else{
           mNumber = 20;
       }
        invalidate();
    }
}
RedCircleActivity类
package com.example.chenjinhua.redcircle;

import android.app.Activity;
import android.os.Bundle;

/**
 * Created by chenjinhua on 16/3/15.
 */
public class RedCircleActivity extends Activity {
    @Override
    protected void onCreate(Bundle savedInstanceState) {
        super.onCreate(savedInstanceState);
        setContentView(R.layout.activity_redcircle);
    }
}
MainActivity类
package com.example.chenjinhua.redcircle;

import android.app.Activity;
import android.content.Intent;
import android.os.Bundle;
import android.view.View;
import android.widget.TextView;

/**
 * Created by chenjinhua on 16/3/15.
 */
public class MainActivity extends Activity implements View.OnClickListener{
    @Override
    protected void onCreate(Bundle savedInstanceState) {
        super.onCreate(savedInstanceState);
        setContentView(R.layout.activity_main);

        TextView textView_mainActivity = (TextView) findViewById(R.id.textView_mainActivity);
        textView_mainActivity.setOnClickListener(this);
    }

    @Override
    public void onClick(View view) {
        startActivity(new Intent(MainActivity.this, RedCircleActivity.class));

    }
}
activity_redcircle.xml
<?xml version="1.0" encoding="utf-8"?>
<LinearLayout xmlns:android="http://schemas.android.com/apk/res/android"
              android:orientation="vertical"
              android:layout_width="match_parent"
              android:layout_height="match_parent">

    <com.example.chenjinhua.redcircle.DrawRedCircleView
        android:id="@+id/redCircle_view"
        android:layout_width="200dp"
        android:layout_height="200dp"/>

</LinearLayout>
如何自定义属性
对于自定义属性,遵循以下几步,就可以实现:
1、自定义一个CustomView(extends View )类
2、编写values/attrs.xml,在其中编写styleable和item等标签元素
3、在布局文件中CustomView使用自定义的属性(注意namespace)
4、在CustomView的构造方法中通过TypedArray获取
在哪里 创建属性 ?
res - values 下新建xml文件,如attrs.xml。
attrs.xml :
<?xml version="1.0" encoding="utf-8"?>
<resources>
    //类
    <declare-styleable name="ViewTest">
        //每一个attr都是一个属性,每个属性都有一个format
        <attr name="backgroundColor" format="color"/>
        <attr name="textColor" format="color"/>
        <attr name="textSize" format="dimension"/>
    </declare-styleable>

</resources>
如何使用这些属性:
代码中引用
private int mBackgroundColor;
//根据名字读取attr.xml里的属性(是一个数组)
TypedArray typedArray = context.obtainStyledAttributes(attrs,R.styleable.ViewTest);
//从读取出来的数组,获取BackgroundColor的属性,没有的话默认值为RED给变量mBackgroundColor。
mBackgroundColor = typedArray.getColor(R.styleable.ViewTest_backgroundColor,Color.BLUE);
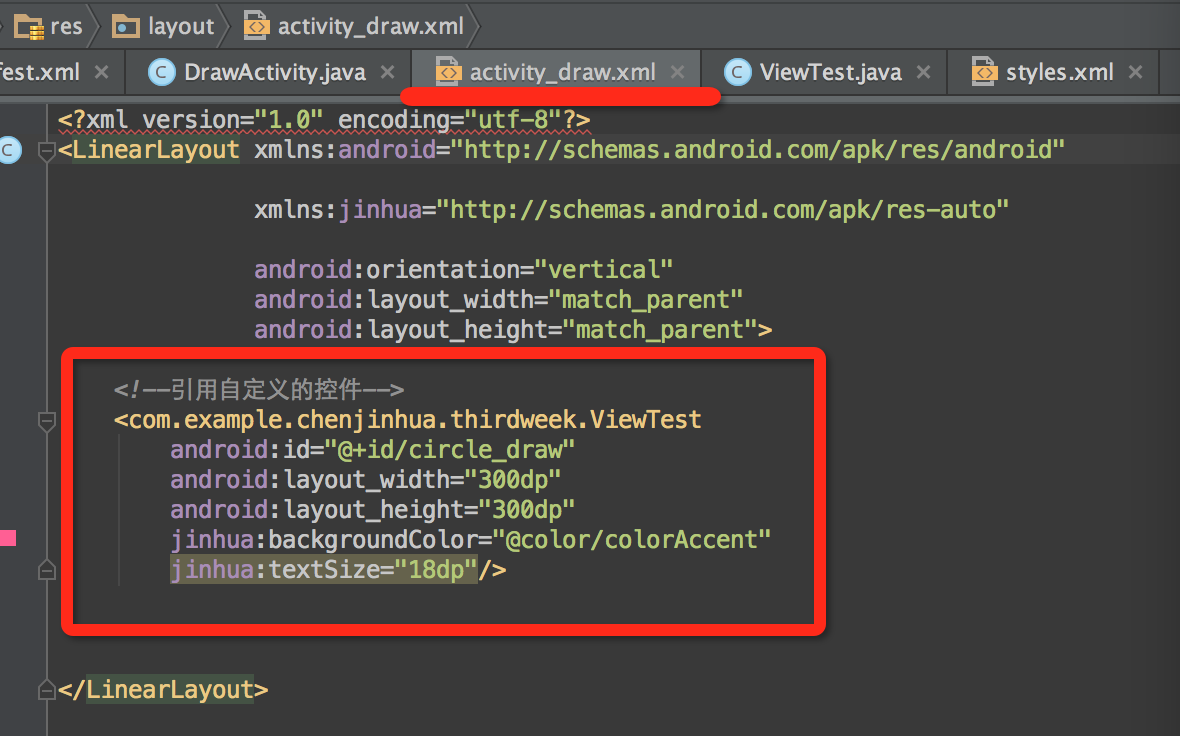
mPaint.setColor(mBackgroundColor);布局中设置 - activity_draw.xml:
<?xml version="1.0" encoding="utf-8"?>
<LinearLayout xmlns:android="http://schemas.android.com/apk/res/android"

//添加自定义命名空间
xmlns:jinhua="http://schemas.android.com/apk/res-auto"

              android:orientation="vertical"
              android:layout_width="match_parent"
              android:layout_height="match_parent">

    <!--引用自定义的控件-->
    <com.example.chenjinhua.thirdweek.ViewTest
        android:layout_width="300dp"
        android:layout_height="300dp"
        jinhua:backgroundColor="@color/colorAccent"
        jinhua:textSize="18dp"/>

</LinearLayout>
小技巧
1、参考系统源码的实现
2、多了解原理
Tips
1、什么时候需要使用init()方法
init : 单词翻译过来是 初始化的意思, 不是一个官方提供的api函数,程序员习惯上 把 要用的控件 都在 oncreate中 统一实例化, 但是把代码放在oncreate中很难看, 所以再创一个init( ) 函数 ……之类的,把初始化代码(new出来的对象等)放里面,方便整改。
2、利用画布绘制文字
        mPaint.setColor(Color.WHITE);
        mPaint.setTextSize(100);
        //要写的数字
        String text = String.valueOf(mNumber);
        //获取文字四周矩形的边距,放到mRect对象里。
        mPaint.getTextBounds(text,0,text.length(),mRect);

        int textWidth = mRect.width();
        int textHight = mRect.height();
        canvas.drawText(text,getWidth()/2 - textWidth/2,getHeight()/2 + textHight/2,mPaint);
3、dp、sp 和 px
是什么?
px:像素点
dp:与像素密度密切相关 (100px 在不同手机上大小显示不一致,dp就解决了这个问题)
sp:相当于dp(用来修饰文字)
dip:= dp
怎么用?
文字的尺寸一律用sp单位;
非文字的尺寸一律用dp单位;
偶尔需要使用px单位:如需要在屏幕上画一条细的分割线 1px。


 483
483

 被折叠的 条评论
为什么被折叠?
被折叠的 条评论
为什么被折叠?
 到【灌水乐园】发言


