


在项目开发之前,先要搭建出web 开发的基本环境,比如JDK+MyEclipse+Tomcate+MySQL
目录
一. CRM系统简介
客户关系管理,简称CRM(Customer Relationship Management):
CRM概念引入中国已有数年,其字面意思是客户关系管理,但其深层的内涵却有许多的解释。从字义上看,它是指企业用CRM来管理与客户之间的关系。CRM是选择和管理有价值客户及其关系的一种商业策略,CRM要求以客户为中心的商业哲学和企业文化来支持有效的市场营销、销售与服务流程。如果企业拥有正确的领导、策略和企业文化,CRM应用将为企业实现有效的客户关系管理。
CRM是一个获取、保持和增加可获利客户的方法和过程。CRM既是一种崭新的、国际领先的、以客户为中心的企业管理理论、商业理念和商业运作模式,也是一种以信息技术为手段、有效提高企业收益、客户满意度、雇员生产力的具体软件和实现方法。
CRM的实施目标就是通过全面提升企业业务流程的管理来降低企业成本,通过提供更快速和周到的优质服务来吸引和保持更多的客户。作为一种新型管理机制,CRM极大地改善了企业与客户之间的关系,实施于企业的市场营销、销售、服务与技术支持等与客户相关的领域。
随着4G移动网络的部署,CRM已经进入了移动时代。移动CRM系统就是一个集3G移动技术、智能移动终端、VPN、身份认证、地理信息系统(GIS)、Webservice、商业智能等技术于一体的移动客户关系管理产品。移动CRM它将原有CRM系统上的客户资源管理、销售管理、客户服务管理、日常事务管理等功能迁移到手机。它既可以像一般的CRM产品一样,在公司的局域网里进行操作,也可以在员工外出时,通过手机进行操作。移动CRM主要实现了经常出差在外,以便随时随地掌握公司内部信息的所提供的手机版管理软件,客户只需下载手机版软件,然后安装在手机上就可以直接使用了,同时账户就用电脑申请的组织名和账户名就能直接使用该系统,这样客户不仅可以随时查看信息,而且也可以通过手机给公司内部人员下达工作指示,同时也可以使用平台所提供的所有功能了。
直到今天 ,云计算的全球化使得传统CRM 软件已逐渐被Web CRM(又称为“在线CRM”、“托管型CRM”和“按需CRM”)超越的杰出代表。越来越多的客户倾向于采用Web来管理CRM 等业务应用程序。
作为解决方案(Solution)的客户关系管理(CRM),它集合了当今最新的信息技术,它们包括Internet和电子商务、多媒体技术、数据仓库和数据挖掘、专家系统和人工智能、呼叫中心等等。作为一个应用软件的客户关系管理(CRM),凝聚了市场营销的管理理念。市场营销、销售管理、客户关怀、服务和支持构成了CRM软件的基石。
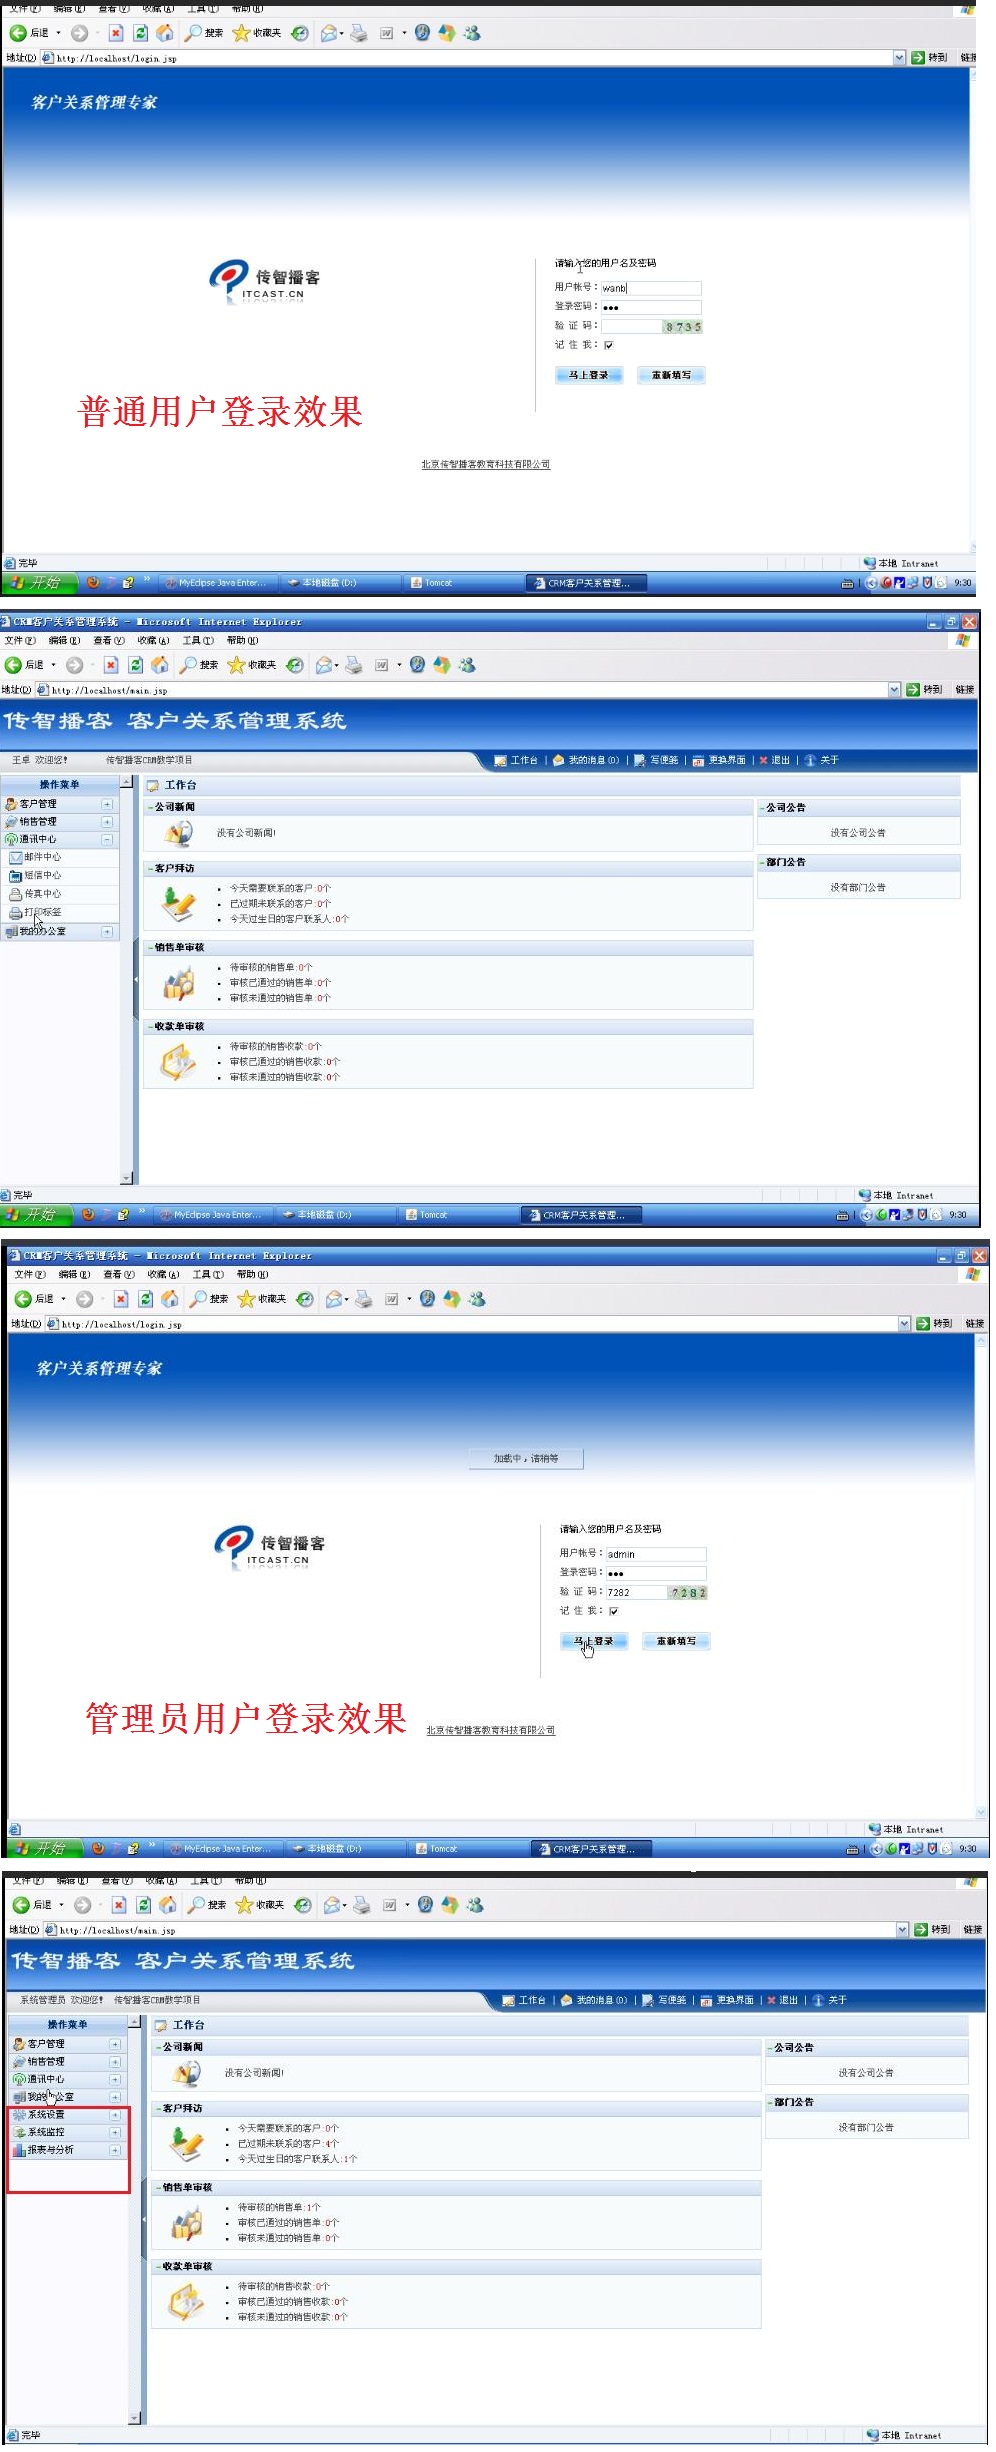
本项目的效果,如下:
二. CRM系统开发
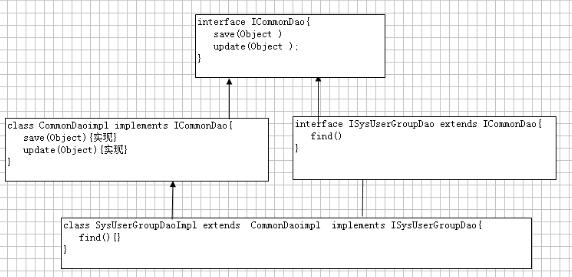
2.1 项目的分层设计

其中Dao层
2.2 搭建SSH项目框架
先撇开具体的需求,先快速搭建一个SSH项目的框架出来。
2.2.1先搭建出Hibernate框架
1)导入相关的jar 包,配置相关的文件。
hibernate-2.1.6.zip解压后,当中的hibernate2.jar是必要的,而在lib目录中j的ar,其中 dom4j、CGLIB、Commons Collections、Commons Logging、ODMG4、EHCache是必要的;而Log4j则是建议使用的,是输出日志使用的。
dom4j(必需):Hibernate在解析XML配置和XML映像元文件时需要使用dom4j。
CGLIB(必需):Hibernate在运行时使用这个代码生成库强化类(与Java反射机制联合使用)。
Commons Collections, Commons Logging(必需):Hibernat使用Apache Jakarta Commons项目提供的多个工具类库。
ODMG4(必需):Hibernate提供了一个可选的ODMG兼容持久化管理界面。如果需要映像集合,需要这个类库,就算不是为了使用ODMG API。
EHCache(必需):Hibernate可以使用不同的第二级Cache方案。如果没有修改配置的话,EHCache提供默认的Cache。
Log4j(可选):Hibernate使用Commons Logging API,后者可以使用Log4j作为底层实施log的机制。如果上下文类目录中存在Log4j库,Commons Logging就会使用Log4j和它在上下文类路径中找到的log4j.properties文件。在Hibernate发行包中包含有一个示例的 properties文件。所以,如果你想看看幕后到底发生了什么,也把log4j.jar拷贝到你的上下文类路径去吧(它位于src/目录中)。
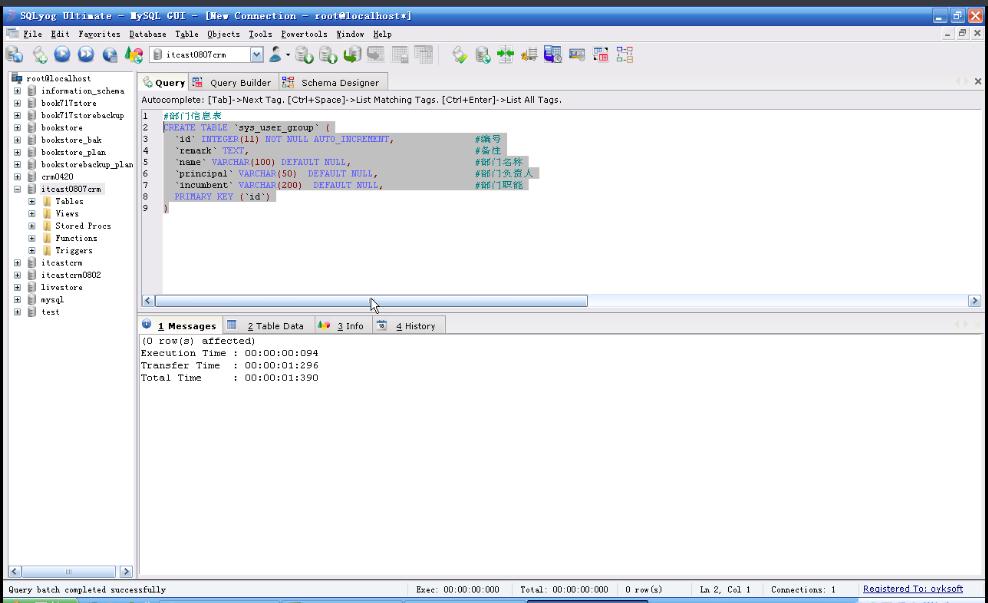
2)新建一个数据库,并创建一个表。
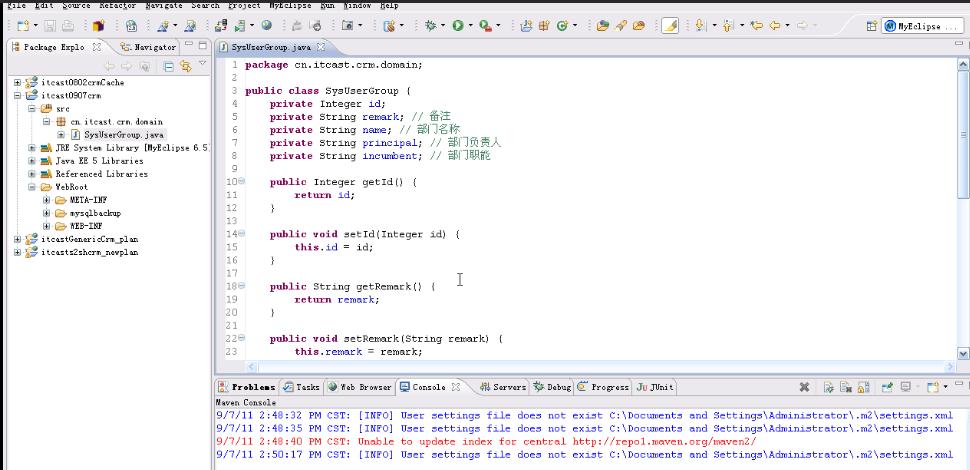
3)根据表,创建一个JavaBean
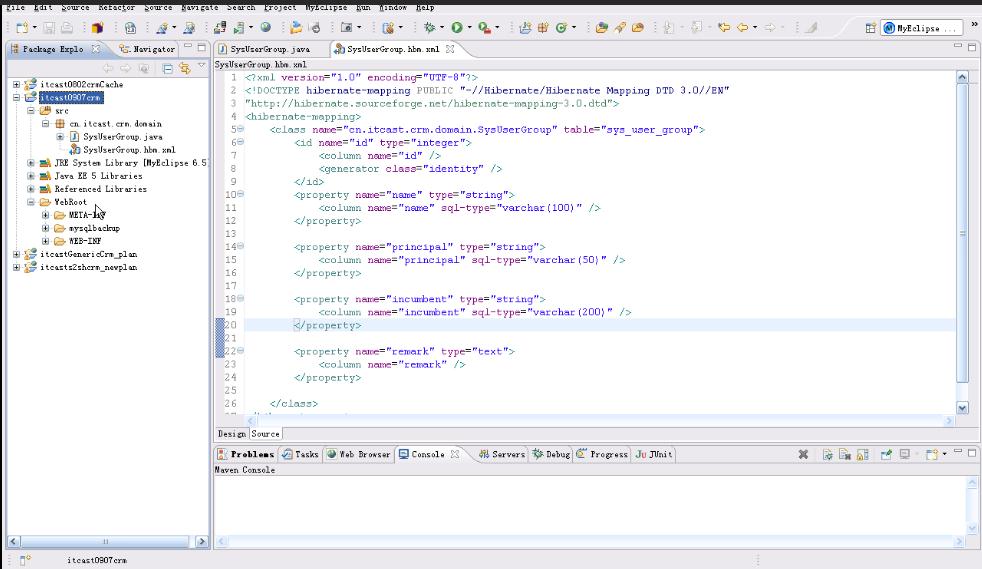
4)创建一个 *.hbm.xml 映射文件,把JavaBean和数据库中的表格关联上
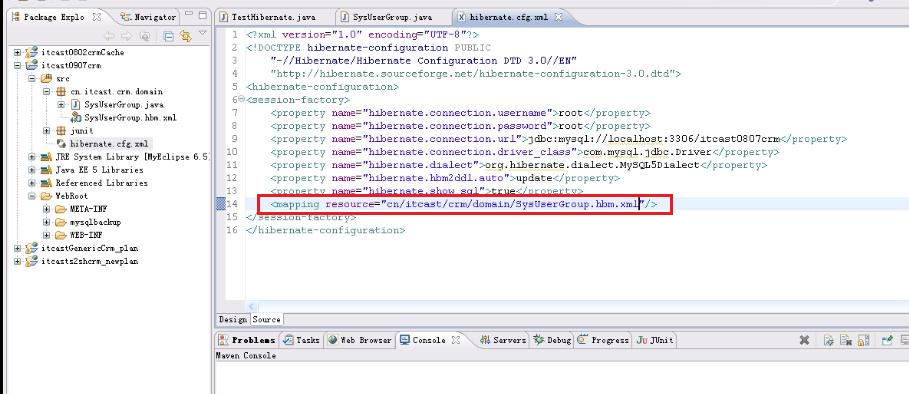
5)创建 hibernate.cfg.xml 配置文件。建立项目与数据库的连接
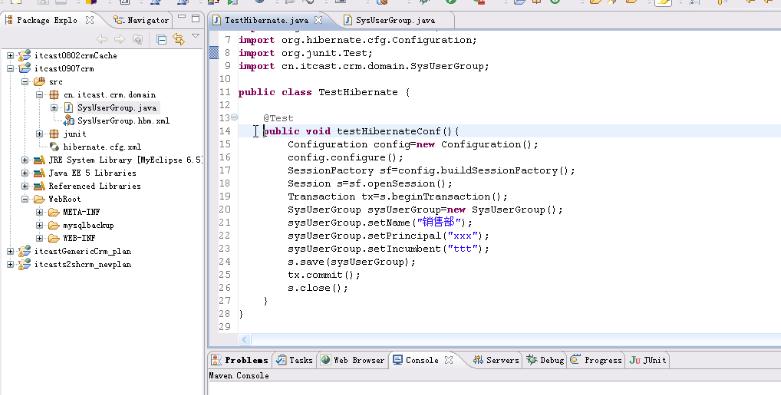
6)编写测试类
编写测试类,测试搭建的框架是否正确。
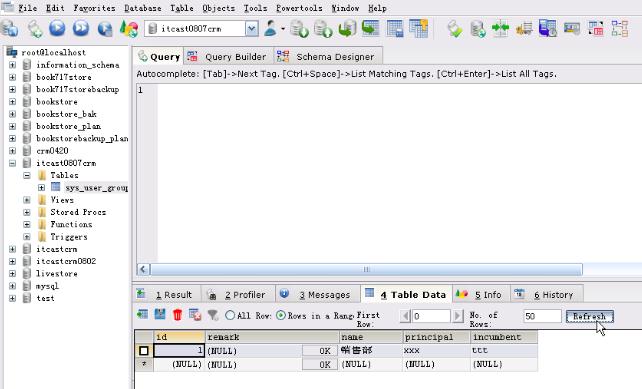
测试运行的结果,成功向数据库中的表中插入了一条数据。如下所示:
2.2.2 Dao层代码的实现
package cn.own.crm.dao.impl;

import javax.annotation.Resource;

import org.hibernate.SessionFactory;
import org.springframework.orm.hibernate3.support.HibernateDaoSupport;
import cn.own.crm.dao.ICommonDao;
//其中HibernateDaoSupport是由Spring 框架所提供的。所以接下来要使用到HibernateDaoSupport就要完成Spring的配置
public class CommonDaoImpl<T> extends HibernateDaoSupport implements ICommonDao<T> {

	//注解方式:以下语句就会到bean.xml文件中去找到3对应的sessionFactory
	@Resource(name="sessionFactory")
	public void setSessionFactoryDI(SessionFactory sessionFactory){
		System.out.println("sessionFactory:"+sessionFactory);
		//调用父类的setSessionFactory方法,注入sessionFactory
		super.setSessionFactory(sessionFactory);
	}

	public void save(T entity) {
		//保存,可以向数据库中插入数据
		//前提条件:你的类必须继承HibernateDaoSupportHibernateTemplate提供非常多的常用方法来完成基本的操作,比如通常的增加、删除、修改、查询等操作。
		//getHibernateTemplate和getSession的区别getHibernateTemplate已经封装好了一些基本的方法,可以直接去用,也就是template嘛,而getSession只是获取一个数据工厂的session,然后大部分方法都需要自己写,加hql语句,然后用query方法执行。
		this.getHibernateTemplate().save(entity);
	}
}
2.2.3再搭建出Spring框架
1)导入相关的jar 包
org.springframework spring-aop ——Spring的面向切面编程,提供AOP(面向切面编程)实现
org.springframework spring-aspects —— Spring提供对AspectJ框架的整合
org.springframework spring-beans —— SpringIoC(依赖注入)的基础实现
org.springframework spring-context-support —— Spring-context的扩展支持,用于MVC方面
org.springframework spring-core —— Spring的核心组件
org.springframework spring-expression —— Spring表达式语言
org.springframework spring-instrument —— Spring对服务器的代理接口
org.springframework spring-orm —— 对象/关系映射,整合第三方的ORM框架,hibernate,ibatis,jdo,以及spring的JPA(java persistent API)实现
org.springframework spring-oxm —— 对象的XML映射,可以让Java与XML之间来回切换
org.springframework spring-test —— 对于单元测试和集成测试的简单封装
org.springframework spring-web —— SpringMVC支持WEB端应用部署架构
org.springframework spring-webmvc —— REST Web服务和Web应用的视图控制器的实现
org.springframework spring-websocket —— sockjs WebSocket的实现,包括对 STOMP的支持 Spring依赖包的描述: aopalliance.jar —— AOP联盟的API包,里面包含了针对面向切面的接口。通常Spring等其它具备动态织入功能的框架依赖此包。
aspectjweaver-1.5.0.jar —— 用于在Spring 中集成AspectJ AspectJ LTW织入器
commons-collections-3.2.2.jar —— Apache Commons包中的一个,包含了一些Apache开发的集合类,功能比java.util.*强大。
commons-dbcp-1.2.1.jar —— DBCP数据库连接池
commons-pool-1.6.jar —— DBCP是一个依赖commons-pool对象池机制的数据库连接池
standard.jar —— JSP 标准标签库,和jstl.jar 一起使用,
jstl-1.2.jar 不在需要。
2)配置相关的文件bean.xml(applicationContext.xm.)
<?xml version="1.0" encoding="UTF-8"?>
<beans  xmlns="http://www.springframework.org/schema/beans"
        xmlns:context="http://www.springframework.org/schema/context"
        xmlns:aop="http://www.springframework.org/schema/aop"
        xmlns:tx="http://www.springframework.org/schema/tx"
		xmlns:xsi="http://www.w3.org/2001/XMLSchema-instance"
		xsi:schemaLocation="http://www.springframework.org/schema/beans
		                    http://www.springframework.org/schema/beans/spring-beans-2.5.xsd
		                    http://www.springframework.org/schema/context
		                    http://www.springframework.org/schema/context/spring-context-2.5.xsd
		                    http://www.springframework.org/schema/tx
		                    http://www.springframework.org/schema/tx/spring-tx-2.5.xsd
		                    http://www.springframework.org/schema/aop
		                    http://www.springframework.org/schema/aop/spring-aop-2.5.xsd">

   <!-- 1 配置注解的自动扫描-->
   <context:component-scan base-package="cn.own.crm"/>


   <!--3 配置本地化代理工程bean,这是spring整合hibernate的入口 -->
   <bean id="sessionFactory" class="org.springframework.orm.hibernate3.LocalSessionFactoryBean">
     <!--配置hibernate使用的连接池 -->
     <!--删除了下面这条语句 -->
    <!--  <property name="dataSource" ref="dataSource"/> -->
     <property name="configLocation">
       <!--表示在类路径下加载hibernate.cfg.xml  -->
       <value>classpath:hibernate.cfg.xml</value>
     </property>
   </bean>

   <!--4 创建事务管理器 aop切面-->
   <bean id="txManager" class="org.springframework.orm.hibernate3.HibernateTransactionManager">
      <property name="sessionFactory" ref="sessionFactory"/>
   </bean>

   <!--5 配置处理事务的注解-->
   <tx:annotation-driven transaction-manager="txManager"/>

   <!-- 添加以下语句,才能完成对数据库的CRUD操作。也可以使用注解注入的方式,则可以省略
   <bean id="xx" class="cn.own.crm.dao.impl.CommonDaoImpl">
   	<property name="sessionFactory" ref="sessionFactory"></property>
   </bean>

  	//以下语句就会到bean.xml文件中去找到3对应的sessionFactory
	@Resource(name="sessionFactory")
	public void setSessionFactoryDI(SessionFactory sessionFactory){
		System.out.println("sessionFactory:::::"+sessionFactory);
		//调用父类的setSessionFactory方法,注入sessionFactory
		super.setSessionFactory(sessionFactory);
		System.out.println(":::::");
	} -->

</beans>
3)编写Service层
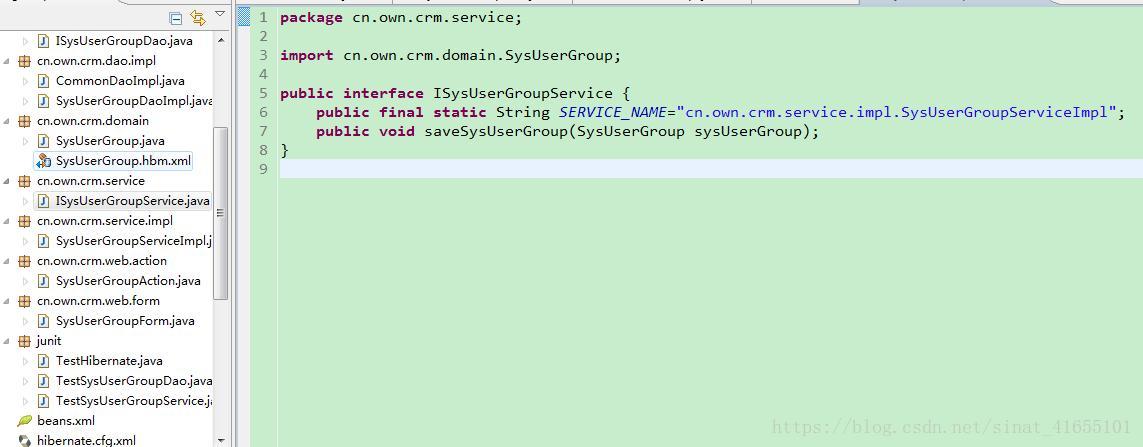
其中 cn.own.crm.service.impl包下SysUserGroupServiceImpl类,具体代码如下所示:
package cn.own.crm.service.impl;

import javax.annotation.Resource;

import org.springframework.stereotype.Service;
import org.springframework.transaction.annotation.Isolation;
import org.springframework.transaction.annotation.Propagation;
import org.springframework.transaction.annotation.Transactional;

import cn.own.crm.dao.ISysUserGroupDao;
import cn.own.crm.domain.SysUserGroup;
import cn.own.crm.service.ISysUserGroupService;

@Transactional(readOnly=true)
@Service(ISysUserGroupService.SERVICE_NAME)       //和下文中的SERVICE_NAME有区别
public class SysUserGroupServiceImpl implements ISysUserGroupService {

    //将 Dao 层作为一个属性
	@Resource(name=ISysUserGroupDao.SERVICE_NAME)  //和上文中的SERVICE_NAME有区别
	private ISysUserGroupDao sysUserGroupDao;

	@Transactional(isolation=Isolation.DEFAULT,propagation=Propagation.REQUIRED,readOnly=false)
	public void saveSysUserGroup(SysUserGroup sysUserGroup) {
		//调用Dao层中的save()方法,来实现Service层中的saveSysUserGroup()完成保存功能,实现向数据库中插入数据
		sysUserGroupDao.save(sysUserGroup);
	}

}
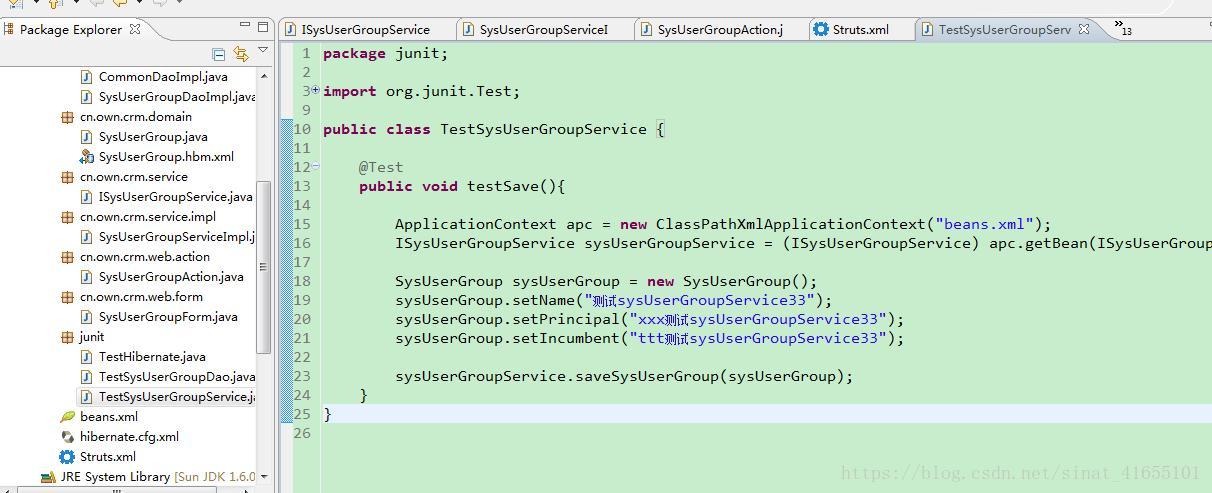
4)编写测试类
2.2.4 最后搭建出Struts2框架
1)导入相关的jar 包
commons-fileupload-1.2.2.jar
commons-io-2.0.1.jar
commons-lang-2.5.jar
commons-logging-1.1.1.jar
freemarker-2.3.16.jar
javassist-3.11.0.GA.jar
ognl-3.0.1.jar
struts2-core-2.2.3.jar
xwork-core-2.2.3.jar
(asm-3.1.jar
asm-commons-3.1.jar这两个包我都没有添加也能运行,一般情况下添加上去)
2)编写struts.xml
<?xml version="1.0" encoding="UTF-8"?>
<!DOCTYPE struts PUBLIC
	"-//Apache Software Foundation//DTD Struts Configuration 2.1.7//EN"
	"http://struts.apache.org/dtds/struts-2.1.7.dtd">
<struts>
   <!-- 配置请求路径的后缀名.do -->
   <constant name="struts.action.extension" value="do"/>

   <!-- 配置主题为简单主题 -->
   <constant name="struts.ui.theme" value="simple"/>

   <!--配置struts2的模式为开发模式-->
   <constant name="struts.devMode" value="true"/>

   <package name="sys" namespace="/sys" extends="struts-default">
      <action name="sysUserGroupAction_*" class="cn.own.crm.web.action.SysUserGroupAction" method="{1}">
         <result name="add">/sys/group/add.jsp</result>
      </action>
   </package>


</struts>
3)编写web.xml
<?xml version="1.0" encoding="UTF-8"?>
<web-app version="2.5"
	xmlns="http://java.sun.com/xml/ns/javaee"
	xmlns:xsi="http://www.w3.org/2001/XMLSchema-instance"
	xsi:schemaLocation="http://java.sun.com/xml/ns/javaee
	http://java.sun.com/xml/ns/javaee/web-app_2_5.xsd">

  <filter>
  	<filter-name>StrutsPrepareAndExecuteFilter</filter-name>
  	<filter-class>org.apache.struts2.dispatcher.ng.filter.StrutsPrepareAndExecuteFilter</filter-class>
  </filter>

  <filter-mapping>
  	<filter-name>StrutsPrepareAndExecuteFilter</filter-name>
 	<url-pattern>/*</url-pattern>
  </filter-mapping>

</web-app>
4)新建JSP页面
<%@ page language="java"  pageEncoding="UTF-8" contentType="text/html; charset=utf-8"%>
<html>
<head>
<meta http-equiv="Content-Type" content="text/html; charset=utf-8">
<title>部门新建</title>
<link href="${pageContext.request.contextPath}/ui/css/style_cn.css" rel="stylesheet" type="text/css">


<script language="javascript">
	function check(){
		document.form1.submit();
	}
</script>

</head>


<body>
<s:form name="form1" method="post" action="${pageContext.request.contextPath}/sys/sysUserGroupAction_save.do" namespace="/sys">
<div class="mtitle">
	<div class="mtitle-row"> </div>
	部门新建
</div>
<br>
<div class="control">
	<button type='button' class='button' onMouseOver="this.className='button_over';"
	        onMouseOut="this.className='button';"  onClick="document.forms[0].submit()">
	        <img src="${pageContext.request.contextPath}/ui/images/button/baocun.png" border='0'
	             align='absmiddle'> 保存</button>
	<button type='button' class='button' onMouseOver="this.className='button_over';"
	        onMouseOut="this.className='button';"  onClick="forward('group.do?method=list')">
	        <img src="${pageContext.request.contextPath}/ui/images/button/fanhui.png" border='0'
	             align='absmiddle'> 返回</button>
</div>
<table width="100%" border="0" cellspacing="0" class="tabForm">
  <tr>
    <th colspan="4" align="left" class="th_head">
		<div id="menuArrow1" style="background:url(${pageContext.request.contextPath}/ui/images/down.gif) no-repeat center;float:left;"> </div>
		<div id="menuTitle1" style="font-weight:bold">基本信息</div>
	</th>
  </tr>
  <tr>
  	<td>
		<div id="menu1">
		<table width="100%" border="0" cellspacing="0" cellpadding="0">
			<tr>
				<td width="16%"></td>
				<td width="34%"></td>
				<td width="16%"></td>
				<td width="34%"></td>
			</tr>
			<tr>
				<td class="red">部门名称</td>
				<td><s:textfield name="name" cssClass="input" cssStyle="width:90%"/></td>
				<td>部门负责人</td>
				<td><s:textfield name="principal" cssClass="input" cssStyle="width:90%"/></td>
			</tr>
			<tr>
				<td height="40" valign="top">部门职能</td>
				<td colspan="3"><s:textarea name="incumbent" rows="3" cssStyle="width:96%"></s:textarea></td>
			</tr>
			<tr>
				<td height="40" valign="top">备注</td>
				<td colspan="3"><s:textarea name="remark" id="remark" rows="3" cssStyle="width:96%"></s:textarea></td>
			</tr>
  		</table>
		</div>
	</td>
  </tr>
</table>
<br>
</s:form>
</body>
</html>
5)根据JSP页面中的信息,VO类
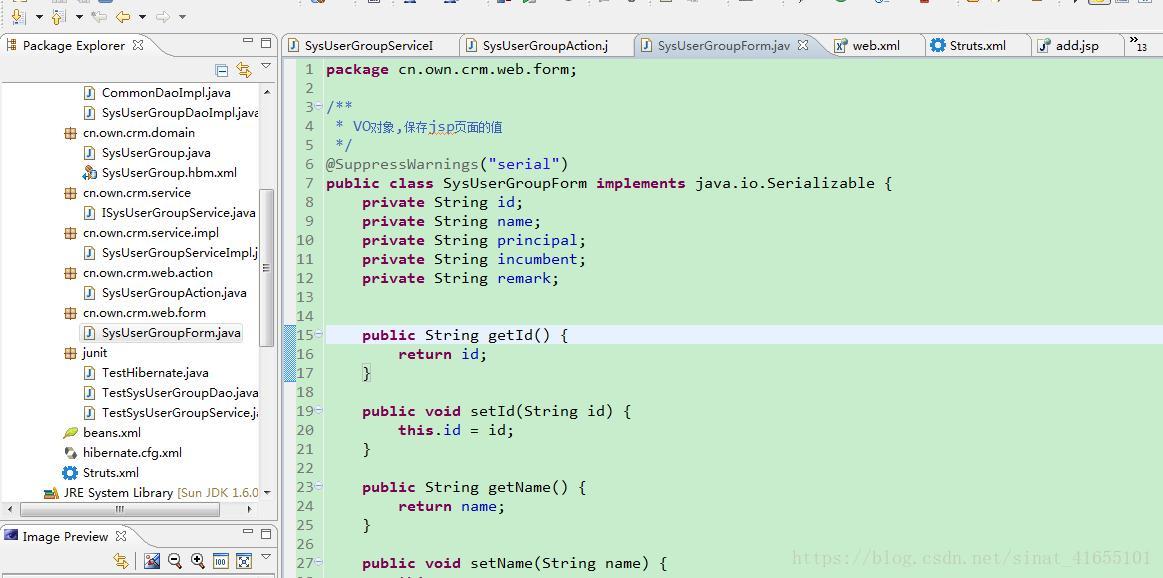
6)再编写Action层
package cn.own.crm.web.action;

import java.lang.reflect.InvocationTargetException;

import org.apache.commons.beanutils.BeanUtils;

import cn.own.crm.annotation.Limit;
import cn.own.crm.container.ServiceProvinder;
import cn.own.crm.domain.SysUserGroup;
import cn.own.crm.service.ISysUserGroupService;
import cn.own.crm.web.form.SysUserGroupForm;

import com.opensymphony.xwork2.ActionSupport;
import com.opensymphony.xwork2.ModelDriven;

@SuppressWarnings("serial")
public class SysUserGroupAction extends ActionSupport implements ModelDriven<SysUserGroupForm> {

	private SysUserGroupForm sysUserGroupForm = new SysUserGroupForm();

	//获取业务层的对象(本项目struts2和spring是分离的)
	private ISysUserGroupService sysUserGroupService=
		   (ISysUserGroupService)ServiceProvinder.getService(ISysUserGroupService.SERVICE_NAME);

	/**
	 * 保存部门信息
	 * @return
	 * @throws IllegalAccessException
	 * @throws InvocationTargetException
	 */
	@Limit(module="group",privilege="save")
	public String save() throws IllegalAccessException, InvocationTargetException{
		//实例化po对象
		SysUserGroup sysUserGroup=new SysUserGroup();

		//赋值vo对象的值到po中
		BeanUtils.copyProperties(sysUserGroup, sysUserGroupForm);
		//调用业务层保存po对象
		sysUserGroupService.saveSysUserGroup(sysUserGroup);

		return "add";
	}


	public SysUserGroupForm getModel() {

		return sysUserGroupForm;
	}
}
7)最后之前的操作一样编写一个测试类,用以验证操作的正确性。
3.1 登录注册功能
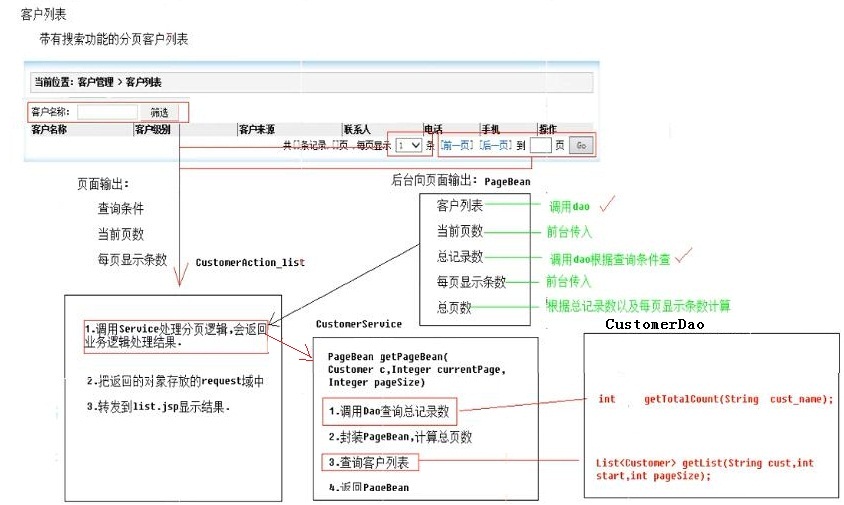
3.2 客户列表功能
3.1.1 功能分析
3.1.2 数据库设计
3.1.3 PageBean的实现
先完成PageBean的实现,新建一个PageBean类
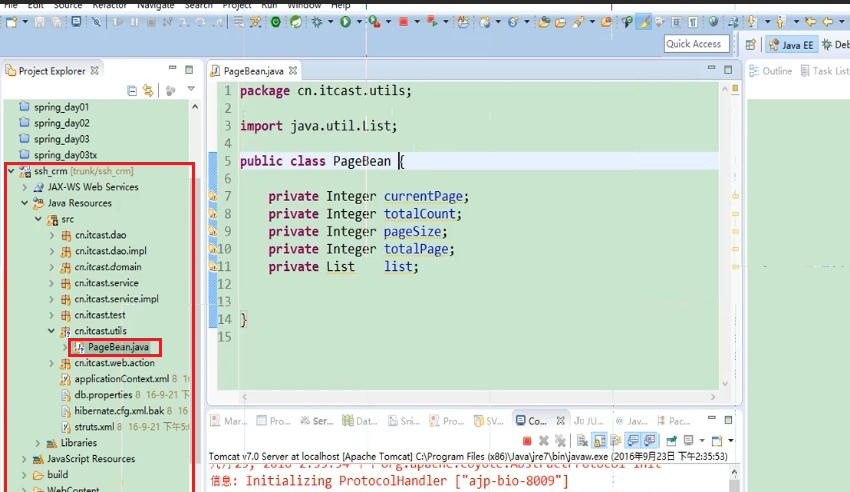
具体代码如下:
package cn.itcast.utils;

import java.util.List;

public class PageBean {
	//当前页数
	private Integer currentPage;
	//总记录数
	private Integer totalCount;
	//每页显示条数
	private Integer pageSize;
	//总页数
	private Integer totalPage;
	//分页列表数据
	private List	list;
	public PageBean(Integer currentPage, Integer totalCount, Integer pageSize) {
		this.totalCount = totalCount;

		this.pageSize =  pageSize;

		this.currentPage = currentPage;

		if(this.currentPage == null){
			//如页面没有指定显示哪一页.则显示第一页.
			this.currentPage = 1;
		}

		if(this.pageSize == null){
			//如果每页显示条数没有指定,默认每页显示3条
			this.pageSize = 3;
		}

		//计算总页数
		this.totalPage = (this.totalCount+this.pageSize-1)/this.pageSize;

		//判断当前页数是否超出范围
		//不能小于1
		if(this.currentPage < 1){
			this.currentPage = 1;
		}
		//不能大于总页数
		if(this.currentPage > this.totalPage){
			this.currentPage = this.totalPage;
		}

	}
	//计算起始索引
	public int getStart(){
		return (this.currentPage-1)*this.pageSize;
	}

	public Integer getCurrentPage() {
		return currentPage;
	}
	public void setCurrentPage(Integer currentPage) {
		this.currentPage = currentPage;
	}
	public Integer getTotalCount() {
		return totalCount;
	}
	public void setTotalCount(Integer totalCount) {
		this.totalCount = totalCount;
	}
	public Integer getPageSize() {
		return pageSize;
	}
	public void setPageSize(Integer pageSize) {
		this.pageSize = pageSize;
	}
	public Integer getTotalPage() {
		return totalPage;
	}
	public void setTotalPage(Integer totalPage) {
		this.totalPage = totalPage;
	}
	public List getList() {
		return list;
	}
	public void setList(List list) {
		this.list = list;
	}

}
3.1.4 编写CustomerAction并配置
按照2.1 中的分析,按部就班的添加各个小模块的代码。先编写CustomerAction类
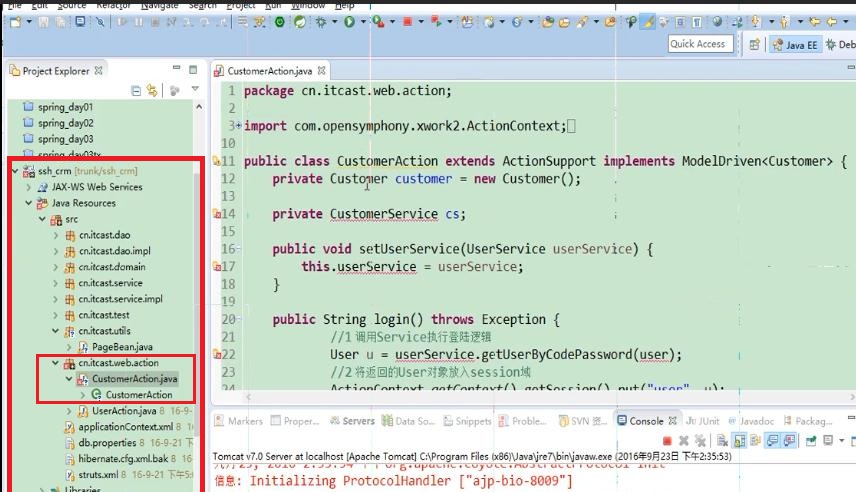
具体代码如下:
package cn.itcast.web.action;

import org.apache.commons.lang3.StringUtils;
import org.hibernate.criterion.DetachedCriteria;
import org.hibernate.criterion.Restrictions;

import com.opensymphony.xwork2.ActionContext;
import com.opensymphony.xwork2.ActionSupport;
import com.opensymphony.xwork2.ModelDriven;

import cn.itcast.domain.Customer;
import cn.itcast.domain.User;
import cn.itcast.service.CustomerService;
import cn.itcast.service.UserService;
import cn.itcast.utils.PageBean;

public class CustomerAction extends ActionSupport implements ModelDriven<Customer> {
	private Customer customer = new Customer();

	private CustomerService cs;

	private Integer currentPage;
	private Integer pageSize;
	public String list() throws Exception {
		//封装离线查询对象
		DetachedCriteria dc = DetachedCriteria.forClass(Customer.class);
		//判断并封装参数
		if(StringUtils.isNotBlank(customer.getCust_name())){
			dc.add(Restrictions.like("cust_name", "%"+customer.getCust_name()+"%"));
		}

		//1 调用Service查询分页数据(PageBean)
		PageBean pb = cs.getPageBean(dc,currentPage,pageSize);
		//2 将PageBean放入request域,转发到列表页面显示
		ActionContext.getContext().put("pageBean", pb);
		return "list";
	}

	@Override
	public Customer getModel() {
		return customer;
	}

	public void setCs(CustomerService cs) {
		this.cs = cs;
	}

	public Integer getCurrentPage() {
		return currentPage;
	}

	public void setCurrentPage(Integer currentPage) {
		this.currentPage = currentPage;
	}

	public Integer getPageSize() {
		return pageSize;
	}

	public void setPageSize(Integer pageSize) {
		this.pageSize = pageSize;
	}

}
在Struts.xml文件中配置Action,代码如下:
<?xml version="1.0" encoding="UTF-8"?>
  <!DOCTYPE struts PUBLIC
	"-//Apache Software Foundation//DTD Struts Configuration 2.3//EN"
	"http://struts.apache.org/dtds/struts-2.3.dtd">

<struts>
	<!-- #  struts.objectFactory = spring	将action的创建交给spring容器
			struts.objectFactory.spring.autoWire = name spring负责装配Action依赖属性
			-->
	<constant name="struts.objectFactory" value="spring"></constant>

	<package name="crm" namespace="/" extends="struts-default" >
		<global-exception-mappings>
			<exception-mapping result="error" exception="java.lang.RuntimeException"></exception-mapping>
		</global-exception-mappings>

		<!-- 整合方案1:class属性上仍然配置action的完整类名
				struts2仍然创建action,由spring负责组装Action中的依赖属性
		 -->
		 <!--
		 	整合方案2:class属性上填写spring中action对象的BeanName
		 		完全由spring管理action生命周期,包括Action的创建
		 		注意:需要手动组装依赖属性
		  -->
		<action name="UserAction_*" class="userAction" method="{1}" >
			<result name="toHome" type="redirect" >/index.htm</result>
			<result name="error" >/login.jsp</result>
		</action>

		 <!--
		 	 配置CustomerAction!!!配置CustomerAction!!!
		  -->
		<action name="CustomerAction_*" class="customerAction" method="{1}" >
			<result name="list"  >/jsp/customer/list.jsp</result>
		</action>
	</package>
</struts>配置CustomerAction!!!
		  -->
		<action name="CustomerAction_*" class="customerAction" method="{1}" >
			<result name="list"  >/jsp/customer/list.jsp</result>
		</action>
	</package>
</struts>
3.1.5 编写Service
编写Service接口及其实现类,接口部分的代码为:
package cn.itcast.service;

import org.hibernate.criterion.DetachedCriteria;

import cn.itcast.domain.Customer;
import cn.itcast.utils.PageBean;

public interface CustomerService {
	//分页业务方法
	PageBean getPageBean(DetachedCriteria dc, Integer currentPage, Integer pageSize);

}
Service接口的实现类,代码如下:
package cn.itcast.service.impl;

import java.util.List;

import org.hibernate.criterion.DetachedCriteria;

import cn.itcast.dao.CustomerDao;
import cn.itcast.domain.Customer;
import cn.itcast.service.CustomerService;
import cn.itcast.utils.PageBean;

public class CustomerServiceImpl implements CustomerService {
	private CustomerDao cd;
	@Override
	public PageBean getPageBean(DetachedCriteria dc, Integer currentPage, Integer pageSize) {
		//1 调用Dao查询总记录数
		Integer totalCount = cd.getTotalCount(dc);
		//2 创建PageBean对象
		PageBean pb = new PageBean(currentPage, totalCount, pageSize);
		//3 调用Dao查询分页列表数据

		List<Customer> list = cd.getPageList(dc,pb.getStart(),pb.getPageSize());
		//4 列表数据放入pageBean中.并返回
		pb.setList(list);
		return pb;
	}
	public void setCd(CustomerDao cd) {
		this.cd = cd;
	}

}
3.1.6 编写DAO
编写DAO接口,如下所示:
package cn.itcast.dao;

import java.util.List;

import org.hibernate.criterion.DetachedCriteria;

import cn.itcast.domain.Customer;

public interface CustomerDao extends BaseDao<Customer> {


}
DAO接口的实现类,代码如下:
package cn.itcast.dao.impl;

import java.util.List;

import org.hibernate.criterion.DetachedCriteria;
import org.hibernate.criterion.Projections;
import org.springframework.orm.hibernate5.support.HibernateDaoSupport;

import cn.itcast.dao.CustomerDao;
import cn.itcast.domain.Customer;

public class CustomerDaoImpl extends BaseDaoImpl<Customer> implements CustomerDao {

}
3.1.7 配置Spring
在applicationContext.xml文件中进行配置,具体如下:
<?xml version="1.0" encoding="UTF-8"?>
<beans xmlns:xsi="http://www.w3.org/2001/XMLSchema-instance"
		xmlns="http://www.springframework.org/schema/beans"
		xmlns:context="http://www.springframework.org/schema/context"
		xmlns:aop="http://www.springframework.org/schema/aop"
		xmlns:tx="http://www.springframework.org/schema/tx"
		xsi:schemaLocation="http://www.springframework.org/schema/beans http://www.springframework.org/schema/beans/spring-beans-4.2.xsd
							http://www.springframework.org/schema/context http://www.springframework.org/schema/context/spring-context-4.2.xsd
							http://www.springframework.org/schema/aop http://www.springframework.org/schema/aop/spring-aop-4.2.xsd
							http://www.springframework.org/schema/tx http://www.springframework.org/schema/tx/spring-tx-4.2.xsd ">

	<!-- 读取db.properties文件 -->
	<context:property-placeholder location="classpath:db.properties" />
	<!-- 配置c3p0连接池 -->
	<bean name="dataSource" class="com.mchange.v2.c3p0.ComboPooledDataSource" >
		<property name="jdbcUrl" value="${jdbc.jdbcUrl}" ></property>
		<property name="driverClass" value="${jdbc.driverClass}" ></property>
		<property name="user" value="${jdbc.user}" ></property>
		<property name="password" value="${jdbc.password}" ></property>
	</bean>

	<!-- 核心事务管理器 -->
	<bean name="transactionManager" class="org.springframework.orm.hibernate5.HibernateTransactionManager" >
		<property name="sessionFactory" ref="sessionFactory" ></property>
	</bean>

	<!-- 配置通知 -->
	<!-- <tx:advice id="txAdvice" transaction-manager="transactionManager" >
		<tx:attributes>
			<tx:method name="save*" isolation="REPEATABLE_READ" propagation="REQUIRED" read-only="false" />
			<tx:method name="persist*" isolation="REPEATABLE_READ" propagation="REQUIRED" read-only="false" />
			<tx:method name="update*" isolation="REPEATABLE_READ" propagation="REQUIRED" read-only="false" />
			<tx:method name="modify*" isolation="REPEATABLE_READ" propagation="REQUIRED" read-only="false" />
			<tx:method name="delete*" isolation="REPEATABLE_READ" propagation="REQUIRED" read-only="false" />
			<tx:method name="remove*" isolation="REPEATABLE_READ" propagation="REQUIRED" read-only="false" />
			<tx:method name="get*" isolation="REPEATABLE_READ" propagation="REQUIRED" read-only="true" />
			<tx:method name="find*" isolation="REPEATABLE_READ" propagation="REQUIRED" read-only="true" />
		</tx:attributes>
	</tx:advice> -->
	<!-- 配置将通知织入目标对象
	配置切点
	配置切面 -->
	<!-- <aop:config>
		<aop:pointcut expression="execution(* cn.itcast.service.impl.*ServiceImpl.*(..))" id="txPc"/>
		<aop:advisor advice-ref="txAdvice" pointcut-ref="txPc" />
	</aop:config> -->
	<!-- ========================================================================================= -->
	<!-- 开启注解事务 -->
	<tx:annotation-driven transaction-manager="transactionManager" />

	<!-- 将SessionFactory配置到spring容器中 -->
	<!-- 加载配置方案1:仍然使用外部的hibernate.cfg.xml配置信息 -->
	<!-- <bean name="sessionFactory" class="org.springframework.orm.hibernate5.LocalSessionFactoryBean" >
		<property name="configLocation" value="classpath:hibernate.cfg.xml" ></property>
	</bean> -->
	<!-- 加载配置方案2:在spring配置中放置hibernate配置信息 -->
	<bean name="sessionFactory" class="org.springframework.orm.hibernate5.LocalSessionFactoryBean" >
		<!-- 将连接池注入到sessionFactory, hibernate会通过连接池获得连接 -->
		<property name="dataSource" ref="dataSource" ></property>
		<!-- 配置hibernate基本信息 -->
		<property name="hibernateProperties">
			<props>
				<!--  必选配置 -->
			<!-- 	<prop key="hibernate.connection.driver_class" >com.mysql.jdbc.Driver</prop>
				<prop key="hibernate.connection.url" >jdbc:mysql:///crm_32</prop>
				<prop key="hibernate.connection.username" >root</prop>
				<prop key="hibernate.connection.password" >1234</prop> -->
				<prop key="hibernate.dialect" >org.hibernate.dialect.MySQLDialect</prop>

				<!--  可选配置 -->
				<prop key="hibernate.show_sql" >true</prop>
				<prop key="hibernate.format_sql" >true</prop>
				<prop key="hibernate.hbm2ddl.auto" >update</prop>
			</props>
		</property>
		<!-- 引入orm元数据,指定orm元数据所在的包路径,spring会自动读取包中的所有配置 -->
		<property name="mappingDirectoryLocations" value="classpath:cn/itcast/domain" ></property>
	</bean>

	<!-- action Action-->
	<!-- 注意:Action对象作用范围一定是多例的.这样才符合struts2架构 -->
	<bean name="userAction" class="cn.itcast.web.action.UserAction" scope="prototype" >
		<property name="userService" ref="userService" ></property>
	</bean>
	<bean name="customerAction" class="cn.itcast.web.action.CustomerAction" scope="prototype" >
		<property name="cs" ref="customerService" ></property>
	</bean>
	<!-- service Service-->
	<bean name="userService" class="cn.itcast.service.impl.UserServiceImpl" >
		<property name="ud" ref="userDao" ></property>
	</bean>
	<bean name="customerService" class="cn.itcast.service.impl.CustomerServiceImpl" >
		<property name="cd" ref="customerDao" ></property>
	</bean>
	<!-- dao Dao-->
	<bean name="userDao" class="cn.itcast.dao.impl.UserDaoImpl" >
		<!-- 注入sessionFactory -->
		<property name="sessionFactory" ref="sessionFactory" ></property>
	</bean>
	<bean name="customerDao" class="cn.itcast.dao.impl.CustomerDaoImpl" >
		<!-- 注入sessionFactory -->
		<property name="sessionFactory" ref="sessionFactory" ></property>
	</bean>
</beans>Action-->
	<!-- 注意:Action对象作用范围一定是多例的.这样才符合struts2架构 -->
	<bean name="userAction" class="cn.itcast.web.action.UserAction" scope="prototype" >
		<property name="userService" ref="userService" ></property>
	</bean>
	<bean name="customerAction" class="cn.itcast.web.action.CustomerAction" scope="prototype" >
		<property name="cs" ref="customerService" ></property>
	</bean>
	<!-- service Service-->
	<bean name="userService" class="cn.itcast.service.impl.UserServiceImpl" >
		<property name="ud" ref="userDao" ></property>
	</bean>
	<bean name="customerService" class="cn.itcast.service.impl.CustomerServiceImpl" >
		<property name="cd" ref="customerDao" ></property>
	</bean>
	<!-- dao Dao-->
	<bean name="userDao" class="cn.itcast.dao.impl.UserDaoImpl" >
		<!-- 注入sessionFactory -->
		<property name="sessionFactory" ref="sessionFactory" ></property>
	</bean>
	<bean name="customerDao" class="cn.itcast.dao.impl.CustomerDaoImpl" >
		<!-- 注入sessionFactory -->
		<property name="sessionFactory" ref="sessionFactory" ></property>
	</bean>
</beans>至此,后台部分的代码几乎都全部完成了。接下来就要开始前端的页面部分了。
3.1.8 前端List页面
<%@ page language="java" contentType="text/html; charset=UTF-8"
    pageEncoding="UTF-8"%>
<%@ taglib uri="http://java.sun.com/jsp/jstl/core" prefix="c" %>
<%@ taglib  prefix="s" uri="/struts-tags" %>
<!DOCTYPE html PUBLIC "-//W3C//DTD HTML 4.01 Transitional//EN" "http://www.w3.org/TR/html4/loose.dtd">
<html>
<head>
<TITLE>客户列表</TITLE>
<meta http-equiv="Content-Type" content="text/html; charset=UTF-8">
<LINK href="${pageContext.request.contextPath }/css/Style.css" type=text/css rel=stylesheet>
<LINK href="${pageContext.request.contextPath }/css/Manage.css" type=text/css
	rel=stylesheet>
<script type="text/javascript" src="${pageContext.request.contextPath }/js/jquery-1.4.4.min.js"></script>
<SCRIPT language=javascript>
	function changePage(pageNum){
			//1 将页码的值放入对应表单隐藏域中
				$("#currentPageInput").val(pageNum);
			//2 提交表单
				$("#pageForm").submit();
	};

	function changePageSize(pageSize){
			//1 将页码的值放入对应表单隐藏域中
			$("#pageSizeInput").val(pageSize);
		//2 提交表单
			$("#pageForm").submit();
	};
</SCRIPT>

<META content="MSHTML 6.00.2900.3492" name=GENERATOR>
</HEAD>
<BODY>


		<TABLE cellSpacing=0 cellPadding=0 width="98%" border=0>
			<TBODY>
				<TR>
					<TD width=15><IMG src="${pageContext.request.contextPath }/images/new_019.jpg"
						border=0></TD>
					<TD width="100%" background="${pageContext.request.contextPath }/images/new_020.jpg"
						height=20></TD>
					<TD width=15><IMG src="${pageContext.request.contextPath }/images/new_021.jpg"
						border=0></TD>
				</TR>
			</TBODY>
		</TABLE>
		<TABLE cellSpacing=0 cellPadding=0 width="98%" border=0>
			<TBODY>
				<TR>
					<TD width=15 background=${pageContext.request.contextPath }/images/new_022.jpg><IMG
						src="${pageContext.request.contextPath }/images/new_022.jpg" border=0></TD>
					<TD vAlign=top width="100%" bgColor=#ffffff>
						<TABLE cellSpacing=0 cellPadding=5 width="100%" border=0>
							<TR>
								<TD class=manageHead>当前位置:客户管理 > 客户列表</TD>
							</TR>
							<TR>
								<TD height=2></TD>
							</TR>
						</TABLE>
						<TABLE borderColor=#cccccc cellSpacing=0 cellPadding=0
							width="100%" align=center border=0>
							<TBODY>
								<TR>
									<TD height=25>
									<FORM id="pageForm" name="customerForm"
										action="${pageContext.request.contextPath }/CustomerAction_list"
										method=post>
										<!-- 隐藏域.当前页码 -->
										<input type="hidden" name="currentPage" id="currentPageInput" value="<s:property value="#pageBean.currentPage" />" />
										<!-- 隐藏域.每页显示条数 -->
										<input type="hidden" name="pageSize" id="pageSizeInput"       value="<s:property value="#pageBean.pageSize" />" />
										<TABLE cellSpacing=0 cellPadding=2 border=0>
											<TBODY>
												<TR>
													<TD>客户名称:</TD>
													<TD><INPUT class=textbox id=sChannel2
														style="WIDTH: 80px" maxLength=50 name="cust_name" value="${param.cust_name}"></TD>

													<TD><INPUT class=button id=sButton2 type=submit
														value=" 筛选 " name=sButton2></TD>
												</TR>
											</TBODY>
										</TABLE>
									</FORM>
									</TD>
								</TR>

								<TR>
									<TD>
										<TABLE id=grid
											style="BORDER-TOP-WIDTH: 0px; FONT-WEIGHT: normal; BORDER-LEFT-WIDTH: 0px; BORDER-LEFT-COLOR: #cccccc; BORDER-BOTTOM-WIDTH: 0px; BORDER-BOTTOM-COLOR: #cccccc; WIDTH: 100%; BORDER-TOP-COLOR: #cccccc; FONT-STYLE: normal; BACKGROUND-COLOR: #cccccc; BORDER-RIGHT-WIDTH: 0px; TEXT-DECORATION: none; BORDER-RIGHT-COLOR: #cccccc"
											cellSpacing=1 cellPadding=2 rules=all border=0>
											<TBODY>
												<TR
													style="FONT-WEIGHT: bold; FONT-STYLE: normal; BACKGROUND-COLOR: #eeeeee; TEXT-DECORATION: none">
													<TD>客户名称</TD>
													<TD>客户级别</TD>
													<TD>客户来源</TD>
													<TD>联系人</TD>
													<TD>电话</TD>
													<TD>手机</TD>
													<TD>操作</TD>
												</TR>
												<s:iterator value="#pageBean.list" var="cust" >
												<TR
													style="FONT-WEIGHT: normal; FONT-STYLE: normal; BACKGROUND-COLOR: white; TEXT-DECORATION: none">
													<TD>
														<s:property value="#cust.cust_name" />
													</TD>
													<TD>
													<s:property value="#cust.cust_level" />
													</TD>
													<TD>
													<s:property value="#cust.cust_source" />
													</TD>
													<TD>
													<s:property value="#cust.cust_linkman" />
													</TD>
													<TD>
													<s:property value="#cust.cust_phone" />
													</TD>
													<TD>
													<s:property value="#cust.cust_mobile" />
													</TD>
													<TD>
													<a href="${pageContext.request.contextPath }/customerServlet?method=edit&custId=${customer.cust_id}">修改</a>

													<a href="${pageContext.request.contextPath }/customerServlet?method=delete&custId=${customer.cust_id}">删除</a>
													</TD>
												</TR>
												</s:iterator>

											</TBODY>
										</TABLE>
									</TD>
								</TR>

								<TR>
									<TD><SPAN id=pagelink>
											<DIV
												style="LINE-HEIGHT: 20px; HEIGHT: 20px; TEXT-ALIGN: right">
												共[<B><s:property value="#pageBean.totalCount" /> </B>]条记录,[<B><s:property value="#pageBean.totalPage" /></B>]页
												,每页显示 <%-- changePageSize($('#pageSizeSelect option').filter(':selected').val()) --%>
												<select name="pageSize" onchange="changePageSize($('#pageSizeSelect option:selected').val())" id="pageSizeSelect" >
													<option value="3" <s:property value="#pageBean.pageSize==3?'selected':''" /> >3</option>
													<option value="5" <s:property value="#pageBean.pageSize==5?'selected':''" /> >5</option>
												</select>
												条
												[<A href="javaScript:void(0)" onclick="changePage(<s:property value='#pageBean.currentPage-1' />)" >前一页</A>]
												<B><s:property value="#pageBean.currentPage" /></B>
												[<A href="javaScript:void(0)" onclick="changePage(<s:property value='#pageBean.currentPage+1' />)"  >后一页</A>]
												到
												<input type="text" size="3" id="page" name="page" value="<s:property value="#pageBean.currentPage" />"  />
												页

												<input type="button" value="Go" onclick="changePage($('#page').val())"/>
											</DIV>
									</SPAN></TD>
								</TR>
							</TBODY>
						</TABLE>
					</TD>
					<TD width=15 background="${pageContext.request.contextPath }/images/new_023.jpg"><IMG
						src="${pageContext.request.contextPath }/images/new_023.jpg" border=0></TD>
				</TR>
			</TBODY>
		</TABLE>
		<TABLE cellSpacing=0 cellPadding=0 width="98%" border=0>
			<TBODY>
				<TR>
					<TD width=15><IMG src="${pageContext.request.contextPath }/images/new_024.jpg"
						border=0></TD>
					<TD align=middle width="100%"
						background="${pageContext.request.contextPath }/images/new_025.jpg" height=15></TD>
					<TD width=15><IMG src="${pageContext.request.contextPath }/images/new_026.jpg"
						border=0></TD>
				</TR>
			</TBODY>
		</TABLE>

</BODY>
</HTML>
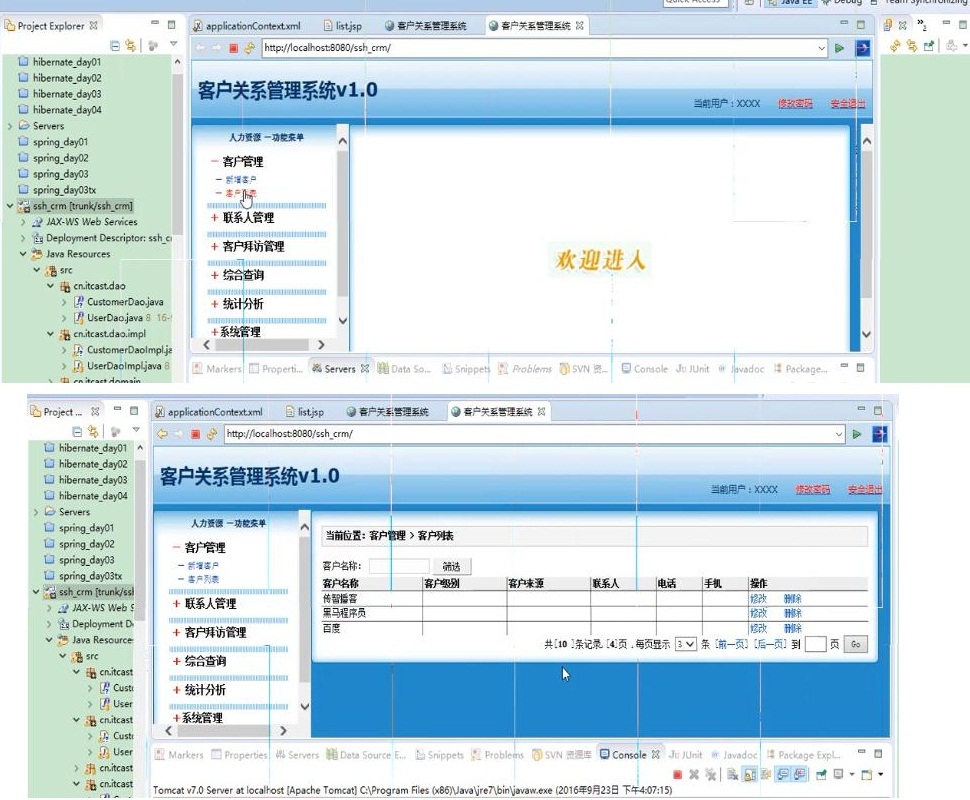
运行效果,如下所示:
---------------------------------------------------------------------- 我是低调的分隔线 --------------------------------------------------------------------------


吾欲之南海,一瓶一钵足矣...


 3786
3786


 被折叠的 条评论
为什么被折叠?
被折叠的 条评论
为什么被折叠?
 到【灌水乐园】发言


