


DHCP服务
- Dynamic Host Configuration Protocol,动态主机配置协议
- 使用UDP协议工作
- 主要有两个用途:给内部网络或网络服务供应商自动分配IP地址,给用户或者内部网络管理员作为对所有计算机作中央管理的手段
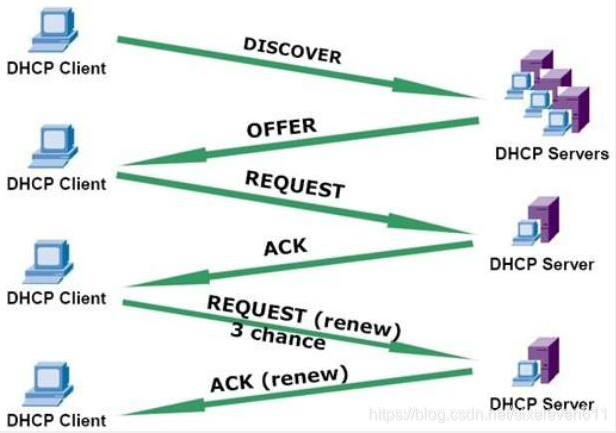
- 主机发送请求消息到DHCP服务器的67号端口,DHCP服务器回应应答消息给主机的68号端口
- DHCP的交互过程如下:
一、实验目的
- 搭建DHCP linux服务器
- 给客户端分配IP地址
二、实验环境
- Linux主机作为DHCP服务器,ip地址:192.168.100.20
三、实验过程(如下)
第一步:安装DHCP服务
- 使用yum安装方式
[root@pakho ~]# yum provides dhcp #首查看dhcp服务的安装包
Loaded plugins: fastestmirror
Loading mirror speeds from cached hostfile
 * epel: fedora.cs.nctu.edu.tw
12:dhcp-4.2.5-82.el7.centos.x86_64 : Dynamic host configuration protocol software
Repo        : base
[root@pakho ~]# yum -y install dhcp #使用yum安装方式进行安装
第二步:查看dhcp服务安装目录
[root@pakho ~]# rpm -ql dhcp  #搜索dhcp服务软件包安装路径
/etc/dhcp/dhcpd.conf #ipv4主配置文件
/usr/lib/systemd/system/dhcpd.service #服务的启动名称
/usr/share/doc/dhcp-4.2.5/dhcpd.conf.example #example:举例   该文件路径为配置文件举例
...#省略部分
[root@pakho ~]#  vim /usr/share/doc/dhcp-4.2.5/dhcpd.conf.example # 查看配置文件实例
# dhcpd.conf
#
# Sample configuration file for ISC dhcpd
#
# option definitions common to all supported networks...
option domain-name "example.org";                            #搜索域的域名
option domain-name-servers ns1.example.org, ns2.example.org; #dns服务器

default-lease-time 600;
max-lease-time 7200;  #最大租约时间7200秒

# Use this to enble / disable dynamic dns updates globally.
#ddns-update-style none;

# If this DHCP server is the official DHCP server for the local
# network, the authoritative directive should be uncommented.
#authoritative;

# Use this to send dhcp log messages to a different log file (you also
# have to hack syslog.conf to complete the redirection).
log-facility local7;

# No service will be given on this subnet, but declaring it helps the
# DHCP server to understand the network topology.
subnet 10.152.187.0 netmask 255.255.255.0 {
}                                                          #地址池
# This is a very basic subnet declaration.
"/usr/share/doc/dhcp-4.2.5/dhcpd.conf.example" 104L, 3262C
第三步:配置dhcp服务
[root@pakho ~]# vim /etc/dhcp/dhcpd.conf                          #进入主配置文件
#
# DHCP Server Configuration file.
#   see /usr/share/doc/dhcp*/dhcpd.conf.example
#   see dhcpd.conf(5) man page
#
option domain-name "baidu.com";                                   #搜索域
option domain-name-servers www.baidu.com;                         #自定义修改
default-lease-time 600;
max-lease-time 7200; #最大租约时间                                  #外面为全局配置
subnet 192.168.100.0  netmask 255.255.255.0 {                     #分配的网段
range 192.168.100.100 192.168.100.110;                            #可用网段的范围
option routers 192.168.100.2;      #dns服务器网关                   #里面为局部配置{内}
}
第四步:开启dhcp服务
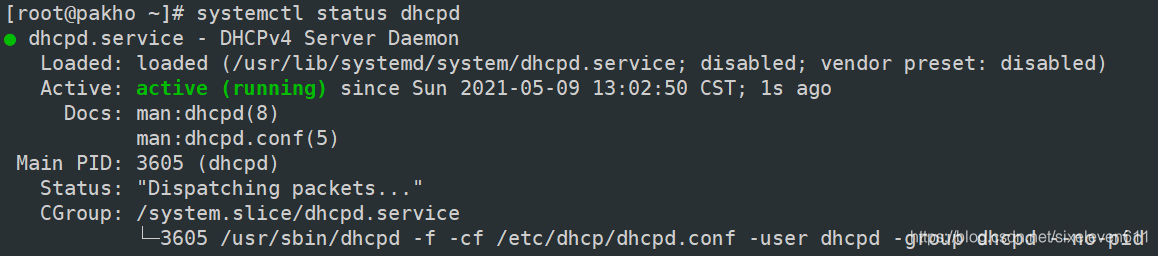
1、查看dhcp服务状态

2、开启dhcp服务
[root@pakho ~]# systemctl start dhcpd
3、再次查看dhcp服务状态
ps:或使用查看进程的方式查看服务开启状态
[root@pakho ~]# ps aux | grep dhcp #查看dhcp服务开启状态
root       3542  0.0  0.2 149492  5352 pts/0    S+   12:35   0:00 vim /usr/share/doc/dhcp-4.2.5/dhcpd.conf.example
dhcpd      3605  0.0  0.3 105860  8096 ?        Ss   13:02   0:00 /usr/sbin/dhcpd -f -cf /etc/dhcp/dhcpd.conf -user dhcpd -group dhcpd --no-pid
root       3609  0.0  0.0 112704   968 pts/1    S+   13:07   0:00 grep --color=auto dhcp
第五步:检测dhcp服务器是否工作
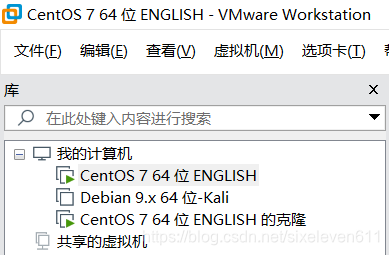
- 开启一台新的虚拟机
1、查看网络信息
[root@611 ~]# ifconfig  #192.168.100.10是预先设置好的
ens32: flags=4163<UP,BROADCAST,RUNNING,MULTICAST>  mtu 1500
        inet 192.168.100.10  netmask 255.255.255.0  broadcast 192.168.100.255
        inet6 fe80::ce37:2f67:fb41:ce40  prefixlen 64  scopeid 0x20<link>
        inet6 fe80::596:e48c:e042:d630  prefixlen 64  scopeid 0x20<link>
        ether 00:0c:29:95:1a:ef  txqueuelen 1000  (Ethernet)
        RX packets 417  bytes 35424 (34.5 KiB)
        RX errors 0  dropped 0  overruns 0  frame 0
        TX packets 307  bytes 39703 (38.7 KiB)
        TX errors 0  dropped 0 overruns 0  carrier 0  collisions 0
2、进入网卡配置
[root@611 ~]# vim /etc/sysconfig/network-scripts/ifcfg-ens32
TYPE="Ethernet"
PROXY_METHOD="none"
BROWSER_ONLY="no"
BOOTPROTO="dhcp"                        #修改为dhcp
DEFROUTE="yes"
IPV4_FAILURE_FATAL="no"
IPV6INIT="yes"
IPV6_AUTOCONF="yes"
IPV6_DEFROUTE="yes"
IPV6_FAILURE_FATAL="no"
IPV6_ADDR_GEN_MODE="stable-privacy"
NAME="ens32"
UUID="6b9e423d-c32d-4074-8b6f-f6c4e47a6f9b"
DEVICE="ens32"
#ONBOOT="yes"   #如下配置注释
#IPADDR="192.168.100.10"
#PREFIX="24"
#GATEWAY="192.168.100.2"
#IPV6_PRIVACY="no"
#DNS1="192.168.100.2"
3、查看ip地址 (已成功分配)
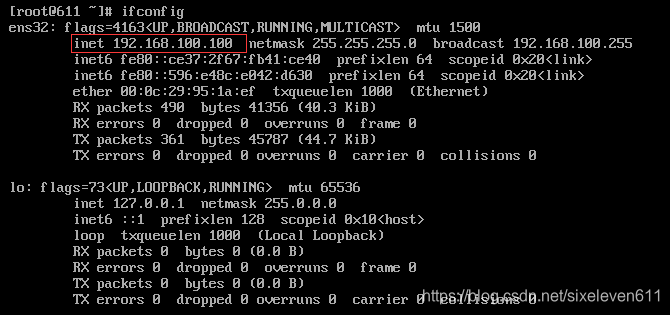
ps:使用服务机查看租约过程
[root@pakho ~]# cat /var/lib/dhcpd/dhcpd.leases
# The format of this file is documented in the dhcpd.leases(5) manual page.
# This lease file was written by isc-dhcp-4.2.5

server-duid "\000\001\000\001(*)z\000\014)\367\273\035";

lease 192.168.100.100 {
  starts 0 2021/05/09 05:19:29;
  ends 0 2021/05/09 05:29:29;
  cltt 0 2021/05/09 05:19:29;
  binding state active;
  next binding state free;
  rewind binding state free;
  hardware ethernet 00:0c:29:95:1a:ef; #客户端mac地址
  client-hostname "611"; #客户端主机名
}
DHCP释放IP命令:dhclient -r
获取IP命令:dhclient


 771
771


 被折叠的 条评论
为什么被折叠?
被折叠的 条评论
为什么被折叠?
 到【灌水乐园】发言


