


Linux 环境:Ubuntu 14.0 、Centos6.8 64-bit
Nginx版本:Nginx-1.9.11.tar.gz
一、安装步骤:
1、安装 Nginx所有依赖软件,请按照如下步骤安装:
sudo apt-get install gcc
sudo apt-get install g++
sudo apt-get install gcc-c++
sudo apt-get install make
sudo apt-get install libz-dev
sudo apt-get install libbz2-dev
sudo apt-get install libreadline-dev
sudo apt-get install openssl openssl-devel
2、安装pcre正则表达式库,下载之后解压
tar -zxvf pcre-8.38.tar.gz /usr/lib/pcre-8.38
cd /usr/lib/pcre-8.38
./configure
sudo make
sudo make install
3、安装nginx, 下载压缩包, 我的版本是nginx-1.9.11.tar.gz
tar -zxvf nginx-1.9.11.tar.gz /usr/lib/nginx
cd /usr/lib/inginx/nginx-1.9.11
./configure
sudo make
sudo make install
4、启动nginx
默认配置文件的启动方式
[root@localhost ~]# /usr/local/nginx/sbin/nginx

指定配置文件的启动方式
[root@localhost ~]# /usr/local/nginx/sbin/nginx -c /配置/文件/路径
1) 如果启动报:error while loading shared libraries: libpcre.so.1: cannot open shared object file: No such file or directory
解决办法:用root身份执行如下命令就可以了
ln -s /usr/local/lib/libpcre.so.1 /lib 或者 ln -s /usr/local/lib/libpcre.so.1 /lib642) 如果启动报:nginx: [emerg] "alias" directive is duplicate, "root" directive was specified earlier in /usr/local/nginx/conf/nginx.conf:45
那是因为你的nginx.conf里的配置冲突了:去配置文件里,把location下冲突的那行干掉就可以了。
二、测试
1、在4台服务器上部署4个tomcat(或者一台机器上部署多个tomcat也行,改一下端口就好)
修改index.jsp页面,可以识别是哪一台tomcat的就好
2、修改nginx配置文件内容:
[root@localhost ~]# vi /usr/local/nginx/conf/nginx.conf

#user  nobody;
worker_processes  1;
worker_rlimit_nofile 100000; 	#把这个值设高,这样nginx就不会有“too many open files”问题
#error_log  logs/error.log;
#error_log  logs/error.log  notice;
#error_log  logs/error.log  info;
#pid        logs/nginx.pid;
events {
    worker_connections  1024;
}

http {
    server_tokens	off;	#不显示nginx版本, 提高安全性
    sendfile            on;
    include      	mime.types;
    tcp_nopush          on;
    charset 		utf-8;
    default_type  	application/octet-stream;

    keepalive_timeout  65;
    tcp_nodelay on;
    client_body_buffer_size  512k;
    proxy_connect_timeout    5;
    proxy_read_timeout       60;
    proxy_send_timeout       5;
    reset_timeout_connection on;	#告诉nginx关闭不响应的客户端连接。

    gzip  on;	#开启压缩

    upstream mytomcat {
	#配置权重,有多台机器的话配置多个ip,单台机器多个tomcat的话,修改端口
        server 192.168.3.111:8080 weight=1;
        server 192.168.3.112:8080 weight=2;
        server 192.168.3.113:8080 weight=3;
        server 192.168.3.114:8080 weight=4;
    }
    server {
        listen 80;
        server_name 192.168.3.111;		# 访问地址
        location /your_project_name {	      # 访问的项目

            proxy_pass http://mytomcat; #这里名字跟上面的upstream对应

            #配置获取用户真实IP地址
            proxy_set_header Host $host;
            proxy_set_header Proxy-Client-IP $remote_addr;
            proxy_set_header WL-Proxy-Client-IP $remote_addr;
            proxy_set_header x-forwarded-for $proxy_add_x_forwarded_for;
        }
        # 静态资源交给nginx管理
        location ~* \.(jpg|jpeg|gif|png|bmp)$ {
            root /usr/web/tomcat_w1/webapps/your_project_name/images;
            expires 30d;
        }
    }
}
3、测试nginx配置:
[root@localhost ~]#/usr/local/nginx/sbin/nginx -t

有如下信息表示配置没问题

nginx: the configuration file /usr/local/nginx/conf/nginx.conf syntax is ok
nginx: configuration file /usr/local/nginx/conf/nginx.conf test is successful
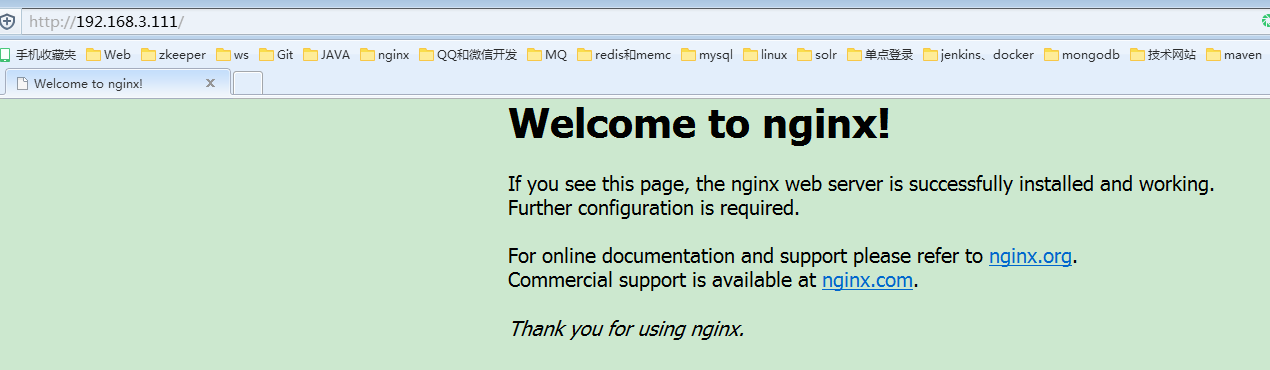
4、请求server_name的配置地址:如果上面的 192.168.3.111,出现下图就是成功了。
5、测试请求:http://192.168.3.111/brandSearch/testnginx.jsp
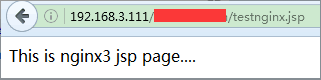


到此,测试结束。。。。
三、出错总结:
1、make出错
make: *** No rule to make target `build', needed by `default'. Stop. ./configure: error: SSL modules require the OpenSSL library. You can either do not enable the modules, or install the OpenSSL library into the system, or build the OpenSSL library statically from the source with nginx by using --with-openssl= option. 解决办法:
Ubuntu系统:
apt-get install openssl
apt-get install libssl-dev
Centos系统:
yum -y install openssl openssl-devel以上方法还不能解决的话,就kill掉进程,再重新执行make命令,亲测可用
configure的时候可以带参数
./configure --prefix=/usr/local/nginx --user=www --group=www --with-http_ssl_module --with-http_stub_status_module --with-pcre=/home/pcre-8.38


 1746
1746

 被折叠的 条评论
为什么被折叠?
被折叠的 条评论
为什么被折叠?
 到【灌水乐园】发言


