


搞事一:导航栏
1.导航栏高度变化
导航栏在iOS10之前都是默认的64p,但是,到了iOS10就不单单是64p了,可以看一下系统的信息App,在iOS11添加了大标题,效果如下图1:
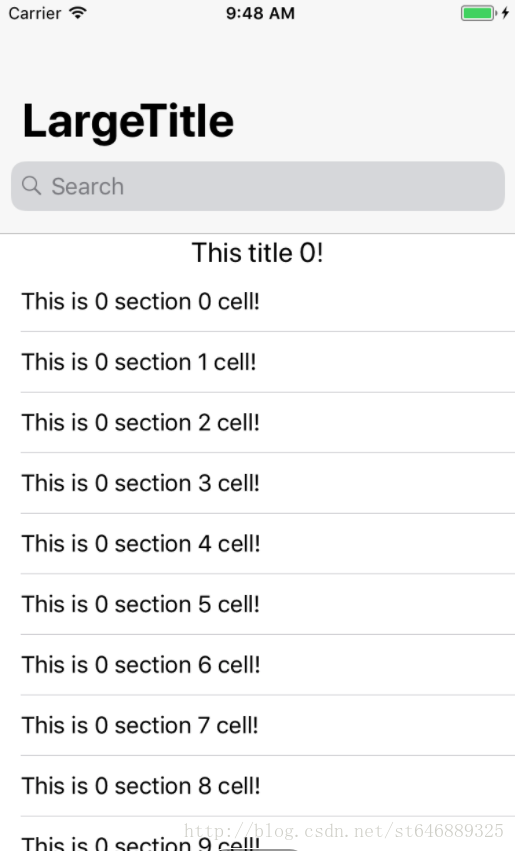
navigationBar的结构,看图2、3、4:
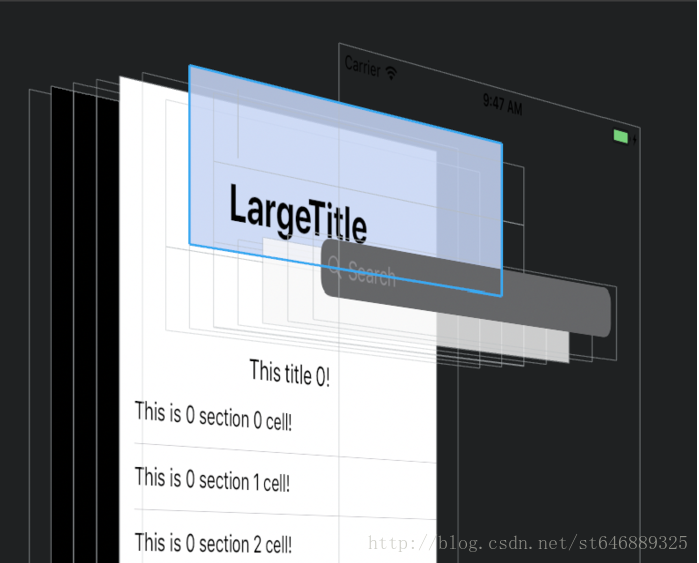
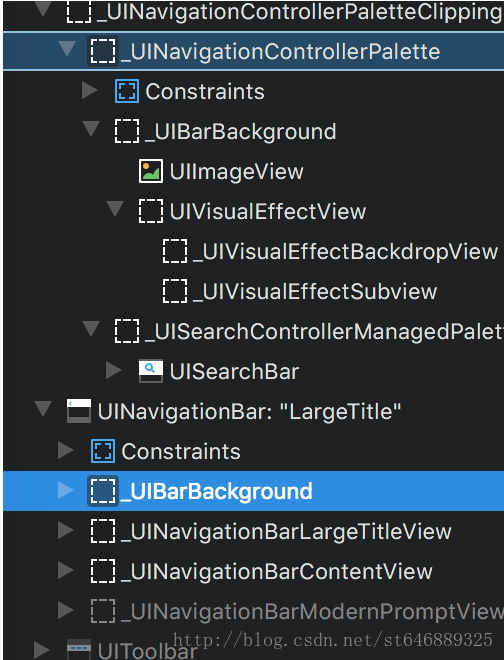
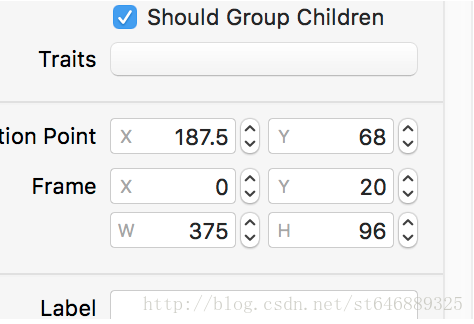
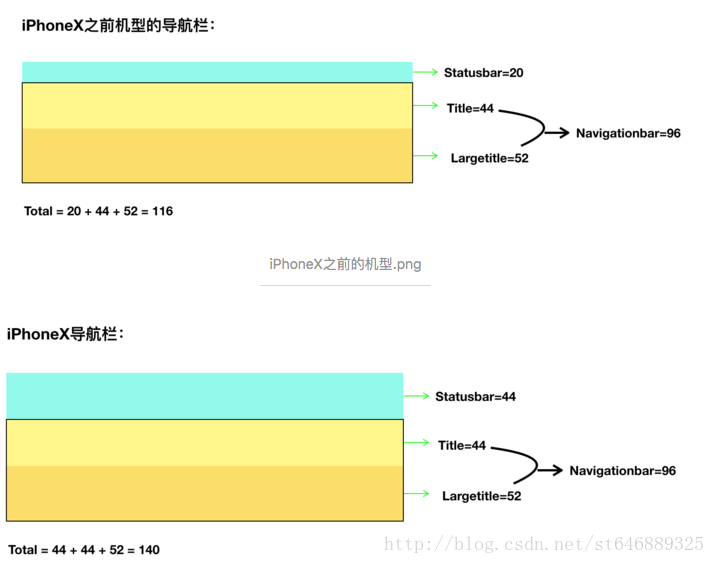
在上面三幅图可以知道,在iOS11导航栏多了一个LargeTitleView,专门显示大字标题用的,整个导航栏的高度达到了96p,这不包括状态栏的高度,也就是说,整个app顶部高度达到了116p,其中statusbar=20,title=44,largetitle=52,不过默认是64p;当然,iPhoneX的高度会更高点,如果不显示大字标题,顶部的高度也达到了88,statusbar=44,title=44,如果显示大字标题,则高度变成了140,statusbar=44,title=44,largetitle=52,也就是说,iPhoneX的刘海高度为24p,大字标题如下图:
2.导航栏的图层变化
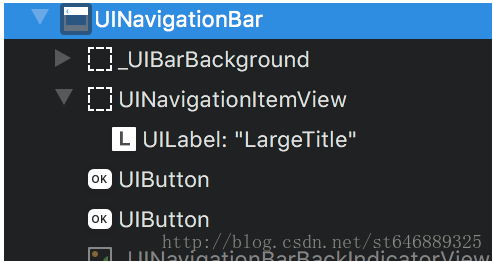
iOS11之前导航栏的title是添加在UINavigationItemView上面,而navigationBarButton则直接添加在navigationBar上面;如果设置了titleView,则titleView也是直接添加在navigationBar上面,如图5:
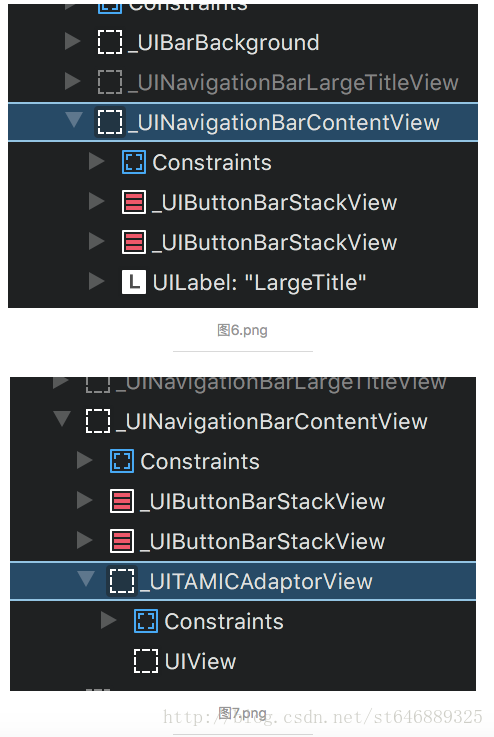
在iOS11之后,苹果添加了新的类来管理,navigationBar会添加在_UIButtonBarStackView上面,而_UIButtonBarStackView则添加在_UINavigationBarContentView上面;如果没有给titleView赋值,则titleView会直接添加在_UINavigationBarContentView上面,如果赋值给了titleView,则会新生成_UITAMICAdaptorView,把titleView添加在这个类上面,这个类会添加在_UINavigationBarContentView上面,如下图6、7:
3.导航栏的边距变化
在iOS11对导航栏里面的item的边距也做了调整:
(1)如果只是设置了titleView,没有设置barbutton,把titleview的宽度设置为屏幕宽度,则titleview距离屏幕的边距,iOS11之前,在iPhone6p上是20p,在iPhone6p之前是16p;iOS11之后,在iPhone6p上是12p,在iPhone6p之前是8p。
(2)如果只是设置了barbutton,没有设置titleview,则在iOS11里,barButton距离屏幕的边距是20p和16p;在iOS11之前,barButton距离屏幕的边距也是20p和16p。
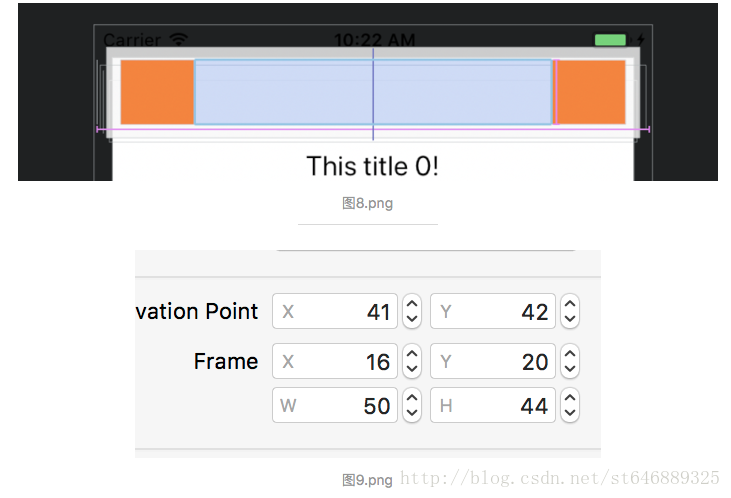
(3)如果同时设置了titleView和barButton,则在iOS11之前,titleview和barbutton之间的间距是6p,在iOS11上titleview和barbutton之间无间距,如下图8、9:
4.App需要实现导航栏左右按钮边距为0
在iOS11之前,可以设置一个width为负的navigationBarButton,将按钮挤到边缘,变相实现0边距的导航栏按钮,但是,这招在iOS11失效了,原因在于_UIButtonBarStackView,这个iOS9之后出来的,用来相对布局的组件,限制了子view的布局。那怎么搞呢?
想到的方法有几个:
(1)在viewWillAppear里面,将_UIButtonBarStackView取出来,直接设置它的x坐标。
(2)设置titleView,然后将button添加在titleView上面,根据不同的边距做偏移。
方法一:
遇到的问题,在viewDidLoad,viewWillAppear,viewWillLayoutSubviews,viewDidLayoutSubviews里面都取不到_UIButtonBarStackView,只有在viewDidAppear里才能取到值,这样就会在页面显示了之后才开始移动navigationBarButton,显然这样体验不好,所以,暂时pass掉。
方法二:
这个做法完全可以做到0边距,但是,问题来了,就是点击区域的问题。因为左右navigationBarButton的点击区域是超出父view的,所以,点击不到。这好办,重写titleView的hitTest方法就好。嘿嘿嘿,问题没有那么简单。之前在iOS11的图层结构就解释过,titleView会被添加在_UITAMICAdaptorView上面,而重点是,这个view也有边距,所以,单单重写titleView的hitTest方法还不够,那怎么解决呢?我的办法就是写一个view的类别,hook所有view的hitTest方法,在里面判断是否是iOS11以上,是否是_UITAMICAdaptorView类,如果都满足条件,则可以搞事了。
搞事二:列表的变化
1.automaticallyAdjustsScrollViewInsets
在iOS11之前,如果想要scrollView不偏移64p,则需设置automaticallyAdjustsScrollViewInsets=NO,但是这个属性在iOS11直接被遗弃了��:
@property(nonatomic,assign) BOOL automaticallyAdjustsScrollViewInsets
API_DEPRECATED_WITH_REPLACEMENT(“Use UIScrollView’s contentInsetAdjustmentBehavior instead”, ios(7.0,11.0),tvos(7.0,11.0));
所以,看一下contentInsetAdjustmentBehavior是何方神圣:
typedef NS_ENUM(NSInteger, UIScrollViewContentInsetAdjustmentBehavior) {
UIScrollViewContentInsetAdjustmentAutomatic, // Similar to .scrollableAxes, but will also adjust the top & bottom contentInset when the scroll view is owned by a view controller with automaticallyAdjustsScrollViewContentInset = YES inside a navigation controller, regardless of whether the scroll view is scrollable
UIScrollViewContentInsetAdjustmentScrollableAxes, // Edges for scrollable axes are adjusted (i.e., contentSize.width/height > frame.size.width/height or alwaysBounceHorizontal/Vertical = YES)
UIScrollViewContentInsetAdjustmentNever, // contentInset is not adjusted
UIScrollViewContentInsetAdjustmentAlways, // contentInset is always adjusted by the scroll view’s safeAreaInsets
} API_AVAILABLE(ios(11.0),tvos(11.0));
/* Configure the behavior of adjustedContentInset.
Default is UIScrollViewContentInsetAdjustmentAutomatic.
*/
@property(nonatomic) UIScrollViewContentInsetAdjustmentBehavior contentInsetAdjustmentBehavior API_AVAILABLE(ios(11.0),tvos(11.0));
看起来这和iOS11搞的safeArea有关,这个先放一遍,看看怎么适配:
define adjustsScrollViewInsets_NO(scrollView,vc)\
do { \
_Pragma(“clang diagnostic push”) \
_Pragma(“clang diagnostic ignored \”-Warc-performSelector-leaks\”“) \
if ([UIScrollView instancesRespondToSelector:NSSelectorFromString(@”setContentInsetAdjustmentBehavior:”)]) {\
[scrollView performSelector:NSSelectorFromString(@”setContentInsetAdjustmentBehavior:”) withObject:@(2)];\
} else {\
vc.automaticallyAdjustsScrollViewInsets = NO;\
}\
_Pragma(“clang diagnostic pop”) \
} while (0)
上面是公司里面一个大神写的,这样就可以在Xcode8上面跑了。
2.tableView默认使用Self-Sizing
这个配合estimatedRowHeight、estimatedSectionFooterHeight、estimatedSectionHeaderHeight使用,可以预估高度。之前,设置header或者footer高度为0时,需要设置height=0.1,才会起作用,如果直接设置为0,则会使用默认高度。iOS11由于自动使用预估高度,所以,忽略了设置的高度,使原来的高度增大了。只要把这几个属性设置为0就可以解决。
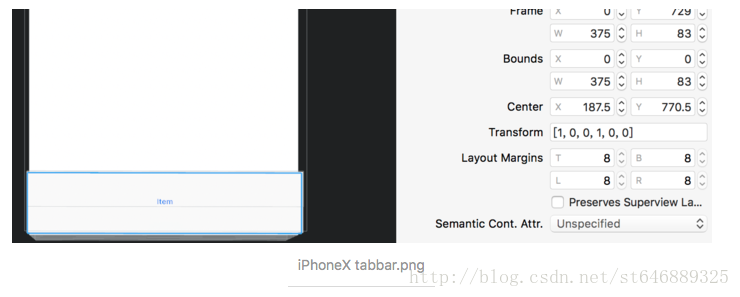
搞事三:iPhoneX底部tabbar的高度改变
iPhoneX不止多了刘海,底部还有一个半角的矩形,使得tabbar多出来了34p的高度,不过不管导航栏和tabbar一般系统都会自动适配safeArea。
搞事四:iOS11 iPhoneX页面push时tabbar位置变化
可以看到在页面push的时候,tabbar的frame上移了,这个只有在iPhoneX上面才能看到(因为iPhoneX的TabBar的高度不一样),有可能是模拟器的bug,但是,具体要到真机出来才知道。下面说说修复的几种办法:
(1)将导航栏的代理设置为当前的controller,然后在将要展示下个页面的方法里修正TabBar的frame。
(void)navigationController:(UINavigationController )navigationController willShowViewController:(UIViewController )viewController animated:(BOOL)animated {
if (![[[UIDevice currentDevice] modelName] isEqualToString: @”iPhone X”]) {
return;
}
CGRect frame = self.tabBarController.tabBar.frame;
if (frame.origin.y < ([UIScreen mainScreen].bounds.size.height - 83)) {
frame.origin.y = [UIScreen mainScreen].bounds.size.height - 83;
self.tabBarController.tabBar.frame = frame;
}
}
(2)新建一个类,继承UITabBar,然后在setFrame:里面做判断修正,将改类替换系统默认的TabBar。(void)setFrame:(CGRect)frame {
if ([[[UIDevice currentDevice] modelName] isEqualToString: @”iPhone X”]) {
if (frame.origin.y < ([UIScreen mainScreen].bounds.size.height - 83)) {
frame.origin.y = [UIScreen mainScreen].bounds.size.height - 83;
}
}
[super setFrame: frame];
}
(3)其他方法。


 1万+
1万+


 被折叠的 条评论
为什么被折叠?
被折叠的 条评论
为什么被折叠?
 到【灌水乐园】发言


