


文章目录
一、前言
在前期博文《ReactNative进阶(一):ReactNative 学习资料汇总》中,提到目前主流的移动跨平台技术方案大体可以分为三类,
- 使用原生内置浏览器加载HTML5的Hybrid技术方案,采用此种方案的主要有
Cordova、Ionic和微信小程序; - 使用JavaScript语言进行开发,然后使用原生组件进行渲染,采用此方案的主要有
React Native、Weex和轻快应用; - 使用自带渲染引擎和自带原生组件来实现跨平台,采用此种方案的主要是
Flutter。
二、cordova 自定义插件
注意⚠️:存放自定义cordova插件目录不能有空格可能会报错!
2.1 cordova 安装
前提条件:已安装node.js;
安装cordova使用node.js的npm工具。打开控制台输入
npm install -g cordova
-g是全局安装cordova。安装完成后就可以在命令行使用cordova命令查看版本信息。
cordova -v
安装plugman
cordova需要用plugman来创建自定义插件。
npm install -g plugman
2.2 cordova 创建 android 工程
- 创建
cordova工程
首先在电脑中创建一个cordova工程的目录,然后进入到创建的目录里。之后就可以开始创建cordova工程,下面是创建工程的代码和实例图。
cordova create hello com.example.hello HelloWorld
参数说明:
| 名称 | 必填 | 描述 |
|---|---|---|
| hello | 是 | 工程的文件夹名 |
| com.example.hello | 否 | 应用程序的id, 名如果不指定的话默认为io.cordova.hellocordova |
| HelloWorld | 否 | App的名称 |
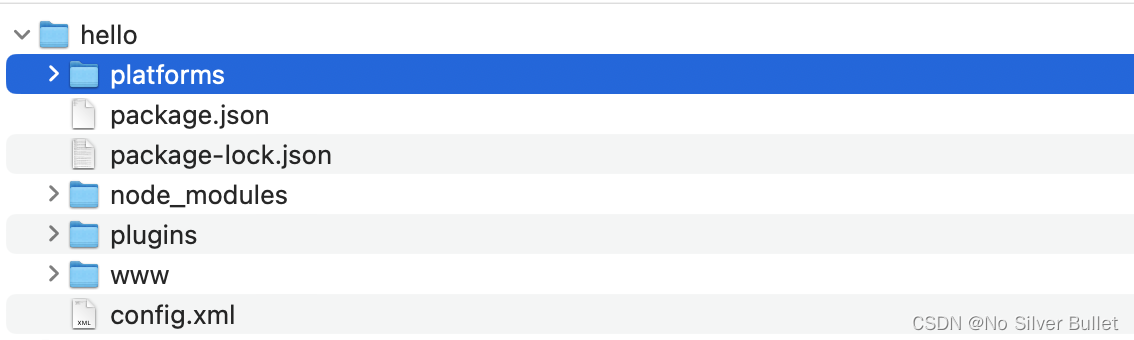
创建成功后的目录:
2. 添加 Android 平台
先进入到刚刚创建的cordova目录中,然后开始创建android工程。
cordova platform add android
android --> 创建的平台名也可以是iOS等。
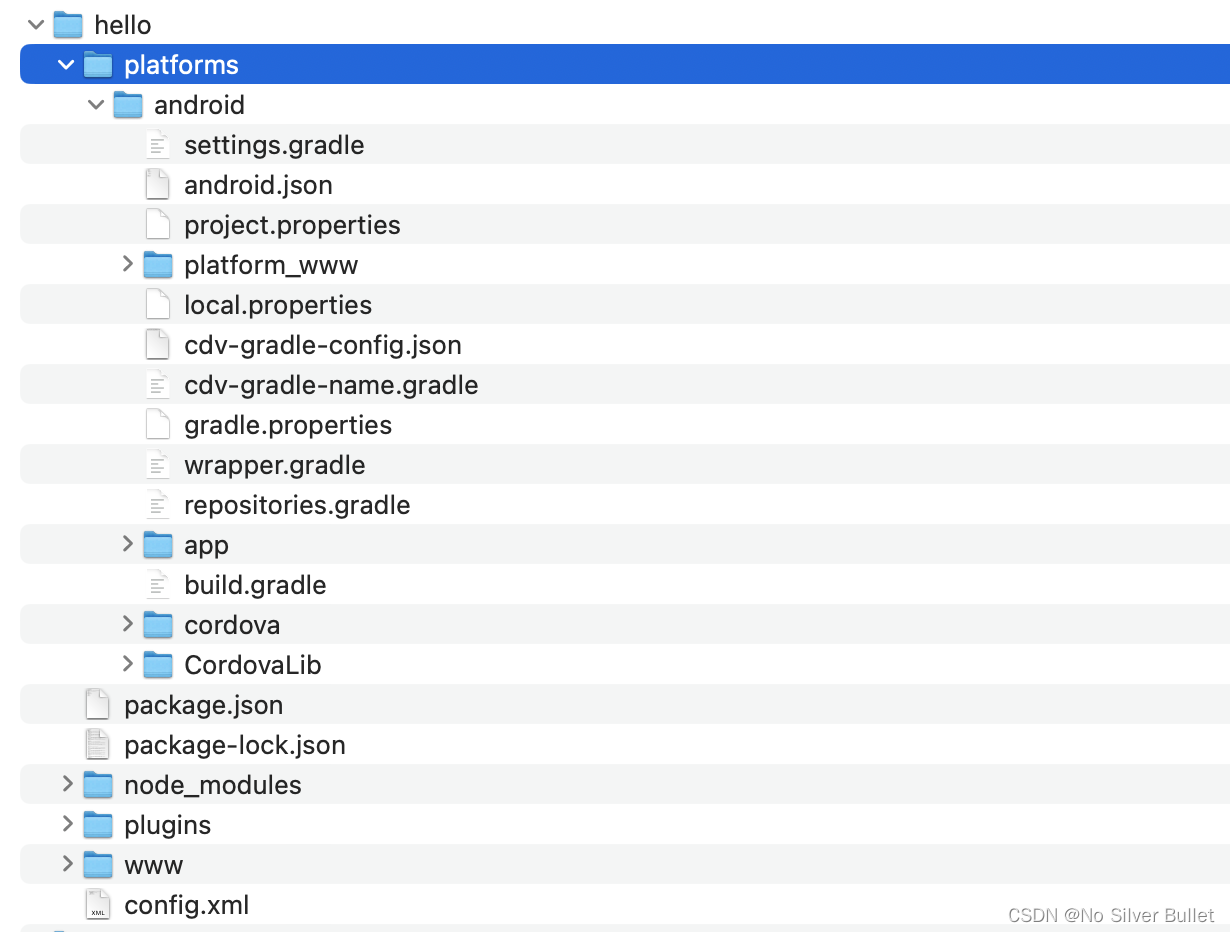
下图是创建成功的情况,失败的原因有可能是 android 开发环境没有配好。
生成之后开始导入到android studio中:
第一步:选择打开本地已有的android工程。
第二步:找到刚刚创建好的android工程导入。
导入之后目录如下:
至此就已经把cordova插件开头的部分创建好了。
2.3 使用 cordova 官方提供的插件
首先进入到创建好的android工程目录下,然后再进行添加插件操作:
cordova plugin add cordova-plugin-camera
应用 cordova plugin list 命令查看cordova插件列表。
若误添加插件,可通过 cordova plugin remove cordova-plugin-camera 删除已安装插件。
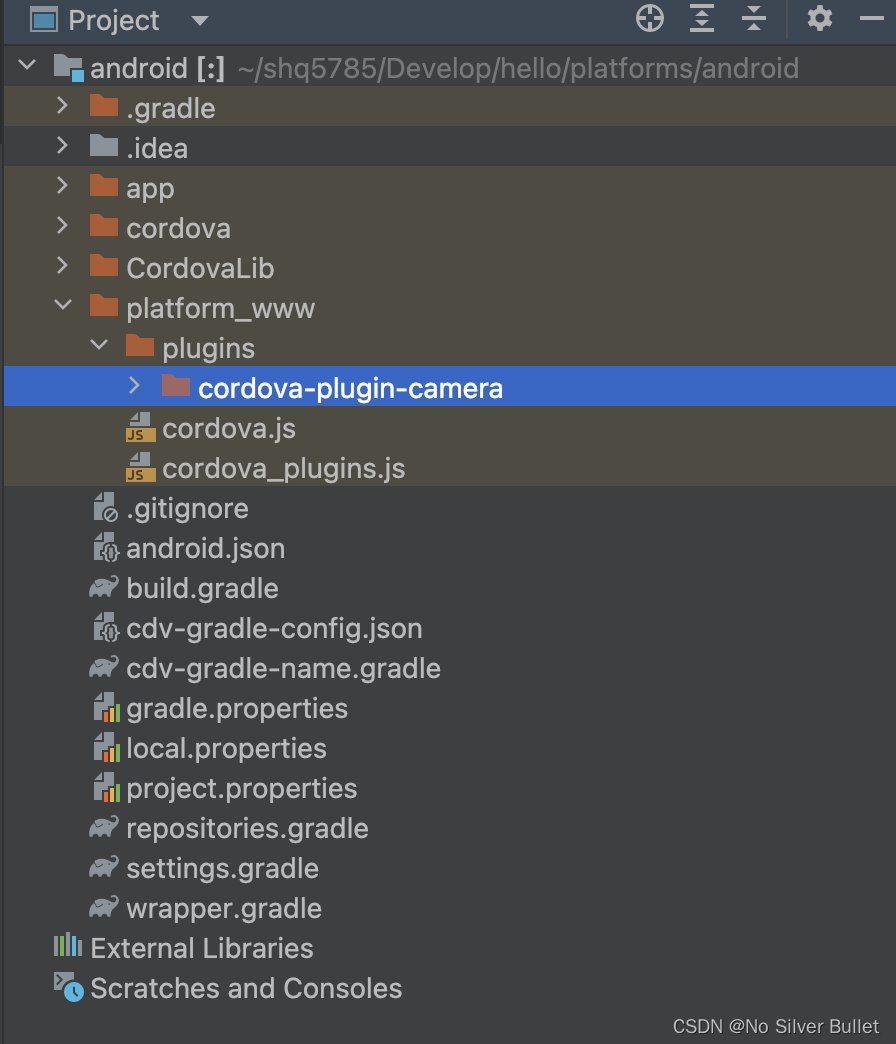
添加成功后的Android目录变化如下:
使用插件的位置,在Android工程下找到index.html和index.js这两个文件。
使用位置
在index.html文件中添加一个测试按钮。
<button id="test">test</button>
在index.js文件中添加:
//前面的test是之前那个button的按钮,后面的test是方法名,给按钮注册点击事件
document.getElementById("test").addEventListener("click",test);
//点击事件绑定的方法
function test(){
    //调用添加的camera插件
    // onSuccess:是调用成功的返回事件;onFail:是调用失败的返回事件
    navigator.camera.getPicture(onSuccess,onFail);
}
//成功的返回事件
function onSuccess() {
    console.log("Camera cleanup success.")
}
//失败的返回事件
function onFail(message) {
    alert('Failed because: ' + message);
}
然后运行起来项目。
2.4 创建自定义插件
注意⚠️:创建插件是先cd到待创建目录,存放自定义cordova插件目录不能有中文和空格!
然后,在电脑上创建一个cordova插件目录,跳转到该目录,开始创建cordova插件。
创建自定义插件
plugman create --name toast-plugin --plugin_id toast-plugin --plugin_version 1.0.0
-
--name toast-plugin: 插件名 -
--plugin_id toast-plugin: 插件ID -
--plugin_version 1.0.0: 插件版本号
编写ToastDemo.java用于被调用
可以在刚刚创建的Android工程下面编写这个代码,具体代码如下:
execute方法是插件被调用时,会把操作和参数以及回调传递过来。
package com.demo.android;

import android.widget.Toast;

import org.apache.cordova.CallbackContext;
import org.apache.cordova.CordovaArgs;
import org.apache.cordova.CordovaPlugin;
import org.json.JSONException;

/**
 * ToastDemo
 *
 * @author shq1874009
 * @date 2028-08-19
 */
public class ToastDemo extends CordovaPlugin {

    @Override
    public boolean execute(String action, CordovaArgs args, CallbackContext callbackContext) throws JSONException {
        if ("show".equals(action)){
            // 获取activity和context --> cordova.getActivity()和cordova.getContext()
            Toast.makeText(cordova.getContext(),args.getString(0),Toast.LENGTH_SHORT).show();
            return true;
        }
        return false;
    }
}
把这个文件复制到刚刚生成的插件目录下。
修改plugin.xml,如下:
<?xml version='1.0' encoding='utf-8'?>
<plugin id="toast-demo-plugin" version="1.0.0" xmlns="http://apache.org/cordova/ns/plugins/1.0" xmlns:android="http://schemas.android.com/apk/res/android">
    <name>toast-demo-plugin</name>
    <js-module name="ToastShow" src="www/toast-demo-plugin.js">
        <clobbers target="ToastShow" />
    </js-module>

    <!--添加Android平台  -->
    <platform name="android">
        <config-file target="res/xml/config.xml" parent="/*">
            <!-- JS调用时的名字 -->
            <feature name="ToastShow">
                <!-- value:的值是对应的插件中ToastDemo.java存放的路径 -->
                <param name="android-package" value="com.shq1874009.android.ToastDemo"/>
            </feature>
        </config-file>
        <!-- src:是插件里存放对应.java的路径, target-dir:安装插件时把.java文件存放的位置,要和上面的value路径对应 -->
        <source-file src="src/android/ToastDemo.java" target-dir="src/com/shq1874009/android" />
    </platform>
</plugin>
编辑www目录下的toast-demo-plugin.js文件
打开后是这样的:
var exec = require('cordova/exec');

exports.coolMethod = function (arg0, success, error) {
    exec(success, error, 'toast-plugin', 'coolMethod', [arg0]);
};
修改为
var exec = require('cordova/exec');

// ToastShow: 是plugin.xml文件中的feature标签 name属性
// show:是js中调用的方法名
// [arg0]: 表示一个参数,[arg0,arg1]:表示两个参数
exports.show = function (arg0, success, error) {
    exec(success, error, 'ToastShow', 'show', [arg0]);
};
初始化插件
进入到插件目录,初始化插件
npm init
上面基本上就完成了一个简单的自定义插件的制作,接下来把插件添加到之前创建的Android工程中测试,验证是否成功。
添加的方法和上面一样,先进入到platforms目录下
然后输入
// 插件的本地目录
cordova plugin add D:\CordovaPlugin\plugins\toast-plugin
添加插件
然后在Android studio中调用测试。
ToastShow.show("123456");
三、cordova 插件实战
在Vue项目中集成引用cordova插件步骤如下:
3.1 cordova.js 自定义生成
鉴于Cordova 是 OSS 的,所以可以通过源代码来生成 cordova.js。
a) 下载 cordova 源码
cordova目前稳定版是6.1.x。
从 https://github.com/shq5785/cordova-js/tree/6.1.x) 下载 cordova-js-6.1.x.zip 并解压。
b) 下载 cordova-android、cordova-ios 源码
Cordova Android is an Android application library that allows for Cordova-based projects to be built for the Android Platform. Cordova based applications are, at the core, applications written with web technology: HTML, CSS and JavaScript.
Cordova iOS is an iOS application library that allows for Cordova-based projects to be built for the iOS Platform. Cordova based applications are, at the core, applications written with web technology: HTML, CSS and JavaScript.
npm i cordova-ios
npm i cordova-android
cordova源码构建依赖平台包library,依据Gruntfile.js文件配置信息可知,构建前需提前检出至cordova同级目录。点击下载平台编译包源码。
/*
 * Licensed to the Apache Software Foundation (ASF) under one
 * or more contributor license agreements.  See the NOTICE file
 * distributed with this work for additional information
 * regarding copyright ownership.  The ASF licenses this file
 * to you under the Apache License, Version 2.0 (the
 * "License"); you may not use this file except in compliance
 * with the License.  You may obtain a copy of the License at
 *
 *   http://www.apache.org/licenses/LICENSE-2.0
 *
 * Unless required by applicable law or agreed to in writing,
 * software distributed under the License is distributed on an
 * "AS IS" BASIS, WITHOUT WARRANTIES OR CONDITIONS OF ANY
 * KIND, either express or implied.  See the License for the
 * specific language governing permissions and limitations
 * under the License.
*/

const path = require('path');
const { build, collectModules } = require('./build-tools');

module.exports = function (grunt) {
    grunt.initConfig({
        pkg: grunt.file.readJSON('package.json'),
        compile: {
            android: {},
            ios: {},
            osx: {},
            windows: { useWindowsLineEndings: true },
            browser: {},
            electron: {}
        },
        clean: ['pkg']
    });

    // custom tasks
    grunt.registerMultiTask('compile', 'Packages cordova.js', function () {
        const done = this.async();

        const platformPath = path.resolve(`../cordova-${this.target}`);
        const platformPkgPath = path.join(platformPath, 'package');
        const platformModulesPath = path.join(platformPath, 'cordova-js-src');

        build({
            platformName: this.target,
            platformVersion: grunt.option('platformVersion') ||
                             require(platformPkgPath).version,
            extraModules: collectModules(platformModulesPath)
        })
            .then(cordovaJs => {
                // if we are using windows line endings, we will also add the BOM
                if (this.data.useWindowsLineEndings) {
                    cordovaJs = '\ufeff' + cordovaJs.split(/\r?\n/).join('\r\n');
                }

                // Write out the bundle
                const baseName = `cordova.${this.target}.js`;
                const fileName = path.join('pkg', baseName);
                grunt.file.write(fileName, cordovaJs);

                console.log(`Generated ${fileName}`);
            })
            .then(done, done);
    });

    // external tasks
    grunt.loadNpmTasks('grunt-contrib-clean');

    // defaults
    grunt.registerTask('default', ['compile']);
};

c) 构建工具使用的是 Grunt,所以要先安装 grunt-cli
npm install -g grunt-cli
d) 手动生成 cordova.js
cd cordova-js-6.1.x
npm install -- 安装package.json中 devDependencies 定义的依赖包
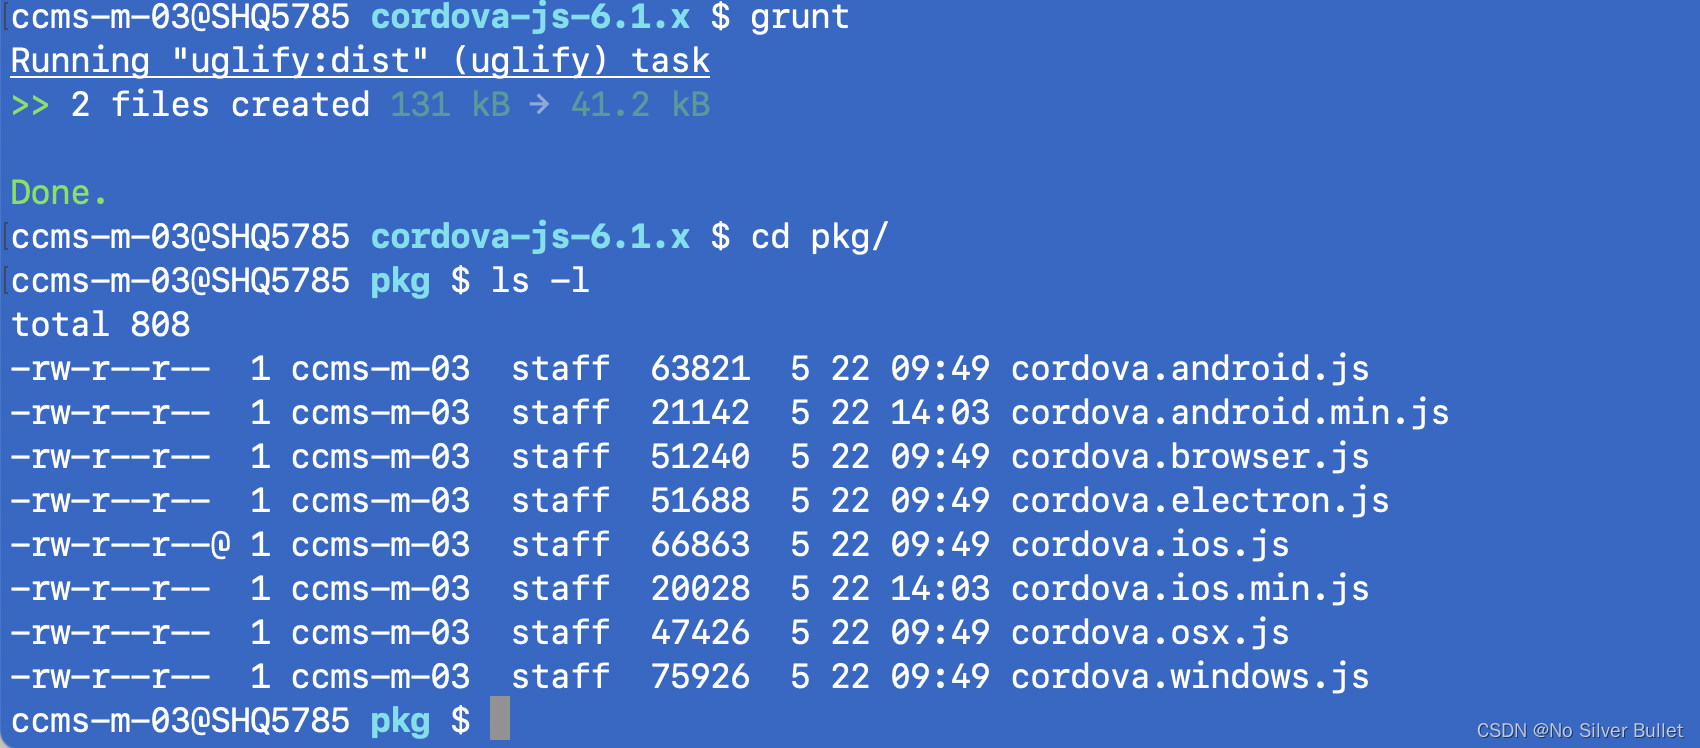
grunt -- 运行 grunt
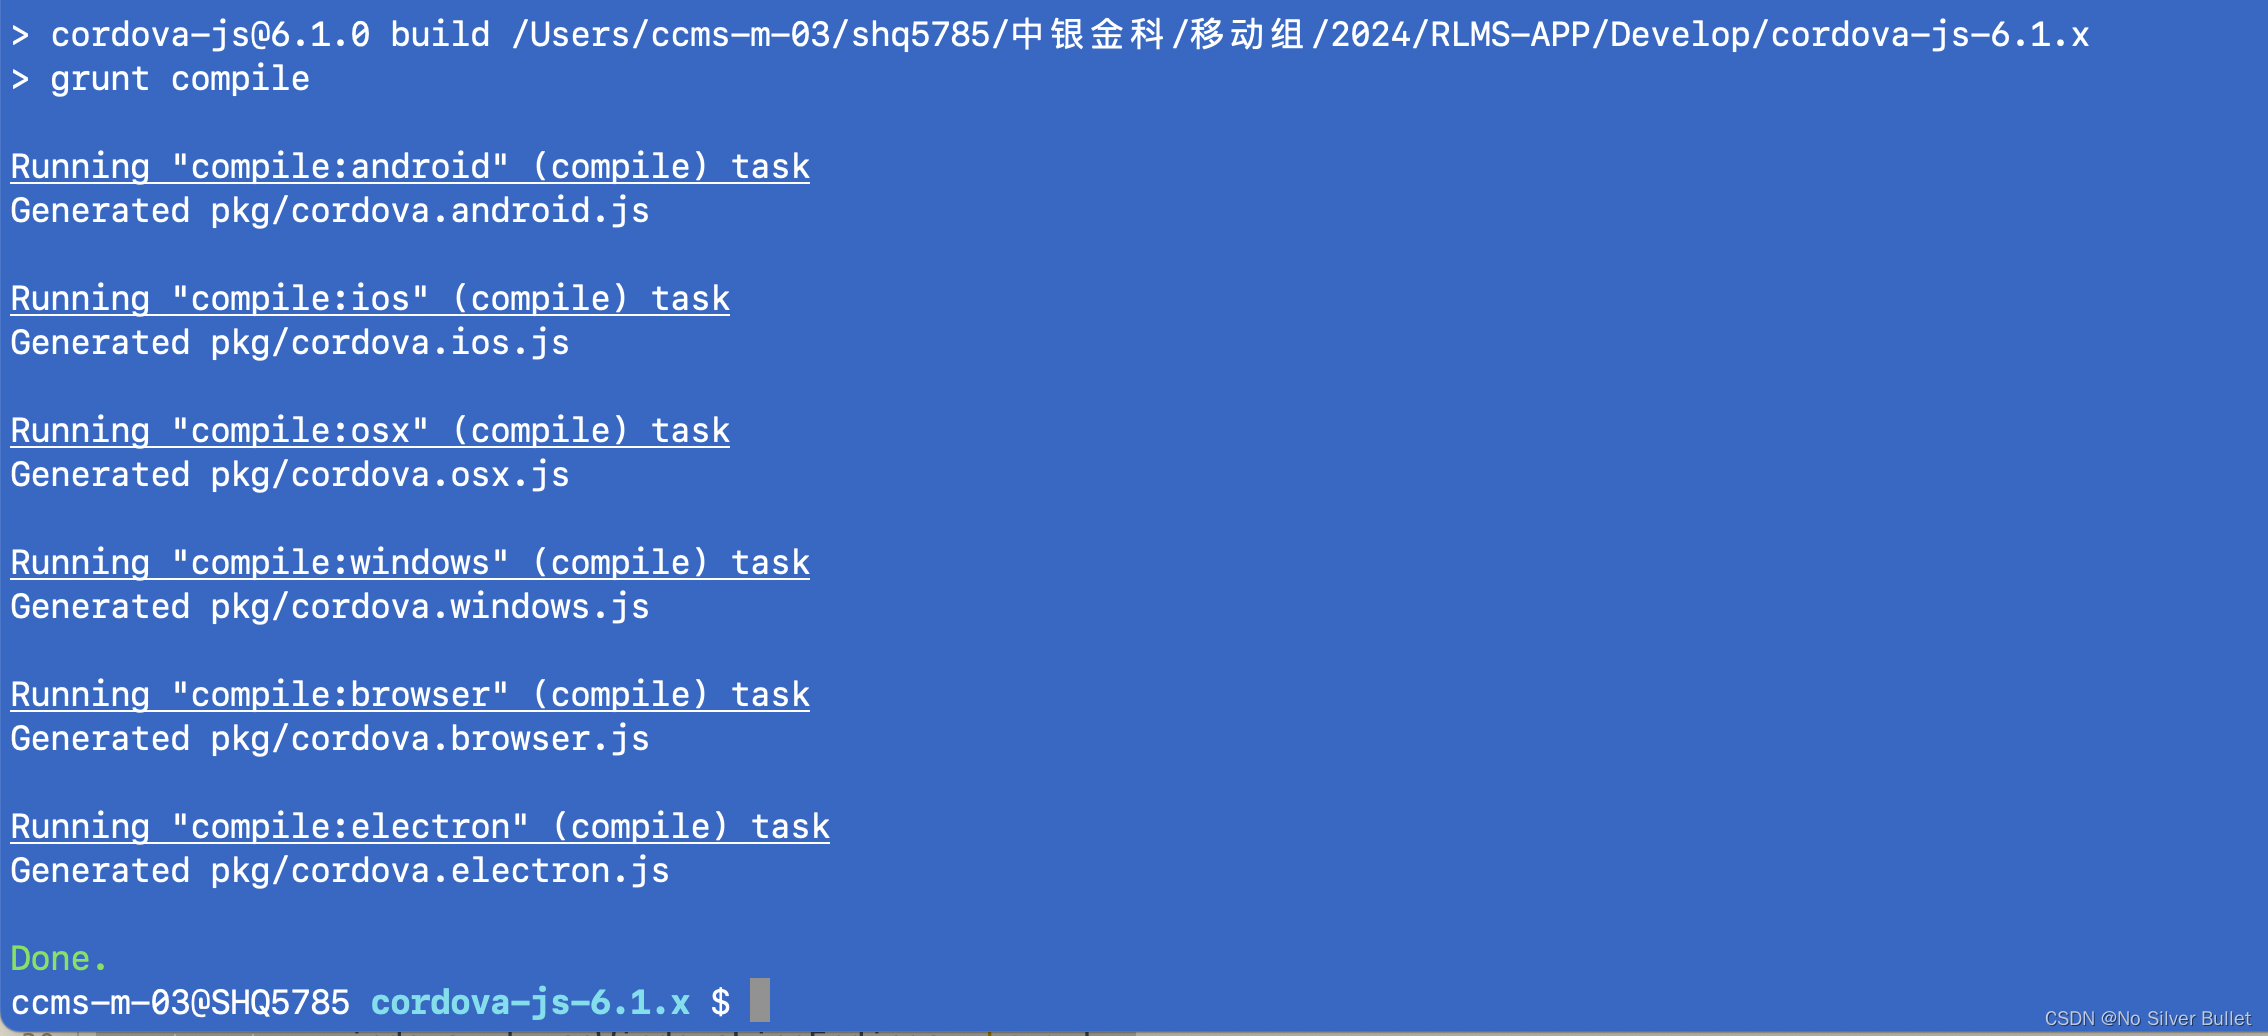
d) 执行后新生成2个文件夹:xnode_modules、pkg
pkg文件夹下包含如下cordova.js文件:

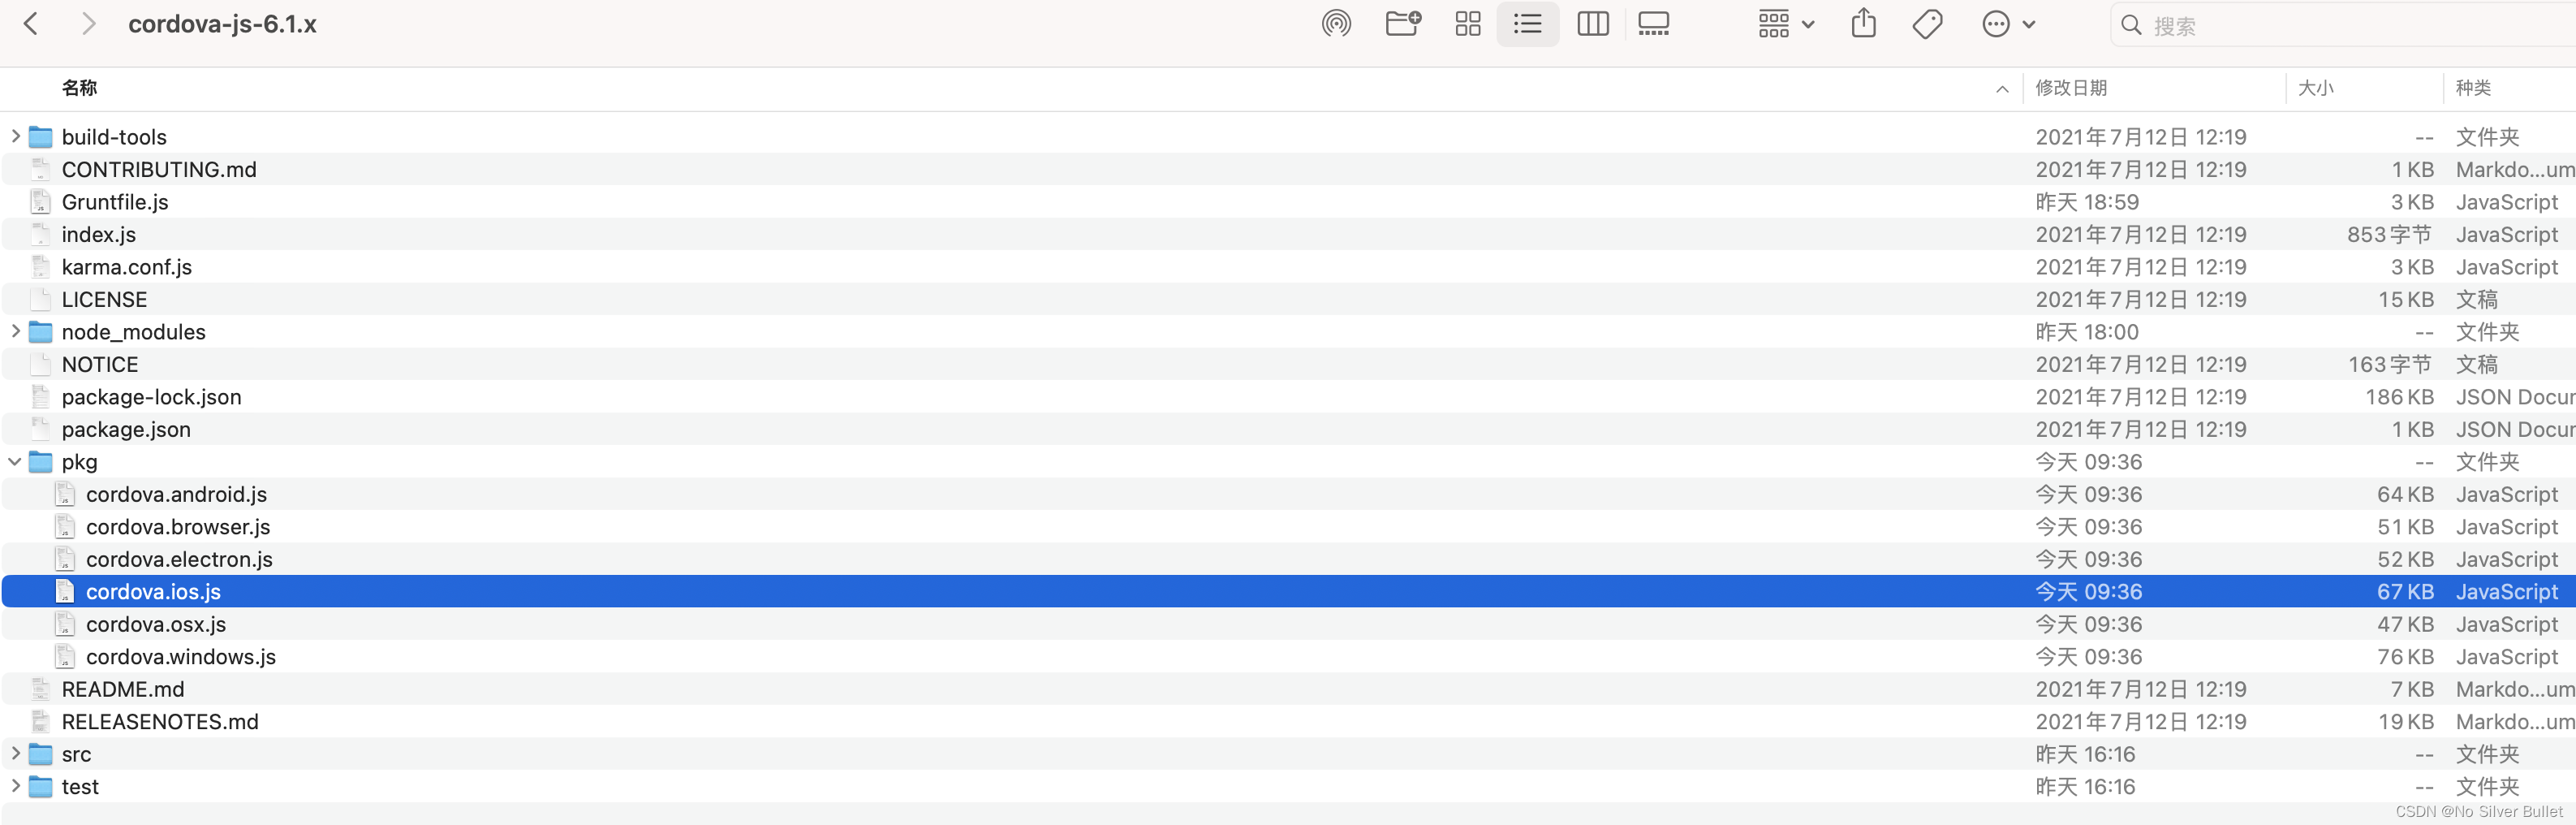
其中, cordova.android.js 、cordova.ios.js就是我们 Android、iOS原生工程要用到的 cordova.js 。
但是,生成的cordova.ios.js文件为67kb,cordova.android.js文件为64kb,相较于项目中目前使用的文件体积(cordova.ios.js文件为20kb,cordova.android.js文件为24kb)较大,由此可知,现有项目中使用的cordova.js文件进行了压缩。
When it comes to distributing your work, you want to offer a version as small in size as possible. To create a minified version you need a Grunt plugin like grunt-contrib-uglify. Moreover, unless the project you’re developing is very small, chances are that you’ve split the code in multiple files. While this is a good practice for the developer, you want users to include only one file. So, before minifying the code, you should concatenate the source files to create a single one. To achieve this goal you need a Grunt plugin like grunt-contrib-concat.
官方文档指出,可应用 grunt-contrib-uglify 插件实现cordova.js文件压缩。
首先,安装 grunt-contrib-uglify
npm install grunt-contrib-uglify --save-dev
然后,配置Gruntfile.js文件,新增 grunt-contrib-uglify 配置信息。
/*
 * Licensed to the Apache Software Foundation (ASF) under one
 * or more contributor license agreements.  See the NOTICE file
 * distributed with this work for additional information
 * regarding copyright ownership.  The ASF licenses this file
 * to you under the Apache License, Version 2.0 (the
 * "License"); you may not use this file except in compliance
 * with the License.  You may obtain a copy of the License at
 *
 *   http://www.apache.org/licenses/LICENSE-2.0
 *
 * Unless required by applicable law or agreed to in writing,
 * software distributed under the License is distributed on an
 * "AS IS" BASIS, WITHOUT WARRANTIES OR CONDITIONS OF ANY
 * KIND, either express or implied.  See the License for the
 * specific language governing permissions and limitations
 * under the License.
*/

const path = require('path');
const { build, collectModules } = require('./build-tools');

module.exports = function (grunt) {
    grunt.initConfig({
        pkg: grunt.file.readJSON('package.json'),
		uglify: {
		  dist: {
			files: {
			  'pkg/cordova.ios.min.js': ['pkg/cordova.ios.js'],
			  'pkg/cordova.android.min.js': ['pkg/cordova.android.js']
			}
		  }
		},
        compile: {
            android: {},
            ios: {},
            osx: {},
            windows: { useWindowsLineEndings: true },
            browser: {},
            electron: {}
        },
        clean: ['pkg']
    });

    // custom tasks
    grunt.registerMultiTask('compile', 'Packages cordova.js', function () {
        const done = this.async();

        const platformPath = path.resolve(`../cordova-${this.target}`);
        const platformPkgPath = path.join(platformPath, 'package');
        const platformModulesPath = path.join(platformPath, 'cordova-js-src');

        build({
            platformName: this.target,
            platformVersion: grunt.option('platformVersion') ||
                             require(platformPkgPath).version,
            extraModules: collectModules(platformModulesPath)
        })
            .then(cordovaJs => {
                // if we are using windows line endings, we will also add the BOM
                if (this.data.useWindowsLineEndings) {
                    cordovaJs = '\ufeff' + cordovaJs.split(/\r?\n/).join('\r\n');
                }

                // Write out the bundle
                const baseName = `cordova.${this.target}.js`;
                const fileName = path.join('pkg', baseName);
                grunt.file.write(fileName, cordovaJs);

                console.log(`Generated ${fileName}`);
            })
            .then(done, done);
    });

    // external tasks
	grunt.loadNpmTasks('grunt-contrib-uglify');
    grunt.loadNpmTasks('grunt-contrib-clean');

    // defaults
    grunt.registerTask('default', ['compile']);
	grunt.registerTask('default', ['uglify']);
};
执行后压缩文件大小参见下图,可知cordova.android.js文件压缩到21kb,cordova.ios.js文件压缩到20kb,压缩率客观。
3.2 vue 项目引入cordova
3.2.1 配置文件维护
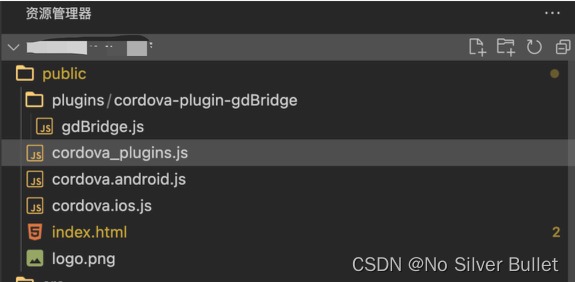
将之前生成的cordova文件,存放至public文件加下,并新增配置桥接文件public/plugins/cordova-plugin-gdBridge/gdBridge.js
cordova.define("com.framework.plugin.gdBridge", function(require, exports, module) {
    var exec = require('cordova/exec');
    //调起原生的getUserInfo方法获取登录返回的报文
    exports.getUserInfo  = function (arg0, success, error) {
        exec(success, error, 'gdBridge', 'getUserInfo', [arg0]);
    };
});
继续新增public/cordova_plugins.js配置文件
cordova.define('cordova/plugin_list', function(require, exports, module) {
  module.exports = [
    {
      "id": "com.framework.plugin.gdBridge", // 插件中某个模块或具体功能的id
      "file": "plugins/cordova-plugin-gdBridge/gdBridge.js", // 这个id对应的js文件(实现这个模块或功能的文件)
      "pluginId": "com.framework.plugin", // 插件的ID,通过这个ID可以进行插件的安装和卸载
      "clobbers": [ // H5或js通过它去调用js中间件(插件)中定义的方法
        "cordova.plugins.gdBridge"
      ]
    }
  ];
  module.exports.metadata = {
    "ocom.framework.plugin": "0.0.1"
  };
});
维护后的目录结构如下:
3.2.2 cordova 引入
在index.html文件中,通过动态添加标签方式引入cordova。
<script type="text/javascript">
  // 识别设备终端,获取app相关信息
   window.terminal = (function () {
    var u = navigator.userAgent;//app = navigator.appVersion;
    var appSequence = u.match(/appSequence:([^;]*);/) //虚拟版本号
    return {//浏览器版本信息
      trident: u.indexOf('Trident') > -1,
      presto: u.indexOf('Presto') > -1,
      webKit: u.indexOf('AppleWebKit') > -1,
      gecko: u.indexOf('Gecko') > -1 && u.indexOf('KHTML') > -1,
      mobile: !!u.match(/AppleWebKit.*Mobile.*/),
      ios: !!u.match(/\(i[^;]+;( U;)? CPU.+Mac OS X/),
      android: u.indexOf('Android') > -1 || u.indexOf('Linux') > -1,
      iPhone: u.indexOf('iPhone') > -1,
      iPad: u.indexOf('iPad') > -1,
      webApp: u.indexOf('Safari') > -1,
      weixin: u.indexOf('MicroMessenger') > -1 && u.replace(/.*(MicroMessenger\/[^\s]*).*/, "$1").replace("MicroMessenger/", "") || false,
      appVersion: u.indexOf('bocapp(') > -1 ? u.match(/bocapp\(\S+\)/)[0].slice(7, -1) : '3.0.0',
      appSequence: (appSequence && appSequence[1]) || ''
    };
  })()
  // 引入cordova
  var script = document.createElement('script')
  if (window.terminal.iPhone) {
    // script.src = pth + 'cordova.ios.js'
    script.src = 'cordova.ios.min.js'
  } else if (window.terminal.android) {
    // script.src = pth + 'cordova.android.js'
    script.src = 'cordova.android.min.js'
  } else {
    script.src = "cordova.android.min.js"
  }
  script.setAttribute("id","cordova");
  document.getElementsByTagName('head')[0].appendChild(script)

  let cordovaAlready = "pending"

  script.onload = function () {
    cordovaAlready= true;
  }
  script.onerror = function () {
    cordovaAlready= false;
  }
</script>
3.3 cordova 应用(H5侧)
经过前面的一系列配置,项目中应用cordova环境已维护完毕。
应用cordova实现H5调用原生功能,项目结构方面,可定义一个js文件用于专门处理H5通过桥接调用原生方法,例如新建src/api/service/jsBrigde.js文件,
//获取登录信息
export const getNativeUserInfo = () => {
  return new Promise((resolve, reject) =>{
    cordova.plugins.gdBridge.getUserInfo(
      {}
      , function(responseData) {
        resolve(JSON.parse(responseData));
      },function(error){
         reject('');
      });
    });
};
应用逻辑层,可进行接口调用,
import {getNativeUserInfo} from "@/api/service/jsBrigde";

const userInfo = await getNativeUserInfo();
3.4 cordova 应用(iOS 原生侧)
Model层新建GDBridge.h、GDBridge.m文件
/// 全局单例
+ (GDBridge *)sharedInstance;

// 获取用户信息
- (void)getUserInfo:(BPGCTCDVInvokedUrlCommand *)command;

@end

NS_ASSUME_NONNULL_END
GDBridge.m文件如下:
#import "GDBridge.h"
#import "AppDelegate.h"

@implementation GDBridge

+ (GDBridge *)sharedInstance {
    static GDBridge *bridge = nil;
    static dispatch_once_t onceToken;
    dispatch_once(&onceToken, ^{
        bridge = [[GDBridge alloc] init];
    });
    return bridge;
}

// 获取用户信息
- (void)getUserInfo:(BPGCTCDVInvokedUrlCommand *)command {}
3.4 cordova 应用(Android 原生侧)
在MainActivity.java文件中添加监听H5调用原生逻辑,
@Override
protected <S extends EventMessage> void onEventListener(S eventMessage) {
    super.onEventListener(eventMessage);
    if (eventMessage == null) return;
    if (eventMessage instanceof GDBridgeEvent) {
        GDBridgeEvent e = (GDBridgeEvent) eventMessage;
        LogUtil.e(Thread.currentThread().getName());
        LogUtil.e(e.toString());
        callbackContext = e.getCallbackContext();
        runOnUiThread(() -> executeH5Callback(e));
    }
}

protected void executeH5Callback(GDBridgeEvent event) {
    switch (event.getAction()) {
        // H5调用用户登录信息
        case "getUserInfo":
            String userInfoMsg = gson.toJson(userInfoBean);
            LogUtil.e(userInfoMsg);
            callbackContext.success(userInfoMsg);
            break;
        default:
            break;
    }
}


 2827
2827

 被折叠的 条评论
为什么被折叠?
被折叠的 条评论
为什么被折叠?
 到【灌水乐园】发言


