


在Spring的IOC里,把一切配置到IOC容器里的实体或对象都称为bean。
Bean配置项:
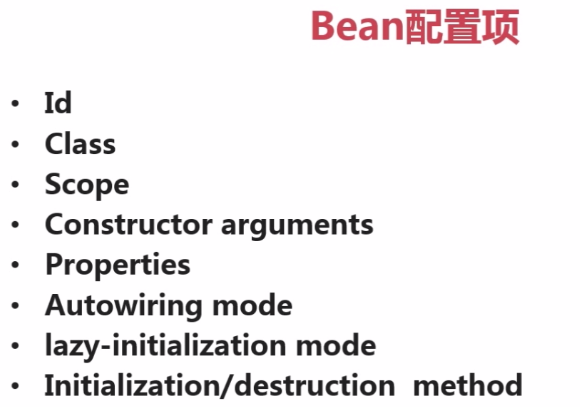
- id:在整个IOC容器中,这个bean的唯一标识
- class:具体要实例化的类(必须)
- scope:范围、作用域
- constructor arguments:构造器的参数
- properties:属性
- autowiring mode:自动装配的模式
- lazy-initialization mode:懒加载模式
- initialization/destruction method:初始化/销毁的方法
从bean容器中得到某一个实例的方式:
- 通过id来获取(必须配置id)
- 根据bean的类型来获取(只需配置class)
Bean的作用域:
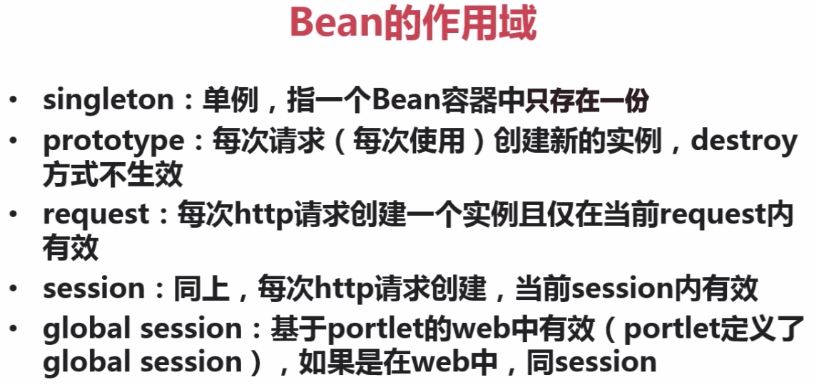
注:单例singleton模式是spring bean的默认模式
例:(singleton与prototype)
BeanScope:
package com.bean;

public class BeanScope {
    public void say(){
        System.out.println("BeanScope say:"+this.hashCode()); //通过hashcode来区分是否为同一个实例
    }
}
spring-beanscope.xml:
<?xml version="1.0" encoding="UTF-8"?>
<beans xmlns="http://www.springframework.org/schema/beans"
    xmlns:xsi="http://www.w3.org/2001/XMLSchema-instance"
    xsi:schemaLocation="http://www.springframework.org/schema/beans
        http://www.springframework.org/schema/beans/spring-beans.xsd" >

        <!-- 设置bean的作用域为singleton
        <bean id="beanScope" class="com.bean.BeanScope" scope="singleton"></bean>
        -->
        <bean id="beanScope" class="com.bean.BeanScope" scope="prototype"></bean>
 </beans>
测试TestBeanScope:
package com.test.bean;

import org.junit.Test;
import org.junit.runner.RunWith;
import org.junit.runners.BlockJUnit4ClassRunner;

import com.bean.BeanScope;
import com.imooc.test.base.UnitTestBase;

@RunWith(BlockJUnit4ClassRunner.class)
public class TestBeanScope extends UnitTestBase {

    public TestBeanScope() {
        super("classpath*:spring-beanscope.xml");
    }

    @Test
    public void testSay(){
        BeanScope beanScope=super.getBean("beanScope"); //从IOC容器中获取bean
        beanScope.say();

        BeanScope beanScope2=super.getBean("beanScope"); //从IOC容器中获取bean
        beanScope2.say();  //若在一个IOC容器中scope设置为singleton,则两次输出hashcode相同
                           //若在一个IOC容器中scope设置为prototype,则两次输出hashcode不同
    }

    @Test
    public void testSay2(){ //这种情况下两个方法执行的结果hashcode不相同是因为每一个测试方法都会执行@before、@test、@after,虽然方法体一样,但是是从两个spring的IOC容器中获取的,所以bean的hashcode不同
        BeanScope beanScope=super.getBean("beanScope"); //从IOC容器中获取bean
        beanScope.say();

        BeanScope beanScope2=super.getBean("beanScope"); //从IOC容器中获取bean
        beanScope2.say();  //若在一个IOC容器中scope设置为singleton,则两次输出hashcode相同
    }

}
Bean的生命周期:
- Bean的定义:在Spring的bean的配置文件(xml文件)中为bean定义id和class
- Bean的初始化:在IOC容器启动时加载bean配置文件里的bean,并初始化,生成bean的实例
- Bean的使用:在单元测试或实际开发中从bean容器中取出一个bean的实例,然后调用它的方法
- Bean的销毁:在bean容器停止的时候去销毁由当前这个bean容器创建的所有的bean的实例
初始化:两种方式
方式一:


IOC容器加载这个bean,判断是否实现了InitializingBean这个接口,然后自动调用afterPropertiesSet方法,执行初始化工作,不需要实现init-method。
方式二:

当IOC容器加载这个bean并初始化的时候,就会根据init-method指定的方法去调用ExampleBean的init方法,去执行一些初始化的工作。
Bean的销毁:两种方式
方式一:

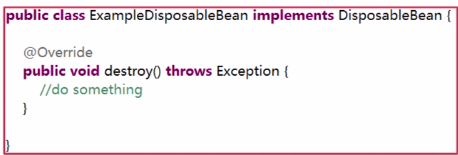
当bean销毁的时候,也就是调用ApplicationContext的销毁方法的时候就会调用这个bean实例的destroy方法,执行方法的内容
方式二:
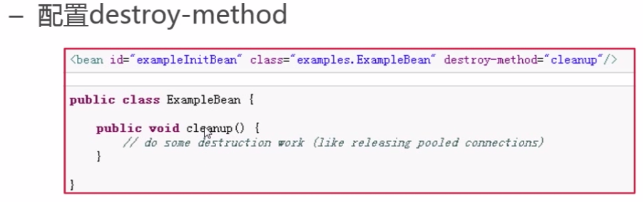
当bean销毁的时候,也就是调用ApplicationContext的销毁方法的时候就会调用这个bean实例的cleanup方法,执行一些销毁的工作,比如释放连接池操作。
注:以上的初始化和销毁方法都是针对具体的某一个bean的配置,那么配置全局默认初始化、销毁方法:
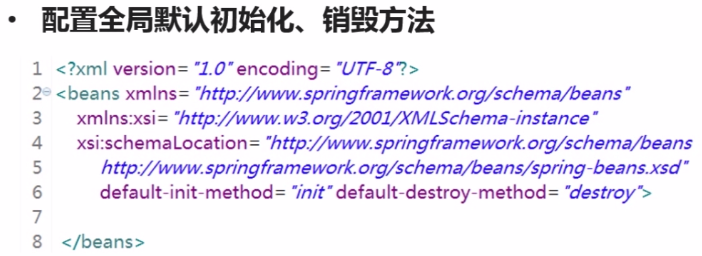
在bean的配置文件的<beans>里配置default-init-method和default-destroy-method,那么在这个配置文件里的所有bean初始化的时候,也就是IOC容器在加载这些bean的时候,都会调用它的init方法,最后在IOC容器销毁的时候都会调用默认销毁方法destroy。
例:(bean的初始化、销毁)
spring-lifecycle.xml配置一个bean:
<?xml version="1.0" encoding="UTF-8"?>
<beans xmlns="http://www.springframework.org/schema/beans"
    xmlns:xsi="http://www.w3.org/2001/XMLSchema-instance"
    xsi:schemaLocation="http://www.springframework.org/schema/beans
        http://www.springframework.org/schema/beans/spring-beans.xsd"

        default-init-method="defautInit" default-destroy-method="defaultDestroy" >
        <!--  方式三:全局配置默认方法,若存在另外两种方式之一,则此方式不生效-->

     <!--  方式一: 配置init-method和 destroy-method-->
     <bean id="beanLifeCycle" class="com.lifecycle.BeanLifeCycle" init-method="start" destroy-method="stop"></bean>


     <!-- 方式二: 类必须实现InitializingBean,DisposableBean接口
     <bean id="beanLifeCycle" class="com.lifecycle.BeanLifeCycle"></bean>
     -->
 </beans>
BeanLifeCycle.java:
package com.lifecycle;

import org.springframework.beans.factory.DisposableBean;
import org.springframework.beans.factory.InitializingBean;
import org.springframework.context.annotation.Bean;

public class BeanLifeCycle implements InitializingBean,DisposableBean{ //实现初始化bean和销毁的bean的两个接口

    //方式三:配置全局初始化和销毁方式,在beans定义default-init-method="defautInit"等,若没有方向defautInit也可编译通过
    //若存在另外两种方式之一,则此方法不生效
    public void defautInit(){
        System.out.println("Bean defautInit.");
    }

    public void defaultDestroy(){
        System.out.println("Bean defaultDestroy");
    }


    //方式二:类必须实现InitializingBean,DisposableBean接口,bean中设置id,class即可
    @Override
    public void destroy() throws Exception {
        System.out.println("Bean destroy.");
    }

    @Override
    public void afterPropertiesSet() throws Exception {
        System.out.println("Bean afterPropertiesSet.");
    }

    //方式一:bean中必须设置init-method="start" destroy-method="stop",且必须有start和stop方法,否则编译不通过
    public void start(){
        System.out.println("Bean start.");
    }

    public void stop(){
        System.out.println("Bean stop.");
    }

}
测试类TestBeanLifecycle:
package com.test.lifecycle;

import org.junit.Test;
import org.junit.runner.RunWith;
import org.junit.runners.BlockJUnit4ClassRunner;
import com.imooc.test.base.UnitTestBase;

@RunWith(BlockJUnit4ClassRunner.class)
public class TestBeanLifecycle extends UnitTestBase {

    public TestBeanLifecycle() {
        super("classpath:spring-lifecycle.xml");
    }

    @Test
    public void test1(){
        super.getBean("beanLifeCycle"); //通过id获取bean
    }

}
通过运行三种方式:
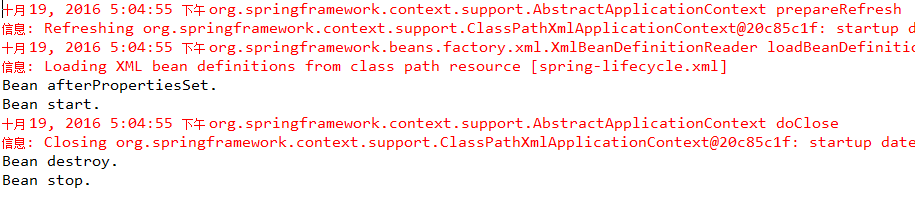
先执行初始化,再执行销毁。
注:同时使用三种配置方式,先执行实现接口的方法,再执行在bean中配置的init-method和destroy-method,默认的初始化和销毁方法不生效。


 399
399

 被折叠的 条评论
为什么被折叠?
被折叠的 条评论
为什么被折叠?
 到【灌水乐园】发言


