


Getting Started
下载配置nacos
将nacos注册为win服务
参考先前的文章
Windows下将JAVA jar注册成windows服务
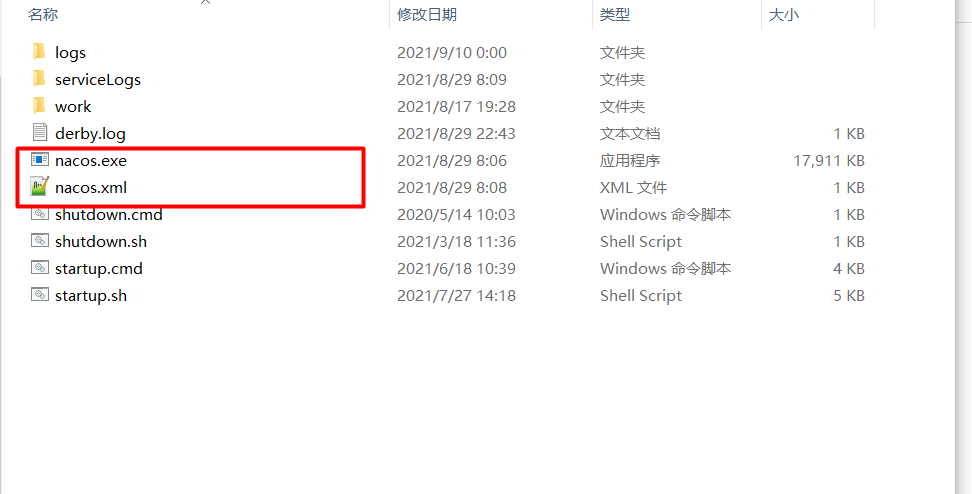
nacos.xml的配置信息
<service>
    <!-- 指定在Windows系统内部使用的识别服务的ID。在系统中安装的所有服务中,这必须是唯一的,它应该完全由字母数字字符组成 -->
    <id>nacos-id-000001</id>
    <!-- 服务的简短名称,它可以包含空格和其他字符。尽量简短,就像“id”一样,在系统的所有服务名称中,也要保持唯一 -->
    <name>Nacos</name>
    <!-- 该服务可读描述。当选中该服务时,它将显示在Windows服务管理器中 -->
    <description>nacos 服务描述</description>
    <!-- 该元素指定要启动的可执行文件 -->
    <executable>%BASE%\startup.cmd</executable>
    <!-- 指定单机启动 -->
    <arguments>-m standalone</arguments>
    <!-- 日志输出位置 -->
    <logpath>%BASE%\serviceLogs</logpath>
</service>
随后启动nacos服务
父module spring-cloud-alibaba-nacos-discovery 信息
pom.xml
<?xml version="1.0" encoding="UTF-8"?>
<project xmlns:xsi="http://www.w3.org/2001/XMLSchema-instance" xmlns="http://maven.apache.org/POM/4.0.0"
         xsi:schemaLocation="http://maven.apache.org/POM/4.0.0 https://maven.apache.org/xsd/maven-4.0.0.xsd">
    <modelVersion>4.0.0</modelVersion>
    <parent>
        <groupId>com.xiaobu</groupId>
        <artifactId>springcloud-alibaba-learn</artifactId>
        <version>0.0.1-SNAPSHOT</version>
    </parent>
    <artifactId>spring-cloud-alibaba-nacos-discovery</artifactId>
    <version>0.0.1-SNAPSHOT</version>
    <name>spring-cloud-alibaba-nacos-discovery</name>
    <packaging>pom</packaging>
    <description>spring-cloud-alibaba-nacos-discovery</description>

    <modules>
        <module>nacos-consumer</module>
        <module>nacos-provider</module>
    </modules>

</project>
nacos-provider
pom.xml
<?xml version="1.0" encoding="UTF-8"?>
<project xmlns:xsi="http://www.w3.org/2001/XMLSchema-instance" xmlns="http://maven.apache.org/POM/4.0.0"
         xsi:schemaLocation="http://maven.apache.org/POM/4.0.0 https://maven.apache.org/xsd/maven-4.0.0.xsd">
    <modelVersion>4.0.0</modelVersion>
    <parent>
        <groupId>com.xiaobu</groupId>
        <artifactId>spring-cloud-alibaba-nacos-discovery</artifactId>
        <version>0.0.1-SNAPSHOT</version>
    </parent>
    <artifactId>nacos-provider</artifactId>
    <version>0.0.1-SNAPSHOT</version>
    <name>nacos-provider</name>
    <description>nacos-provider</description>

    <properties>
        <spring.boot.version>2.2.4.RELEASE</spring.boot.version>
        <spring.cloud.version>Hoxton.SR1</spring.cloud.version>
        <spring.cloud.alibaba.version>2.2.0.RELEASE</spring.cloud.alibaba.version>
    </properties>
    <!--
        引入 Spring Boot、Spring Cloud、Spring Cloud Alibaba 三者 BOM 文件,进行依赖版本的管理,防止不兼容。
        在 https://dwz.cn/mcLIfNKt 文章中,Spring Cloud Alibaba 开发团队推荐了三者的依赖关系
     -->
    <dependencyManagement>
        <dependencies>
            <dependency>
                <groupId>org.springframework.boot</groupId>
                <artifactId>spring-boot-starter-parent</artifactId>
                <version>${spring.boot.version}</version>
                <type>pom</type>
                <scope>import</scope>
            </dependency>
            <dependency>
                <groupId>org.springframework.cloud</groupId>
                <artifactId>spring-cloud-dependencies</artifactId>
                <version>${spring.cloud.version}</version>
                <type>pom</type>
                <scope>import</scope>
            </dependency>
            <dependency>
                <groupId>com.alibaba.cloud</groupId>
                <artifactId>spring-cloud-alibaba-dependencies</artifactId>
                <version>${spring.cloud.alibaba.version}</version>
                <type>pom</type>
                <scope>import</scope>
            </dependency>
        </dependencies>
    </dependencyManagement>

    <dependencies>
        <!-- 引入 SpringMVC 相关依赖,并实现对其的自动配置 -->
        <dependency>
            <groupId>org.springframework.boot</groupId>
            <artifactId>spring-boot-starter-web</artifactId>
        </dependency>
        <!-- 引入 Spring Cloud Alibaba Nacos Discovery 相关依赖,将 Nacos 作为注册中心,并实现对其的自动配置 -->
        <dependency>
            <groupId>com.alibaba.cloud</groupId>
            <artifactId>spring-cloud-starter-alibaba-nacos-discovery</artifactId>
        </dependency>
        <!-- 引入 Spring Cloud Alibaba config 相关依赖 -->
        <dependency>
            <groupId>com.alibaba.cloud</groupId>
            <artifactId>spring-cloud-starter-alibaba-nacos-config</artifactId>
        </dependency>
    </dependencies>

</project>
application.properties
#应用程序名称
spring.application.name=nacos-provider
#nacos注册中心地址
spring.cloud.nacos.discovery.server-addr=127.0.0.1:8848
#namespace
spring.cloud.nacos.discovery.service=${spring.application.name}
#应用程序端口
server.port=${random.int[10000,19999]}
启动类
@EnableDiscoveryClient 注解,开启 Spring Cloud 的注册发现功能。不过从 Spring Cloud Edgware 版本开始,实际上已经不需要添加 @EnableDiscoveryClient 注解,只需要引入 Spring Cloud 注册发现组件,就会自动开启注册发现的功能。例如说,我们这里已经引入了 spring-cloud-starter-alibaba-nacos-discovery 依赖,就不用再添加 @EnableDiscoveryClient 注解了。
package com.xiaobu;

import org.springframework.boot.SpringApplication;
import org.springframework.boot.autoconfigure.SpringBootApplication;
import org.springframework.cloud.client.discovery.EnableDiscoveryClient;
import org.springframework.web.bind.annotation.GetMapping;
import org.springframework.web.bind.annotation.PathVariable;
import org.springframework.web.bind.annotation.RestController;

/**
 * The type Nacos provider application.
 *
 * @author 小布
 */
@SpringBootApplication
@EnableDiscoveryClient
public class NacosProviderApplication {


    /**
     * The entry point of application.
     *
     * @param args the input arguments
     */
    public static void main(String[] args) {
        SpringApplication.run(NacosProviderApplication.class, args);
    }

    @RestController
    static class TestController {

        /**
         * Hello string.
         *
         * @param name the name
         * @return the string
         */
        @GetMapping("/hello/{name}")
        public String hello(@PathVariable String name) {
            return String.format("nacos-provider,%s", name);
        }
    }
}
nacos-consumer
pom.xml
<?xml version="1.0" encoding="UTF-8"?>
<project xmlns:xsi="http://www.w3.org/2001/XMLSchema-instance" xmlns="http://maven.apache.org/POM/4.0.0"
         xsi:schemaLocation="http://maven.apache.org/POM/4.0.0 https://maven.apache.org/xsd/maven-4.0.0.xsd">
    <modelVersion>4.0.0</modelVersion>
    <parent>
        <groupId>com.xiaobu</groupId>
        <artifactId>spring-cloud-alibaba-nacos-discovery</artifactId>
        <version>0.0.1-SNAPSHOT</version>
    </parent>
    <artifactId>nacos-consumer</artifactId>
    <version>0.0.1-SNAPSHOT</version>
    <name>nacos-consumer</name>
    <description>nacos-consumer</description>
    <properties>
        <spring.boot.version>2.2.4.RELEASE</spring.boot.version>
        <spring.cloud.version>Hoxton.SR1</spring.cloud.version>
        <spring.cloud.alibaba.version>2.2.0.RELEASE</spring.cloud.alibaba.version>
    </properties>
    <!--
        引入 Spring Boot、Spring Cloud、Spring Cloud Alibaba 三者 BOM 文件,进行依赖版本的管理,防止不兼容。
        在 https://dwz.cn/mcLIfNKt 文章中,Spring Cloud Alibaba 开发团队推荐了三者的依赖关系
     -->
    <dependencyManagement>
        <dependencies>
            <dependency>
                <groupId>org.springframework.boot</groupId>
                <artifactId>spring-boot-starter-parent</artifactId>
                <version>${spring.boot.version}</version>
                <type>pom</type>
                <scope>import</scope>
            </dependency>
            <dependency>
                <groupId>org.springframework.cloud</groupId>
                <artifactId>spring-cloud-dependencies</artifactId>
                <version>${spring.cloud.version}</version>
                <type>pom</type>
                <scope>import</scope>
            </dependency>
            <dependency>
                <groupId>com.alibaba.cloud</groupId>
                <artifactId>spring-cloud-alibaba-dependencies</artifactId>
                <version>${spring.cloud.alibaba.version}</version>
                <type>pom</type>
                <scope>import</scope>
            </dependency>
        </dependencies>
    </dependencyManagement>

    <dependencies>
        <!-- 引入 SpringMVC 相关依赖,并实现对其的自动配置 -->
        <dependency>
            <groupId>org.springframework.boot</groupId>
            <artifactId>spring-boot-starter-web</artifactId>
        </dependency>

        <!-- 引入 Spring Cloud Alibaba Nacos Discovery 相关依赖,将 Nacos 作为注册中心,并实现对其的自动配置 -->
        <dependency>
            <groupId>com.alibaba.cloud</groupId>
            <artifactId>spring-cloud-starter-alibaba-nacos-discovery</artifactId>
        </dependency>
    </dependencies>

</project>
application.properties
#应用程序名称
spring.application.name=nacos-consumer
#nacos注册中心地址
spring.cloud.nacos.discovery.server-addr=127.0.0.1:8848
#注册到nacos上的服务名称
spring.cloud.nacos.discovery.service=${spring.application.name}
#应用程序端口
server.port=28080
启动类
package com.xiaobu;
import org.springframework.beans.factory.annotation.Autowired;
import org.springframework.boot.SpringApplication;
import org.springframework.boot.autoconfigure.SpringBootApplication;
import org.springframework.cloud.client.discovery.EnableDiscoveryClient;
import org.springframework.cloud.client.loadbalancer.LoadBalanced;
import org.springframework.context.annotation.Bean;
import org.springframework.web.bind.annotation.GetMapping;
import org.springframework.web.bind.annotation.PathVariable;
import org.springframework.web.bind.annotation.RestController;
import org.springframework.web.client.RestTemplate;
/**
* The type Nacos consumer application.
*
* @author 小布
*/
@SpringBootApplication
@EnableDiscoveryClient
public class NacosConsumerApplication {
/**
* The entry point of application.
*
* @param args the input arguments
*/
public static void main(String[] args) {
SpringApplication.run(NacosConsumerApplication.class, args);
}
/**
* Rest template rest template.
*
* @return the rest template
*/
@LoadBalanced
@Bean
public RestTemplate restTemplate() {
return new RestTemplate();
}
/**
* The type Test controller.
*/
@RestController
public static class TestController {
/**
* The Rest template.
*/
@Autowired
private RestTemplate restTemplate;
/**
* Hello string.
*
* @param name the name
* @return the string
*/
@GetMapping("/hello/{name}")
public String hello(@PathVariable String name) {
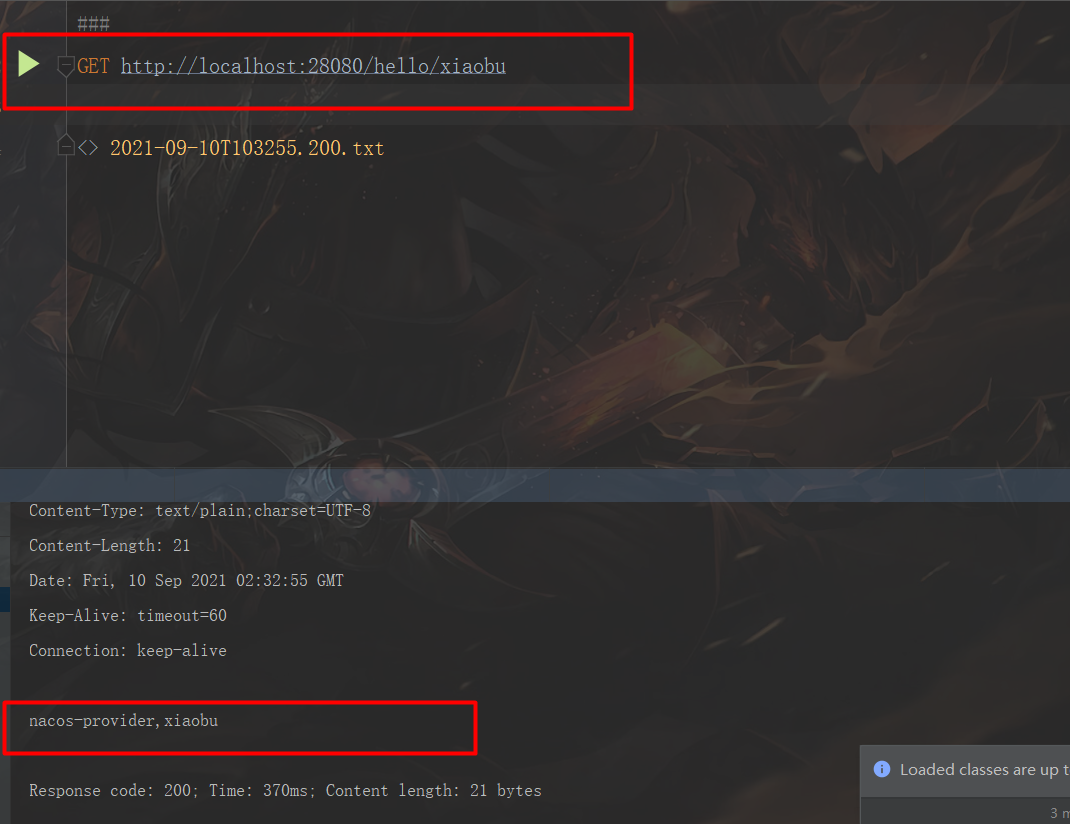
return restTemplate.getForObject("http://nacos-provider/hello/" + name, String.class);
}
}
}
然后 使用Idea的 Http Client进行方法调用 可以看到已经成功了
参考:


 1万+
1万+


 被折叠的 条评论
为什么被折叠?
被折叠的 条评论
为什么被折叠?
 到【灌水乐园】发言


