前言
ButterKnife是控件注入框架,可以帮助安卓开发者省去初始化控件的重复性工作,简单快捷地初始化布局文件中的控件,极大地提升开发效率。
项目地址-传送门。
导入ButterKnife至项目中
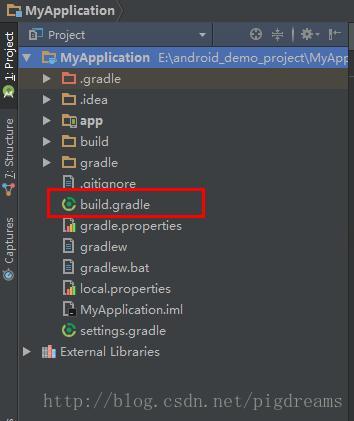
1.在工程的build.gradle中导入butterknife插件
buildscript {
    repositories {
        jcenter()
    }
    dependencies {
        classpath 'com.android.tools.build:gradle:2.3.0'
        //加入下面这段代码
        classpath 'com.jakewharton:butterknife-gradle-plugin:8.5.1'
    }
}

allprojects {
    repositories {
        jcenter()
    }
}
- 1
- 2
- 3
- 4
- 5
- 6
- 7
- 8
- 9
- 10
- 11
- 12
- 13
- 14
- 15
- 16
- 17
- 18
- 19
- 20
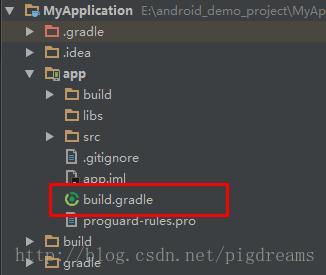
2.在项目的build.gradle中添加butterknife的插件,即是app中的builde.gradle
apply plugin: 'com.android.application'
apply plugin: 'com.jakewharton.butterknife'
3.在项目的build.gradle中添加依赖,然后同步项目,即可下载butterknife库至项目中
dependencies {
compile fileTree(dir: 'libs', include: ['*.jar'])
compile 'com.android.support:appcompat-v7:25.2.0'
compile 'com.jakewharton:butterknife:8.5.1'
annotationProcessor 'com.jakewharton:butterknife-compiler:8.5.1'
}
简单使用butterknife初始化控件
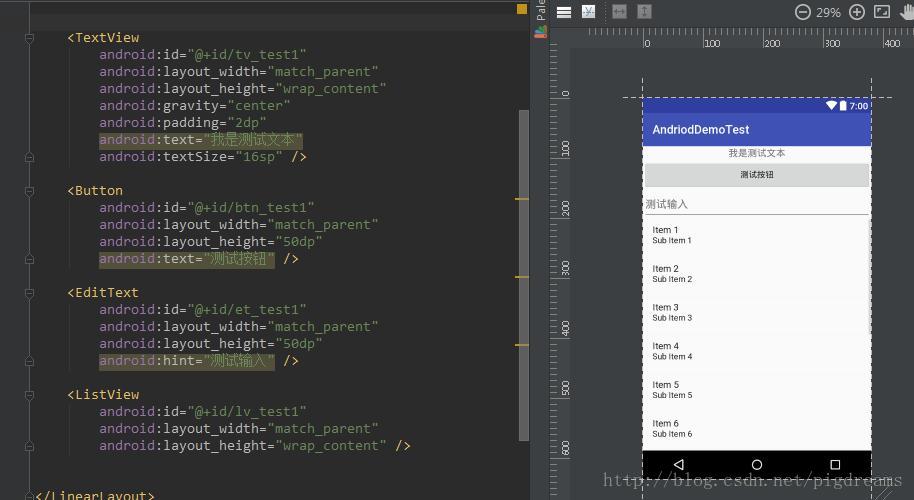
1.创建一个android工程,布局如下
2.在activity中的oncreate()方法里初始化butterknife框架
注意初始化要放在setView()之后
 @Override
    protected void onCreate(Bundle savedInstanceState) {
        super.onCreate(savedInstanceState);
        setContentView(R.layout.activity_butter_knife_test);
        ButterKnife.bind(this);
    }
3.查找TextView与Button
public class ButterKnifeTestActivity extends AppCompatActivity {
@BindView(R.id.tv_test1)
private TextView tvTest;
@BindView(R.id.btn_test1)
private Button btnTest;
@Override
protected void onCreate(Bundle savedInstanceState) {
super.onCreate(savedInstanceState);
setContentView(R.layout.activity_butter_knife_test);
ButterKnife.bind(this);
}
}
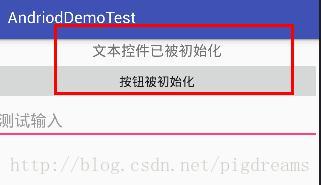
4.测试控件是否被正确初始化
tvTest.setText("文本控件已被初始化")
btnTest.setText("按钮被初始化")
运行工程,结果如下,报了一个编译错误。

Error:(14, 22) 错误: @BindView fields must not be private or static. (com.example.hapzhu.andrioddemotest.ButterKnifeTestActivity.tvTest)
意思是控件不能被声明为私有的或者是静态的,看来butterknife框架是对控件声明有限制的,将private去掉即可。
    @BindView(R.id.tv_test1)
   TextView tvTest;
    @BindView(R.id.btn_test1)
    Button btnTest;
5.给按钮设置点击监听事件
@OnClick(R.id.btn_test1)
public void onclick(View view){
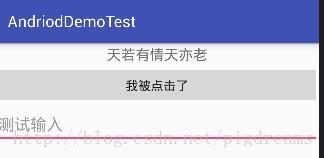
btnTest.setText("我被点击了");
tvTest.setText("天若有情天亦老");
}
随便写一个方法,参数可以放View也可以不放任何参数,
在方法上一行注解OnClick即可绑定点击事件,注意该方法必须不能为private或者是static的,与声明时规则一致。
下载注解插件进行一键初始化
打开android的plugins中心,搜索butterknife

点击browse repo,下载前两个插件都可以。

下载完成后,回到activity代码的setContentview处,右键布局文件名,注意一定要把光标停在布局文件名上

选择Generate,这时可以看到生成butterknife注解的选项,如果光标不放在布局文件名上,则看不到该选项。

点击生成butterknife注解

插件将布局文件中的所有id都加载出来了,还可以设置点击事件,点击confirm即可快速初始化控件,非常方便。
@BindView(R.id.tv_test1)
TextView tvTest1
@BindView(R.id.btn_test1)
Button btnTest1
@BindView(R.id.et_test1)
EditText etTest1
@BindView(R.id.lv_test1)
ListView lvTest1
@Override
protected void onCreate(Bundle savedInstanceState) {
super.onCreate(savedInstanceState)
setContentView(R.layout.activity_butter_knife_test)
ButterKnife.bind(this)
tvTest1.setText("文本控件已被初始化")
btnTest1.setText("按钮被初始化")
}
@OnClick(R.id.btn_test1)
public void onViewClicked() {
btnTest1.setText("我被点击了")
tvTest1.setText("天若有情天亦老")
}
- 1
- 2
- 3
- 4
- 5
- 6
- 7
- 8
- 9
- 10
- 11
- 12
- 13
- 14
- 15
- 16
- 17
- 18
- 19
- 20
- 21
- 22
- 23
- 24
- 25
效果与手动注解一样,对于安卓开发工作者来说,这个插件确实是个神器,节省了大量初始化控件的时间。
其它用途绑定
绑定res里资源对象
class ExampleActivity extends Activity {
@BindString(R.string.title) String title;
@BindDrawable(R.drawable.graphic) Drawable graphic;
@BindColor(R.color.red) int red;
@BindDimen(R.dimen.spacer) Float spacer;
}
绑定Fragment
public class FancyFragment extends Fragment {
@Override public View onCreateView(LayoutInflater inflater, ViewGroup container, Bundle savedInstanceState) {
View view = inflater.inflate(R.layout.fancy_fragment, container, false);
ButterKnife.bind(this, view);
return view;
}
}
绑定adapter
public class MyAdapter extends BaseAdapter {
@Override public View getView(int position, View view, ViewGroup parent) {
ViewHolder holder;
if (view != null) {
holder = (ViewHolder) view.getTag();
} else {
view = inflater.inflate(R.layout.whatever, parent, false);
holder = new ViewHolder(view);
view.setTag(holder);
}
holder.name.setText("John Doe");
return view;
}
static class ViewHolder {
@BindView(R.id.title) TextView name;
@BindView(R.id.job_title) TextView jobTitle;
public ViewHolder(View view) {
ButterKnife.bind(this, view);
}
}
}
- 1
- 2
- 3
- 4
- 5
- 6
- 7
- 8
- 9
- 10
- 11
- 12
- 13
- 14
- 15
- 16
- 17
- 18
- 19
- 20
- 21
- 22
- 23
- 24
- 25
- 26
- 27
- 28
绑定控件ID直接将控件添加至集合或数组中
@BindViews({ R.id.first_name, R.id.middle_name, R.id.last_name })
//nameViews的集中中添加了三个edittext对象
List<EditText> nameViews
一次性改变集合中所有对象的值-apply
ButterKnife.apply(nameViews, DISABLE);
ButterKnife.apply(nameViews, ENABLED, false);
Action and Setter interfaces allow specifying simple behavior.
static final ButterKnife.Action<View> DISABLE = new ButterKnife.Action<View>() {
@Override public void apply(View view, int index) {
view.setEnabled(false);
}
};
static final ButterKnife.Setter<View, Boolean> ENABLED = new ButterKnife.Setter<View, Boolean>() {
@Override public void set(View view, Boolean value, int index) {
view.setEnabled(value);
}
};
ButterKnife.apply(nameViews, View.ALPHA, 0.0f);
- 1
- 2
- 3
- 4
- 5
- 6
- 7
- 8
- 9
- 10
- 11
- 12
- 13
- 14
- 15
- 16
- 17
- 18
- 19
- 20
- 21
- 22
- 23
绑定listview的item点击事件
@OnItemSelected(R.id.list_view)
void onItemSelected(int position) {
  // TODO ...
}
findviewById的简化
适用于从dialog中找到控件
View view = LayoutInflater.from(context).inflate(R.layout.thing, null)
TextView firstName = ButterKnife.findById(view, R.id.first_name)
TextView lastName = ButterKnife.findById(view, R.id.last_name)
ImageView photo = ButterKnife.findById(view, R.id.photo)


 5059
5059

 被折叠的 条评论
为什么被折叠?
被折叠的 条评论
为什么被折叠?
 到【灌水乐园】发言


