


第二篇 Spring与Hibernate的融合
有的朋友可能只希望知道spring与hibernate的融合。所以在讲struts+spring+hibernate之前,我们跳过使用stuts,先说一下spring+hibernate的融合。如果仍然用SSHProject这个项目,需要把po和dao包下面的类删除,因为我们在生成影射文件和DAO时可能会出现重名文件。还有applicationContext.xml中的bean同样删除。
第一步 配置数据环境
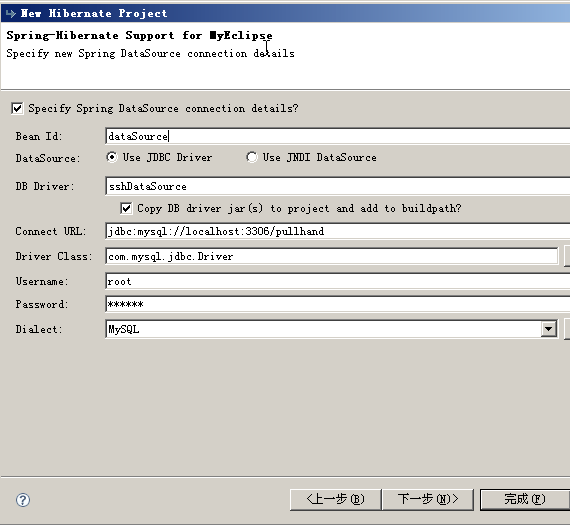
既然我们用到hibernate,就要给他配置数据库,这里我们使用的是mysql5.0。eclipse3.2.2一下的版本与3.2.2版本数据库的配置是不同的,这里我们只讲3.2.2的配置。
1、打开DB Brower

2、新建数据库连接
在DB Brower中右键>新建打开下面对话框,选择输入正确的配置。提示:注意你的数据库名、密码、和驱动器。
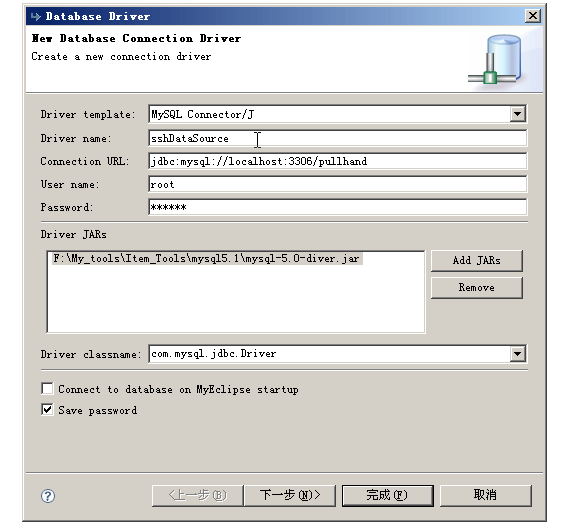
单击“完成”,测试如果连接到数据库,就OK。
第二步 选择hibernate与包的导入
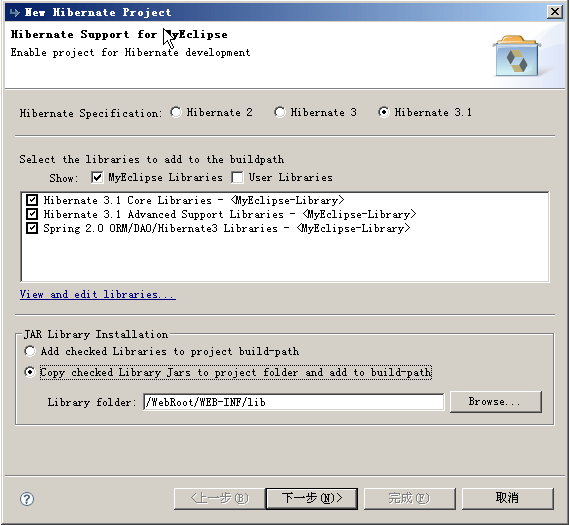
1、hibernate的选择
上面我们已经提到,spring1.2只支持hibernate3.0以下的版本,所以如果你选择的是spring1.2一定要注意这个问题。这里我使用的是hibernate3.1
2、包的导入
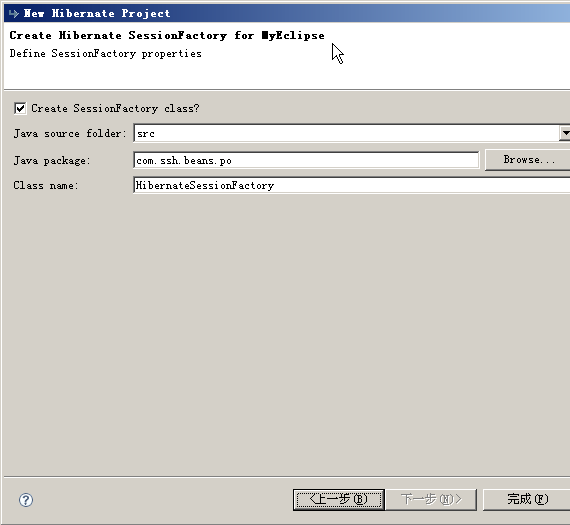
单击“完成”OK。
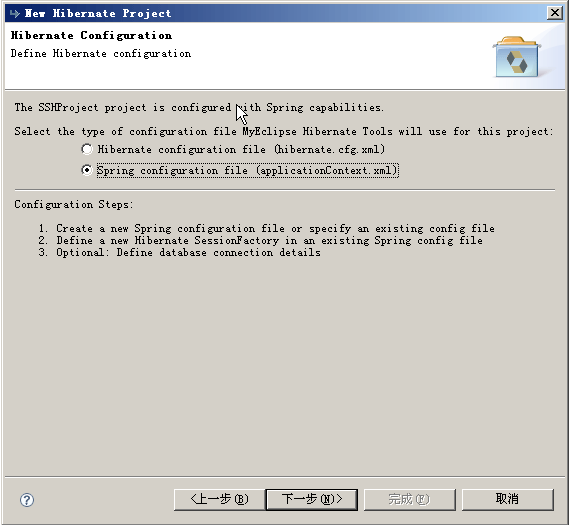
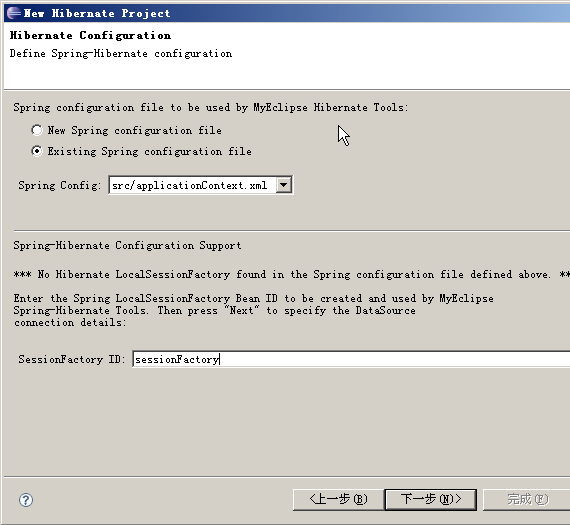
分析:在导入包时出现几个问题:1、在找spring建好的applicationContext.xml文件时没有找到路径,被迫把其他项目的数据库连接bean考到该文件内((注:仅仅是我存在的问题)。2、把自动生成的sessionFactory删除。3、最后可能会出现找不到包,所以你要手动添加几个包。
现在我们看看applicationContext.xml文件内容有什么变化,内容如下:
<?xml version="1.0" encoding="UTF-8"?>
<beans
xmlns="http://www.springframework.org/schema/beans"
xmlns:xsi="http://www.w3.org/2001/XMLSchema-instance"
xsi:schemaLocation="http://www.springframework.org/schema/beans http://www.springframework.org/schema/beans/spring-beans-2.0.xsd">
<bean id="dataSource"
class="org.apache.commons.dbcp.BasicDataSource">
<property name="driverClassName"
value="com.mysql.jdbc.Driver">
</property>
<property name="url"
value="jdbc:mysql://localhost:3306/pullhand">
</property>
<property name="username" value="root"></property>
<property name="password" value="815241"></property>
</bean>
<bean id="sessionFactory"
class="org.springframework.orm.hibernate3.LocalSessionFactoryBean">
<property name="dataSource">
<ref bean="dataSource" />
</property>
<property name="hibernateProperties">
<props>
<prop key="hibernate.dialect">
org.hibernate.dialect.MySQLDialect
</prop>
</props>
</property>
</bean>
</beans>
注:粗体字为自动加入的内容。
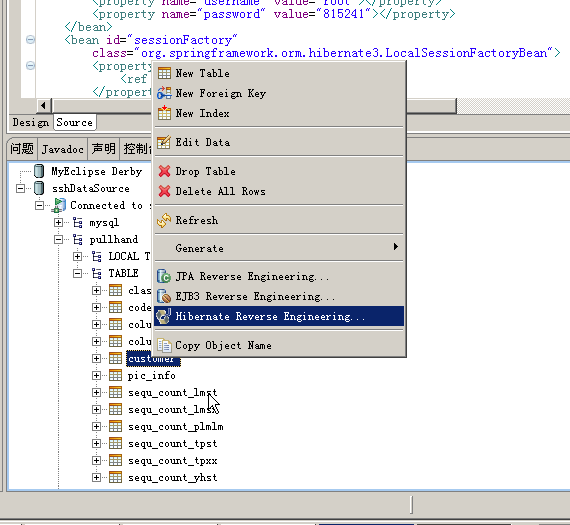
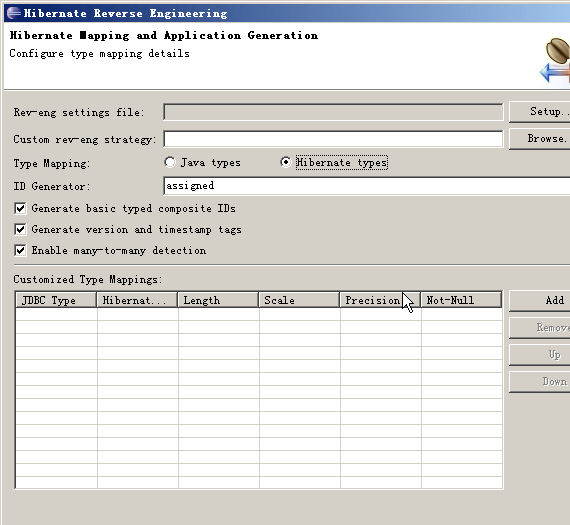
第三步 创建影射文件po及dao
1、创建影射文件
首先你要确定所需要的包都导入classpath路径中,否则在创建影射文件中会出现一些不能操作的对象。如果出现问题,建议大家多重复做几次。


单击"完成",就OK。
在包资源管理器中我们可以看到,自动生成四个文件,包括CustomerDAO。
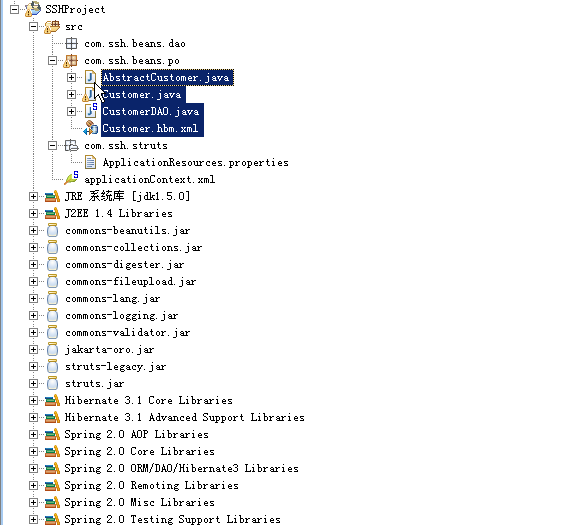
为了方便操作我们包CustomerDAO放在dao包下。如果你没有删除ICustomerDAO接口,那我们就使用它了(因为spring是面对接口的,所以我们的操作都应该经过接口)。
接下来,我们再看看applicationContext.xml有什么变化。内容如下:
<?xml version="1.0" encoding="UTF-8"?>
<beans
xmlns="http://www.springframework.org/schema/beans"
xmlns:xsi="http://www.w3.org/2001/XMLSchema-instance"
xsi:schemaLocation="http://www.springframework.org/schema/beans http://www.springframework.org/schema/beans/spring-beans-2.0.xsd">
<bean id="dataSource"
class="org.apache.commons.dbcp.BasicDataSource">
<property name="driverClassName"
value="com.mysql.jdbc.Driver">
</property>
<property name="url"
value="jdbc:mysql://localhost:3306/pullhand">
</property>
<property name="username" value="root"></property>
<property name="password" value="815241"></property>
</bean>
<bean id="sessionFactory"
class="org.springframework.orm.hibernate3.LocalSessionFactoryBean">
<property name="dataSource">
<ref bean="dataSource" />
</property>
<property name="hibernateProperties">
<props>
<prop key="hibernate.dialect">
org.hibernate.dialect.MySQLDialect
</prop>
</props>
</property>
<property name="mappingResources">
<list>
<value>com/ssh/beans/po/Customer.hbm.xml</value></list>
</property>
</bean>
<bean id="CustomerDAO" class="com.ssh.beans.dao.CustomerDAO">
<property name="sessionFactory">
<ref bean="sessionFactory" />
</property>
</bean>
</beans>
注:粗体字为新内容。提醒:如果你没有改CustomerDAO的路径,它应该在po包下。
2、创建dao。
CustomerDAO.java我们使用hibernate自动生成,ICustomerDAO.java接口使用我们以前建好的。
3、创建测试类
既然我们不使用action,那么我们就新建一个类Test.java用于测试。内容如下:
package com.ssh.struts.action;
import java.util.List;
import org.springframework.context.ApplicationContext;
import org.springframework.context.support.ClassPathXmlApplicationContext;
import com.ssh.beans.dao.CustomerDAO;
public class Test{
private ApplicationContext context;
private void test(){
CustomerDAO customerDAO=(CustomerDAO)context.getBean("customerDAO");
List list=customerDAO.findAll();
if(list!=null&&list.size()>0){
System.out.println("list.size():"+list.size());
}else{
System.out.println("ERROR or NULL");
}
}
private void run(){
context=new ClassPathXmlApplicationContext("applicationContext.xml");
test();
}
public static void main(String[] args){
new Test().run();
}
}
分析:在测试中可能出现两个异常:
异常一、java.lang.NoClassDefFoundError: org/apache/commons/pool/impl/GenericObjectPool。如果出现这个异常说明缺少commons-pool-1.2.jar包。
异常二、org.apache.commons.dbcp.SQLNestedException: Cannot load JDBC driver class 'com.mysql.jdbc.Driver';;;Caused by: java.lang.ClassNotFoundException: com.mysql.jdbc.Driver。如果出现这个异常,说明在构建路径中没有驱动包。
好的,我们现在测试一下,如果System.out.println("list.size():"+list.size());执行,说明我们对spring与hibernate的融合成功了。
第三篇 整合struts+spring+hibernate
我们在上两篇的基础只要再对applicationContext.xml文件进行修改,就可以达到我们整合的目地。
第一步 完善applicationContext.xml内容
1、添加事务处理。内容如下:
<bean id="transactionManager" class="org.springframework.orm.hibernate3.HibernateTransactionManager">
<property name="sessionFactory">
<ref local="sessionFactory" />
</property>
</bean>
<bean id="customerDAOProxy" class="org.springframework.transaction.interceptor.TransactionProxyFactoryBean">
<property name="transactionManager">
<ref bean="transactionManager" />
</property>
<property name="target">
<ref local="customerDAO" />
</property>
<property name="transactionAttributes">
<props>
<prop key="find*">PROPAGATION_REQUIRED,readOnly</prop>
</props>
</property>
</bean>
2、CustomerAction Bean注入事务处理。内容如下:
<bean name="/customer" class="com.ssh.struts.action.CustomerAction" >
<property name="customerDAO"><ref bean="customerDAOProxy"/></property>
</bean>
3、最终applicationContext.xml文件,内容如下:
<?xml version="1.0" encoding="UTF-8"?>
<beans
xmlns="http://www.springframework.org/schema/beans"
xmlns:xsi="http://www.w3.org/2001/XMLSchema-instance"
xsi:schemaLocation="http://www.springframework.org/schema/beans http://www.springframework.org/schema/beans/spring-beans-2.0.xsd">
<bean id="dataSource"
class="org.apache.commons.dbcp.BasicDataSource">
<property name="driverClassName"
value="com.mysql.jdbc.Driver">
</property>
<property name="url"
value="jdbc:mysql://localhost:3306/pullhand">
</property>
<property name="username" value="root"></property>
<property name="password" value="815241"></property>
</bean>
<bean id="sessionFactory"
class="org.springframework.orm.hibernate3.LocalSessionFactoryBean">
<property name="dataSource">
<ref bean="dataSource" />
</property>
<property name="hibernateProperties">
<props>
<prop key="hibernate.dialect">
org.hibernate.dialect.MySQLDialect
</prop>
</props>
</property>
<property name="mappingResources">
<list>
<value>com/ssh/beans/po/Customer.hbm.xml</value></list>
</property>
</bean>
<bean id="transactionManager" class="org.springframework.orm.hibernate3.HibernateTransactionManager">
<property name="sessionFactory">
<ref local="sessionFactory" />
</property>
</bean>
<bean id="customerDAOProxy" class="org.springframework.transaction.interceptor.TransactionProxyFactoryBean">
<property name="transactionManager">
<ref bean="transactionManager" />
</property>
<property name="target">
<ref local="customerDAO" />
</property>
<property name="transactionAttributes">
<props>
<prop key="find*">PROPAGATION_REQUIRED,readOnly</prop>
</props>
</property>
</bean>
<bean id="customerDAO" class="com.ssh.beans.dao.CustomerDAO">
<property name="sessionFactory">
<ref bean="sessionFactory" />
</property>
</bean>
<bean name="/customer" class="com.ssh.struts.action.CustomerAction" >
<property name="customerDAO"><ref bean="customerDAOProxy"/></property>
</bean>
</beans>
第二步,修改CustomerAction
最后内容如下:
package com.ssh.struts.action;
import java.util.ArrayList;
import java.util.List;
import javax.servlet.http.HttpServletRequest;
import javax.servlet.http.HttpServletResponse;
import org.apache.struts.action.Action;
import org.apache.struts.action.ActionForm;
import org.apache.struts.action.ActionForward;
import org.apache.struts.action.ActionMapping;
import com.ssh.beans.dao.ICustomerDAO;
import com.ssh.beans.po.Customer;
public class CustomerAction extends Action {
ICustomerDAO customerDAO=null;
public void setCustomerDAO(ICustomerDAO customerDAO){
this.customerDAO=customerDAO;
}
public ActionForward execute(ActionMapping mapping, ActionForm form,
HttpServletRequest request, HttpServletResponse response) {
List list=new ArrayList();
Customer customer=null;
if(customerDAO!=null){
list=customerDAO.getALLCustomer();
for(int i=0;i<list.size();i++){
customer=(Customer)list.get(i);
System.out.println("OK:"+customer.getCustName());
}
}else{
System.out.println("ERROR or NULL");
}
return mapping.findForward("success");
}
}
第三步 解决找不到Action问题
初学者会经常遇到下面这个问题:
HTTP Status 404 - Servlet action is not available
type Status report
message Servlet action is not available
description The requested resource (Servlet action is not available) is not available.
Apache Tomcat/5.0.28
就是找不到我们的action。
当你努力去解决这个问题时,会发现去掉applicationContext.xml下面这个<property>标签,一切正常:
<property name="mappingResources">
<list>
<value>
com/ssh/beans/po/Customer.hbm.xml
</value>
</list>
</property>
那是什么原因呢?我想大家都会首先想到下面两个问题:
1、路径是否正确:即com/ssh/beans/po/Customer.hbm.xml的路径正确么?
2、文件是否正确:即Customer.hbm.xml的文件内容对么?
当你费了一身力气发现一切OK,到底什么原因???
问题在于构件路径(lib)内的包重叠(提示:前提是你要保证这个问题出现之前都正常),所以你要确定构建路径里的包不能重复!
建议:大家在导入包时,按照默认导入,不要把所有的包都导进工程,在操作中在把需要的jar包导进去(最好不要把整个liberaries导进去),这样即可以减小工程的大小,又能确保struts\spring\hibernate之间的包不会重叠或者被替换。


 681
681

 被折叠的 条评论
为什么被折叠?
被折叠的 条评论
为什么被折叠?
 到【灌水乐园】发言


