


案例使用第三方库:NextAuth.js, Shadcn/ui, react-hook-form, and Zod等
- prisma: is an open-source database toolkit. We will use it to store user credentials.
- next-auth: Authentication for Next.js.
- react-hook-form: a library that helps you validate forms in React.
- zod: a data validator.
- bcrypt: to hash passwords.
- shadcn/ui: a collection of reusable components.
简要概述:
确保用户的安全和隐私比以往任何时候都更加重要。 Web认证在这方面发挥着至关重要的作用,是保护用户信息和数据的第一道防线。
今天,我们拥有像 NextAuth.js 这样的工具,使我们的工作变得更加轻松,使我们能够在 Next.js 应用程序中轻松实现不同类型的身份验证。
在本系列教程中,我们将在 Next.js 14 中构建一个完整的身份验证系统,从基础知识开始:使用电子邮件和密码进行身份验证。
什么是 NextAuth.js (Auth.js)?
在 JavaScript 生态系统中,更具体地说,在使用 Next.js 开发的应用程序中,处理身份验证的最著名的库之一是 NextAuth.js。
该工具提供了一个简单且易于实施的解决方案,用于向我们的应用程序添加身份验证。最好的一点是它的灵活性;除了基于凭证的身份验证(例如经典的电子邮件和密码)之外,它还允许集成不同的身份验证提供商(例如 Google、Facebook 和 Twitter)。
实现凭证认证 Authentication
凭证验证是非常有用的在需要完全控制验证过程和用户凭证存储的应用程序中,或者当您不想依赖外部身份验证提供商时。
起步
- 使用以下命令创建一个新的Next.js项目,并按照指示的步骤进行操作。我们将使用TypeScript和src/文件夹。
npx create-next-app@latest
- 安装项目需要的依赖,使用pnpm进行依赖管理
pnpm install next-auth prisma react-hook-form zod, bcrypt
我们使用Shadcn/ui组件
pnpm dlx shadcn-ui@latest init
- prisma: 是一个开源数据库工具包。我们将使用它来存储用户凭据。
- next-auth: Next.js的身份验证。
- react-hook-form: 一个帮助你在React中验证表单的库。
- zod: 数据验证器。
- bcrypt: 对密码进行哈希运算。
- shadcn/ui: 可重用UI组件的集合。
- 为项目创建以下结构
...
├── prisma/
...
├── src/
│   ├── actions/
│   │   └── auth-actions.tsx
│   ├── app/
│   │   ├── api/auth/[...nextauth]
│   │   │   └── route.ts
│   │   ├── auth/
│   │   │   ├── signin
│   │   │   │   └── page.tsx
│   │   │   └── signup
│   │   │       └── page.tsx
│   │   │   ...
│   ├── components/
│   │   ├── auth/
│   │   │   ├── auth-buttons.tsx
│   │   │   ├── signin-form.tsx
│   │   │   ├── signup-form.tsx
│   │   │   └── user-nav.ts
│   │   ├── ui/
│   │   │   ...
│   │   ├── auth-provider.tsx
│   │   ├── icons.tsx
│   │   └── theme-provider.tsx
│   ├── lib/
│   │   ├── prisma.ts
│   │   ├── types.d.ts
│   │   └── utils.ts
│   ...
...
设置Prisma,初始化数据结构
我们将使用Prisma在数据库中存储和检索用户。Prisma允许集成不同的数据库类型,因此您可以使用所需的任何数据库,我们将使用SQLite。
初始化Prisma
npx prisma init --datasource-provider sqlite
这将创建包含其数据model的数据文件夹。
创建 models.
为了创建模型,我们将使用@auth/prisma-adapter提供的模型,并对其进行一些自定义,如下所示
generator client {
  provider = "prisma-client-js"
  output = "../../node_modules/.prisma/client"
}

datasource db {
  provider = "sqlite"
  url      = env("DATABASE_URL")
}

...
model User {
  id            String    @id @default(cuid())
  username      String
  password      String
  email         String    @unique
  emailVerified DateTime?
  phone         String?
  image         String?
}
创建第一个migration
npx prisma migrate dev --name first-migration
使用此命令,在Prisma文件夹中创建了更多文件,数据库已与模型同步。
Prisma客户端
最后,我们创建一个Prisma客户端代码。
import { PrismaClient } from "@prisma/client";

const globalForPrisma = global as unknown as {
  prisma: PrismaClient;
};

export const prisma = globalForPrisma.prisma || new PrismaClient();

if (process.env.NODE_ENV !== "production") globalForPrisma.prisma = prisma;

export default prisma;
设置NextAuth.js
创建 .env 环境变量
# Secret key for NextAuth.js, used for encryption and session security.  It should be a long,
# random string unique to your application.
NEXTAUTH_SECRET=XXX3B2CC28F123456C6934531CXXXXX

# Base URL for your Next.js app, used by NextAuth.js for redirects and callbacks.
NEXTAUTH_URL=http://localhost:3000/
创建身份auth验证路由
此路径允许在单个端点上处理所有身份验证请求(如登录、注销和供应商回调)。
src/app/api/auth/[...nextauth]
创建providers
...
// Imports the Prisma User type for typing.
import { User } from '@prisma/client'

// Configuration of authentication options for NextAuth.
export const authOptions: AuthOptions = {
  ...
 // Defines authentication providers, in this case, only credentials.
 providers: [
  CredentialsProvider({
   name: 'Credentials',
   // Defines the required fields for authentication.
   credentials: {
    email: { label: 'Email', type: 'text' },
    password: { label: 'Password', type: 'password' },
   },
   // Function to authenticate the user with the provided credentials.
   async authorize(credentials) {
    // Searches for the user in the database by email.
    const user = await prisma.user.findUnique({
     where: {
      email: credentials?.email,
     },
    })

    // Checks if the user exists and if the password is correct.
    if (!user) throw new Error('User name or password is not correct')

    if (!credentials?.password) throw new Error('Please Provide Your Password')
    const isPasswordCorrect = await bcrypt.compare(credentials.password, user.password)

    if (!isPasswordCorrect) throw new Error('User name or password is not correct')

    // Returns the user without including the password.
    const { password, ...userWithoutPass } = user
    return userWithoutPass
   },
  }),
 ],
}

// Exports the configured NextAuth handler to handle GET and POST requests.
const handler = NextAuth(authOptions)
export { handler as GET, handler as POST }
创建 Auth Provider
src/components/auth-provider.tsx:
'use client'

import { SessionProvider } from 'next-auth/react'

export default function AuthProvider({ children }: { children: React.ReactNode }) {
 return <SessionProvider>{children}</SessionProvider>
}
此组件充当使用NextAuth进行身份验证的Next.js应用程序的会话提供者。
将组件或页面包装在此提供程序中,可以授予它们访问会话上下文的权限,允许子组件使用NextAuth钩子和功能,例如useSession来访问或修改用户当前会话的状态。
src/app/layout.tsx:
export default function RootLayout({ children }: { children: React.ReactNode }) {
 return (
  <html
   lang='en'
   suppressHydrationWarning
  >
   <body className={`${inter.className} relative`}>
    <AuthProvider>
      <main>{children}</main>
    </AuthProvider>
   </body>
  </html>
 )
}
使用Shadcn/UI设置用户界面
按照文档安装shadcn/ui
Would you like to use TypeScript (recommended)? yes
Which style would you like to use? › Default
Which color would you like to use as base color? › Slate
Where is your global CSS file? › src/app/globals.css
Do you want to use CSS variables for colors? › yes
Are you using a custom tailwind prefix eg. tw-? Leave blank
Where is your tailwind.config.js located? › tailwind.config.js
Configure the import alias for components: › @/components
Configure the import alias for utils: › @/lib/utils
Are you using React Server Components? › yes
实施黑暗模式
src/app/layout.tsx
export default function RootLayout({ children }: { children: React.ReactNode }) {
 return (
  <html
   lang='en'
   suppressHydrationWarning
  >
   <body className={`${inter.className} relative`}>
    <AuthProvider>
     <ThemeProvider
      attribute='class'
      defaultTheme='dark'
      enableSystem
      disableTransitionOnChange
     >
      <main>{children}</main>

      <Toaster />
     </ThemeProvider>
    </AuthProvider>
   </body>
  </html>
 )
}
安装以下shadcn/ui组件:
pnpm dlx shadcn-ui@latest add avatar button dropdown-menu form input label tabs toast
创建身份验证组件
src/components/auth-buttons.tsx:
'use client'

import Link from 'next/link'
import { signIn, useSession } from 'next-auth/react'

import { Button } from '../ui/button'
import { UserNav } from './user-nav'

export default function AuthButtons() {
 // Use the useSession hook to access session data
 const { data: session } = useSession()

 return (
  <div className='flex justify-end gap-4'>
   {session && session.user ? (
    <UserNav user={session.user} />
   ) : (
    <>
     <Button
      size={'sm'}
      variant={'secondary'}
      onClick={() => signIn()}
     >
      Sign In
     </Button>
     <Button
      size={'sm'}
      asChild
      className='text-foreground'
     >
      <Link href='/auth/signup'>Sign Up</Link>
     </Button>
    </>
   )}
  </div>
 )
}
此组件根据用户的会话状态动态显示身份验证选项。如果用户已登录,则会显示用户特定的导航。此外,它还提供了登录或注册按钮,利用Next.js的路由和NextAuth的身份验证功能,提供流畅的用户体验。
src/components/auth/signup-form.tsx
'use client'

/*
  all imports
*/

// Function to register a new user
import { registerUser } from '@/actions/auth-actions'

// Define the validation schema for the signup form using Zod
const formSchema = z
 .object({
  username: z
   .string({
    required_error: 'Username is required',
   })
   .min(2, 'User name must have at least 2 characters')
   .max(12, 'Username must be up to 12 characters')
   .regex(new RegExp('^[a-zA-Z0-9]+$'), 'No special characters allowed!'),
  email: z.string({ required_error: 'Email is required' }).email('Please enter a valid email address'),
  password: z
   .string({ required_error: 'Password is required' })
   .min(6, 'Password must have at least 6 characters')
   .max(20, 'Password must be up to 20 characters'),
  confirmPassword: z
   .string({ required_error: 'Confirm your password is required' })
   .min(6, 'Password must have at least 6 characters')
   .max(20, 'Password must be up to 20 characters'),
 })
 .refine(values => values.password === values.confirmPassword, {
  message: "Password and Confirm Password doesn't match!",
  path: ['confirmPassword'],
 })

// Type inference for form inputs based on the Zod schema
type InputType = z.infer<typeof formSchema>

export function SignUpForm() {
 const [isLoading, setIsLoading] = useState(false)
 const { toast } = useToast() // Hook to show toast notifications

 // Initialize form handling with React Hook Form and Zod for validation
 const form = useForm<InputType>({
  resolver: zodResolver(formSchema),
 })

 // Handles form submission
 async function onSubmit(values: InputType) {
  try {
   setIsLoading(true)
   const { confirmPassword, ...user } = values // Exclude confirmPassword from data to be sent

   const response = await registerUser(user) // Register the user
   if ('error' in response) {
    toast({
     title: 'Something went wrong!',
     description: response.error,
     variant: 'success',
    })
   } else {
    toast({
     title: 'Account Created!',
     description: 'Your account has been created successfully! You can now login.',
    })
   }
  } catch (error) {
   console.error(error)
   toast({
    title: 'Something went wrong!',
    description: "We couldn't create your account. Please try again later!",
    variant: 'destructive',
   })
  } finally {
   setIsLoading(false)
  }
 }

 return (
  <Form {...form}>
   <form onSubmit={form.handleSubmit(onSubmit)}>
    <div className='grid gap-2'>
     // Each FormField validates and displays an input
     <FormField
      control={form.control}
      name='username'
      render={({ field }) => (
       <FormItem>
        <FormControl>
         <div className='flex items-center gap-2'>
          <Icons.user
           className={`${form.formState.errors.username ? 'text-destructive' : 'text-muted-foreground'} `}
          />
          <Input
           placeholder='Your Username'
           className={`${form.formState.errors.username && 'border-destructive bg-destructive/30'}`}
           {...field}
          />
         </div>
        </FormControl>
        <FormMessage />
       </FormItem>
      )}
     />

     // Repeated structure for email, password, and confirmPassword with respective validations and icons

     <Button
      className='text-foreground mt-4'
      disabled={isLoading} // Disable button during form submission
     >
      {isLoading && <Icons.spinner className='mr-2 h-4 w-4 animate-spin' />} // Show loading icon if isLoading is true
      Sign Up
     </Button>
    </div>
   </form>
  </Form>
 )
}
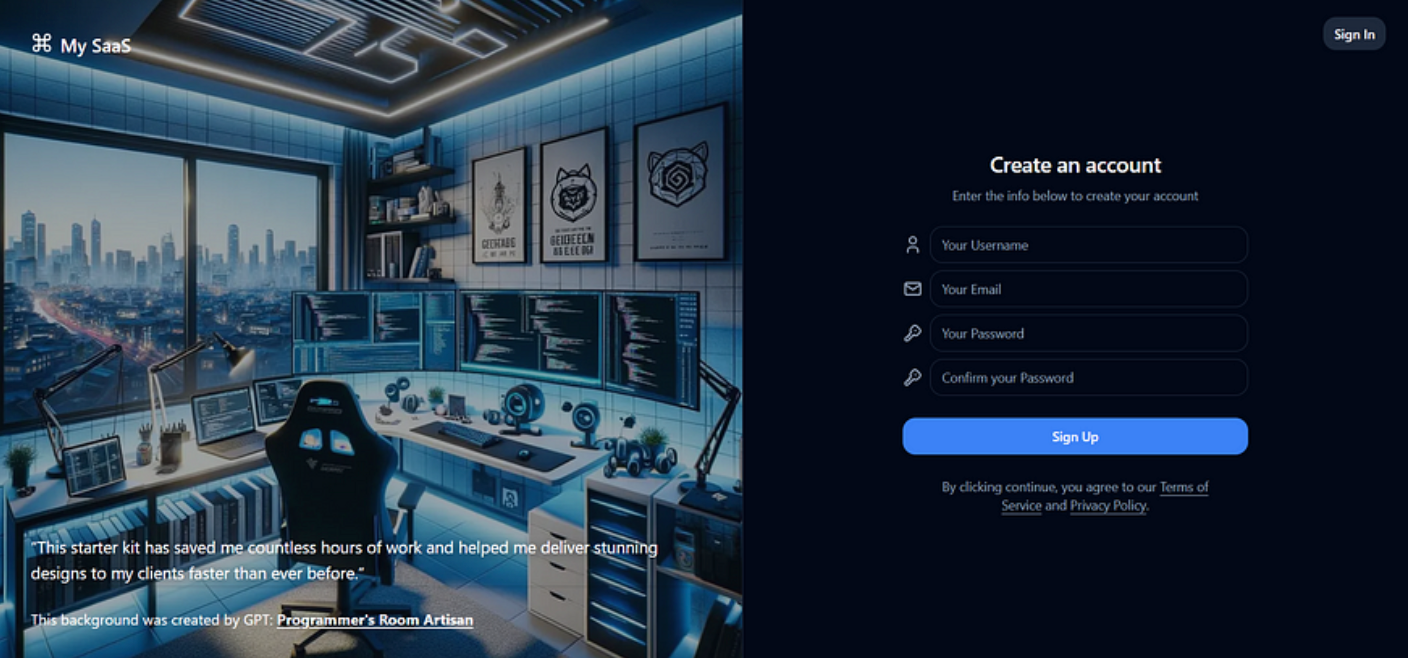
该组件封装了一个用户注册表,使用react钩子表单进行表单状态管理,使用Zod进行模式验证。
我在页面上添加了更多样式,看起来像这样:
src/actions/auth-action.ts
'use server'

/*
  all imports
*/

export async function registerUser(user: Omit<User, 'id' | 'phone' | 'emailVerified' | 'image'>) {
 try {
  // Attempt to create a new user record in the database
  const result = await prisma.user.create({
   data: {
    ...user,
    // Hash the password before storing it
    password: await bcrypt.hash(user.password, 10),
   },
  })

  return result
 } catch (error) {
  console.log(error)
  // Handle known request errors from Prisma
  if (error instanceof Prisma.PrismaClientKnownRequestError) {
   // Check for unique constraint failure (e.g., email already exists)
   if (error.code === 'P2002') {
    return { error: 'Email already exists.' }
   }
  }

  // Return a generic error message for any other errors
  return { error: 'An unexpected error occurred.' }
 }
}
registerUser函数旨在通过在数据库中创建包含所提供用户信息的记录来安全地注册新用户,不包括id、phone、emailVerified和image等字段。
它使用bcrypt对用户的密码进行哈希运算,以实现安全存储。
为了测试我们的注册并验证用户是否正确注册,我们需要添加一些回调;这些功能允许您自定义身份验证和会话管理的行为。
src/app/api/auth/[...nextauth]
export const authOptions: AuthOptions = {
 // Define custom pages for authentication flow
 pages: {
  signIn: '/auth/signin', // Custom sign-in page
 },
 // Configure session management to use JSON Web Tokens (JWT)
 session: {
  strategy: 'jwt',
 },
 // JWT configuration, including secret for token signing
 jwt: {
  secret: process.env.NEXTAUTH_SECRET, // Secret used to sign the JWT, stored in environment variables
 },

...

// Callbacks for customizing JWT and session behaviors
 callbacks: {
  // Callback to modify the JWT content. Adds user information if available.
  async jwt({ token, user }) {
   if (user) token.user = user as User // Cast user object to User type and assign to token
   return token
  },

  // Callback to modify session content. Adds user information to the session.
  async session({ token, session }) {
   session.user = token.user // Assign user information from token to session
   return session
  },
 },
}
回调jwt:
在身份验证生命周期中,每当创建或更新JSON Web令牌(jwt)时,都会执行此回调。它允许您在令牌被签名并发送到客户端或存储在服务器上之前修改令牌的内容。
这对于向令牌添加可能与您的应用程序逻辑相关的其他信息非常有用。
session 回调
每次读取会话数据时都会调用此回调,例如在服务器端呈现期间或在受保护的API请求中。它允许在将会话数据发送到客户端之前对其进行修改。
这对于基于JWT中存储的信息或其他标准添加或修改会话数据特别有用。
最后,我们需要扩展NextAuth Session和JWT类型定义,以包含其他用户信息。
src/lib/types.d.ts
import { User } from '@prisma/client'

declare module 'next-auth' {
 interface Session {
  user: User
 }
}

declare module 'next-auth/jwt' {
 interface JWT {
  user: User
 }
}
现在,如果我们填写表格并提交,我们将能够看到成功的提示语。为了验证用户是否保存在数据库中,我们可以使用以下命令以图形方式查看Prisma创建的表:
nxp prisma studio
将提供以下路线http://localhost:5555

src/components/auth/user-nav.tsx:
/*
   all imports
*/

interface Props {
 user: User // Expect a user object of type User from Prisma client
}

export function UserNav({ user }: Props) {
 return (
  <DropdownMenu>
   <DropdownMenuTrigger asChild>
    <Button
     variant='ghost'
     className='relative h-8 w-8 rounded-full'
    >
     <Avatar className='h-9 w-9'>
      <AvatarImage
       src='/img/avatars/01.png'
       alt=''
      />
      <AvatarFallback>UU</AvatarFallback>
     </Avatar>
    </Button>
   </DropdownMenuTrigger>
   <DropdownMenuContent
    className='w-56'
    align='end'
    forceMount
   >
    <DropdownMenuLabel className='font-normal'>
     <div className='flex flex-col space-y-1'>
      <p className='text-sm font-medium leading-none'>{user.username}</p>
      <p className='text-xs leading-none text-muted-foreground'>{user.email}</p>
     </div>
    </DropdownMenuLabel>
    <DropdownMenuSeparator />
    <DropdownMenuItem>
     <Link
      href={'/api/auth/signout'} // Link to the signout API route
      className='w-full'
     >
      Sign Out
     </Link>
    </DropdownMenuItem>
   </DropdownMenuContent>
  </DropdownMenu>
 )
}
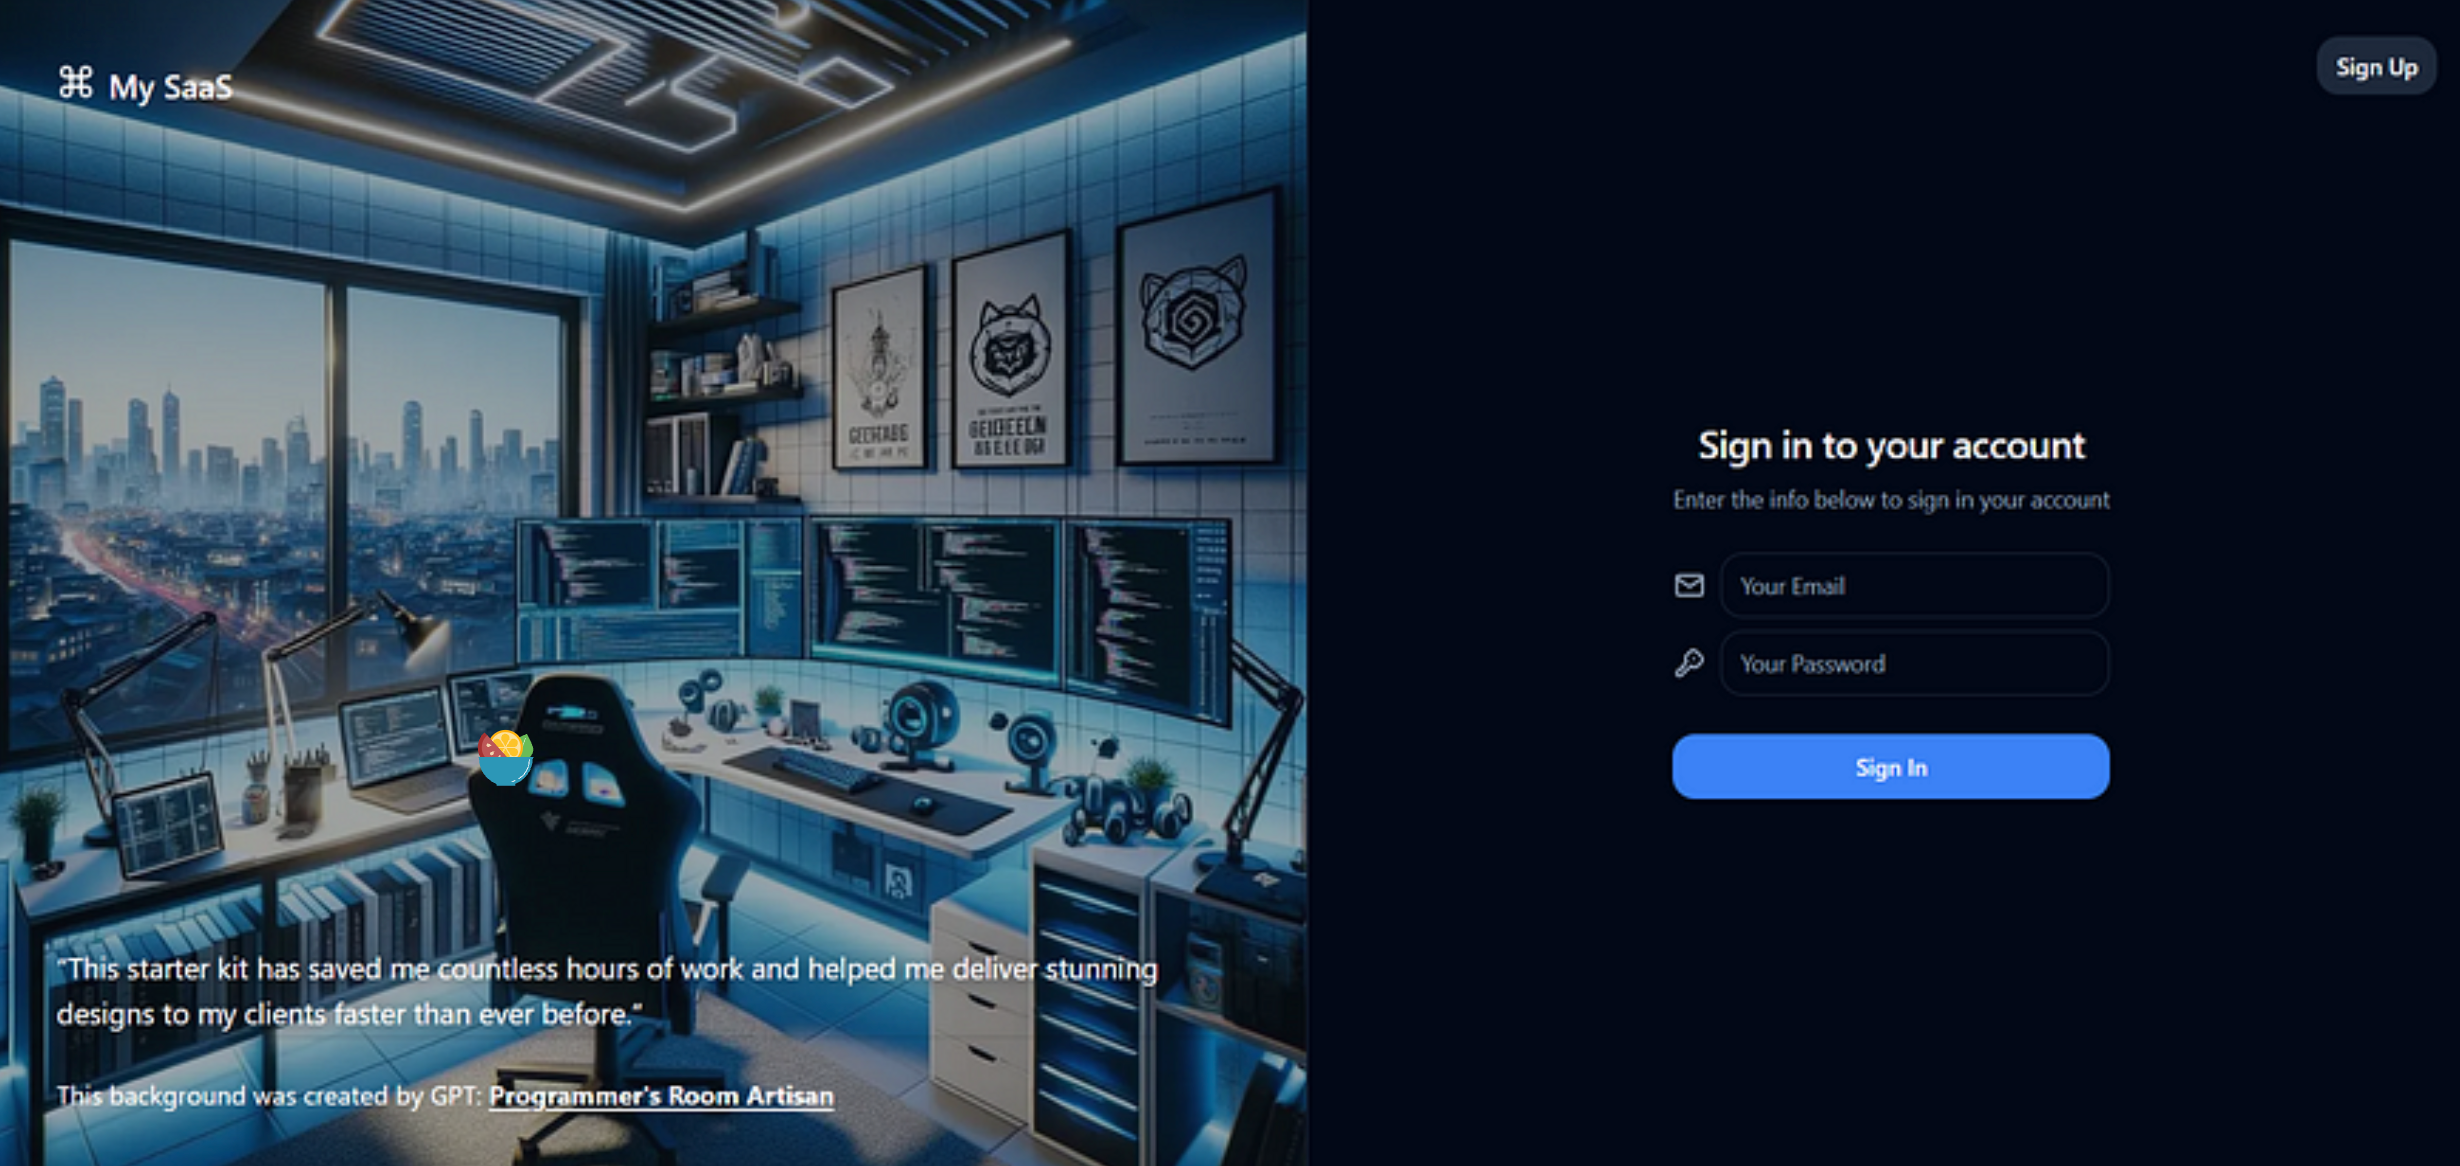
src/components/auth/signin-form.tsx
/*
  all imports
*/

// Schema definition for form validation using Zod
const formSchema = z.object({
 email: z.string({ required_error: 'Please enter your email' }).email('Please enter a valid email address'),
 password: z.string({
  required_error: 'Please enter your password',
 }),
})

// Type inference for form inputs based on the Zod schema
type InputType = z.infer<typeof formSchema>

// Props definition, optionally including a callback URL
interface Props {
 callbackUrl?: string
}

export function SignInForm({ callbackUrl }: Props) {
 const [isLoading, setIsLoading] = useState(false)
 const { toast } = useToast()

 const router = useRouter() // Hook to control routing

 const form = useForm<InputType>({
  resolver: zodResolver(formSchema), // Set up Zod as the form validation resolver
 })

 // Function to handle form submission
 async function onSubmit(values: InputType) {
  try {
   setIsLoading(true)

   // Attempt to sign in using the 'credentials' provider
   const response = await signIn('credentials', {
    redirect: false, // Prevent automatic redirection
    email: values.email,
    password: values.password,
   })

   // Handle unsuccessful sign in attempts
   if (!response?.ok) {
    toast({
     title: 'Something went wrong!',
     description: response?.error,
     variant: 'destructive',
    })
    return
   }

   toast({
    title: 'Welcome back! ',
    description: 'Redirecting you to your dashboard!',
   })
   router.push(callbackUrl ? callbackUrl : '/') // Redirect to the callback URL or home page
  } catch (error) {
   toast({
    title: 'Something went wrong!',
    description: "We couldn't create your account. Please try again later!",
    variant: 'destructive',
   })
  } finally {
   setIsLoading(false)
  }
 }

 return (
  <Form {...form}>
   <form onSubmit={form.handleSubmit(onSubmit)}>
    <div className='grid gap-2'>
     <div className='grid gap-1'>
      <FormField
       control={form.control}
       name='email'
       render={({ field }) => (
        <FormItem>
         <FormControl>
          <div className='flex items-center gap-2'>
           <Icons.email className={`${form.formState.errors.email ? 'text-destructive' : 'text-muted-foreground'} `}/>
           <Input
            type='email'
            placeholder='Your Email'
            className={`${form.formState.errors.email && 'border-destructive bg-destructive/30'}`}
            {...field}
           />
          </div>
         </FormControl>
         <FormMessage />
        </FormItem>
       )}
      />
      {/* Password field */}
      {/* Similar structure to email field, customized for password input */}
     </div>
     <Button
      className='text-foreground mt-4'
      disabled={isLoading} // Disable button while loading
     >
      {isLoading && <Icons.spinner className='mr-2 h-4 w-4 animate-spin' />} // Show loading spinner when processing
      Sign In
     </Button>
    </div>
   </form>
  </Form>
 )
}
我们已经完成了使用NextAuth.js实现基本身份验证。
项目仓库代码
要拥有一个完整的身份验证系统,还有很多事情要做,我们将在接下来的教程中介绍它们。
https://hackernoon.com/how-to-send-email-verification-in-nextjs-14-with-nextauthjs-resend-and-react-email
https://hackernoon.com/enhancing-password-security-and-recovery-with-nextjs-14-and-nextauthjs
项目总结
总之,我们探讨了如何使用NextAuth在Next.js中实现和定制身份验证系统,如何扩展会话和JWT以丰富用户管理,以及如何使用react hook form和Zod通过有效验证来处理表单。


 3851
3851

 被折叠的 条评论
为什么被折叠?
被折叠的 条评论
为什么被折叠?
 到【灌水乐园】发言


