


搭建注解方式的spring环境
1.引入jar包,除了配置文件类型的几个基本jar包,还需要引入一个AOP的jar包
2.创建实体类
3.配置文件,除了之前的约束,还要加上一条关于注解的约束,而且还多了一下一条
xmlns:context="http://www.springframework.org/schema/context"
<?xml version="1.0" encoding="UTF-8"?>
<beans xmlns="http://www.springframework.org/schema/beans"
    xmlns:xsi="http://www.w3.org/2001/XMLSchema-instance"
    xmlns:context="http://www.springframework.org/schema/context" xsi:schemaLocation="
        http://www.springframework.org/schema/beans http://www.springframework.org/schema/beans/spring-beans.xsd
        http://www.springframework.org/schema/context http://www.springframework.org/schema/context/spring-context.xsd">

	<!-- 开起注解扫描,会扫描我们指定包名下所有包里面的类中的注解,包括类名上,方法上,属性上的注解 -->
	<context:component-scan base-package="com.lee.bean"></context:component-scan>
</beans>
package com.lee.bean;

import org.springframework.stereotype.Component;

@Component(value="user") //这里的user对应配置文件中bean标签的id值
@Scope(value="prototype") //配置创建为单实例还是多实例,默认为单实例
public class User {
private String name;
private int age;
public void setName(String name) {
this.name = name;
}
public void setAge(int age) {
this.age = age;
}
public void print(){
System.out.println("name = " + this.name + "----age=" + this.age);
}
}ApplicationContext context = new ClassPathXmlApplicationContext("ApplicationContext2.xml");
User user = (User) context.getBean("user");
user.print();关于属性的注入:
package com.lee.bean;

import org.springframework.beans.factory.annotation.Autowired;
import org.springframework.stereotype.Component;

@Component("lession") //如果是value属性,可以省略,其他不能
public class Lession {

	@Autowired
	private User user;
	public void print(){
		user.print();
		System.out.println("lession===================");
	}
}还有一种写法,@Resource(name="user"),这种必须要指定name属性,name属性必须和User类名上的value属性值一样。
配置文件和注解混合使用,可以通过配置文件创建实例,属性的注入通过注解完成。
关于AOP

在spring中进行AOP操作,使用aspectj实现
使用aspectj实现AOP操作有两种方式:
1.使用XML配置文件完成
2.使用注解方式完成
范例:使用XML配置AOP
1.导入AOP需要的jar包
这里除了spring自带的aop相关的两个jar包,还有两个,不知道为何spring不提供
2.创建实体类,一个需要被增强的类(本类),增强类
Book.jar
package com.lee.bean;

public class Book {
	public void print(){
		System.out.println("book===============");
	}
}
package com.lee.bean;

public class BookAdd {
	public void before(){
		System.out.println("Book中print方法之前===============");
	}
	public void after(){
		System.out.println("Book中print方法之后===============");
	}
}
3.配置文件
ApplicationContext
<?xml version="1.0" encoding="UTF-8"?>
<beans xmlns="http://www.springframework.org/schema/beans"
    xmlns:xsi="http://www.w3.org/2001/XMLSchema-instance"
    xmlns:aop="http://www.springframework.org/schema/aop" xsi:schemaLocation="
        http://www.springframework.org/schema/beans http://www.springframework.org/schema/beans/spring-beans.xsd
        http://www.springframework.org/schema/aop http://www.springframework.org/schema/aop/spring-aop.xsd">

	<!-- 实体类创建配置 -->
	<bean id="book" class="com.lee.bean.Book"></bean>
	<bean id="bookAdd" class="com.lee.bean.BookAdd"></bean>

	<!-- AOP配置 -->
	<aop:config>
		<!-- 配置切入点 -->
		<aop:pointcut expression="execution(* com.lee.bean.Book.*(..))" id="point"/>

		<!-- 配置切面
			ref对应的增强类
		-->
		<aop:aspect ref="bookAdd">
			<!-- 对应的增强方法,对应的切入点 -->
			<aop:before method="before" pointcut-ref="point"/>
		</aop:aspect>

	</aop:config>

</beans>
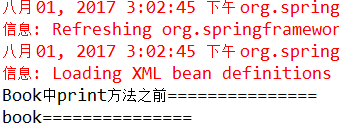
ApplicationContext context = new ClassPathXmlApplicationContext("ApplicationContext3.xml");
Book book = (Book) context.getBean("book");
book.print();
运行结果:
增强方法的几种形式:之前,之后,环绕。。
增强类
package com.lee.bean;
import org.aspectj.lang.ProceedingJoinPoint;
public class BookAdd {
public void before(){
System.out.println("Book中print方法之前===============");
}
public void after(){
System.out.println("Book中print方法之后===============");
}
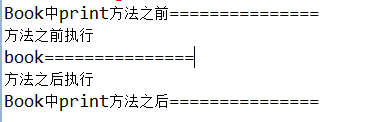
public void round(ProceedingJoinPoint joinPoint) throws Throwable{
//在增强方法前执行
System.out.println("方法之前执行");
//被增强的原方法
joinPoint.proceed();
//在增强方法之后执行
System.out.println("方法之后执行");
}
}
配置:
<!-- AOP配置 -->
	<aop:config>
		<!-- 配置切入点 -->
		<aop:pointcut expression="execution(* com.lee.bean.Book.*(..))" id="point"/>

		<!-- 配置切面
			ref对应的增强类
		-->
		<aop:aspect ref="bookAdd">
			<!-- 对应的增强方法,对应的切入点 -->
			<aop:before method="before" pointcut-ref="point"/>
			<aop:after method="after" pointcut-ref="point"/>
			<aop:around method="round" pointcut-ref="point"/>
		</aop:aspect>

	</aop:config>
除了配置文件的方式,还可以通过注解方式实现AOP操作
配置文件内容:
<?xml version="1.0" encoding="UTF-8"?>
<beans xmlns="http://www.springframework.org/schema/beans"
    xmlns:xsi="http://www.w3.org/2001/XMLSchema-instance"
    xmlns:aop="http://www.springframework.org/schema/aop" xsi:schemaLocation="
        http://www.springframework.org/schema/beans http://www.springframework.org/schema/beans/spring-beans.xsd
        http://www.springframework.org/schema/aop http://www.springframework.org/schema/aop/spring-aop.xsd">

	<!-- 开起AOP -->
	<aop:aspectj-autoproxy></aop:aspectj-autoproxy>

	<!-- 实体类创建配置 -->
	<bean id="book" class="com.lee.bean.Book"></bean>
	<bean id="bookAdd" class="com.lee.bean.BookAdd"></bean>

</beans>
Book.java不变
在BookAdd.java上需要配置AOP相关的注解
package com.lee.bean;

import org.aspectj.lang.ProceedingJoinPoint;
import org.aspectj.lang.annotation.After;
import org.aspectj.lang.annotation.Around;
import org.aspectj.lang.annotation.Aspect;
import org.aspectj.lang.annotation.Before;

@Aspect
public class BookAdd {

	@Before(value="execution(* com.lee.bean.Book.*(..))")
	public void before(){
		System.out.println("Book中print方法之前===============");
	}

	@After(value="execution(* com.lee.bean.Book.*(..))")
	public void after(){
		System.out.println("Book中print方法之后===============");
	}

	@Around(value="execution(* com.lee.bean.Book.*(..))")
	public void round(ProceedingJoinPoint joinPoint) throws Throwable{
		//在增强方法前执行
		System.out.println("方法之前执行");

		//被增强的原方法
		joinPoint.proceed();

		//在增强方法之后执行
		System.out.println("方法之后执行");
	}
}


 210
210

 被折叠的 条评论
为什么被折叠?
被折叠的 条评论
为什么被折叠?
 到【灌水乐园】发言


