


连接pg数据库
PostgreSQL 至少有至少 3 个 Python 接口程序可
以访问 PosgreSQL: psycopg, PyPgSQL 和 PyGreSQL. 第四个, PoPy, 现在已经被废弃(2003年, 它
贡献出自己的代码, 与PygreSQL整合在一起). 这三个接口程序各有长处, 各有缺点, 根据实践结
果选择使用哪个接口是个好主意.
多亏他们都支持 DB-API, 所以他们的接口基本一致, 你只需要写一个应用程序, 然后分别测
试这三个接口的性能(如果性能对你的程序很重要的化). 下面我给出这三个接口的连接代码:
psycopg
>>> import psycopg
>>> cxn = psycopg.connect(user='pgsql')
PyPgSQL
>>> from pyPgSQL import PgSQL
>>> cxn = PgSQL.connect(user='pgsql')
PyGreSQL
>>> import pgdb
>>> cxn = pgdb.connect(user='pgsql')
psycopg2 - Python-PostgreSQL Database Adapter
********************************************
psycopg2 is a PostgreSQL database adapter for the Python programming
language. psycopg2 was written with the aim of being very small and fast,
and stable as a rock.
psycopg2 is different from the other database adapter because it was
designed for heavily multi-threaded applications that create and destroy
lots of cursors and make a conspicuous number of concurrent INSERTs or
UPDATEs. psycopg2 also provide full asycronous operations and support
for coroutine libraries.
基本的连接参数有:
- dbname – 数据库名(仅在DSN中使用有效)
- database – 数据库名(仅在使用命名参数时可用)
- user – 连接数据所用的数据库用户名
- password – 用户的密码
- host – 数据库所在主机名或IP地址(默认为本机)
- port – 端口号(默认为5432 )
1、下载,在WIN下可以直接下载它的安装包
2、启动pg数据库
3、测试代码
#!/usr/bin/env python
import psycopg2
conn= psycopg2.connect("user=adadmin dbname=admanager")
cur = conn.cursor()
cur.execute('SELECT * FROM loginuser')
rows = cur.fetchall()
for i in rows:
    print i
cur.close()
conn.commit()
conn.close()
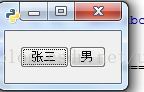
下面代码随意读取某记录的2个字段内容做为按钮的内容
#!/usr/bin/env python
# -*- coding: utf-8 -*-


import pygtk
pygtk.require('2.0')
import gtk
import psycopg2
conn= psycopg2.connect("user=**** dbname=studentscs password=*******")
cur = conn.cursor()
cur.execute('SELECT * FROM students')
rows = cur.fetchall()
for i in rows:
    print i
cur.close()
conn.commit()
conn.close()
class DeepFuture:
    def blogurlshow(self):
        print(i[3])
    def mynameshow(self):
        print(i[4])
    def buttonpress(self,widget, data):
        if data=="blog":
            self.blogurlshow()
        else:
            self.mynameshow()
    def delwin_event(self,widget,event,data=None):
        #如果你在"delete_event"信号处理中,返回FALSE,GTK会继续发射这个信号,以供destroy,否则返回TRUE,表示这个信号已经被处理,不需要再处理了,也不需要再发射这个信号了,这意味着你不能destroy窗口。
        print("delete event!")
        return False
    def destroy_win(self,widget,data=None):
        #窗口销毁处理
        print("destroy event!")
        gtk.main_quit()
    def __init__(self):
        #创建一个新窗口
        self.window = gtk.Window(gtk.WINDOW_TOPLEVEL)
        self.window.set_title("2个按钮的窗口")
        #放入一个不可见的box,然后在里面放2个按钮,并设置回调
        self.buttonbox = gtk.HBox(False, 0)
        self.window.add(self.buttonbox)
        self.blogbutton = gtk.Button(i[3])
        self.namebutton = gtk.Button(i[4])
        self.blogbutton.connect("clicked", self.buttonpress, "blog")
        self.namebutton.connect("clicked", self.buttonpress, "name")
        #加入box
        self.buttonbox.pack_start(self.blogbutton, True, True, 0)
        self.buttonbox.pack_start(self.namebutton, True, True, 0)
        #显示
        self.blogbutton.show()
        self.namebutton.show()
        self.buttonbox.show()
        #指定窗口信号与相关处理事件
        self.window.connect("delete_event", self.delwin_event)
        self.window.connect("destroy", self.destroy_win)
        self.window.set_border_width(15)
        #显示窗口
        self.window.show()
    def main(self):
        gtk.main()
if __name__ == "__main__":
	deep=DeepFuture()
	deep.main()


 492
492


 被折叠的 条评论
为什么被折叠?
被折叠的 条评论
为什么被折叠?
 到【灌水乐园】发言


