


上一篇我们讲解了一下WCF的理论知识,这次我们来讲解一下WCF的具体应用。我们来讲解两种部署WCF的方式。
1. WCF服务如何部署
Ø 利用配置文件进行部署
首先我们新建一个解决方案,之后添加一个类库,把接口和以及相关的契约写在类库里面。删除默认的class1,添加一个接口,命名为Interface。因为供其他程序的调用,故而设为public。
如图:
<span style="font-family:Microsoft YaHei;font-size:14px;"><strong>using System;
using System.Collections.Generic;
using System.Linq;
using System.Text;
using System.Data;
using System.ServiceModel;
namespace ClassLibrary1
{
    [ServiceContract]
    public interface myInterface
    {
        [OperationContract]
        string getServerTime();

        [OperationContract]
        DataTable getData();
    }
}
</strong></span>这样一个服务契约就定好了,接口代表的是一种能力,代表的是一种约定。
添加一个项目来承载和实现WCF服务,这里我们采用winform应用程序。因为前面的接口只是定义了接口,没有实现,这里我们添加一个类,对服务契约中的接口进行实现,这里需要添加两个引用:前面的契约classLibrary1以及WCF的核心库System.ServiceModel.
如图:
实现类代码:<span style="font-family:Microsoft YaHei;font-size:14px;"><strong>using System;
using System.Collections.Generic;
using System.Linq;
using System.Text;
using System.Data;
namespace winServer
{
public class myClass:ClassLibrary1.myInterface
{
public string getServerTime()
{
return DateTime.Now.ToString();
}
public DataTable getData()
{
DataTable dt = new DataTable("books");
DataColumn dc1 = new DataColumn("书号");
DataColumn dc2 = new DataColumn("书名");
DataColumn dc3 = new DataColumn("价格");
dt.Columns.Add(dc1);
dt.Columns.Add(dc2);
dt.Columns.Add(dc3);
DataRow dr = dt.NewRow();
dr["书号"] = "BF1001";
dr["书名"] = "WCF高级进阶";
dr["价格"] = "30";
dt.Rows.Add(dr);
return dt;
}
}
}
</strong></span>添加配置文件app.config
<span style="font-family:Microsoft YaHei;font-size:14px;"><strong><?xml version="1.0" encoding="utf-8" ?>
<configuration>
  <system.serviceModel>
    <!--services是不可以省略的,还有bindingy以及behaviors是可以省略的-->
    <services>
      <service name="winServer.myClass" behaviorConfiguration="testBehavior">
        <!--name是服务名称,就是我们的类型,就是实现契约接口的类型,behaviorConfiguration是行为的配置-->
        <host>
          <!--基地址-->
          <baseAddresses>
            <add baseAddress="http://localhost:8002/test"/>
          </baseAddresses>
        </host>
        <!--端点的配置地址、绑定以及契约,地址是前面的基地址,一样的时候可以不写,不一样的时候写上-->
        <!--绑定协议可以写成tcp或者http,同基地址对应,contact是契约的名称-->
        <endpoint address="" binding="basicHttpBinding" contract="ClassLibrary1.myInterface"></endpoint>
      </service>
    </services>

    <behaviors>
      <serviceBehaviors>
        <!-- behaviorConfiguration="testBehavior",此时的name是同配置行为挂钩的-->
        <behavior name="testBehavior">
          <!--允许获得元数据,也就是WCF元数据的描述也即是xml文件-->
          <serviceMetadata httpGetEnabled="true"/>
        </behavior>
      </serviceBehaviors>
    </behaviors>
  </system.serviceModel>
</configuration></strong></span>
最后我们需要一个winform程序来启动这个程序
<span style="font-family:Microsoft YaHei;font-size:14px;"><strong>using System;
using System.Collections.Generic;
using System.ComponentModel;
using System.Data;
using System.Drawing;
using System.Linq;
using System.Text;
using System.Windows.Forms;
using System.ServiceModel;
namespace winServer
{
    public partial class Form1 : Form
    {
        public Form1()
        {
            InitializeComponent();
        }
        //创建ServiceHost host此对象
        ServiceHost host = null;
        private void button1_Click(object sender, EventArgs e)
        {
            host = new ServiceHost(typeof(winServer.myClass));//承载服务的一个实例,服务有这个类来实现的
            host.Open();
            label1.Text = "服务已启动!";
        }
    }
}
</strong></span>
服务发布到基地址上,我们可以把基地址输入到浏览器地址栏中,可以看到相应的结果
我们可以创建客户端对这个程序进行调用。
调用顺序是添加引用:
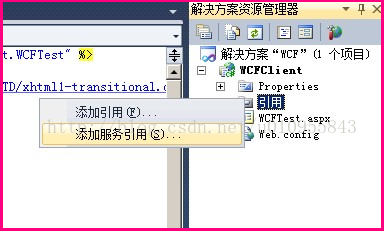
此时弹出添加服务引用的窗体,如下图所示:
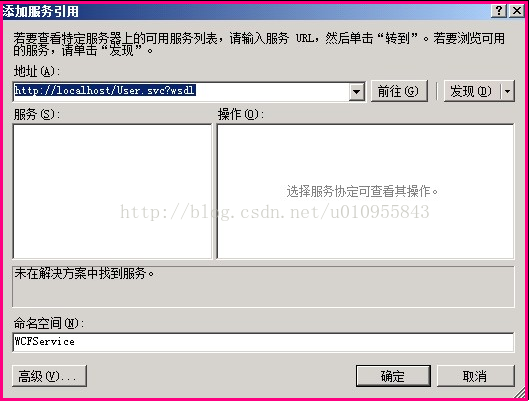
此时在地址中输入我们配置的基地址或者在发现中找寻服务即可,添加进去即可。
Ø 利用代码部署服务
在前一个实例的基础上,创建一个winform窗体,同样添加一个实现契约的具体类,同前者一样,之后在变成窗体程序,在窗体上添加两个按钮,一个是开启,一个停止。
这里不再是通过配置文件来部署WCF服务而是通过代码来实现。
winform程序如图:
<span style="font-family:Microsoft YaHei;font-size:14px;"><strong>using System;
using System.Collections.Generic;
using System.ComponentModel;
using System.Data;
using System.Drawing;
using System.Linq;
using System.Text;
using System.Windows.Forms;
using System.ServiceModel;
namespace winServer2
{
    public partial class Form1 : Form
    {
        public Form1()
        {
            InitializeComponent();
        }
        //此处需要ServiceHost host对这个对象承载这个服务
        ServiceHost host = null;
        //启动
        private void button1_Click(object sender, EventArgs e)
        {
            host = new ServiceHost(typeof(winServer2.myClass));//承载的具体服务(类,实现接口的具体类)

            NetTcpBinding tcpBind = new NetTcpBinding();//创建一种绑定形式
            string address = "net.tcp://localhost:3200/hello"; //自定义一个地址,根据上面的类型决定协议的类型,端口以及路径(随便取的)
            host.AddServiceEndpoint(typeof(ClassLibrary1.myInterface), tcpBind, address);//添加服务的端点,包括三部分契约、绑定和地址
            host.Opened += delegate { label1.Text = "服务已启动!"; };//定义的一个委托
            host.Open();
        }

        //停止
        private void button2_Click(object sender, EventArgs e)
        {
            if (host.State != CommunicationState.Closed)
            {
                host.Close();
                label1.Text = "服务已停止!";
            }
        }
    }
}
</strong></span>
之后我们可以创建客户端程序对这个服务进行调用,我们创建一个winform窗体,名为client,不是像上面的添加引用来实现,而是通过编写纯代码的形式实现,如下图:
<span style="font-family:Microsoft YaHei;font-size:14px;"><strong>using System;
using System.Collections.Generic;
using System.ComponentModel;
using System.Data;
using System.Drawing;
using System.Linq;
using System.Text;
using System.Windows.Forms;

using System.ServiceModel;
namespace client
{
    public partial class Form1 : Form
    {
        public Form1()
        {
            InitializeComponent();
        }

        //getServerTime
        private void button1_Click(object sender, EventArgs e)
        {
            //绑定形式
            NetTcpBinding bind = new NetTcpBinding();//绑定的协议类型,创建绑定形式
            //地址
            EndpointAddress address = new EndpointAddress("net.tcp://localhost:3200/hello");//发布服务的地址
            //通道工厂
            ChannelFactory<ClassLibrary1.myInterface> factory = new ChannelFactory<ClassLibrary1.myInterface>(bind,address);//通道工厂生成的类型

            ClassLibrary1.myInterface myobject = factory.CreateChannel();//通过这个工厂可以创建通道,也即是获得这个对象,对象的类型是interface
            string time = myobject.getServerTime();//也就是可以获得相应的方法和实现
            MessageBox.Show(time);
        }

        private void button2_Click(object sender, EventArgs e)
        {
            //绑定形式
            NetTcpBinding bind = new NetTcpBinding();
            //地址
            EndpointAddress address = new EndpointAddress("net.tcp://localhost:3200/hello");
            //通道工厂
            ChannelFactory<ClassLibrary1.myInterface> factory = new ChannelFactory<ClassLibrary1.myInterface>(bind, address);

            ClassLibrary1.myInterface myobject = factory.CreateChannel();
            dataGridView1.DataSource = myobject.getData();

        }
    }
}
</strong></span>
2. 总结
上面这两种方式都是WCF的宿主都是winform窗体,其他的形式大家可以自己去尝试。


 197
197


 被折叠的 条评论
为什么被折叠?
被折叠的 条评论
为什么被折叠?
 到【灌水乐园】发言


