xgboost入门与实战(实战调参篇)
前言
前面几篇博文都在学习原理知识,是时候上数据上模型跑一跑了。本文用的数据来自kaggle,相信搞机器学习的同学们都知道它,kaggle上有几个老题目一直开放,适合给新手练级,上面还有很多老司机的方案共享以及讨论,非常方便新手入门。这次用的数据是Classify handwritten digits using the famous MNIST data—手写数字识别,每个样本相当于一个图片像素矩阵(28x28),每个像元就是一个特征啦。用这个数据的好处就是不用做特征工程了,对于上手模型很方便。
xgboost安装看这里:http://blog.csdn.net/sb19931201/article/details/52236020
拓展一下:XGBoost Plotting API以及GBDT组合特征实践
数据集
1.数据介绍:数据采用的是广泛应用于机器学习社区的MNIST数据集:

The data for this competition were taken from the MNIST dataset. The MNIST (“Modified National Institute of Standards and Technology”) dataset is a classic within the Machine Learning community that has been extensively studied. More detail about the dataset, including Machine Learning algorithms that have been tried on it and their levels of success, can be found at http://yann.lecun.com/exdb/mnist/index.html.
2.训练数据集(共42000个样本):如下图所示,第一列是label标签,后面共28x28=784个像素特征,特征取值范围为0-255。


3.测试数据集(共28000条记录):就是我们要预测的数据集了,没有标签值,通过train.csv训练出合适的模型,然后根据test.csv的特征数据集来预测这28000的类别(0-9的数字标签)。

4.结果数据样例:两列,一列为ID,一列为预测标签值。

xgboost模型调参、训练(python)
1.导入相关库,读取数据
import numpy as np
import pandas as pd
import xgboost as xgb
from sklearn.cross_validation import train_test_split
import time
start_time = time.time()
train = pd.read_csv("Digit_Recognizer/train.csv")
tests = pd.read_csv("Digit_Recognizer/test.csv")
2.划分数据集
train_xy,val = train_test_split(train, test_size = 0.3,random_state=1)
y = train_xy.label
X = train_xy.drop(['label'],axis=1)
val_y = val.label
val_X = val.drop(['label'],axis=1)
xgb_val = xgb.DMatrix(val_X,label=val_y)
xgb_train = xgb.DMatrix(X, label=y)
xgb_test = xgb.DMatrix(tests)
3.xgboost模型
params={
'booster':'gbtree',
'objective': 'multi:softmax',
'num_class':10,
'gamma':0.1,
'max_depth':12,
'lambda':2,
'subsample':0.7,
'colsample_bytree':0.7,
'min_child_weight':3,
'silent':0 ,
'eta': 0.007,
'seed':1000,
'nthread':7,
}
plst = list(params.items())
num_rounds = 5000
watchlist = [(xgb_train, 'train'),(xgb_val, 'val')]
model = xgb.train(plst, xgb_train, num_rounds, watchlist,early_stopping_rounds=100)
model.save_model('./model/xgb.model')
print "best best_ntree_limit",model.best_ntree_limit
- 1
- 2
- 3
- 4
- 5
- 6
- 7
- 8
- 9
- 10
- 11
- 12
- 13
- 14
- 15
- 16
- 17
- 18
- 19
- 20
- 21
- 22
- 23
- 24
- 25
- 26
- 27
- 28
- 1
- 2
- 3
- 4
- 5
- 6
- 7
- 8
- 9
- 10
- 11
- 12
- 13
- 14
- 15
- 16
- 17
- 18
- 19
- 20
- 21
- 22
- 23
- 24
- 25
- 26
- 27
- 28
4.预测并保存
preds = model.predict(xgb_test,ntree_limit=model.best_ntree_limit)
np.savetxt('xgb_submission.csv',np.c_[range(1,len(tests)+1),preds],delimiter=',',header='ImageId,Label',comments='',fmt='%d')
cost_time = time.time()-start_time
print "xgboost success!",'\n',"cost time:",cost_time,"(s)......"
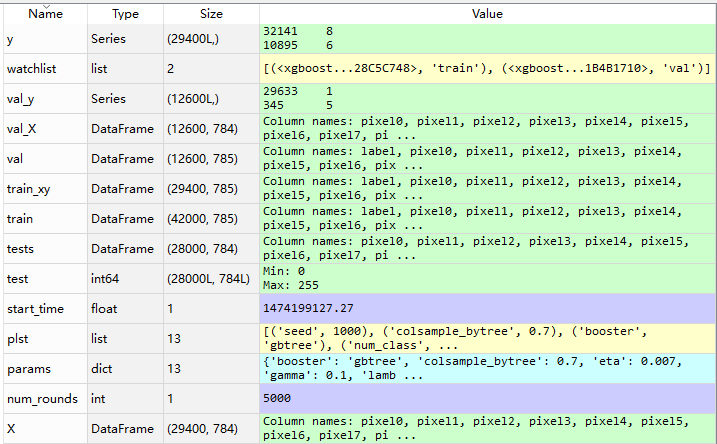
5.变量信息
预测结果评价
将预测得到的xgb_submission.csv文件上传到kaggle,看系统评分。
由于迭代次数和树的深度设置的都比较大,程序还在训练中,等这次跑完在将这两个参数调整小一些,看看运行时间已经预测精度的变化。
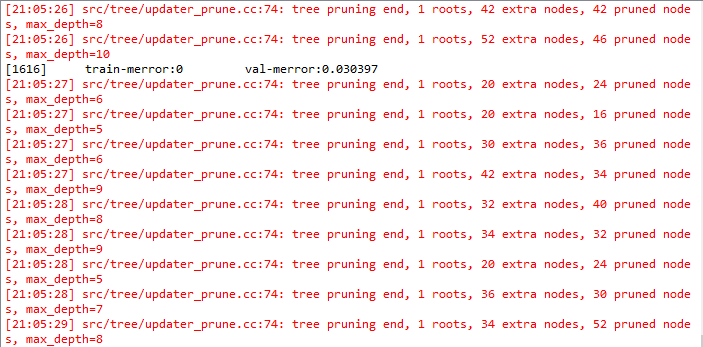
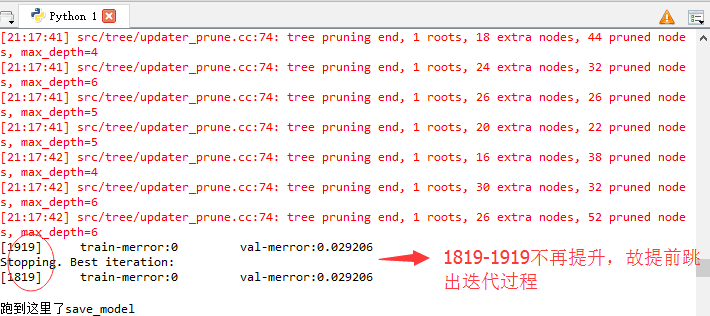
此处先留个坑。。。不同版本的运行结果我会陆续贴出来。
版本:1 运行时长:中间程序报错了一下,大概是2500s
参数:
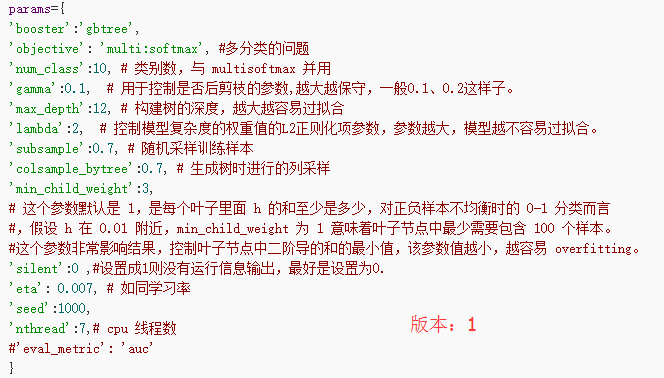
成绩:

版本:2 运行时长:2275s
参数:
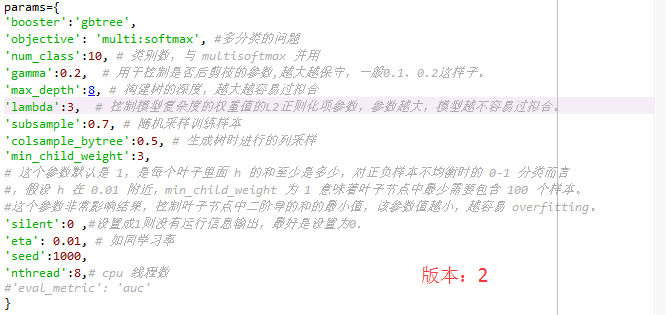
成绩:

.
.
.
结
果
图
片
.
.
.
附:完整代码
"""
Created on 2016/09/17
By 我曾经被山河大海跨过
"""
import numpy as np
import pandas as pd
import xgboost as xgb
from sklearn.cross_validation import train_test_split
import time
start_time = time.time()
train = pd.read_csv("Digit_Recognizer/train.csv")
tests = pd.read_csv("Digit_Recognizer/test.csv")
params={
'booster':'gbtree',
'objective': 'multi:softmax',
'num_class':10,
'gamma':0.1,
'max_depth':12,
'lambda':2,
'subsample':0.7,
'colsample_bytree':0.7,
'min_child_weight':3,
'silent':0 ,
'eta': 0.007,
'seed':1000,
'nthread':7,
}
plst = list(params.items())
num_rounds = 5000
train_xy,val = train_test_split(train, test_size = 0.3,random_state=1)
y = train_xy.label
X = train_xy.drop(['label'],axis=1)
val_y = val.label
val_X = val.drop(['label'],axis=1)
xgb_val = xgb.DMatrix(val_X,label=val_y)
xgb_train = xgb.DMatrix(X, label=y)
xgb_test = xgb.DMatrix(tests)
watchlist = [(xgb_train, 'train'),(xgb_val, 'val')]
model = xgb.train(plst, xgb_train, num_rounds, watchlist,early_stopping_rounds=100)
model.save_model('./model/xgb.model')
print "best best_ntree_limit",model.best_ntree_limit
print "跑到这里了model.predict"
preds = model.predict(xgb_test,ntree_limit=model.best_ntree_limit)
np.savetxt('xgb_submission.csv',np.c_[range(1,len(tests)+1),preds],delimiter=',',header='ImageId,Label',comments='',fmt='%d')
cost_time = time.time()-start_time
print "xgboost success!",'\n',"cost time:",cost_time,"(s)"


 6万+
6万+

 被折叠的 条评论
为什么被折叠?


