在 动手打造史上最简单的 Recycleview 侧滑菜单 中,萌生了将这种方案封装为一个开源库的想法,旨在实现调用方式最简单,且又不失可定制性。本库最大的特点的是采用了 Glide 简洁明了的链式调用方式,一句代码即可添加侧滑菜单、头部底部等。
特性:
1.自定义侧滑菜单布局
2.添加头部、底部
3.轻松实现加载更多
4.设置 item 间距
5.多种 item 类型
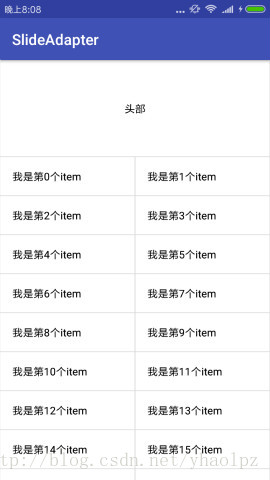
6.支持 LinearLayout 及 GridLayout
7.一句代码实现所有功能
效果:
左侧滑菜单、右侧滑菜单、自定义菜单布局:

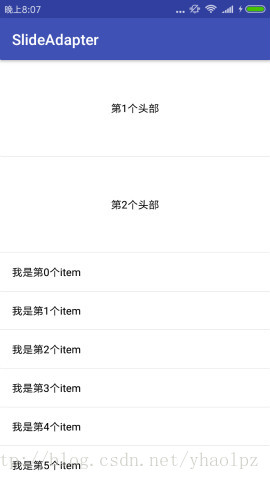
头部、多头部:

底部、多底部、加载更多:

集成:
第 1 步、在工程的 build.gradle 中添加:
    allprojects {
        repositories {
            ...
            maven { url 'https://jitpack.io' }
        }
    }
第 2 步、在应用的 build.gradle 中添加:
    dependencies {
            compile 'com.github.yhaolpz:SlideAdapter:1.0.0'
    }
使用:
下面通过简单案例演示如何在程序中使用 SlideAdapter,假设 item.xml 为:
<?xml version="1.0" encoding="utf-8"?>
<LinearLayout xmlns:android="http://schemas.android.com/apk/res/android"
              android:layout_width="match_parent"
              android:layout_height="wrap_content"
              android:orientation="vertical"
              android:background="#fff"
    >

    <TextView
        android:id="@+id/textView"
        android:layout_width="wrap_content"
        android:layout_height="wrap_content"
        android:padding="16dp"
        android:textColor="#000"
        android:textSize="14sp"
        />

</LinearLayout>
- 1
- 2
- 3
- 4
- 5
- 6
- 7
- 8
- 9
- 10
- 11
- 12
- 13
- 14
- 15
- 16
- 17
- 18
数据类为:
public class Bean {
private String info;
public Bean(String info) {
this.info = info;
}
}
数据为:
 final List<Bean> data = new ArrayList<>();
 for (int i = 0; i < 30; i++) {
     data.add(new Bean("我是第" + i + "个item"));
 }
1.基本写法 :
SlideAdapter.load(data)
.item(R.layout.item)
.into(recyclerView);
2.数据绑定及事件监听:
SlideAdapter.load(data)
.item(R.layout.item)
.bind(itemBind)
.into(recyclerView);
在 itemBind 中进行数据绑定及控件的事件监听,相当于 Adapter 中的 onBindViewHolder ,实现 ItemBind 时需传入数据类型:
ItemBind itemBind = new ItemBind<Bean>() {
@Override
public void onBind(ItemView itemView, Bean data, int position) {
itemView.setText(R.id.textView, data.getInfo())
.setOnClickListener(new View.OnClickListener() {
@Override
public void onClick(View view) {
}
})
.setOnClickListener(R.id.textView, new View.OnClickListener() {
@Override
public void onClick(View view) {
}
});
}
};
- 1
- 2
- 3
- 4
- 5
- 6
- 7
- 8
- 9
- 10
- 11
- 12
- 13
- 14
- 15
- 16
- 17
- 18
3.添加 item 间距:
SlideAdapter.load(data)
.item(R.layout.item)
.padding(2)
.bind(itemBind)
.into(recyclerView);
4.添加侧滑菜单:
SlideAdapter.load(data)
.item(R.layout.item,0,0,R.layout.menu,0.35f)
.padding(2)
.bind(itemBind)
.into(recyclerView);
SlideAdapter.load(data)
.item(R.layout.item,R.layout.menu,0.4f,0,0)
.padding(2)
.bind(itemBind)
.into(recyclerView);
SlideAdapter.load(data)
.item(R.layout.item,R.layout.menu,0.4f,R.layout.menu,0.35)
.padding(2)
.bind(itemBind)
.into(recyclerView);
上面调用的 item 方法为 :
item (int itemLayoutId,
      int leftMenuLayoutId, float leftMenuRatio,
      int rightMenuLayoutId, float rightMenuRatio)
不添加哪一侧,就把对应参数传入 0 即可。
5.侧滑菜单的数据绑定及事件监听:
菜单布局为 itemView 的一部分,所以对侧滑菜单的数据绑定及事件监听直接在 ItemBind 中进行即可。
比如侧滑菜单布局 menu.xml 为下:
<?xml version="1.0" encoding="utf-8"?>
<LinearLayout xmlns:android="http://schemas.android.com/apk/res/android"
              android:layout_width="match_parent"
              android:layout_height="match_parent"
              android:background="#e61313"
              android:gravity="center">
        <ImageView
            android:id="@+id/rightMenu_Like"
            android:layout_width="30dp"
            android:layout_height="30dp"
            android:src="@drawable/like"/>
</LinearLayout>
对 rightMenu_Like 控件设置点击事件监听,就像对 item 中的普通控件设置一样:
ItemBind itemBind = new ItemBind<Bean>() {
@Override
public void onBind(ItemView itemView, Bean data, int position) {
itemView.setOnClickListener(R.id.rightMenu_Like, new View.OnClickListener() {
@Override
public void onClick(View view) {
}
});
}
};
6.多种 item 布局:
SlideAdapter.load(data)
.item(R.layout.item,0,0,R.layout.menu,0.35)
.item(R.layout.item)
.type(new ItemType<Bean>() {
@Override
public int getItemOrder(Bean data, int position) {
return position % 2 == 0 ? 1 : 2;
}
})
.padding(2)
.bind(itemBind)
.into(recyclerView);
7.添加头部:
SlideAdapter.load(data)
.item(R.layout.item)
.header(R.layout.head,0.1f)
.padding(2)
.bind(itemBind)
.into(recyclerView);
SlideAdapter.load(data)
.item(R.layout.item)
.header(R.layout.head)
.header(R.layout.head2,0.1f)
.padding(2)
.bind(itemBind)
.into(recyclerView);
8.头部的数据绑定及事件监听:
假设头部布局 head.xml 为下:
<?xml version="1.0" encoding="utf-8"?>
<LinearLayout xmlns:android="http://schemas.android.com/apk/res/android"
              android:layout_width="match_parent"
              android:layout_height="match_parent"
              android:background="#fff"
              android:gravity="center"
    >

    <TextView
        android:layout_gravity="center"
        android:id="@+id/headText"
        android:layout_width="match_parent"
        android:layout_height="wrap_content"
        android:text="头部"
        android:textColor="#000"
        android:gravity="center"
        />

</LinearLayout>
- 1
- 2
- 3
- 4
- 5
- 6
- 7
- 8
- 9
- 10
- 11
- 12
- 13
- 14
- 15
- 16
- 17
- 18
- 19
对头部的数据绑定及事件监听在 HeaderBind 中实现:
SlideAdapter.load(data)
.item(R.layout.item)
.header(R.layout.head,0.2f)
.header(R.layout.head2)
.bind(new HeaderBind() {
@Override
public void onBind(ItemView header, int order) {
if (order == 1) {
header.setText(R.id.headText, "我是第一个头部");
}
...
}
})
.padding(2)
.bind(itemBind)
.into(recyclerView);
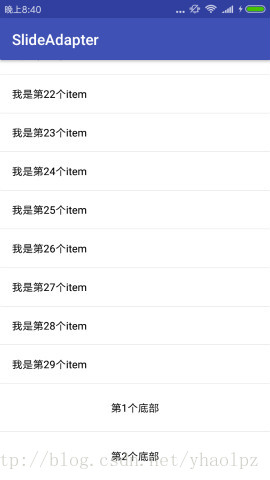
9.添加底部:
SlideAdapter.load(data)
.item(R.layout.item)
.footer(R.layout.foot,0.1f)
.padding(2)
.bind(itemBind)
.into(recyclerView);
SlideAdapter.load(data)
.item(R.layout.item)
.footer(R.layout.foot) //添加第1个底部
.footer(R.layout.foot,0.1f) //添加第2个底部
.padding(2)
.bind(itemBind)
.into(recyclerView)
10.底部的数据绑定及事件监听:
假设底部布局 foot.xml 为下:
<?xml version="1.0" encoding="utf-8"?>
<LinearLayout xmlns:android="http://schemas.android.com/apk/res/android"
              android:layout_width="match_parent"
              android:layout_height="match_parent"
              android:background="#fff"
              android:gravity="center"
    >

    <TextView
        android:layout_gravity="center"
        android:id="@+id/footerText"
        android:layout_width="match_parent"
        android:layout_height="wrap_content"
        android:text="底部"
        android:textColor="#000"
        android:gravity="center"
        />

</LinearLayout>
- 1
- 2
- 3
- 4
- 5
- 6
- 7
- 8
- 9
- 10
- 11
- 12
- 13
- 14
- 15
- 16
- 17
- 18
- 19
对头部的数据绑定及事件监听在 FooterBind 中实现:
SlideAdapter.load(data)
.item(R.layout.item)
.footer(R.layout.foot)
.footer(R.layout.foot,0.1f)
.bind(new FooterBind() {
@Override
public void onBind(ItemView footer, int order) {
if (order == 2) {
footer.setText(R.id.footerText, "我是第2个底部");
}
...
}
})
.padding(2)
.bind(itemBind)
.into(recyclerView);
11.加载更多:
SlideAdapter.load(data)
            .item(R.layout.item)
            .footer(R.layout.foot,0.1f)
            .padding(2)
            .bind(itemBind)
            .listen(new BottomListener() {
                    @Override
                    public void onBottom(final ItemView footer, final SlideAdapter slideAdapter) {
                       footer.setText(R.id.footerText, "正在加载,请稍后...");
                       List data2 = getMoreData();
                       slideAdapter.loadMore(data2);
                       footer.setText(R.id.footerText, "加载完成");
                    }
             })
            .into(recyclerView);
onBottom 方法中的 footer 为最后一个底部,若未添加底部,则 footer 为空。其中 SlideAdapter 的 loadMore() 方法专门用来加载更多数据,需在主线程中调用。
实现原理
1.如何实现链式调用
虽然这部分并不难,但毕竟是 SlideAdapter 异于其他库的一大特点,简单截介绍一下,直接看代码:
public class SlideAdapter extends RecyclerView.Adapter<ItemView> {
private static Builder mBuilder = null;
public static class Builder {
List data;
int itemPadding;
Builder load(List data) {
this.data = data;
return this;
}
public Builder padding(int itemPadding) {
this.itemPadding = itemPadding;
return this;
}
public SlideAdapter into(RecyclerView recyclerView) {
SlideAdapter adapter = new SlideAdapter(mBuilder, recyclerView);
mBuilder = null;
return adapter;
}
}
public static Builder load(List data) {
return getBuilder().load(data);
}
private static Builder getBuilder() {
if (mBuilder == null) {
mBuilder = new Builder();
}
return mBuilder;
}
}
- 1
- 2
- 3
- 4
- 5
- 6
- 7
- 8
- 9
- 10
- 11
- 12
- 13
- 14
- 15
- 16
- 17
- 18
- 19
- 20
- 21
- 22
- 23
- 24
- 25
- 26
- 27
- 28
- 29
- 30
- 31
- 32
- 33
SlideAdapter 中以 Builder load(List data) 方法为入口,然后进入 Builder 内部链式调用一系列方法,将配置属性暂时记录在 Builder 中,最后通过 SlideAdapter into(RecyclerView recyclerView) 方法将一系列配置属性传入到 SlideAdapter 的构造函数中使其配置生效。
2.如何实现侧滑菜单
本库基于一种非常简单的侧滑菜单实现方案:
在 item 布局外部添加一层可以滑动的 HorizontalScrollView ,菜单布局也置于其中
也就是说,本库要做的工作是: 自动在 item 布局外部添加一层可以滑动的 HorizontalScrollView 容器。我们要考虑的问题有两个:1.什么时候添加? 2.怎么添加?首先来看第一个问题,答案很简单,当然是在 onCreateViewHolder 中新建 item 布局时添加;怎么添加呢?可以提前写一个布局文件,准备好这层可以滑动的容器,比如:
<?xml version="1.0" encoding="utf-8"?>
<com.wyh.slideAdapter.SlideLayout
    xmlns:android="http://schemas.android.com/apk/res/android"
    android:id="@+id/slideLayout"
    android:layout_width="wrap_content"
    android:layout_height="wrap_content">
    <LinearLayout
        android:id="@+id/linearLayout"
        android:layout_width="wrap_content"
        android:layout_height="wrap_content"
        android:orientation="horizontal"
        />
</com.wyh.slideAdapter.SlideLayout>
其中 SlideLayout 继承自 HorizontalScrollView ,就是这层可以滑动的容器,我们只要把 item 布局塞到 LinearLayout 内部就可以了,怎么塞呢?很简单:
View itemView = LayoutInflater.from(context).inflate(R.layout.layout, parent, false);
LinearLayout linearLayout = itemView.findViewById(R.id.linearLayout);
View content = LayoutInflater.from(context).inflate(itemLayoutId, linearLayout, false);
linearLayout.addView(content);
这样就成功的把 item 外层裹上可以滑动的 SlideLayout 了,如果要添加侧滑菜单,同理,像 item 布局一样把菜单布局也塞进去就行了,本库是这样实现的:
if (slideItem.leftMenuLayoutId != 0) {
leftMenu = LayoutInflater.from(context).inflate(slideItem.leftMenuLayoutId, linearLayout, false);
linearLayout.addView(leftMenu);
}
content = LayoutInflater.from(context).inflate(slideItem.itemLayoutId, linearLayout, false);
linearLayout.addView(content);
if (slideItem.rightMenuLayoutId != 0) {
rightMenu = LayoutInflater.from(context).inflate(slideItem.rightMenuLayoutId, linearLayout, false);
linearLayout.addView(rightMenu);
}
linearLayout 的 addView 方法是按添加顺序从左到右排列的,所以可以这样实现。其中有一个问题很明显,当没添加侧滑菜单时,仍然给 item 外层添加了 SlideLayout,这的确属于一个漏洞。
最后再说一下 SlideLayout 的实现,其实十分简单,主要就是控制它的滑动,比如当滑开一半多菜单时松手的话,调用其 smoothScrollTo 方法完全打开。还有就是控制菜单打开的唯一性,我自创的方案与主流的 QQ、微信都不同,感兴趣的可以阅读源码。
3.如何初始化侧滑菜单
侧滑菜单的初始化包括两部分,一是根据传入的 float 类型数据,初始化侧滑菜单占屏幕宽度的比例,二是初始化侧滑菜单的滑动位置,比如有左侧侧滑菜单时,需要滑动到刚好隐藏掉左侧侧滑菜单的位置。
初始化时机于 onBindViewHolder 中,关键代码如下:
   final SlideItem item = mSlideItems.get(getItemViewType(position) - 1);
   View rightMenu = holder.getRightMenu();
   if (rightMenu != null) {
       LinearLayout.LayoutParams rightMenuParams = (LinearLayout.LayoutParams) rightMenu.getLayoutParams();
       rightMenuParams.width = (int) (ScreenSize.w(holder.itemView.getContext()) * item.rightMenuRatio);
       rightMenu.setLayoutParams(rightMenuParams);
       ((SlideLayout) holder.getView(R.id.yhaolpz_slideLayout)).setRightMenuWidth(rightMenuParams.width);
   }
   View leftMenu = holder.getLeftMenu();
   if (leftMenu != null) {
       LinearLayout.LayoutParams leftMenuParams = (LinearLayout.LayoutParams) leftMenu.getLayoutParams();
       leftMenuParams.width = (int) (ScreenSize.w(holder.itemView.getContext()) * item.leftMenuRatio);
       leftMenu.setLayoutParams(leftMenuParams);
       holder.getView(R.id.yhaolpz_slideLayout).scrollTo(leftMenuParams.width, 0);
       ((SlideLayout) holder.getView(R.id.yhaolpz_slideLayout)).setLeftMenuWidth(leftMenuParams.width);
   }
首先看代码的第 1 行,mSlideItems 中存放了所有类型的 item 的相关数据,包括 item 的 layoutId 、菜单的 layoutId 及其宽度比例。获取到此 postion 对应的 item 类型信息后,再根据宽度比例设置菜单的宽度即可。
怎么初始化 SlideLayout 的滑动位置呢?可以看到程序将侧滑菜单的宽度记录在 SlideLayout 中,有了侧滑菜单的具体宽度,就很容易初始化 SlideLayout 的滑动位置了,如下:
    @Override
    protected void onLayout(boolean changed, int l, int t, int r, int b) {
        super.onLayout(changed, l, t, r, b);
        scrollTo(mLeftMenuWidth, 0);
    }
总结
这是我的第一个开源库,功力尚浅,如果你在使用过程中遇到了什么问题,随时可以向我反馈,我会第一时间回复并改正。如果你想在此库的基础上添加自己的功能,欢迎 fork、欢迎 star 。
源码:https://github.com/yhaolpz/SlideAdapter


 572
572


 被折叠的 条评论
为什么被折叠?
被折叠的 条评论
为什么被折叠?
 到【灌水乐园】发言


