


上篇博客中谈到spring中如何整合普通形式的hibernate,这次我们来总结下如何整合注解形式的hibernate。
我们知道在普通hibernate中,表与实体的映射关系是写在映射关系文件当中的,一个实体类对应一个映射关系配置文件。而在注解形式中是没有这个映射关系文件的,关系直接在实体类中通过注解的方式展现,所以写法上略有些不同。
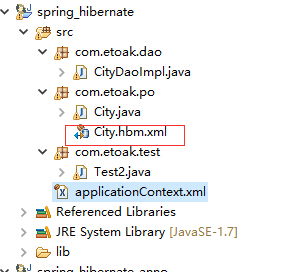
下面我们通过一个例子来看看他们的区别。还是使用上篇博客的例子,先去掉这个hibernate反向生成的City.hbm.xml文件。
Dao层里面是不需要修改的,实现方法都一样。
改一下City.java 和配置文件applicationContext.xml即可
传送门:
spring整合hibernate->
工厂bean不理解的点这里->
applicationContext.xml:
两种方式的区别就是sessionFactory的配置上不同。在配置SessionFactory接口对象时,spring框架内部并没有提供SessionFactory实现类,所以我们采用工厂bean的方式来配置。spring提供工厂实现类对SessionFactory进行实例化。整合普通方式采用LocalSessionFactoryBean,整合注解方式采用AnnotationSessionFactoryBean。
所以上一篇的配置文件修改如下:
<beans xmlns="http://www.springframework.org/schema/beans"
     xmlns:xsi="http://www.w3.org/2001/XMLSchema-instance"
     xsi:schemaLocation="http://www.springframework.org/schema/beans
     http://www.springframework.org/schema/beans/spring-beans-3.2.xsd">
         <!--
            StuDaoImpl hibernateTemplate配置成ioc容器
          -->
    <bean id="dao" class="com.etoak.dao.CityDaoImpl">
        <property name="ht" ref="ht"></property>
    </bean>


    <bean id="ht" class="org.springframework.orm.hibernate3.HibernateTemplate">
        <property name="sessionFactory" ref="sf"></property>
    </bean>

    <!--
        hibernate注解形式(不存在映射文件):
            使用AnnotationSessionFactoryBean工厂bean进行配置
                1 配置数据源 setDataSource
                2 配置映射实体bean  两种方法:
                    a setAnnotatedClasses(Claesses[] class) 指向映射实体bean列表
                      每在工程中添加一个实体bean对象,需要在list中添加一个value指向
                    b setPackagesToScan(String package)
                     扫描实体bean所在的包结构,在包下查找所有的映射
                3 配置可选参数
     -->

    <bean name="sf" class="org.springframework.orm.hibernate3.annotation.AnnotationSessionFactoryBean">
        <property name="dataSource" ref="ds"></property>
        <!--
        第一种方法映射实体bean
        <property name="annotatedClasses">
            <list>
                <value>com.etoak.po.City</value>
            </list>
        </property> -->
        <!-- 第二种方法映射实体bean -->
        <property name="packagesToScan" value="com.etoak.po"></property><!-- 如果有多个包有映射实体,都在value中写,用逗号隔开 -->
        <property name="hibernateProperties">
            <props>
                <prop key="hibernate.show_sql">true</prop>
            </props>
        </property>
    </bean>

      <bean id="ds" class="org.springframework.jdbc.datasource.DriverManagerDataSource">
        <property name="driverClassName" value="com.mysql.jdbc.Driver"></property>
        <property name="url" value="jdbc:mysql://localhost:3306/yitu"></property>
        <property name="username" value="root"></property>
        <property name="password" value="root"></property>
      </bean>

</beans>
City.java实体类添加注解:
package com.etoak.po;

import javax.persistence.Column;
import javax.persistence.Entity;
import javax.persistence.GeneratedValue;
import javax.persistence.GenerationType;
import javax.persistence.Id;
import javax.persistence.Table;

@Entity
@Table(name="city",catalog="yitu")
public class City implements java.io.Serializable {

    @Id
    @GeneratedValue(strategy=GenerationType.IDENTITY)  //自增长策略
    private Integer id;
    @Column(name="pid")
    private Integer pid;
    @Column(name="name")
    private String name;

    // Constructors

    /** default constructor */
    public City() {
    }

    /** full constructor */
    public City(Integer pid, String name) {
        this.pid = pid;
        this.name = name;
    }
    public Integer getId() {
        return this.id;
    }

    public void setId(Integer id) {
        this.id = id;
    }

    public Integer getPid() {
        return this.pid;
    }

    public void setPid(Integer pid) {
        this.pid = pid;
    }

    public String getName() {
        return this.name;
    }

    public void setName(String name) {
        this.name = name;
    }

}


 2591
2591


 被折叠的 条评论
为什么被折叠?
被折叠的 条评论
为什么被折叠?
 到【灌水乐园】发言


