


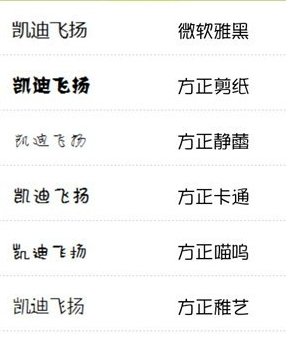
现在手机上字体美化软件越来越多,各种怪状各种风格的字体都有,
作为Android开发人员,应用中有时会需要强制使用某种字体(这样做会增大应用的内存消耗,而且字体包越大消耗内存越大),所以我们就需要尽量的减少内存消耗,同时使用我们自定义的字体
设置自定义字体的方法
在xml中,可以看到一个属性
android:typeface="sans"不过在xml中只能设置为 none,sans,serif,monospace 中的一种
在java代码中,可以找到TextView的一个方法
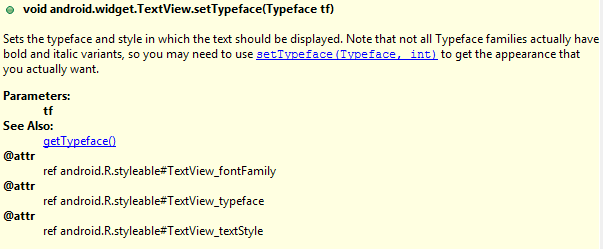
我们通过textview.setTypeface(typeface);即可实现自定义字体,typeface对象我们可以Typeface类的createFromAsset静态方法创建(这里是不是就是前面所学的工厂模式呢),
总之,实现起来跟简单.
textview = (TextView) findViewById(R.id.textview);
Typeface typeface1 =  Typeface.createFromAsset(getAssets(), "fzltxh_gbk.ttf");
textview.setTypeface(typeface1);
但是不能每次都这样重新获取TextView再重新设置字体吧,这样太麻烦,而且消耗性能,所以我们就可以自定义TextView,然后重写onDraw
public class CoustomFontTextView extends TextView {
    public CoustomFontTextView(Context context) {
     this(context, null);
    }

    public CoustomFontTextView(Context context, AttributeSet attrs) {
     this(context, attrs, 0);
    }

    public CoustomFontTextView(Context context, AttributeSet attrs, int defStyle) {
     super(context, attrs, defStyle);

     this.setTypeface(Typeface.createFromAsset(getResources().getAssets(), "fzltxh_gbk.ttf"));
    }
 }
布局文件
<LinearLayout xmlns:android="http://schemas.android.com/apk/res/android"
    xmlns:tools="http://schemas.android.com/tools"
    android:layout_width="match_parent"
    android:layout_height="match_parent"
    android:orientation="vertical"
    android:padding="8dp" >

    <com.zyh.testcustomfont.CustomFontTextView
        android:id="@+id/textview1"
        android:layout_width="wrap_content"
        android:layout_height="wrap_content"
        android:layout_margin="4dp"
        android:lineSpacingMultiplier="1.1"
        android:text="@string/content"
        android:textColor="@android:color/black"
        android:textSize="16sp" />

    <com.zyh.testcustomfont.CustomFontTextView
        android:id="@+id/textview2"
        android:layout_width="wrap_content"
        android:layout_height="wrap_content"
        android:layout_margin="4dp"
        android:lineSpacingMultiplier="1.1"
        android:text="@string/content"
        android:textColor="@android:color/black"
        android:textSize="16sp" />

    <com.zyh.testcustomfont.CustomFontTextView
        android:id="@+id/textview3"
        android:layout_width="wrap_content"
        android:layout_height="wrap_content"
        android:layout_margin="4dp"
        android:lineSpacingMultiplier="1.1"
        android:text="@string/content"
        android:textColor="@android:color/black"
        android:textSize="16sp" />

</LinearLayout>
然后运行起来,一看占内存情况,惊呆了,使用了3个我们自定义的TextView,
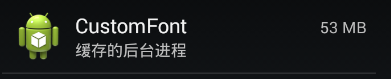
这里主要的原因就是我们每次使用该控件就调用了Typeface.createFromAsset(getResources().getAssets(), “fzltxh_gbk.ttf”),产生typeface对象十分耗内存,这里我们可以把typeface设计成单例模式,
public class FontManager {

    private static Typeface typeface = null;

    public static Typeface getTypeface(Context context) {
        if (typeface == null) {
            typeface = Typeface.createFromAsset(context.getAssets(), "fzltxh_gbk.ttf");
        }
        return typeface;
    }
}
这样可以减少内存消耗,
使用字体包较小的字体文件也能大大减少内存消耗
下面介绍一个开源库Calligraphy,很方便的进行字体更换,
github地址: Calligraphy
使用:
1.引用库,在assets/fonts/ 下放入需要的字体
2.在你的应用的Application类中的onCreate方法中初始化
@Override
    public void onCreate() {
        super.onCreate();
        CalligraphyConfig.initDefault(new CalligraphyConfig.Builder()
                        .setDefaultFontPath("fonts/Roboto-ThinItalic.ttf")
                        .setFontAttrId(R.attr.fontPath)
                        .build()
        );
    }
3.在你的Activity中重写 attachBaseContext方法
@Override
    protected void attachBaseContext(Context newBase) {
        super.attachBaseContext(CalligraphyContextWrapper.wrap(newBase));
    }
运行起来会看到应用中实现了自定义字体,快试试吧


 2118
2118

 被折叠的 条评论
为什么被折叠?
被折叠的 条评论
为什么被折叠?
 到【灌水乐园】发言


