


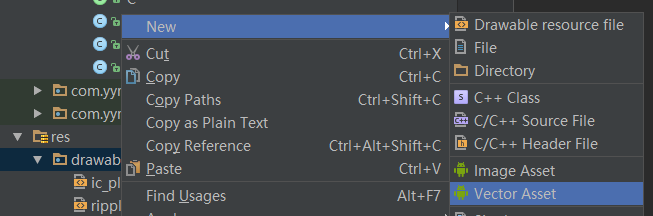
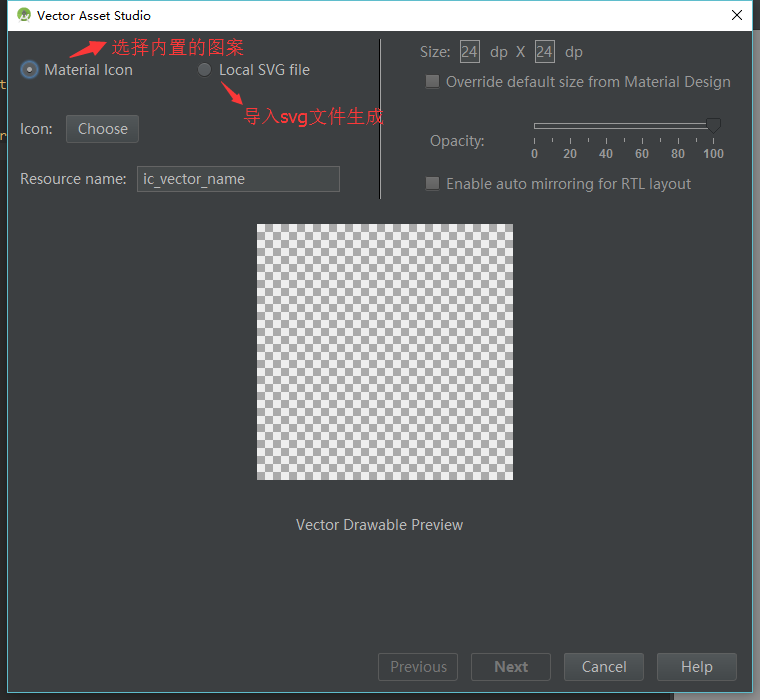
制作VectorDrawable(文件目录:res/drawable)
和普通图片一样使用
<vector xmlns:android="http://schemas.android.com/apk/res/android"
        android:width="24dp"
        android:height="24dp"
        android:viewportWidth="24.0"
        android:viewportHeight="24.0">
    <path
        android:fillColor="#ffff0000"
        android:pathData="M8,5v14l11,-7z"/>
</vector>
Animated Vector Drawable
4个步骤
1.定义矢量资源,在res/drawable
<vector xmlns:android="http://schemas.android.com/apk/res/android"
        android:width="24dp"
        android:height="24dp"
        android:viewportWidth="24.0"
        android:viewportHeight="24.0">
    <path
        android:name="play"
        android:fillColor="#FF000000"
        android:pathData="M15.41,16.09l-4.58,-4.59 4.58,-4.59L14,5.5l-6,6 6,6z"/>
</vector>
2.定义动画文件,在res/animtor
<?xml version="1.0" encoding="utf-8"?>
<set xmlns:android="http://schemas.android.com/apk/res/android">
    <objectAnimator android:duration="200"
                    android:propertyName="pathData"
                    android:valueFrom="M15.41,16.09l-4.58,-4.59 4.58,-4.59L14,5.5l-6,6 6,6z"
                    android:valueTo="M8.59,16.34l4.58,-4.59 -4.58,-4.59L10,5.75l6,6 -6,6z"
                    android:valueType="pathType" />
</set>
3.绑定矢量资源和动画的关系,在res/animtor
<?xml version="1.0" encoding="utf-8"?>
<animated-vector xmlns:android="http://schemas.android.com/apk/res/android"
                 android:drawable="@drawable/ic_keyboard_arrow_left_black_24dp">
    <target
        android:animation="@animator/anim_play_stop"
        android:name="play"/>
</animated-vector>
4.开始动画
<ImageButton
        android:id="@+id/imgBtn"
        android:layout_width="wrap_content"
        android:layout_height="wrap_content"
        android:src="@drawable/animated_vector_menu_back"/>
ImageButton imageButton = (ImageButton) findViewById(R.id.imgBtn);
imageButton.setOnClickListener(new View.OnClickListener() {
@Override
public void onClick(View view) {
Drawable drawable = mImageButton.getDrawable();
if (drawable instanceof Animatable){
((Animatable)drawable).start();
}
}
});


 被折叠的 条评论
为什么被折叠?
被折叠的 条评论
为什么被折叠?
 到【灌水乐园】发言


