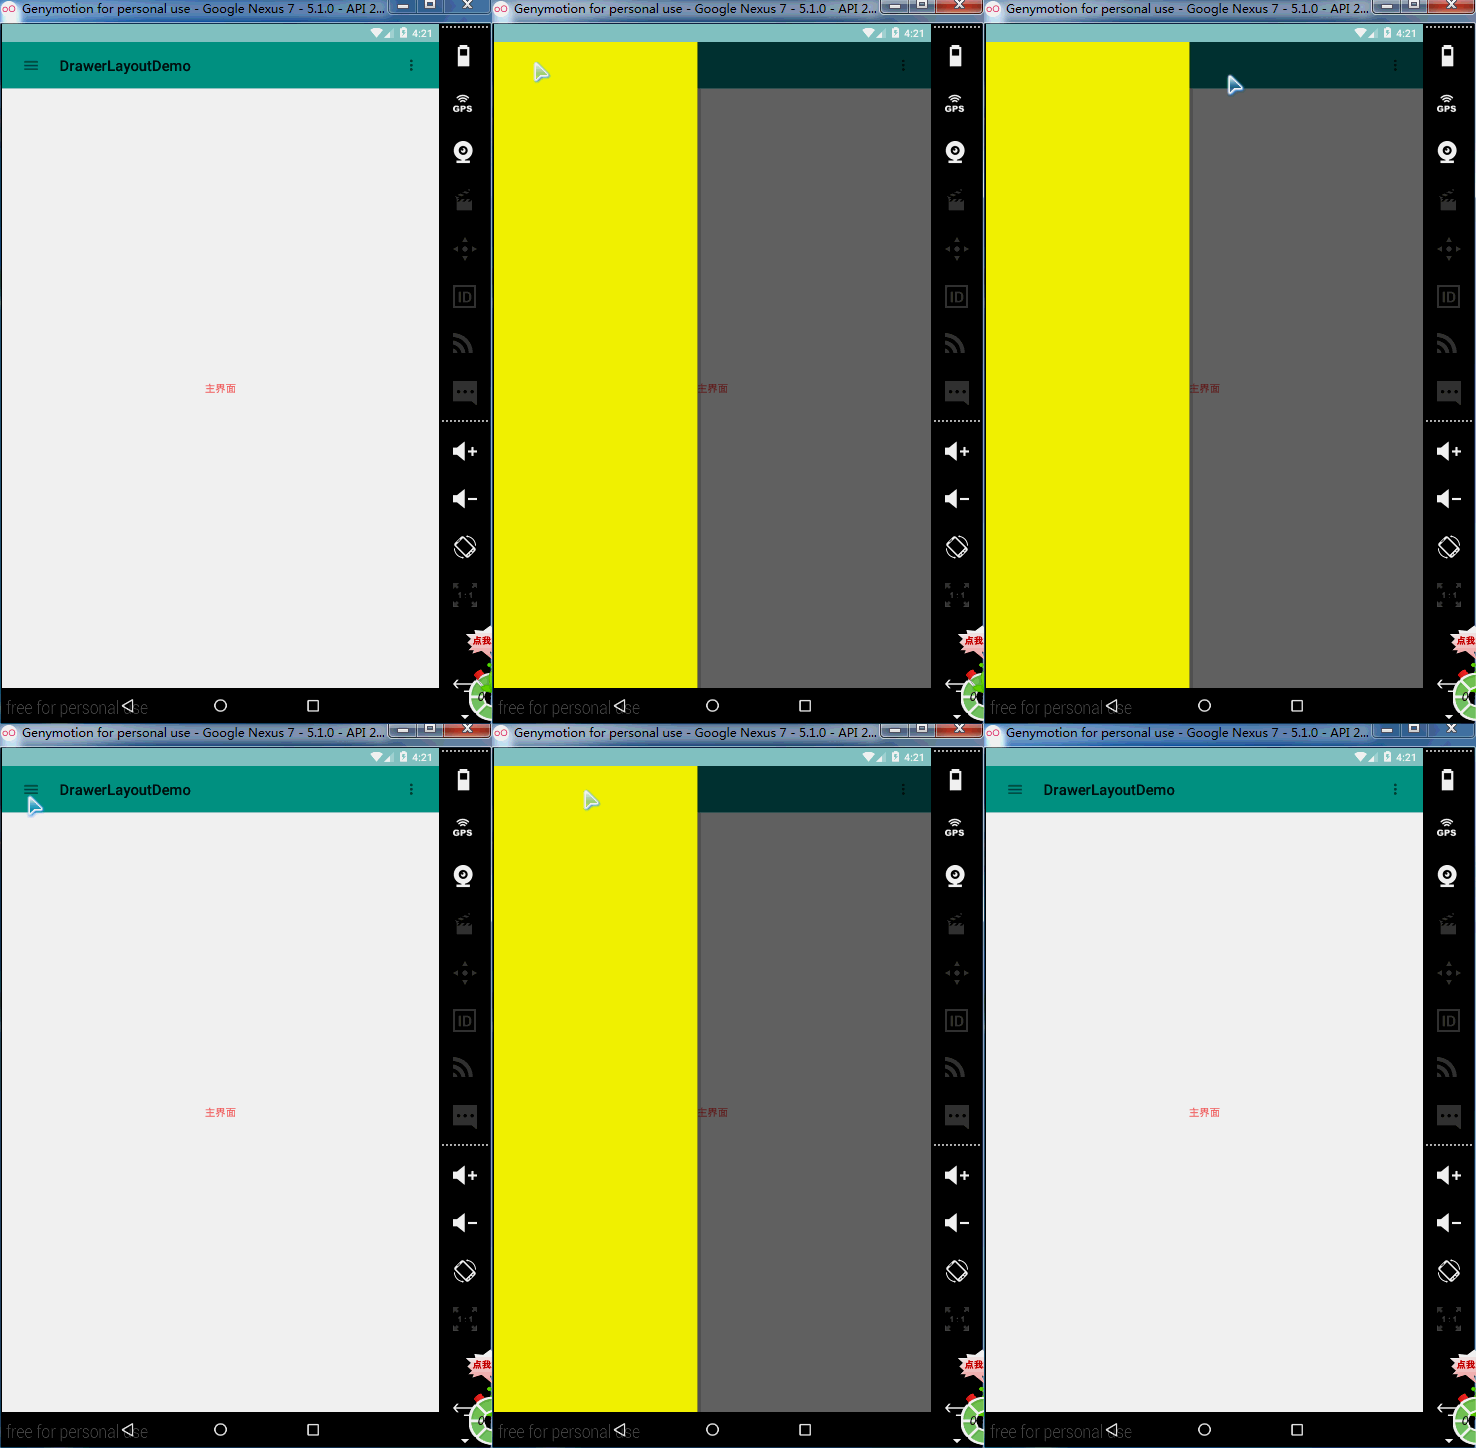
DrawerLayout控件的出现代替了繁琐的自定义view或者使用开源项目那么繁琐。
接下来介绍一下DrawerLayout的简单应用吧
layout布局
<android.support.v4.widget.DrawerLayout
    android:id="@+id/drawerlayout"
    xmlns:android="http://schemas.android.com/apk/res/android"
    xmlns:tools="http://schemas.android.com/tools"
    android:layout_width="match_parent"
    android:layout_height="match_parent"
    tools:context=".MainActivity">

    <RelativeLayout
        android:layout_width="match_parent"
        android:layout_height="match_parent">
        <android.support.v7.widget.Toolbar
            android:id="@+id/toolbar"
            android:layout_width="match_parent"
            android:layout_height="wrap_content"
            android:minHeight="?attr/actionBarSize"
            android:background="?attr/colorPrimary"/>
        <TextView
            android:background="#F2F2F2"
            android:layout_below="@id/toolbar"
            android:layout_width="match_parent"
            android:gravity="center"
            android:textColor="#FF6666"
            android:layout_height="match_parent"
            android:text="@string/hello_world"/>
    </RelativeLayout>
    <LinearLayout
        android:layout_width="280dp"
        android:layout_height="match_parent"
        android:orientation="vertical"
        android:gravity="center_vertical"
        android:background="#ff0"
        android:layout_gravity="start">

    </LinearLayout>
</android.support.v4.widget.DrawerLayout>
设置主题
    <!-- Base application theme. -->
    <style name="AppBaseTheme" parent="Theme.AppCompat.Light.NoActionBar">
        <!-- Customize your theme here. -->
    </style>
    <style name="AppTheme" parent="AppBaseTheme">

        <!-- All customizations that are NOT specific to a particular API-level can go here. -->
        <!-- 整个app的主色调 -->
        <item name="colorPrimary">@color/accent_material_light</item>
        <!-- 整个app的第二色调(比主色调深点的颜色:按钮按下去的效果) -->
        <item name="colorPrimaryDark">@color/accent_material_dark</item>
        <!-- 整体的背景颜色 -->
        <item name="android:windowBackground">@color/dim_foreground_material_dark</item>
        <!--         <item name="android:windowBackground">@android:color/transparent</item> -->
    </style>
MainActivity代码
public class MainActivity extends AppCompatActivity {

    @Override
    protected void onCreate(Bundle savedInstanceState) {
        super.onCreate(savedInstanceState);
        setContentView(R.layout.activity_main);
        DrawerLayout drawerLayout = (DrawerLayout) findViewById(R.id.drawerlayout);
        Toolbar toolbar = (Toolbar) findViewById(R.id.toolbar);
        //将actionbar干掉,替换成toolbar
        setSupportActionBar(toolbar);
        //官方提供的可旋转导航菜单控件
        ActionBarDrawerToggle actionBarDrawerToggle = new ActionBarDrawerToggle(this, drawerLayout, toolbar, R.string.drawer_open, R.string.drawer_close);
        //同步状态(刷新界面)
        actionBarDrawerToggle.syncState();
        //给drawerlayout设置监听,我们使用ActionBarDrawerToggle自带的监听,里面就会监听侧滑的事件,同时处理滑动时旋转效果
        drawerLayout.addDrawerListener(actionBarDrawerToggle);

    }

}
大家看一下效果吧
是不是很简单。
下面修改一下布局,这个布局加载将会是很多人能够使用上的
<LinearLayout
    xmlns:android="http://schemas.android.com/apk/res/android"
    xmlns:tools="http://schemas.android.com/tools"
    android:layout_width="match_parent"
    android:layout_height="match_parent"
    tools:context=".MainActivity"
    android:orientation="vertical">

    <android.support.v7.widget.Toolbar
        android:id="@+id/toolbar"
        android:layout_width="match_parent"
        android:layout_height="wrap_content"
        android:background="?attr/colorPrimary"
        android:gravity="center"
        android:minHeight="?attr/actionBarSize"/>

    <android.support.v4.widget.DrawerLayout
        android:id="@+id/drawerlayout"
        android:layout_width="match_parent"
        android:layout_height="match_parent">

        <RelativeLayout
            android:layout_width="match_parent"
            android:layout_height="match_parent">

            <TextView
                android:layout_width="match_parent"
                android:layout_height="match_parent"
                android:gravity="center"
                android:text="@string/hello_world"/>
        </RelativeLayout>

        <LinearLayout
        android:layout_width="200dp"
        android:layout_height="match_parent"
        android:layout_gravity="start"
        android:background="#ff6666"/>


    </android.support.v4.widget.DrawerLayout>
</LinearLayout>
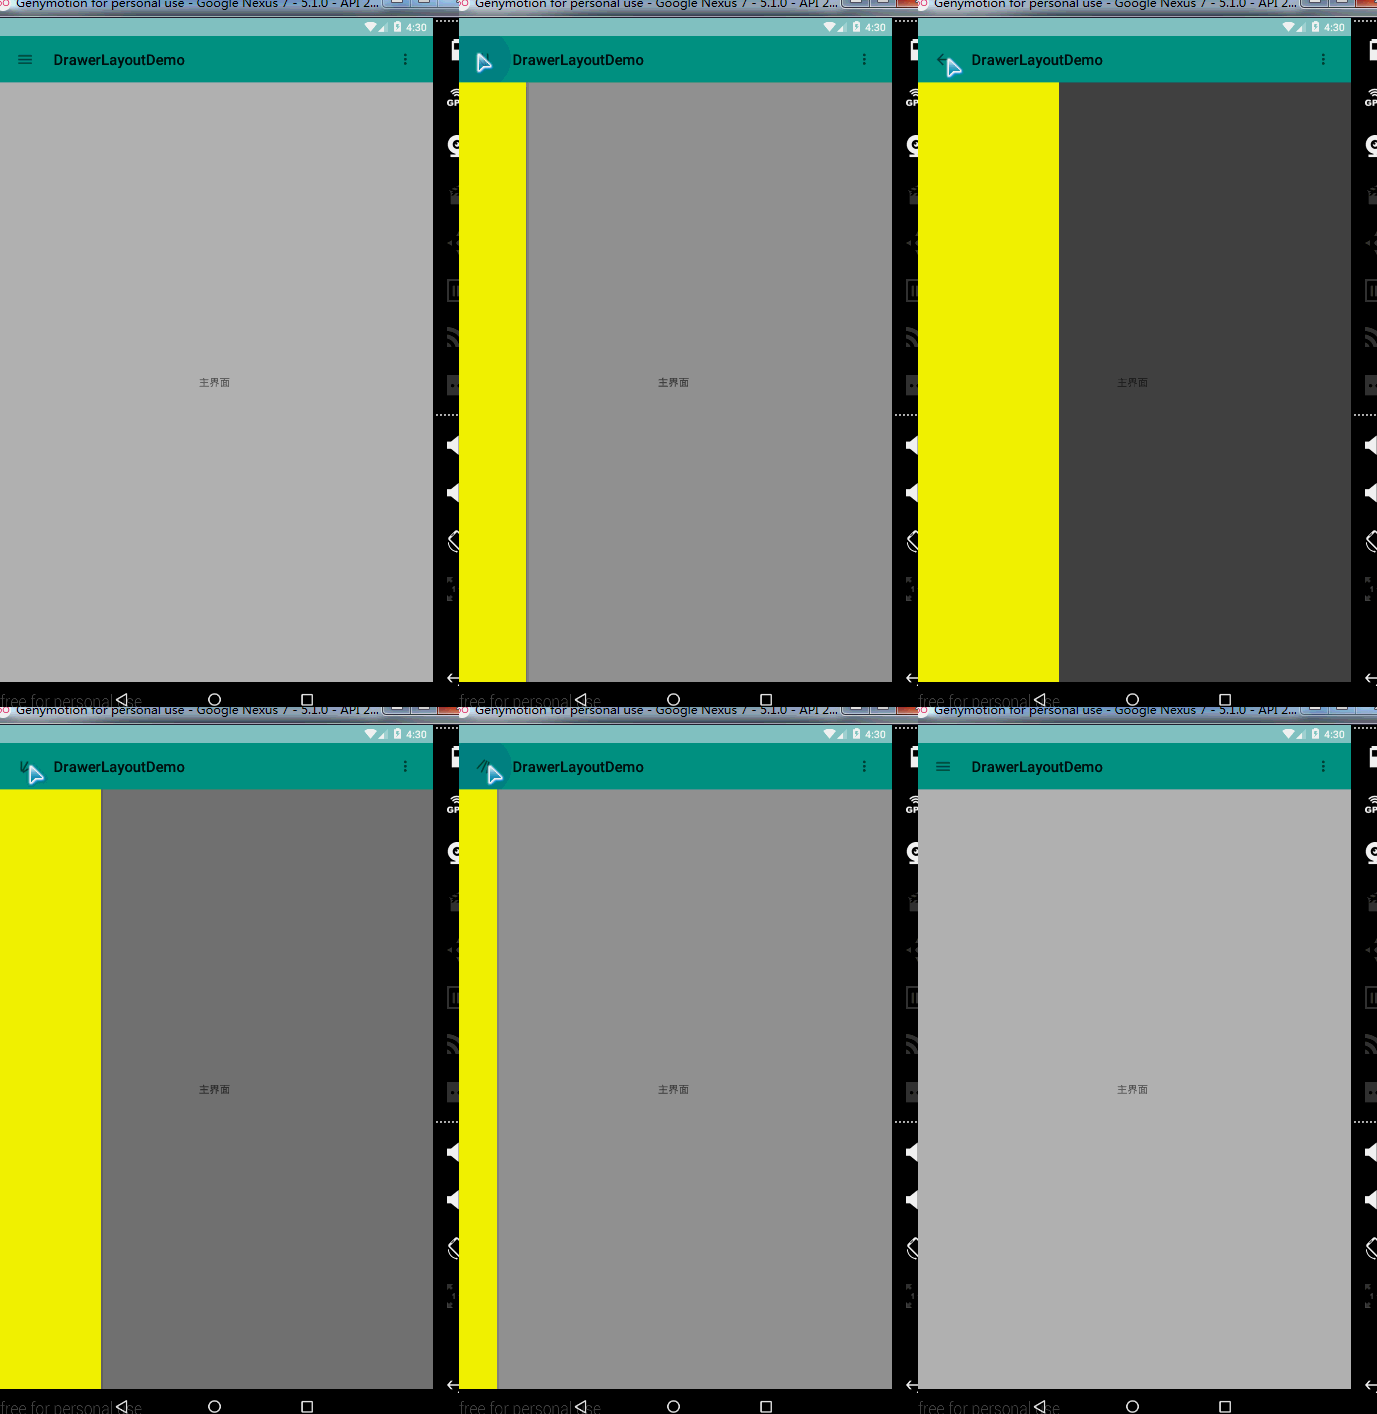
再次看一下效果
OK。这只是简单应用,希望能对大家有所帮助


 376
376

 被折叠的 条评论
为什么被折叠?


