


完成第一部分后,您应该有一个非常基本的书签应用程序。在本章中,我们将添加身份验证,并将每个用户可以查看/修改的书签限制为只有他们自己的书签。
一、添加登录
在CakePHP中,认证由组件处理。 组件可以被认为是创建与特定特征或概念相关的控制器代码的可重用块的方法。 组件也可以挂钩到控制器的事件生命周期中,并以这种方式与您的应用程序交互。 为了开始,我们将AuthComponent添加到我们的应用程序。 我们几乎希望每个方法都需要身份验证,因此我们将在AppController中添加AuthComponent:
// In src/Controller/AppController.php
namespace App\Controller;

use Cake\Controller\Controller;

class AppController extends Controller
{
    public function initialize()
    {
        $this->loadComponent('Flash');
        $this->loadComponent('Auth', [
            'authenticate' => [
                'Form' => [
                    'fields' => [
                        'username' => 'email',
                        'password' => 'password'
                    ]
                ]
            ],
            'loginAction' => [
                'controller' => 'Users',
                'action' => 'login'
            ],
            'unauthorizedRedirect' => $this->referer() // If unauthorized, return them to page they were just on
        ]);

        // Allow the display action so our pages controller
        // continues to work.
        $this->Auth->allow(['display']);
    }
}
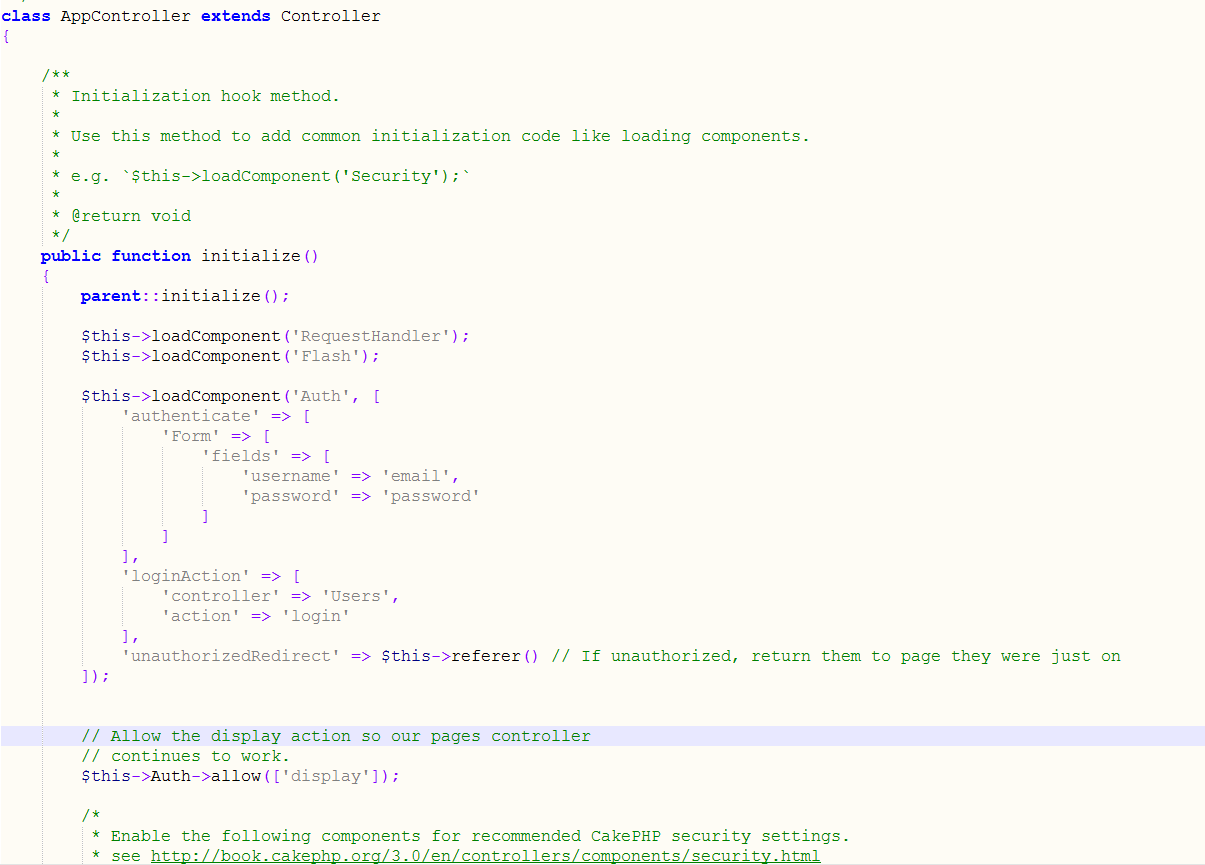
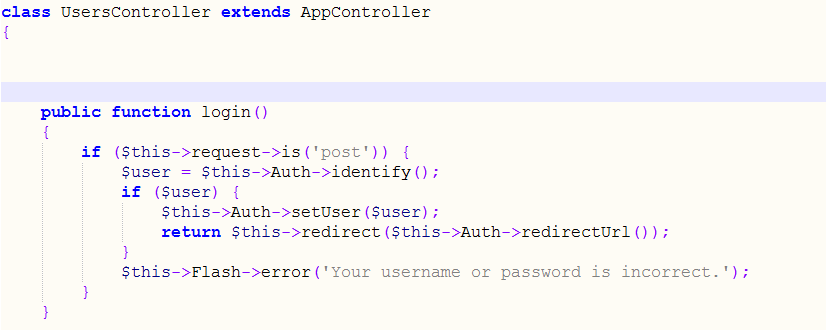
Flash和Auth组件。 此外,我们已经定制了AuthComponent的配置,因为我们的users表使用email作为用户名。 现在,如果你去任何URL,你会被踢到/users/login ,这将显示一个错误页面,因为我们还没有编写该代码。 所以,让我们创建登录操作src/Controller/UsersController.php:
// In src/Controller/UsersController.php
public function login()
{
    if ($this->request->is('post')) {
        $user = $this->Auth->identify();
        if ($user) {
            $this->Auth->setUser($user);
            return $this->redirect($this->Auth->redirectUrl());
        }
        $this->Flash->error('Your username or password is incorrect.');
    }
}
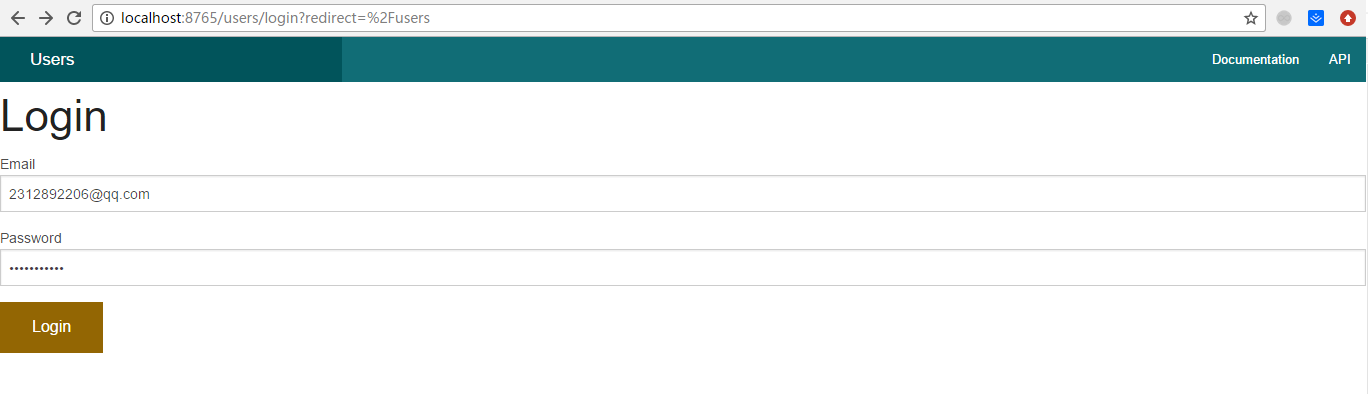
并在src/Template/Users/login.ctp中添加以下内容:
<h1>Login</h1>
<?= $this->Form->create() ?>
<?= $this->Form->input('email') ?>
<?= $this->Form->input('password') ?>
<?= $this->Form->button('Login') ?>
<?= $this->Form->end() ?>

▲ 注意: 如果没有用户拥有哈希密码,请注释loadComponent('Auth')行。 然后转到并编辑用户,为他们保存一个新密码。
您现在应该能够登录。如果没有,请确保您使用的用户具有哈希密码。
二、添加注销
现在人们可以登录,你可能想要提供一种注销方式。 再次,在UsersController ,添加以下代码:
public function initialize()
{
    parent::initialize();
    $this->Auth->allow(['logout']);
}

public function logout()
{
    $this->Flash->success('You are now logged out.');
    return $this->redirect($this->Auth->logout());
}
此代码将
logout操作作为公共操作列入白名单,并实现注销方法。 现在可以访问/users/logout 。 然后您应该被发送到登录页面。
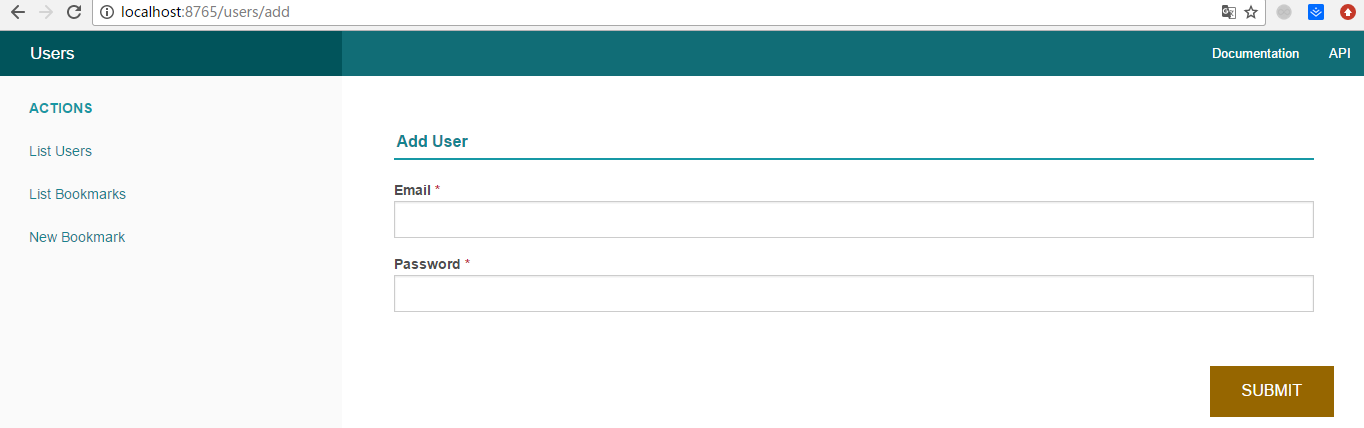
三、启用注册
如果您没有登录,并且您尝试访问/ users / add,您将被踢到登录页面。 我们应该解决这个问题,因为我们希望允许人们注册我们的应用程序。 在UsersController添加以下内容:
public function initialize()
{
    parent::initialize();
    // Add logout to the allowed actions list.
    $this->Auth->allow(['logout', 'add']);
}
上面告诉AuthComponent , add()动作不需要认证或授权。 您可能想花时间清理Users / add.ctp并删除误导的链接,或继续下一部分。 我们不会在本教程中构建用户编辑,查看或列出,因此它们不会工作,因为AuthComponent将拒绝您访问这些控制器操作。
四、限制书签访问
现在用户可以登录,我们将限制他们可以看到的书签,他们所做的。 我们将使用“授权”适配器。 由于我们的要求很简单,我们可以在我们的BookmarksController中写一些简单的代码。 但在我们这样做之前,我们要告诉AuthComponent我们的应用程序将如何授权操作。 在AppController添加以下内容:
public function isAuthorized($user)
{
    return false;
}
另外,将以下内容添加到AppController中的
Auth中:
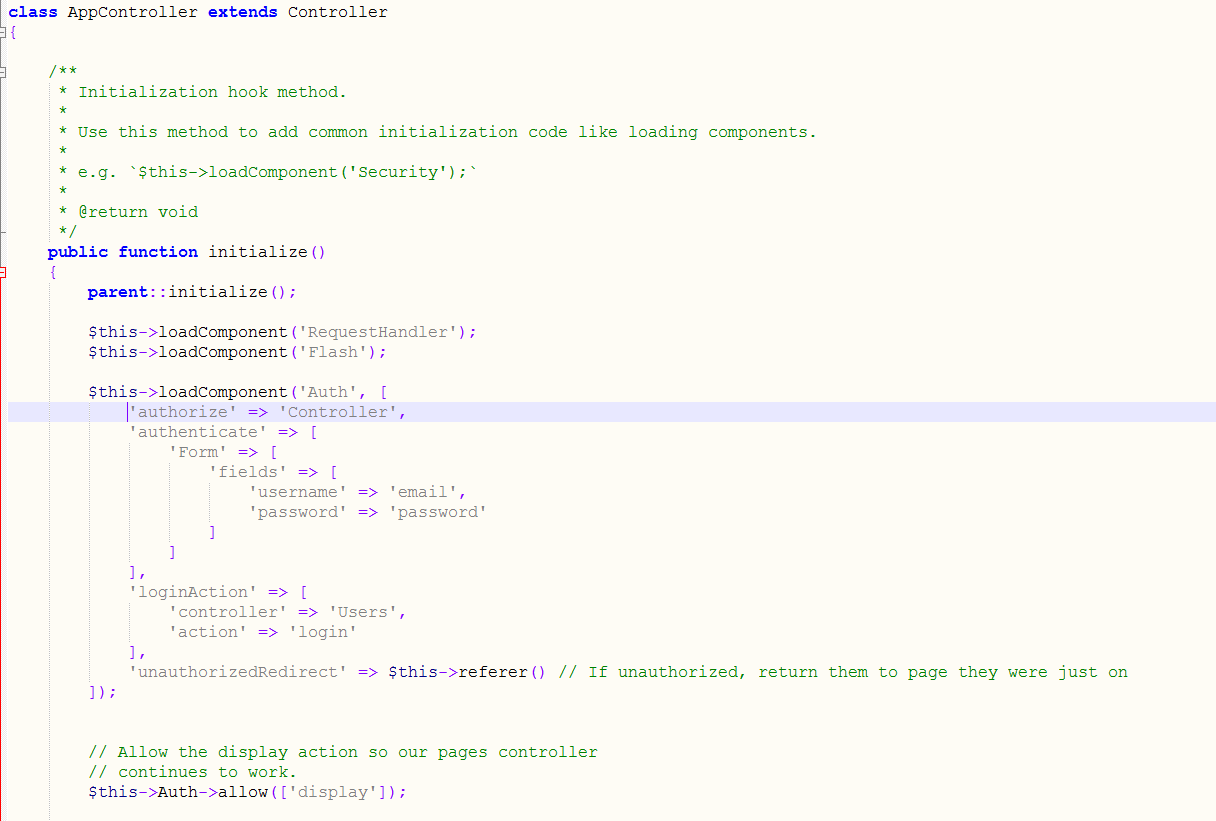
'authorize' => 'Controller',您的
initialize()方法现在应该是:
public function initialize()
{
    $this->loadComponent('Flash');
    $this->loadComponent('Auth', [
        'authorize'=> 'Controller',//added this line
        'authenticate' => [
            'Form' => [
                'fields' => [
                    'username' => 'email',
                    'password' => 'password'
                ]
            ]
        ],
        'loginAction' => [
            'controller' => 'Users',
            'action' => 'login'
        ],
        'unauthorizedRedirect' => $this->referer()
    ]);

    // Allow the display action so our pages controller
    // continues to work.
    $this->Auth->allow(['display']);
}
BookmarksController添加以下内容:
public function isAuthorized($user)
{
    $action = $this->request->getParam('action');

    // The add and index actions are always allowed.
    if (in_array($action, ['index', 'add', 'tags'])) {
        return true;
    }
    // All other actions require an id.
    if (!$this->request->getParam('pass.0')) {
        return false;
    }

    // Check that the bookmark belongs to the current user.
    $id = $this->request->getParam('pass.0');
    $bookmark = $this->Bookmarks->get($id);
    if ($bookmark->user_id == $user['id']) {
        return true;
    }
    return parent::isAuthorized($user);
}

// In src/Template/Layout/default.ctp
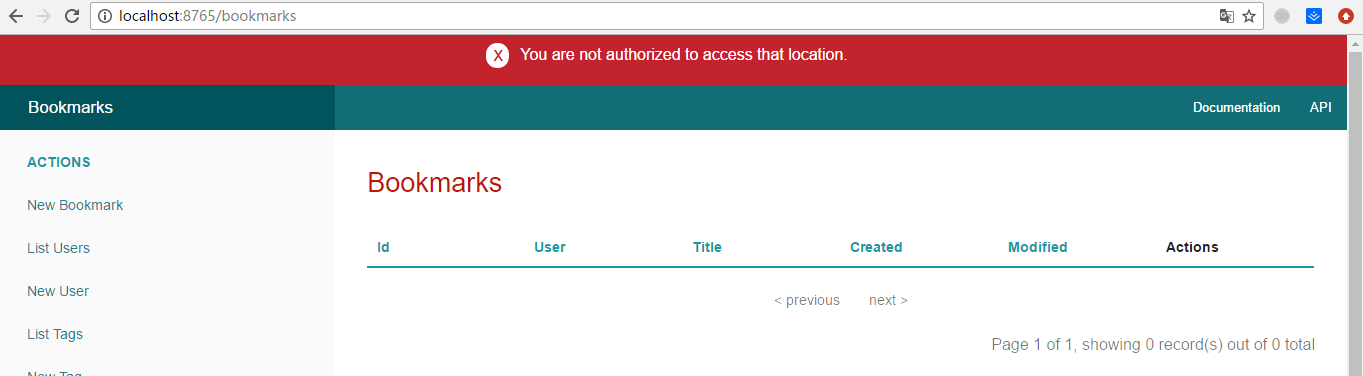
<?= $this->Flash->render() ?>您现在应该看到授权错误消息。
五、修复列表视图和表单
虽然查看和删除工作,编辑,添加和索引有几个问题:
1.添加书签时,您可以选择用户。
2.编辑书签时,您可以选择用户。
3.列表页面显示其他用户的书签。
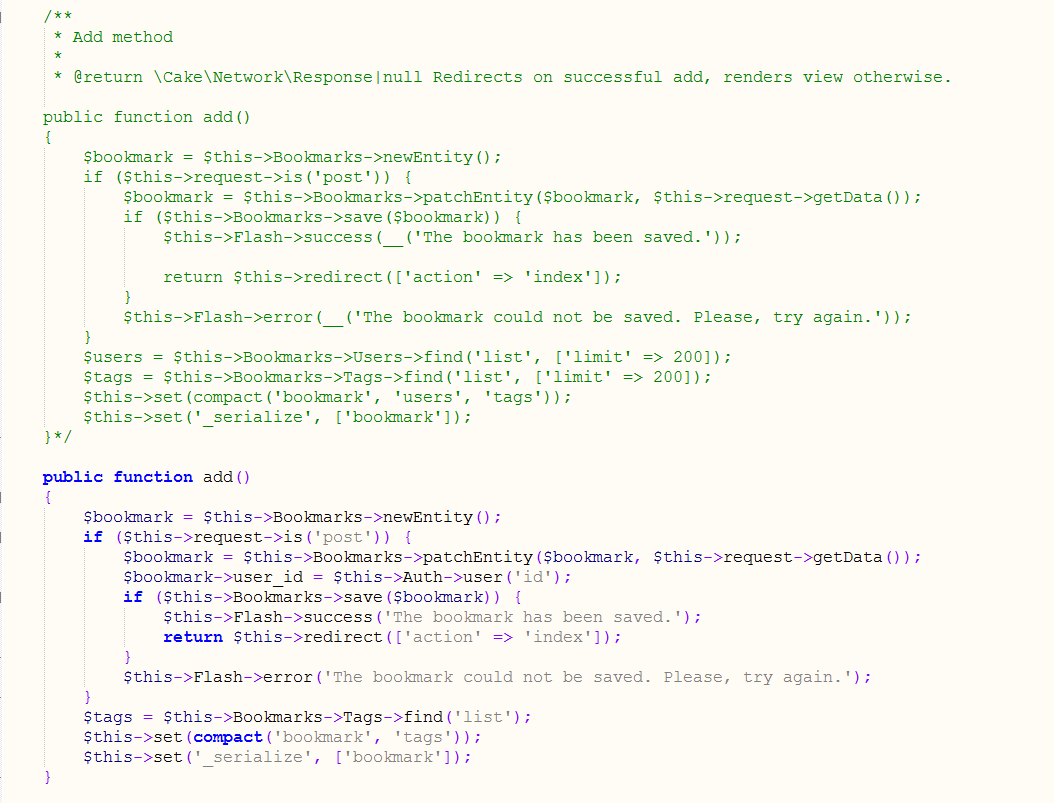
让我们先处理添加表单。 首先从src/Template/Bookmarks/add.ctp中删除input('user_id') 。

删除后,我们还将更新src/Controller/BookmarksController.php中的add()操作,如下所示:
public function add()
{
    $bookmark = $this->Bookmarks->newEntity();
    if ($this->request->is('post')) {
        $bookmark = $this->Bookmarks->patchEntity($bookmark, $this->request->getData());
        $bookmark->user_id = $this->Auth->user('id');
        if ($this->Bookmarks->save($bookmark)) {
            $this->Flash->success('The bookmark has been saved.');
            return $this->redirect(['action' => 'index']);
        }
        $this->Flash->error('The bookmark could not be saved. Please, try again.');
    }
    $tags = $this->Bookmarks->Tags->find('list');
    $this->set(compact('bookmark', 'tags'));
    $this->set('_serialize', ['bookmark']);
}
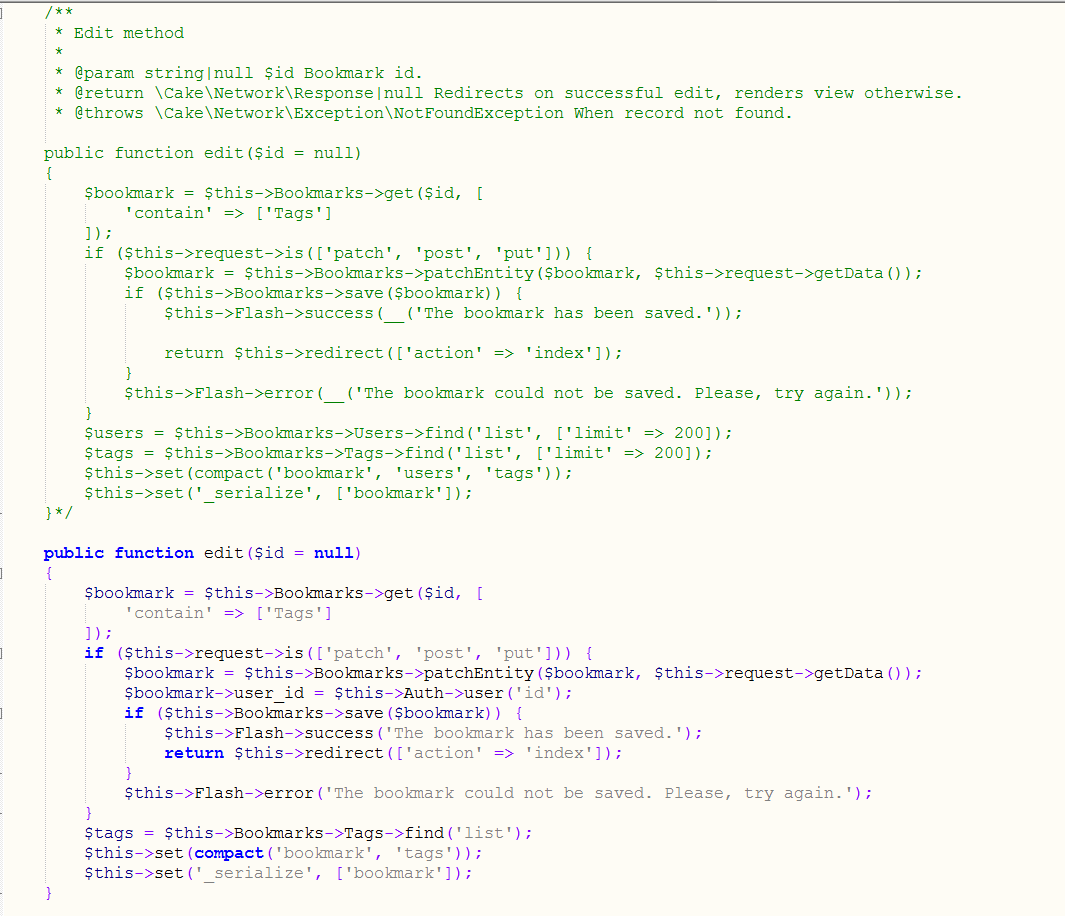
edit()操作应如下所示:
public function edit($id = null)
{
    $bookmark = $this->Bookmarks->get($id, [
        'contain' => ['Tags']
    ]);
    if ($this->request->is(['patch', 'post', 'put'])) {
        $bookmark = $this->Bookmarks->patchEntity($bookmark, $this->request->getData());
        $bookmark->user_id = $this->Auth->user('id');
        if ($this->Bookmarks->save($bookmark)) {
            $this->Flash->success('The bookmark has been saved.');
            return $this->redirect(['action' => 'index']);
        }
        $this->Flash->error('The bookmark could not be saved. Please, try again.');
    }
    $tags = $this->Bookmarks->Tags->find('list');
    $this->set(compact('bookmark', 'tags'));
    $this->set('_serialize', ['bookmark']);
}
六、列表视图
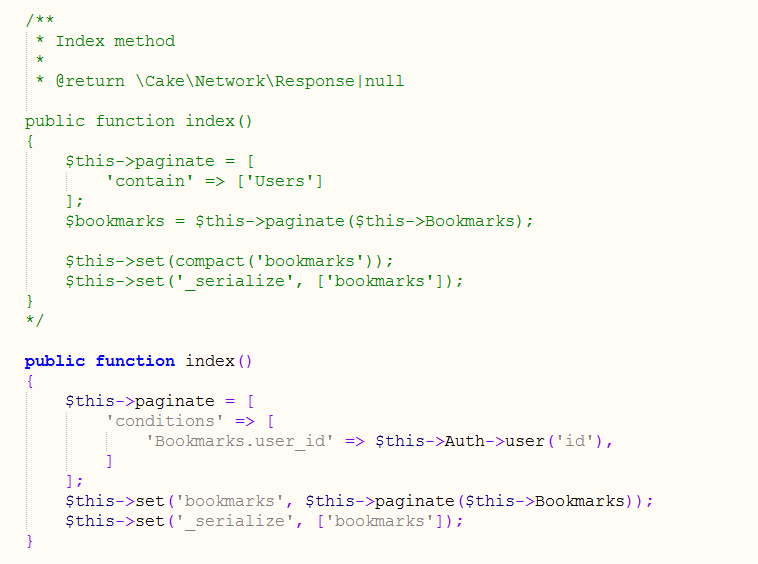
现在,我们只需要为当前登录的用户显示书签。 我们可以通过更新对paginate()的调用来实现。 使你的index()动作从src/Controller/BookmarksController.php看起来像:
public function index()
{
    $this->paginate = [
        'conditions' => [
            'Bookmarks.user_id' => $this->Auth->user('id'),
        ]
    ];
    $this->set('bookmarks', $this->paginate($this->Bookmarks));
    $this->set('_serialize', ['bookmarks']);
}
我们还应该更新tags()动作和相关的finder方法,但我们将这个练习留给你自己完成。
七、改进标记体验
现在,添加新标签是一个困难的过程,因为TagsController不允许所有访问。 我们可以通过使用逗号分隔的文本字段来改进标记选择UI,而不是允许访问。 这将让我们给我们的用户更好的体验,并使用一些更好的功能在ORM。
八、添加计算字段
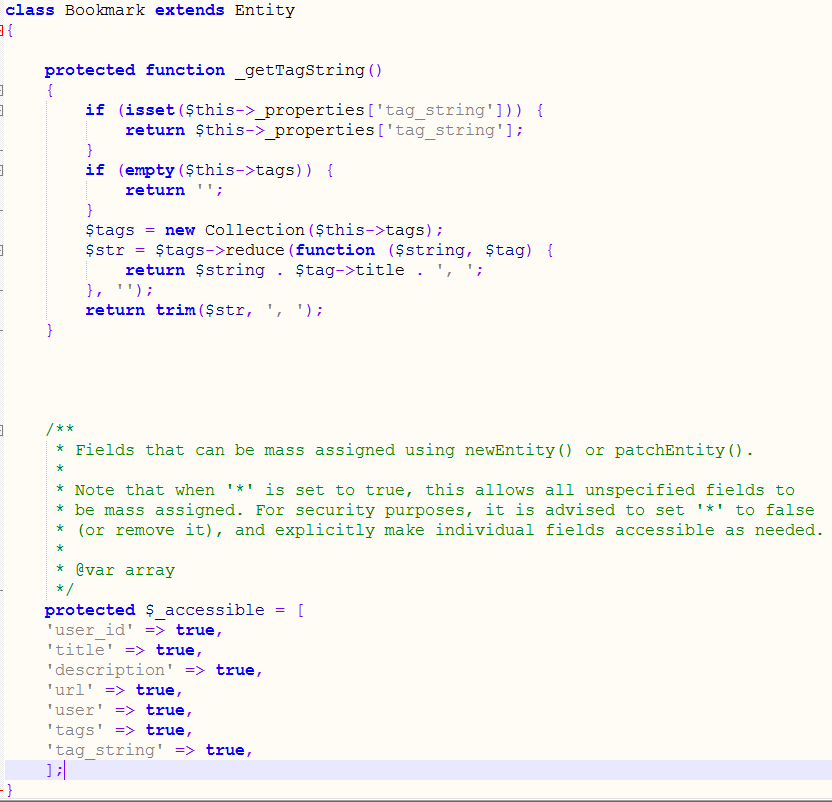
因为我们想要一个简单的方法来访问实体的格式化标签,我们可以向实体添加一个虚拟/计算字段。 在src/Model/ Entity/Bookmark.php中添加以下内容:
use Cake\Collection\Collection;

protected function _getTagString()
{
    if (isset($this->_properties['tag_string'])) {
        return $this->_properties['tag_string'];
    }
    if (empty($this->tags)) {
        return '';
    }
    $tags = new Collection($this->tags);
    $str = $tags->reduce(function ($string, $tag) {
        return $string . $tag->title . ', ';
    }, '');
    return trim($str, ', ');
} 这将让我们访问$bookmark->tag_string computed属性。 我们将在稍后使用这个属性。 请记得将tag_string属性添加到实体的_accessible列表中,因为我们将在以后“保存”。
在src/Model/Entity/Bookmark.php中将tag_string添加到$_accessible这样:
protected $_accessible = [
    'user_id' => true,
    'title' => true,
    'description' => true,
    'url' => true,
    'user' => true,
    'tags' => true,
    'tag_string' => true,
];
十、更新视图
随着实体更新,我们可以为我们的标签添加新的输入。 在src/Template/Bookmarks/add.ctp和src/Template/ Bookmarks/edit.ctp中 ,将现有的tags._ids输入替换为以下内容:
echo $this->Form->input('tag_string', ['type' => 'text']);十一、持久化标签字符串
现在,我们可以将现有标记视为字符串,我们也希望保存该数据。 因为我们将tag_string标记为可访问,所以ORM会将请求中的数据复制到我们的实体中。 我们可以使用beforeSave()钩子方法来解析标签字符串并找到/构建相关的实体。 将以下内容添加到src/Model/Table/BookmarksTable.php :
public function beforeSave($event, $entity, $options)
{
    if ($entity->tag_string) {
        $entity->tags = $this->_buildTags($entity->tag_string);
    }
}

protected function _buildTags($tagString)
{
    // Trim tags
    $newTags = array_map('trim', explode(',', $tagString));
    // Remove all empty tags
    $newTags = array_filter($newTags);
    // Reduce duplicated tags
    $newTags = array_unique($newTags);

    $out = [];
    $query = $this->Tags->find()
        ->where(['Tags.title IN' => $newTags]);

    // Remove existing tags from the list of new tags.
    foreach ($query->extract('title') as $existing) {
        $index = array_search($existing, $newTags);
        if ($index !== false) {
            unset($newTags[$index]);
        }
    }
    // Add existing tags.
    foreach ($query as $tag) {
        $out[] = $tag;
    }
    // Add new tags.
    foreach ($newTags as $tag) {
        $out[] = $this->Tags->newEntity(['title' => $tag]);
    }
    return $out;
}
虽然这段代码比我们迄今为止做的有点复杂,但它有助于展示CakePHP中ORM的强大功能。 您可以使用Collections方法处理查询结果,并处理您正在轻松创建实体的场景。
总结
我们已经扩展了我们的书签应用程序,以处理身份验证和基本授权/访问控制方案。 我们还通过利用FormHelper和ORM功能添加了一些不错的UX改进。


 被折叠的 条评论
为什么被折叠?
被折叠的 条评论
为什么被折叠?
 到【灌水乐园】发言


