


原文地址: http://blog.csdn.net/likebamboo/article/details/26585333
回顾
在本系列的前两篇文章中,我们已经了解了一些关于Bluetooth LE的背景并建立一个简单的Activity / Service框架。 在这篇文章中,我们将探讨Bluetooth LE的细节以及蓝牙设备查找的一些问题。
 扫描并发现蓝牙设备
蓝牙设备的发现是十分简单的,它是一个在蓝牙可见范围内查找设备的过程。首先我们要做的就是在Manifest中添加必要的权限,否则我们将在一开始就碰壁。我们需要的权限是android.permission.BLUETOOTH(一般蓝牙使用)和android.permission.BLUETOOTH_ADMIN(额外的任务,如蓝牙发现)。
在我们深入之前,值得说明的是BleService 将作为一个状态机,在不同的状态执行不同的任务。这些状态中,我们首先要考虑的是扫描状态。当BleService 接收到一个 MSG_START_SCAN 消息后进入扫描状态:
- private static class IncomingHandler extends Handler {
- @Override
- public void handleMessage(Message msg) {
- BleService service = mService.get();
- if (service != null) {
- switch (msg.what) {
- .
- .
- .
- case MSG_START_SCAN:
- service.startScan();
- Log.d(TAG, "Start Scan");
- break;
- default:
- super.handleMessage(msg);
- }
- }
- }
- }
startScan()方法开始扫描:
- public class BleService extends Service implements
- BluetoothAdapter.LeScanCallback {
- private final Map<String,BluetoothDevice> mDevices =
- new HashMap<String, BluetoothDevice>();
- public enum State {
- UNKNOWN,
- IDLE,
- SCANNING,
- BLUETOOTH_OFF,
- CONNECTING,
- CONNECTED,
- DISCONNECTING
- }
- private BluetoothAdapter mBluetooth = null;
- private State mState = State.UNKNOWN;
- .
- .
- .
- private void startScan() {
- mDevices.clear();
- setState(State.SCANNING);
- if (mBluetooth == null) {
- BluetoothManager bluetoothMgr = (BluetoothManager)
- getSystemService(BLUETOOTH_SERVICE);
- mBluetooth = bluetoothMgr.getAdapter();
- }
- if (mBluetooth == null || !mBluetooth.isEnabled()) {
- setState(State.BLUETOOTH_OFF);
- } else {
- mHandler.postDelayed(new Runnable() {
- @Override
- public void run() {
- if (mState == State.SCANNING) {
- mBluetooth.stopLeScan(
- BleService.this);
- setState(State.IDLE);
- }
- }
- }, SCAN_PERIOD);
- mBluetooth.startLeScan(this);
- }
- }
- }
- public class BleActivity extends Activity {
- private final int ENABLE_BT = 1;
- .
- .
- .
- private void enableBluetooth() {
- Intent enableBtIntent =
- new Intent(BluetoothAdapter.ACTION_REQUEST_ENABLE);
- startActivityForResult(enableBtIntent, ENABLE_BT);
- }
- @Override
- protected void onActivityResult(int requestCode,
- int resultCode, Intent data) {
- if(requestCode == ENABLE_BT) {
- if(resultCode == RESULT_OK) {
- //Bluetooth connected, we may continue
- startScan();
- } else {
- //The user has elected not to turn on
- //Bluetooth. There's nothing we can do
- //without it, so let's finish().
- finish();
- }
- } else {
- super.onActivityResult(requestCode,
- resultCode, data);
- }
- }
- private void startScan() {
- mRefreshItem.setEnabled(false);
- mDeviceList.setDevices(this, null);
- mDeviceList.setScanning(true);
- Message msg = Message.obtain(null,
- BleService.MSG_START_SCAN);
- if (msg != null) {
- try {
- mService.send(msg);
- } catch (RemoteException e) {
- Log.w(TAG,
- "Lost connection to service", e);
- unbindService(mConnection);
- }
- }
- }
- }
为了提示用户打开蓝牙,我们可以使用系统服务来完成,这确保了在不同平台上用户的体验是一致的。虽然在程序中也可以打开蓝牙,但提示用户是推荐的方法。这真的是很容易的,我们通过适当的方式(BluetoothAdapter 的7-9行)启动另一个Activity 来提醒用户我们想做什么,在那个Activity结束的时候接收返回结果(onactivityresult()方法)。
到目前为止还没有什么具体的Bluetooth LE 相关的内容,但这些都是标准蓝牙需要经历的步骤。
我们要做的下一件事是扫描Bluetooth LE设备。这其实是很容易的,因为 BluetoothAdapter 类正好包含一个startLeScan()方法!该方法接收一个BluetoothAdapter.LeScanCallback 的实例作为参数,该参数会在扫描过程中接收回调:
- public class BleService extends Service implements
- BluetoothAdapter.LeScanCallback
- private static final String DEVICE_NAME = "SensorTag";
- .
- .
- .
- private void startScan() {
- mDevices.clear();
- setState(State.SCANNING);
- if (mBluetooth == null) {
- BluetoothManager bluetoothMgr = (BluetoothManager)
- getSystemService(BLUETOOTH_SERVICE);
- mBluetooth = bluetoothMgr.getAdapter();
- }
- if (mBluetooth == null || !mBluetooth.isEnabled()) {
- setState(State.BLUETOOTH_OFF);
- } else {
- mHandler.postDelayed(new Runnable() {
- @Override
- public void run() {
- if (mState == State.SCANNING) {
- mBluetooth.stopLeScan(
- BleService.this);
- setState(State.IDLE);
- }
- }
- }, SCAN_PERIOD);
- mBluetooth.startLeScan(this);
- }
- }
- @Override
- public void onLeScan(final BluetoothDevice device,
- int rssi, byte[] scanRecord) {
- if (device != null && !mDevices.containsValue(device) &&
- device.getName() != null &&
- device.getName().equals(DEVICE_NAME)) {
- mDevices.put(device.getAddress(), device);
- Message msg = Message.obtain(null,
- MSG_DEVICE_FOUND);
- if (msg != null) {
- Bundle bundle = new Bundle();
- String[] addresses = mDevices.keySet()
- .toArray(new String[mDevices.size()]);
- bundle.putStringArray(KEY_MAC_ADDRESSES,
- addresses);
- msg.setData(bundle);
- sendMessage(msg);
- }
- Log.d(TAG, "Added " + device.getName() + ": " +
- device.getAddress());
- }
- }
- }
在扫描的过程中每次蓝牙适配器接收来自BLE设备的广播信息 onLeScan() 方法都会被调用。当蓝牙设备处于广播模式的时候通常每秒会发出十次广播信息,所以在扫描的工程中我们必须小心地只回应新的设备。我们通过维护一个已发现设备的映射表(由他们的MAC地址做映射,这在后面很有用)来实现,在扫描过程中如果 onLeScan() 方法被调用,我们检查是否知道这个设备。
另外我们还需要过滤出那些我们感兴趣的设备,这通常是基于某种特征(在之后的文章中会有更多的介绍)。 SensorTag 文档 表明蓝牙名称为SensorTag,所以我们应当匹配设备名称为”SensorTag”的设备。
这里值得一提的是, the host needs to scan while sensors are advertising their presence. This is the heart of security on BLE – sensors must be told by the user to advertise their presence before they can be discovered. (又不知道该怎么翻译了,罪过罪过)一旦蓝牙被发现并建立起主设备与传感器之间的相互信任关系,那么之后主设备就可以直接连接到传感器而无需将其置入广播模式下,although this behaviour any vary on different sensors 。
每当我们发现一个新设备,我们将它加入到映射表(Map)中,同时以字符串数组封装所有已发现设备的MAC地址,并把字符串数组加入到一个 MSG_DEVICE_FOUND 消息中发送给Activity。
还需说明的是我们的Service运行在UI线程中,但我们真的不需要担心它会阻塞UI线程。调用 Bluetooth LE 扫描的操作是异步的,我们开启了一个后台线程去执行扫描并通过onLeScan() 方法回调。如果我们没在onLeScan()方法中做任何复杂的工作,我们就不需要担心后台线程所做的任何事情。
Activity还作为一个状态机,利用BleService的状态改变UI。BleService是否处于SCANNING状态决定了Activity的“刷新”菜单是否可用,BleService的状态也决定了是否切换到显示设备列表的Fragment(当发现设备的时候)。每当Activity收到MSG_DEVICE_FOUND 消息时候都会更新已发现设备的列表。我不想在这里解释所有的UI代码,因为他们和BLE并不相关,但如果你想看,源代码 是公开的。
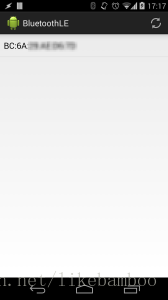
我们运行上述代码后开始扫描设备,如果周边有SensorTag蓝牙设备,他将显示在设备列表中:
下期预告
现在我们完成了基本的设备扫描查找工作,接下来我们需要做的是连接到一个或多个我们已经发现的传感器,我们将在下一篇文章中讨论。
本文的源代码在这里 可以找到。
-----------------------------------------------------不怎么华丽的分割线----------------------------------------------------------------------
原文链接:http://blog.stylingandroid.com/archives/2419
© 2014, Mark Allison. All rights reserved. This article originally appeared on Styling Android.
Portions of this page are modifications based on work created and shared by Google and used according to terms described in the Creative Commons 3.0 Attribution License
第三篇了,继续努力,既然出发了,就一条道走到黑吧。。。


 1189
1189

 被折叠的 条评论
为什么被折叠?
被折叠的 条评论
为什么被折叠?
 到【灌水乐园】发言


