


 本文详细介绍了如何使用MyBatis Generator进行自动化代码生成,包括配置generatorConfig.xml文件、修改pom.xml文件、设置Maven插件以及运行生成代码的步骤,帮助开发者快速创建Mapper、DAO和Entity类。
原文链接:https://blog.csdn.net/gb617305413/article/details/117689348
亲测有效
github地址:GitHub - Yong-Wang-Brave/mybaties-plus
项目结构不细说了,本人使用的idea版本2021.1 其他版本配置位置可能和图片显示的不一致 但是按照名称找到对应的内容就行了
步骤如下:
1.新增一个generatorConfig.xml ,内容如下
注意 classPathEntry标签下的jar包替换成自己用的数据库连接的jar包,记得修改需要生成的mapper、dao、entity地址
<?xml version="1.0" encoding="UTF-8"?>
<!DOCTYPE generatorConfiguration
PUBLIC "-//mybatis.org//DTD MyBatis Generator Configuration 1.0//EN"
"http://mybatis.org/dtd/mybatis-generator-config_1_0.dtd">
<generatorConfiguration>
<!-- 数据库驱动:选择你的本地硬盘上面的数据库驱动包。不同数据库换不同的jar-->
<classPathEntry location="D://work/maven/apache-maven-3.3.9/conf/repe/mysql/mysql-connector-java/5.1.46/mysql-connector-java-5.1.46.jar" />
<context id="DB2Tables" targetRuntime="MyBatis3">
<commentGenerator>
<property name="suppressDate" value="true" />
<property name="suppressAllComments" value="true" />
</commentGenerator>
<!-- 说明是postgresql数据库 -->
<!-- 连接地址为:jdbc:postgresql://localhost:5432/hlxkz 。postgresql的数据库端口为5432;数据库名为hlxkz-->
<!-- 用户名:root,密码:123456 -->
<jdbcConnection driverClass="com.mysql.jdbc.Driver"
connectionURL="jdbc:mysql://192.168.2.112/talent_eval" userId="root" password="123456">
</jdbcConnection>
<javaTypeResolver>
<property name="forceBigDecimals" value="false" />
</javaTypeResolver>
<!-- 生成实体:实体的路径为:com.sys.entity -->
<javaModelGenerator targetPackage="com.np.talent.api.persistence.model"
targetProject="src/main/java">
<property name="enableSubPackages" value="false" />
<property name="trimStrings" value="true" />
</javaModelGenerator>
<!-- 生成mapper:mapper的路径为:mappers.sys -->
<sqlMapGenerator targetPackage="mapper"
targetProject="src/main/resources">
<property name="enableSubPackages" value="false" />
</sqlMapGenerator>
<!-- 生成dao:dao的路径为:com.sys.dao -->
<javaClientGenerator type="XMLMAPPER"
targetPackage="com.np.talent.api.persistence.mapper" targetProject="src/main/java">
<property name="enableSubPackages" value="false" />
</javaClientGenerator>
<!-- 对应的表名为:role_menu_rel ,对应的实体RoleMenuRel-->
<table tableName="t_user" domainObjectName="User"
enableCountByExample="false" enableUpdateByExample="false"
enableDeleteByExample="false" enableSelectByExample="false"
selectByExampleQueryId="false"></table>
<table tableName="t_post" domainObjectName="Post"
enableCountByExample="false" enableUpdateByExample="false"
enableDeleteByExample="false" enableSelectByExample="false"
selectByExampleQueryId="false"></table>
<table tableName="t_post_reply" domainObjectName="PostReply"
enableCountByExample="false" enableUpdateByExample="false"
enableDeleteByExample="false" enableSelectByExample="false"
selectByExampleQueryId="false"></table>
</context>
</generatorConfiguration>
2.pom.xml下增加相关配置
找到
<build>
<plugins>标签
在该标签下增加
<!-- mybatis generator 自动生成代码插件 -->
<plugin>
<groupId>org.mybatis.generator</groupId>
<artifactId>mybatis-generator-maven-plugin</artifactId>
<version>1.3.2</version>
<configuration>
<!-- 配置generatorConfig.xml的位置 如果存到位置和application.yml位置一致 就不需要配置该属性 -->
<!-- <configurationFile>${basedir}/src/main/resources/generatorConfig.xml</configurationFile>-->
<!-- <overwrite>true</overwrite>-->
<!-- <verbose>true</verbose>-->
</configuration>
<!--依赖DB的驱动包 -->
<dependencies>
<dependency>
<groupId>mysql</groupId>
<artifactId>mysql-connector-java</artifactId>
<version>5.1.46</version>
</dependency>
<dependency>
<groupId>org.mybatis.generator</groupId>
<artifactId>mybatis-generator-core</artifactId>
<version>1.3.2</version>
</dependency>
</dependencies>
</plugin>
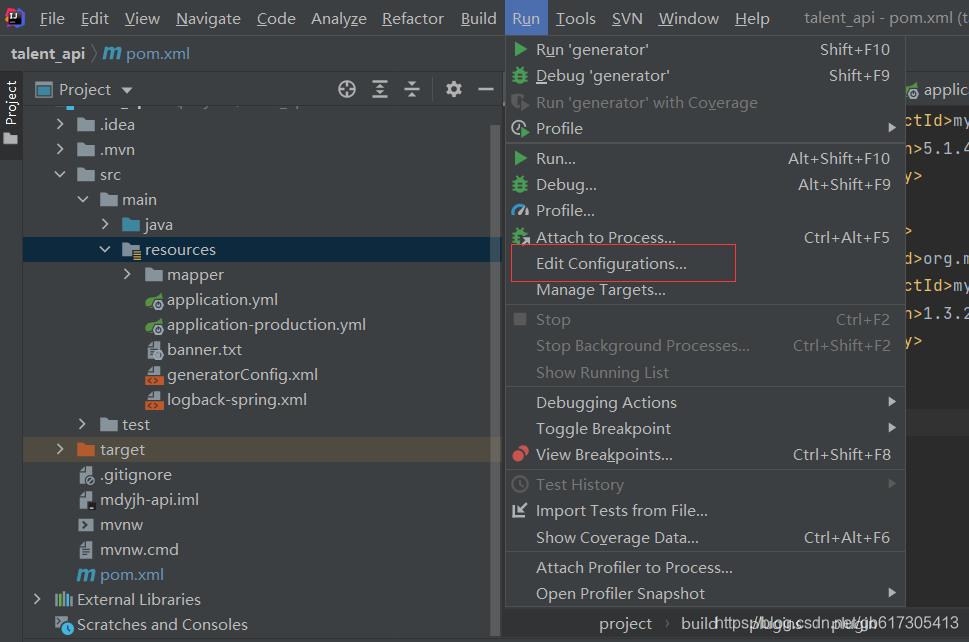
3.设置属性 选择Run-Edit Configurations
点击+ 选择maven
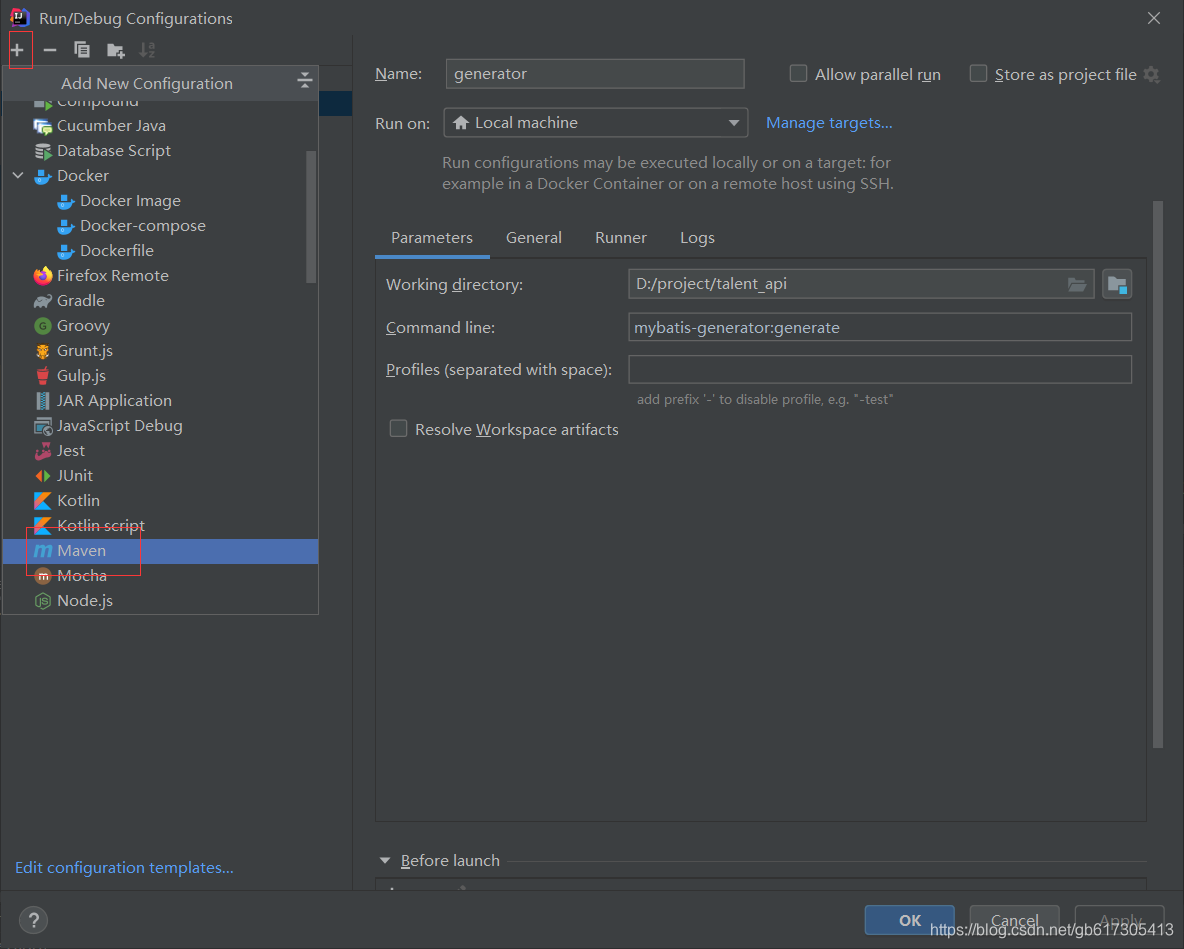
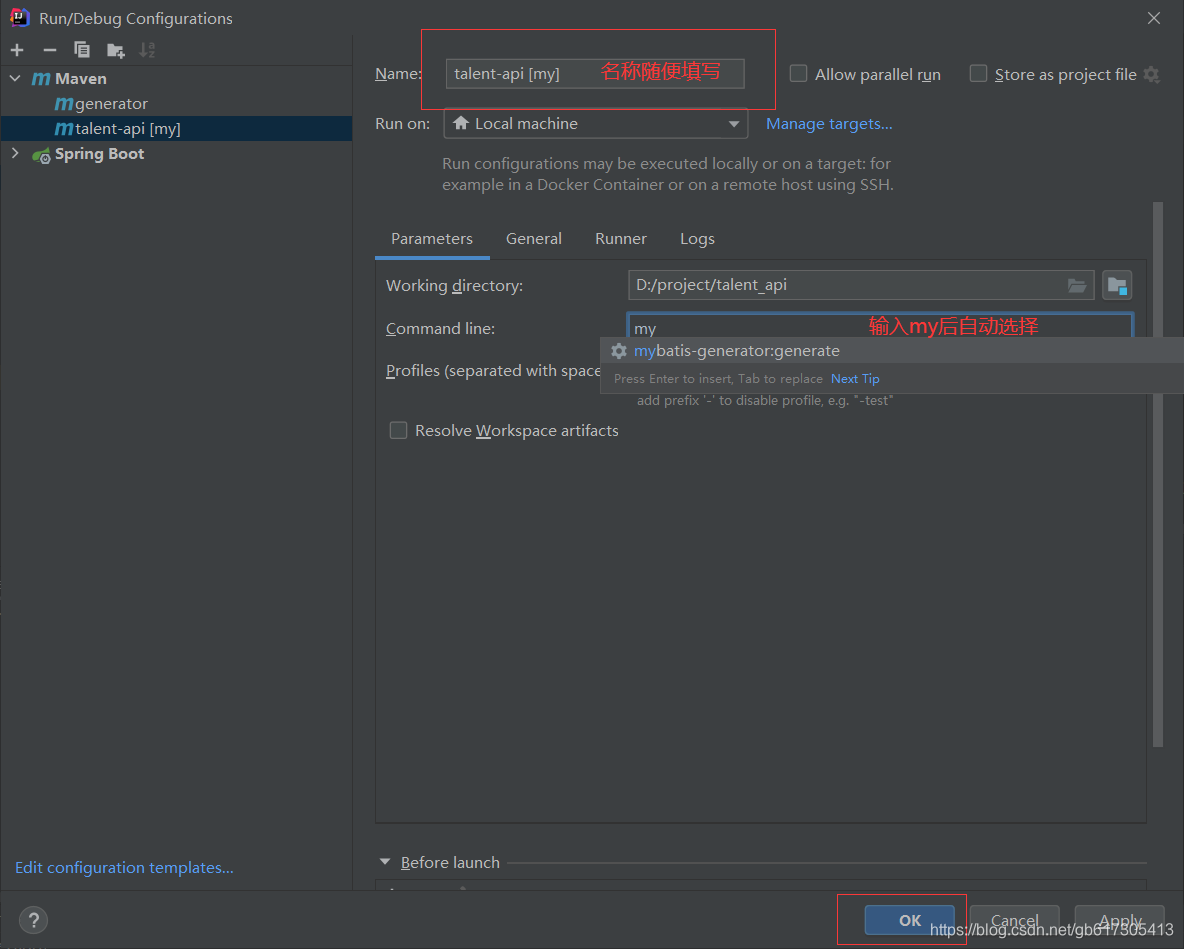
名称随便填写,在下方的Command line 输入my自动选择内容填充,点击OK
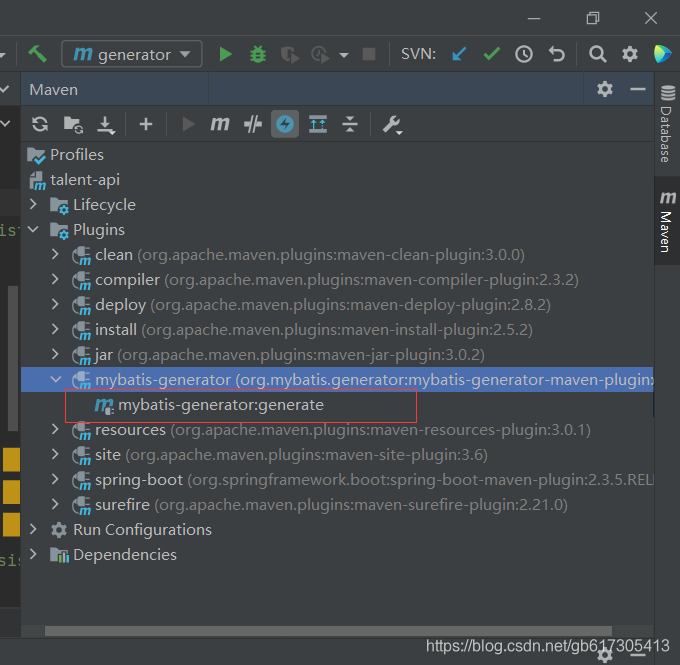
4.生成代码
在maven的Plugins下找到我们刚刚配置的generator 双击后会自动生成对应的代码
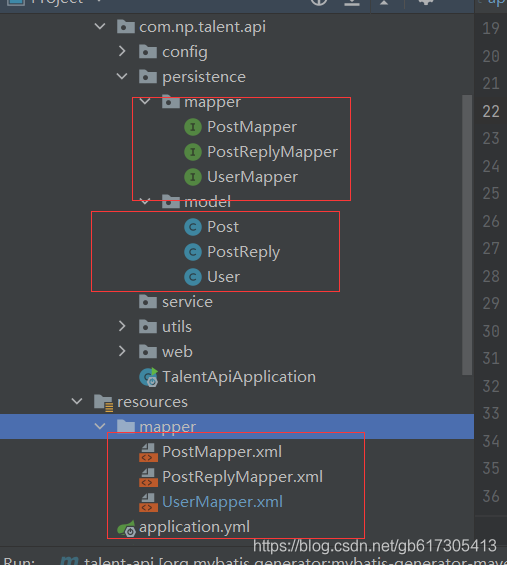
注意:generatorConfig.xml文件里的dao、entity、mapper位置一定要配置成自己需要的地址
下图是我生成的文件:
————————————————
版权声明:本文为CSDN博主「gb617305413」的原创文章,遵循CC 4.0 BY-SA版权协议,转载请附上原文出处链接及本声明。
原文链接:https://blog.csdn.net/gb617305413/article/details/117689348


 7437
7437

 被折叠的 条评论
为什么被折叠?
被折叠的 条评论
为什么被折叠?
 到【灌水乐园】发言


